Key Takeaways
- You should always prefer backing up Windows locally on external storage rather than on a cloud platform.
- The Windows File History feature is one of the best ways to back up Windows to external storage.
- Alternatively, you can also use the old Control Panel method or a dedicated third-party tool for backing up.
It’s very possible to lose important data—or even your entire operating system—due to hardware failure or malware attacks. You can keep your data safe in such situations by backing up Windows to external storage.
Are Local External Storage Backups Safe?
Yes, backing up your data locally on external storage is completely safe as long as you can protect the storage device from hardware failure. If the external device where you’ve stored your backup becomes corrupt or damaged, you could lose all the data on it.
However, if you can prevent hardware failure, there are various advantages to backing up data on an external device, especially when compared to cloud backups. One key benefit is faster backup and restore speeds. The speed at which data is backed up to your cloud account depends mainly on your internet connection. If your connection is slow, the process may sometimes take hours to back up even a small amount of data. On the other hand, the speed at which data is backed up on an external device depends on the read and write speed of that device, which in most cases exceeds 100 Mbps.
Also, unlike cloud backups, you have full control over your data. You can choose where to store it and how often to back it up. Additionally, backing up data on an external device is more cost-effective in the long run compared to cloud storage, particularly when you need to back up large amounts of data.
For instance, backing up 2TB of data can be done by purchasing an SSD for around $100 as a one-time investment. On the other hand, backing up the same amount of data on a cloud platform like Google Drive requires purchasing their 2TB storage plan, which costs $10 per month.
Back Up Windows Using File History
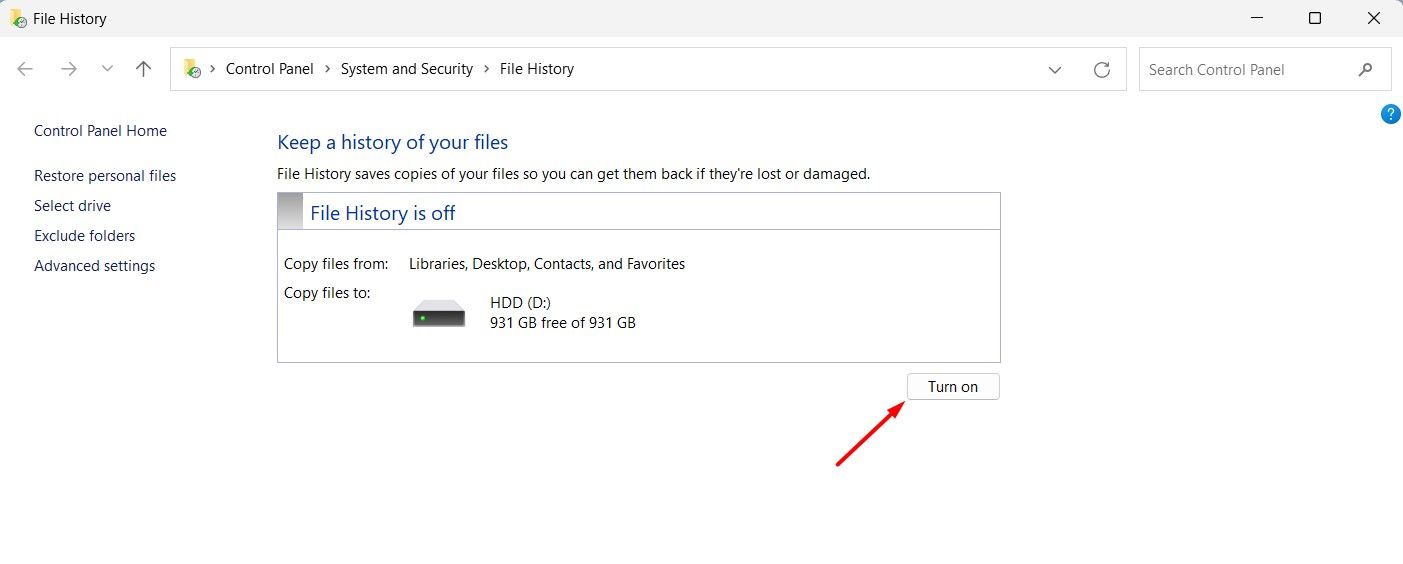
Microsoft offers built-in tools to back up Windows to an external drive. You can use the File History feature, which has been part of Windows since Windows 8, to back up Windows to an external drive. To use this feature, first ensure that you have connected the external drive, then open the Start menu, type File History in the search bar, and click “Open.”
Click the “Turn On” button.
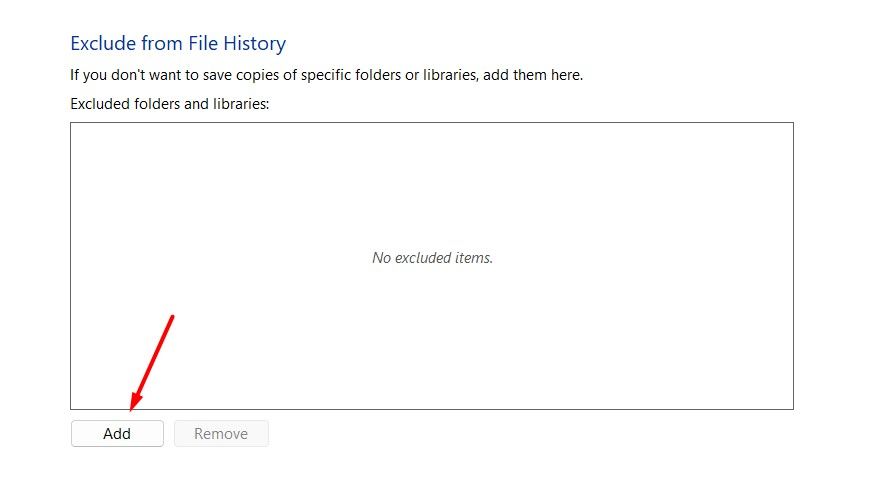
If you don’t want to back up a specific folder, click the “Exclude Folders” option on the left, and then click the “Add” button.
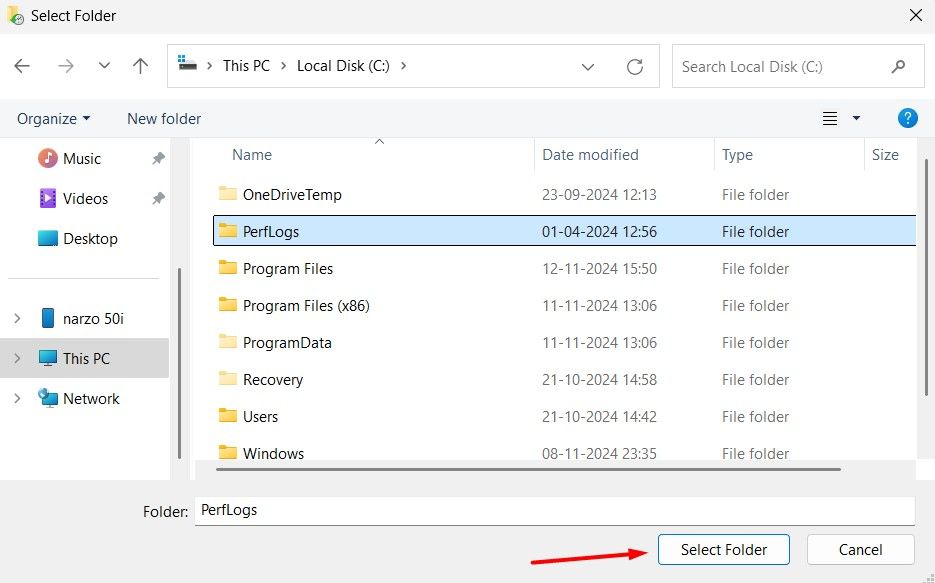
Choose the folder you don’t want to back up and click “Select Folder.” After that, click “Save Changes.”
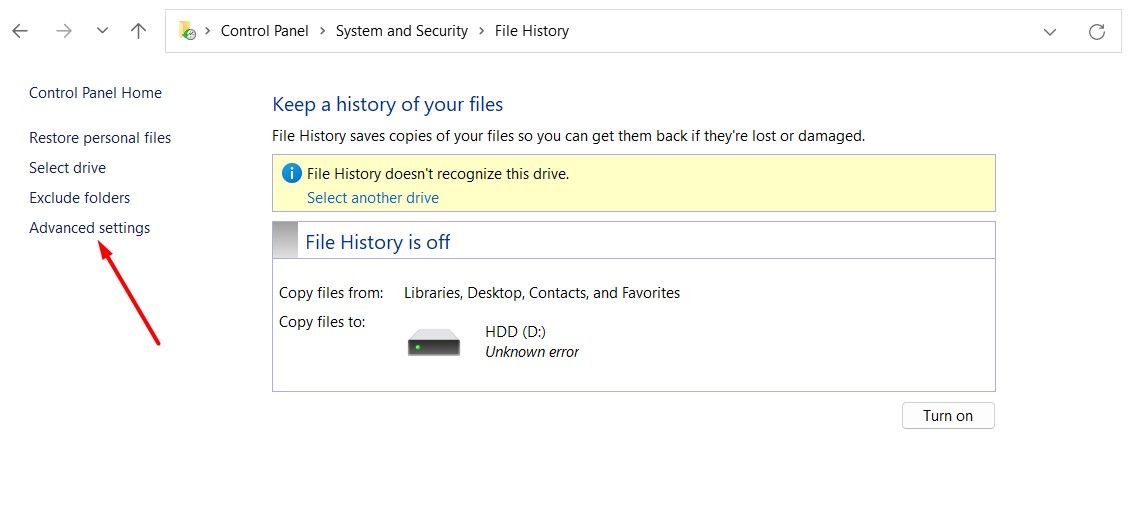
Next, click the “Advanced Settings” option.
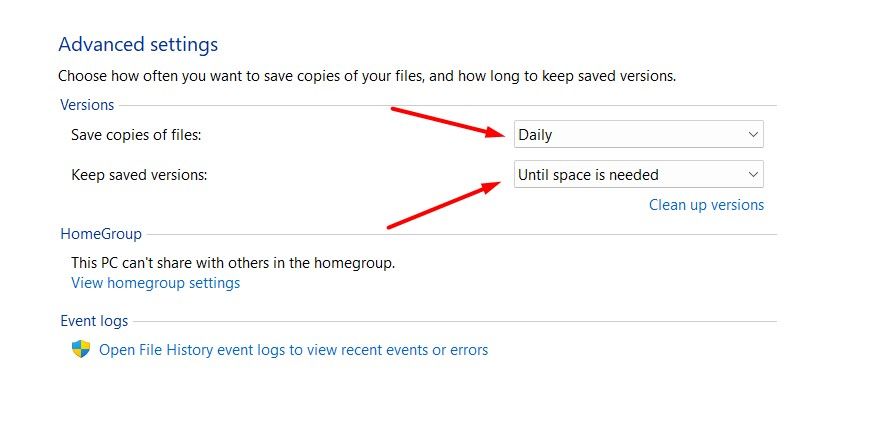
In the Advanced Settings window, select “Daily” from the Save copies of files drop-down menu. From the Keep saved versions drop-down menu, choose “Until Space Is Needed.” This option ensures that once the external drive is full, the File History feature will automatically delete the oldest backup to create space for a new backup.
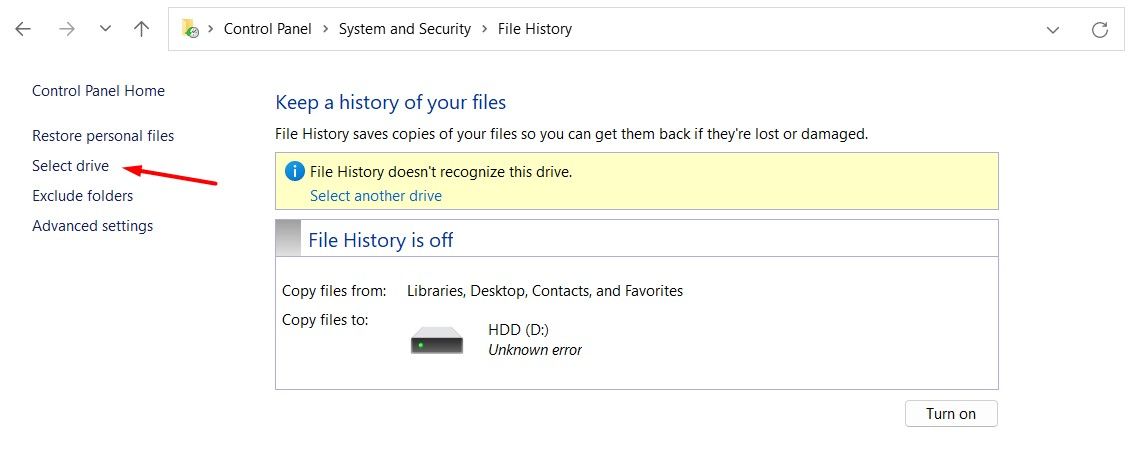
Then, choose the “Select Drive” option on the left.
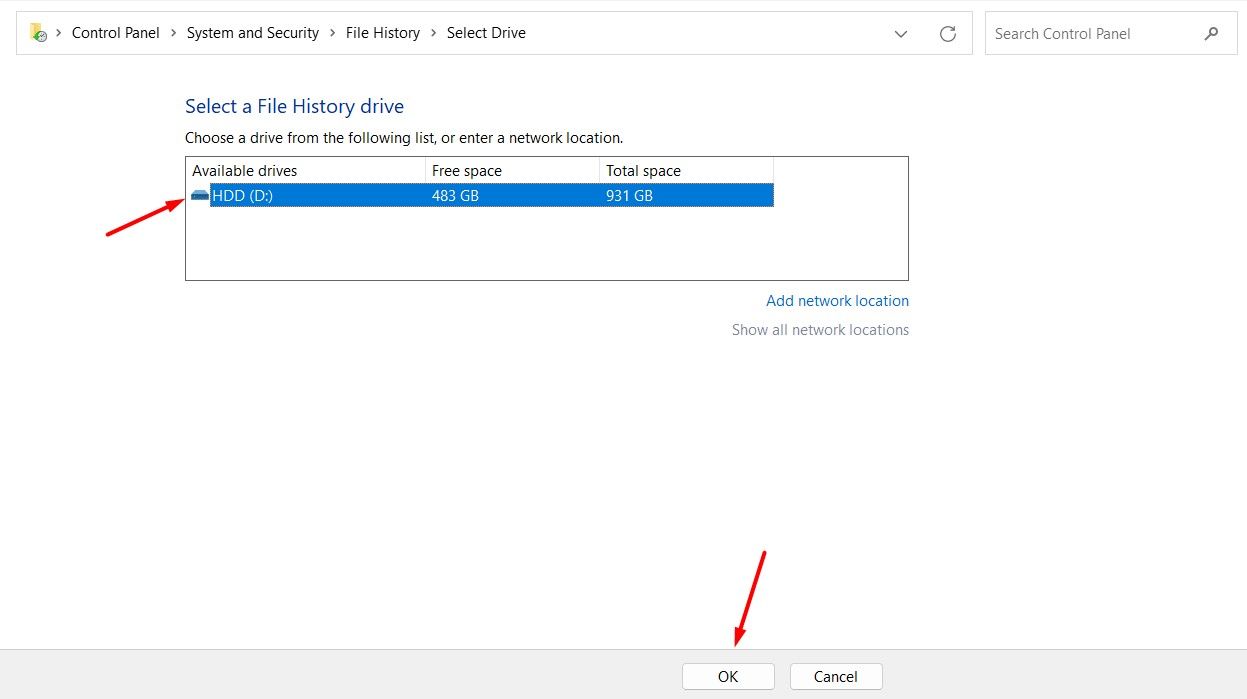
Select the drive you want to use for the Windows backup and click “OK.”
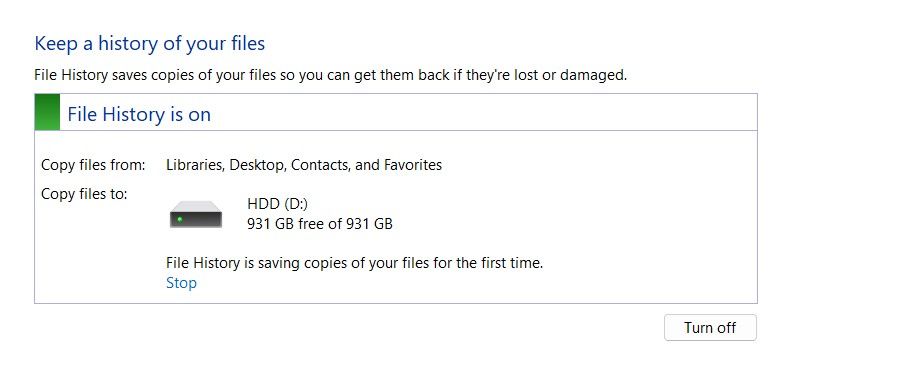
File History will take some time to copy the files to the selected storage. The process may take some time, depending on the amount of data being backed up.
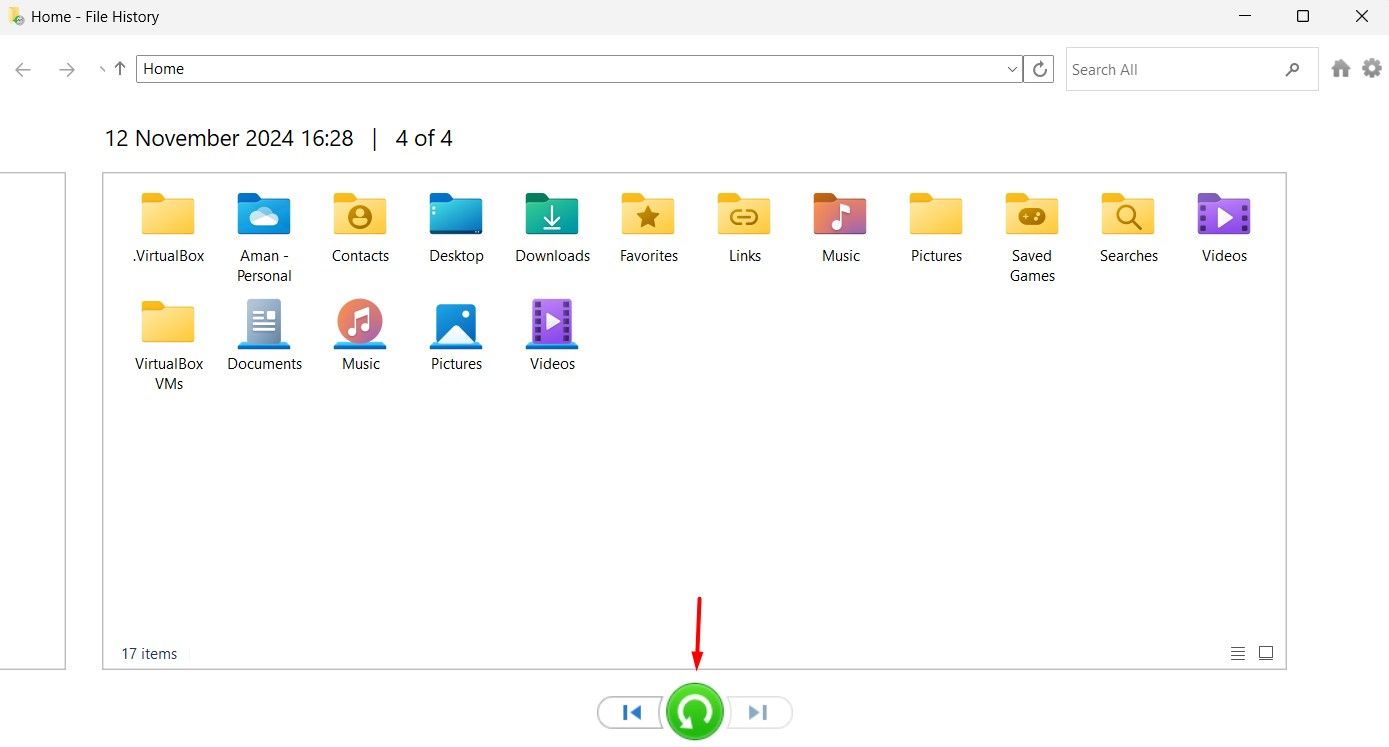
To restore the backup, click the “Restore Personal Files” option on the left. In the restore window that appears, select the items you want to restore and click the restore icon.
That’s it—all the data will be restored to their original location.
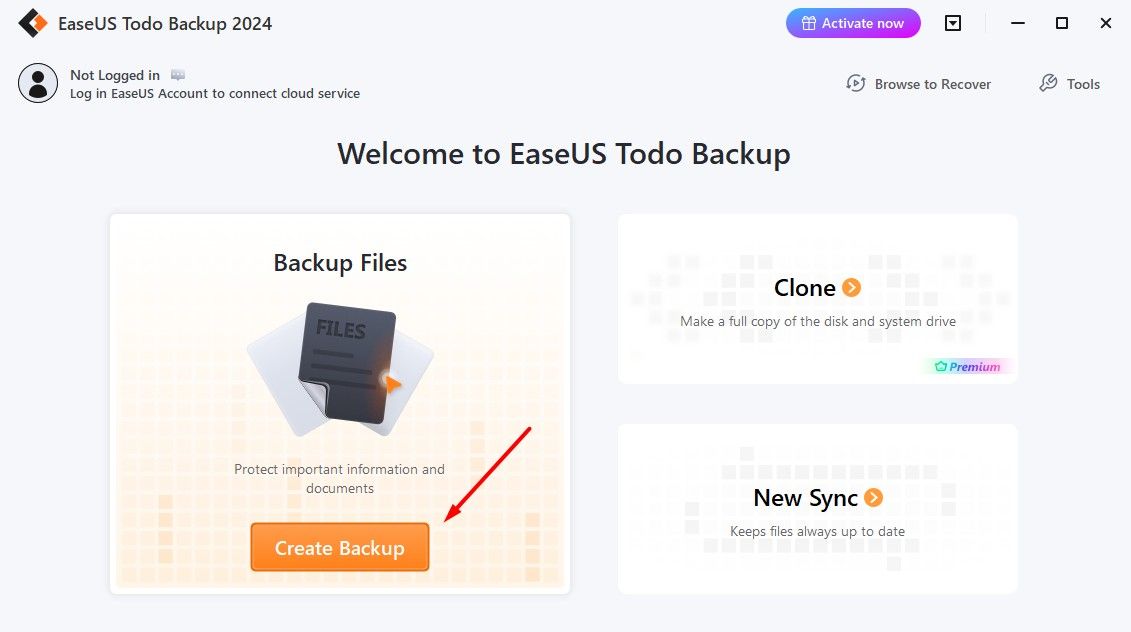
The EaseUS Todo Backup tool provides an easy and quick way to back up Windows to an external drive. To use this tool, first download and install it. Then, launch the tool and click the “Create Backup” button.
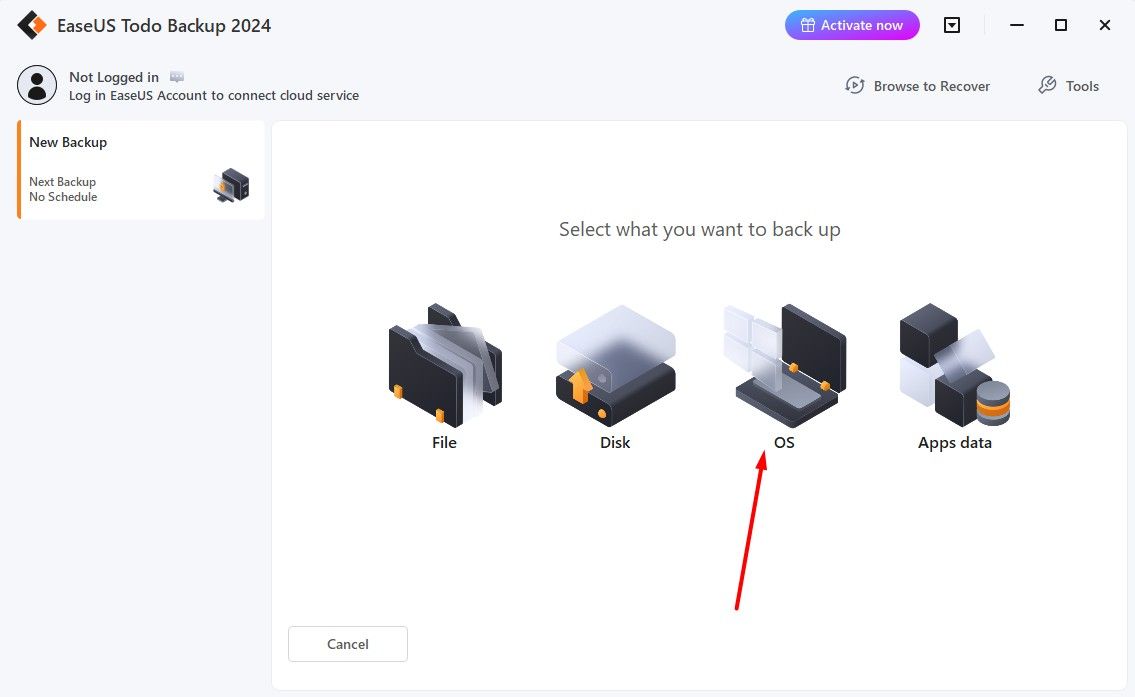
Select the “OS” option.
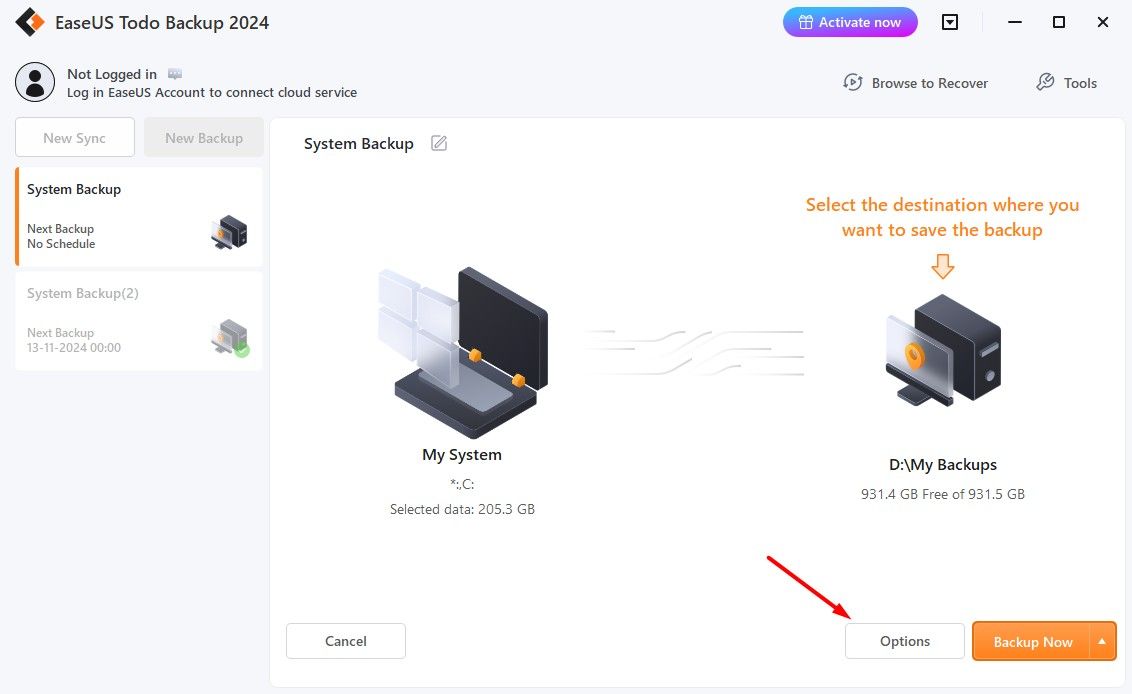
Choose the external storage where you want to back up Windows and click the “Options” button.
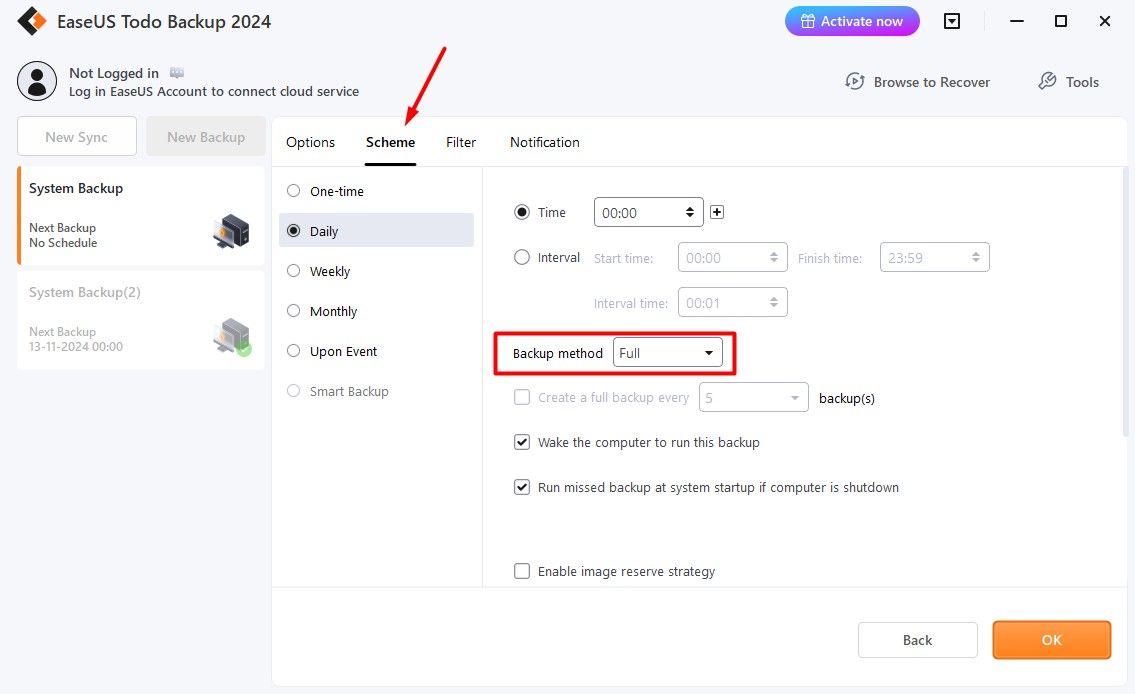
Switch to the “Scheme” tab, select “Daily” from the left sidebar, and choose the time at which you want the tool to automatically back up your computer daily. Select “Full” from the Backup method drop-down menu and click “OK.”
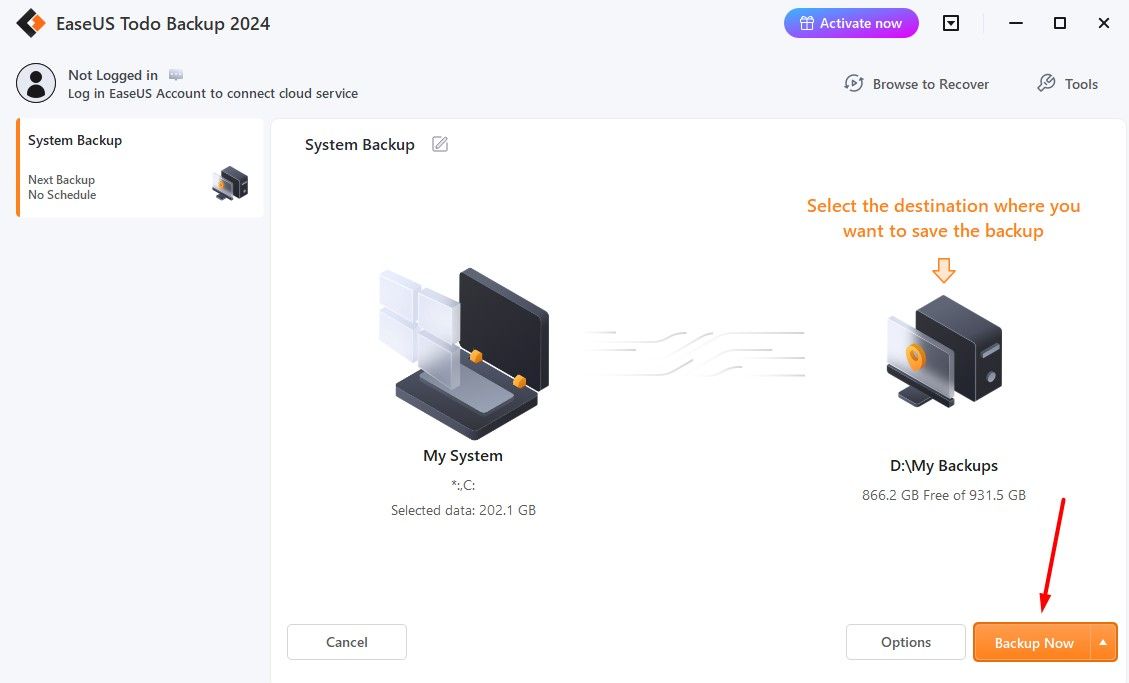
After that, click the “Backup Now” button.
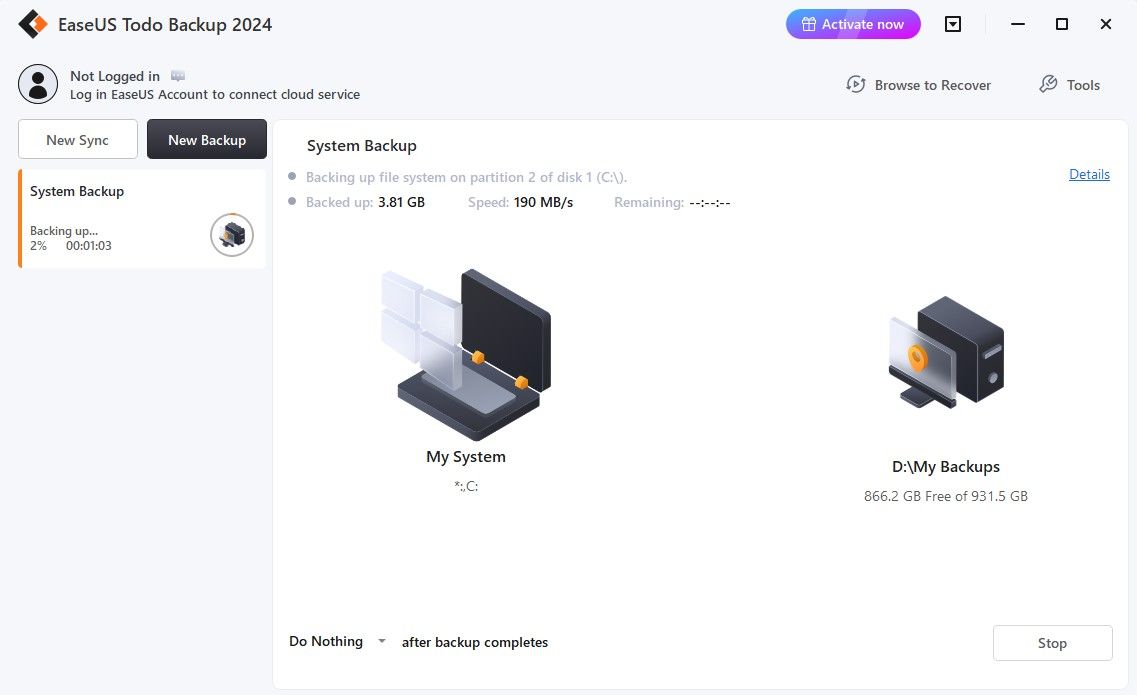
The tool will begin backing up the data, and it will take some time, depending on the size.
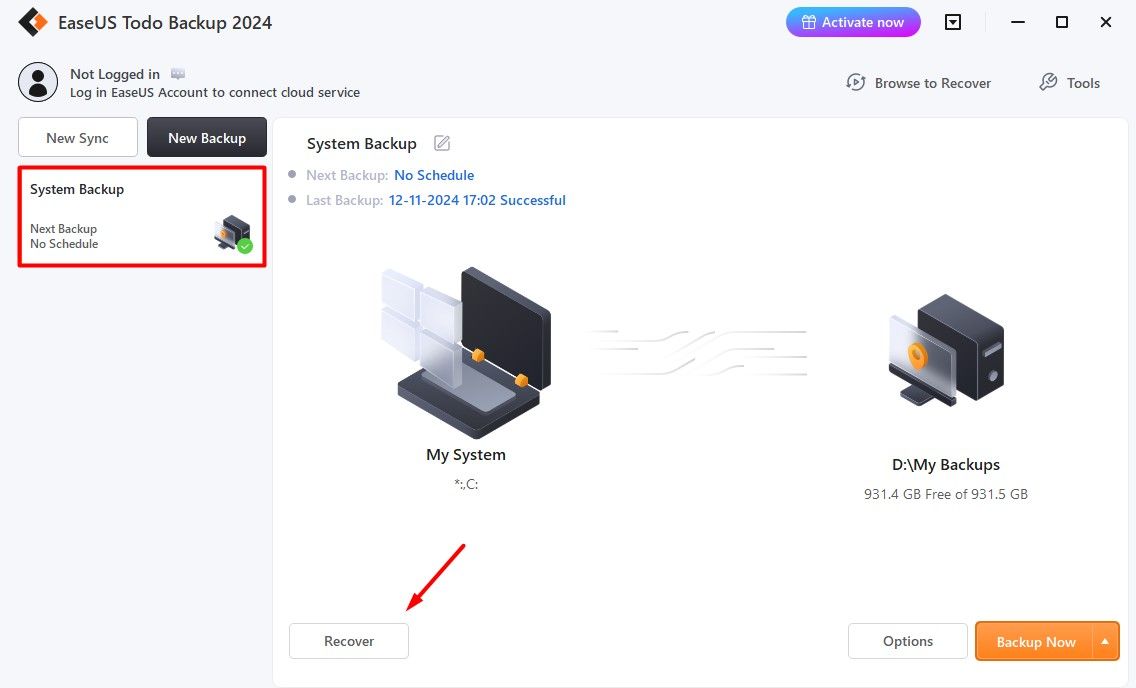
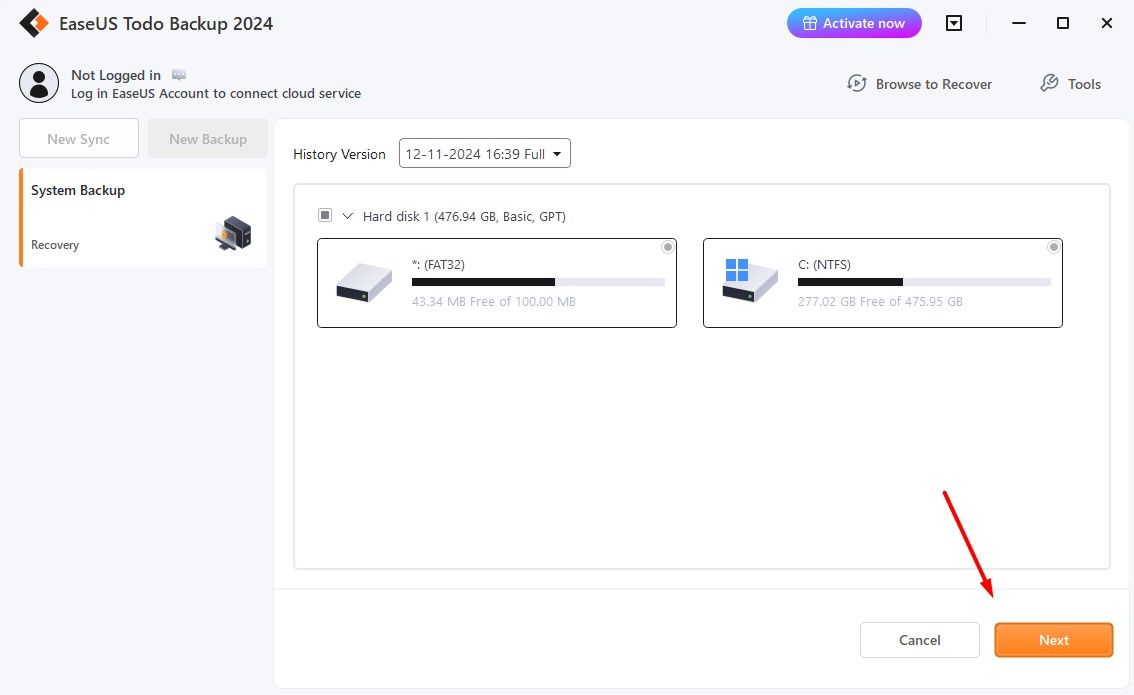
To restore the backup, launch the tool, select the backed-up data from the System Backup section on the left, and click “Recover.”
Click the “Next” button.
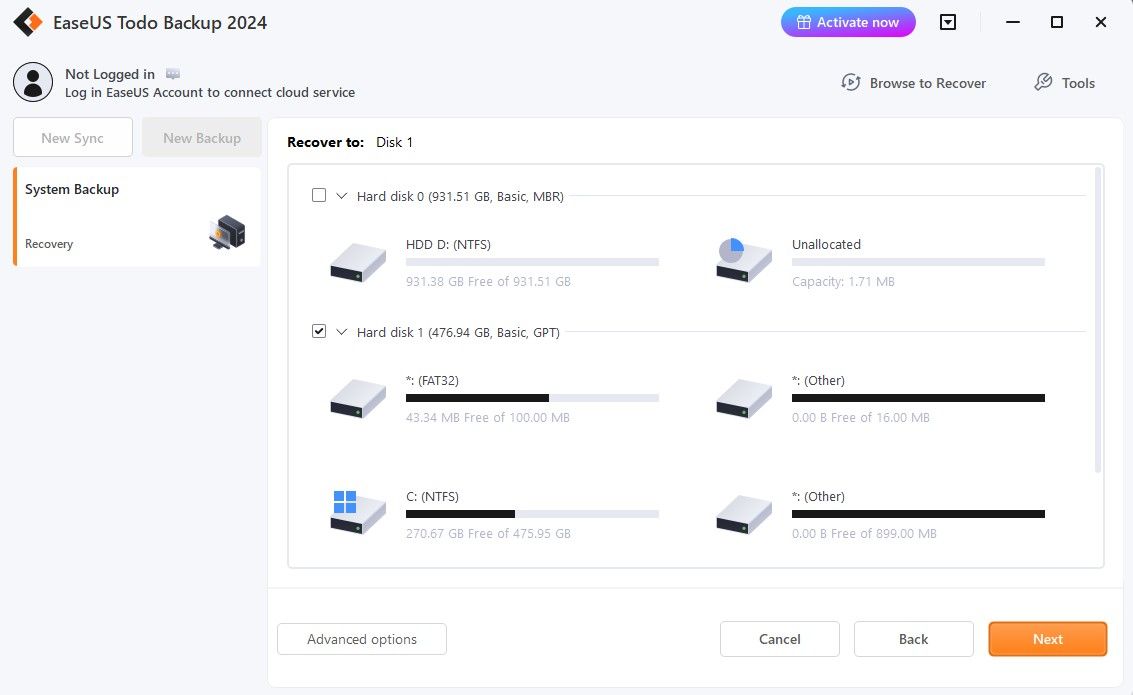
Select the location where you want to restore the files and click “Next.”
And that’s it. The data will be restored to the selected drive.
Microsoft introduced the Backup and Restore feature in Windows 7, and it’s still available in Windows 11. While it’s still one of the best ways to back up Windows to an external hard drive, the downside is that it’s extremely outdated, and Microsoft could remove it from Windows at any time. Furthermore, there’s also the possibility that Microsoft will eventually get rid of the Control Panel entirely. This means you wouldn’t be able to access the Backup and Restore tool at all.
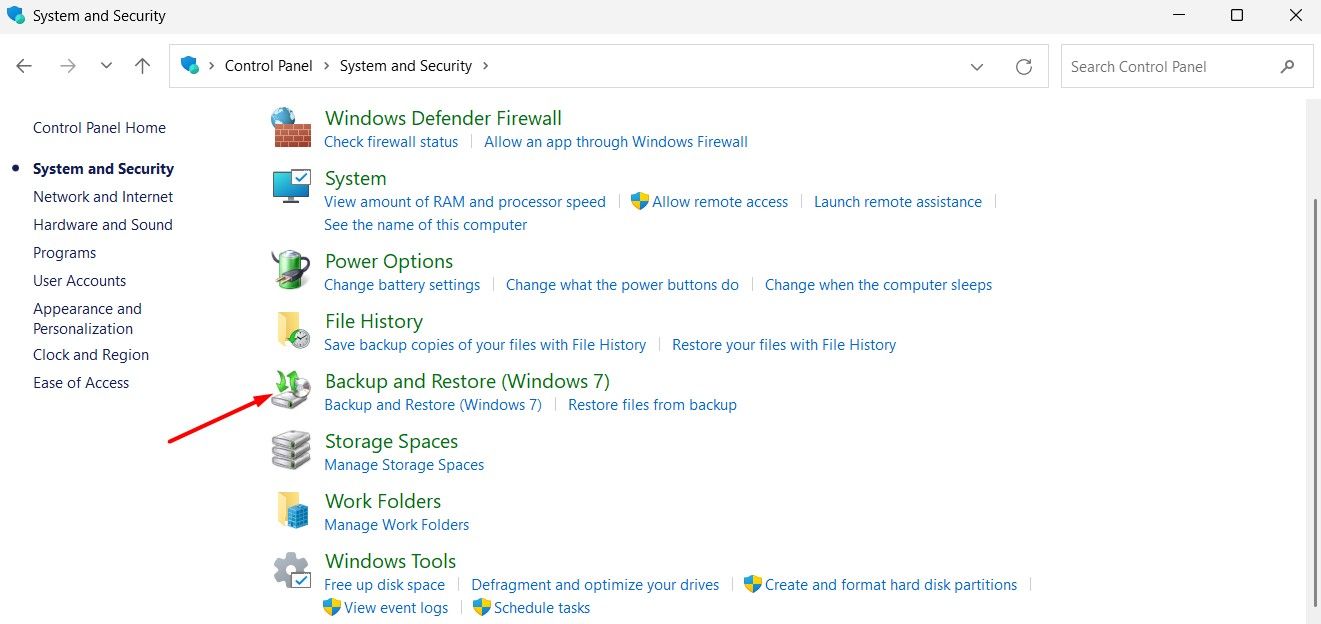
Nevertheless, if you still want to try this method, open the Control Panel and navigate to System and Security > Backup and Restore (Windows 7).
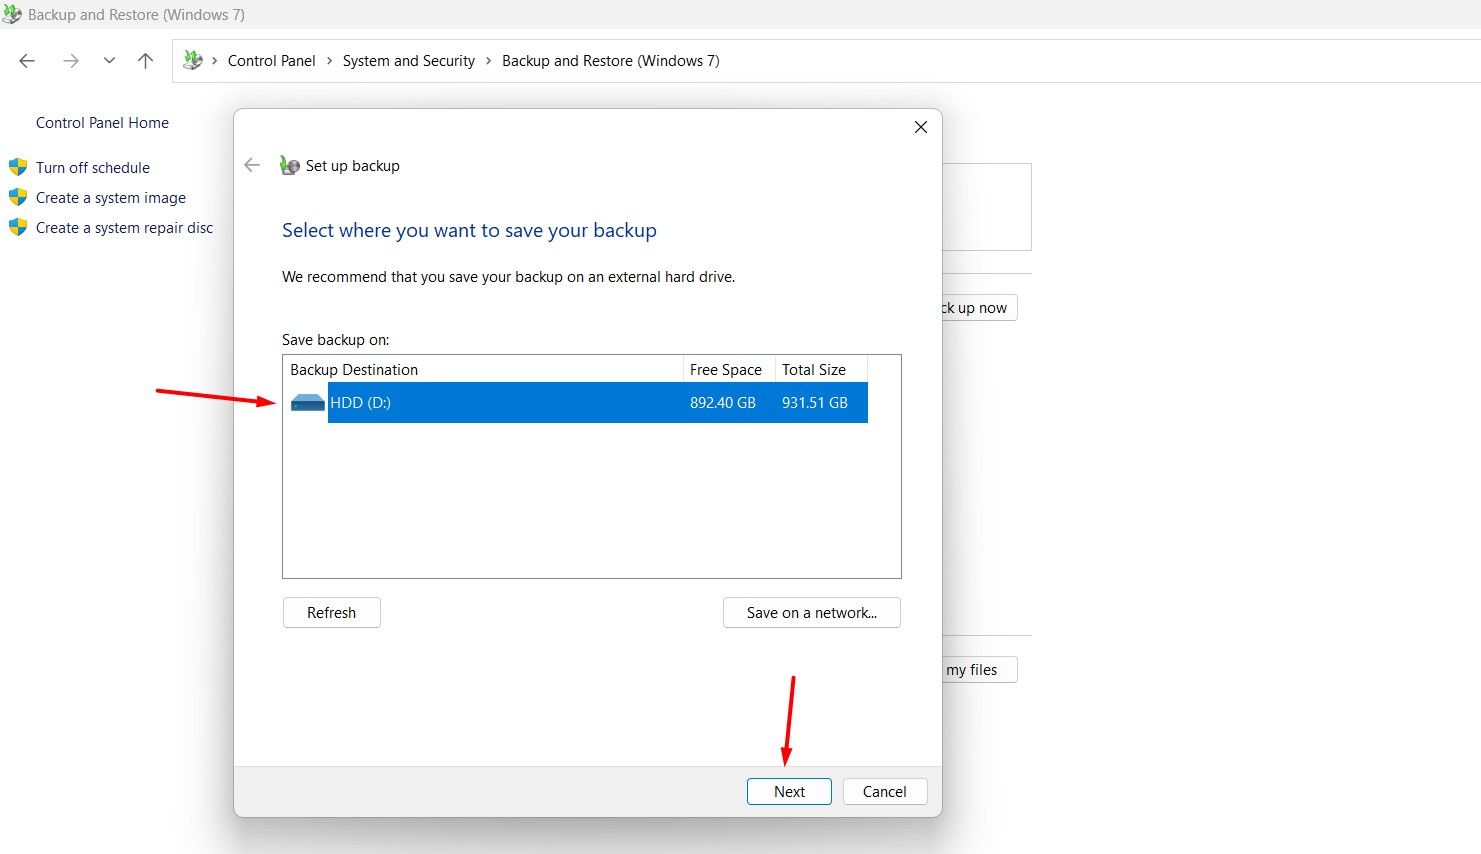
Click the “Set Up Backup” option. Select the drive where you want to back up the data, and click the “Next” button.
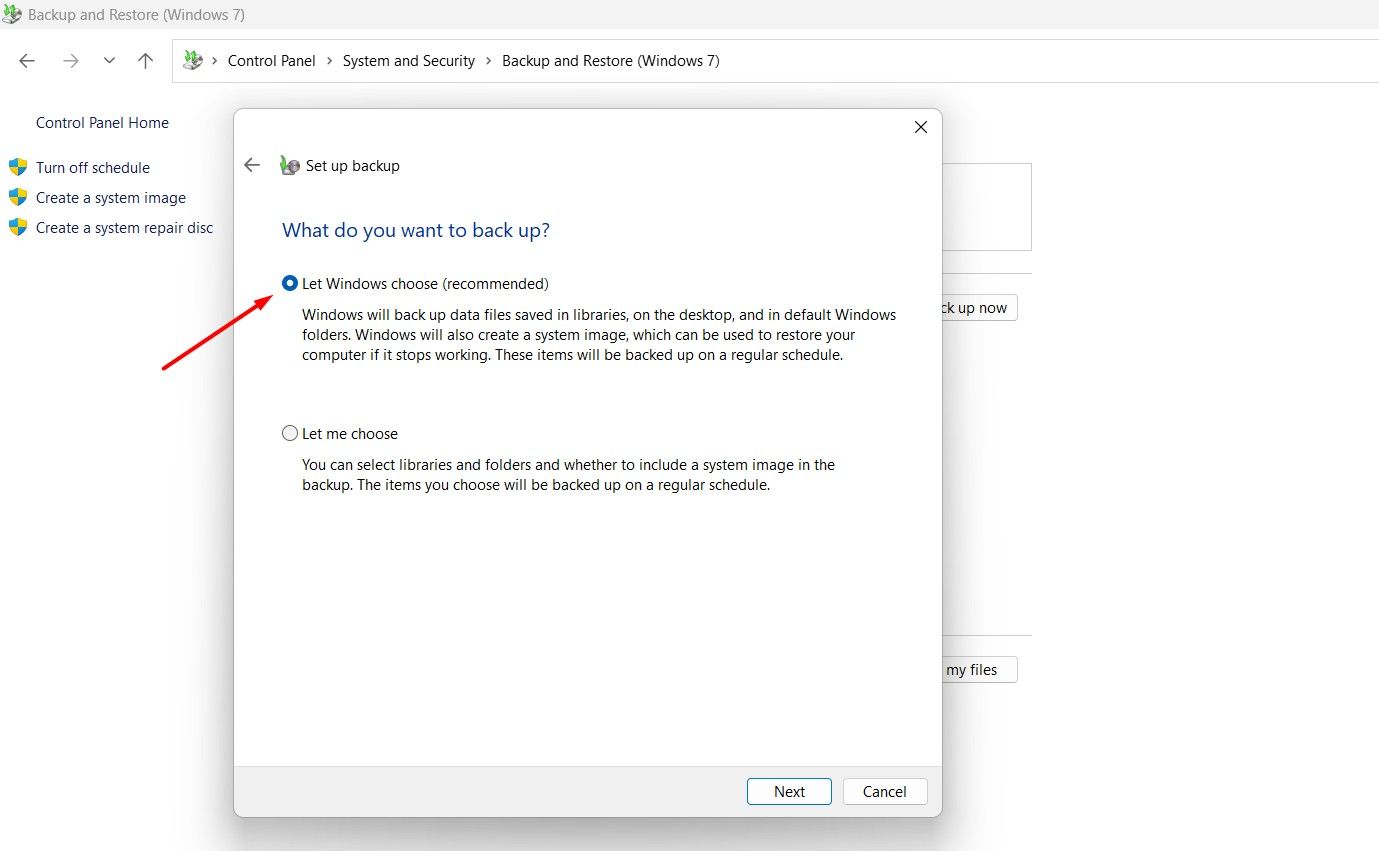
Choose the “Let Windows Choose” option and click “Next.”
Click the “Change Schedule” option and set how often you want to back up your data. Then, click “OK.” After that, select the “Save Settings and Run Backup” option. Windows will start the backup process, which will take some time.
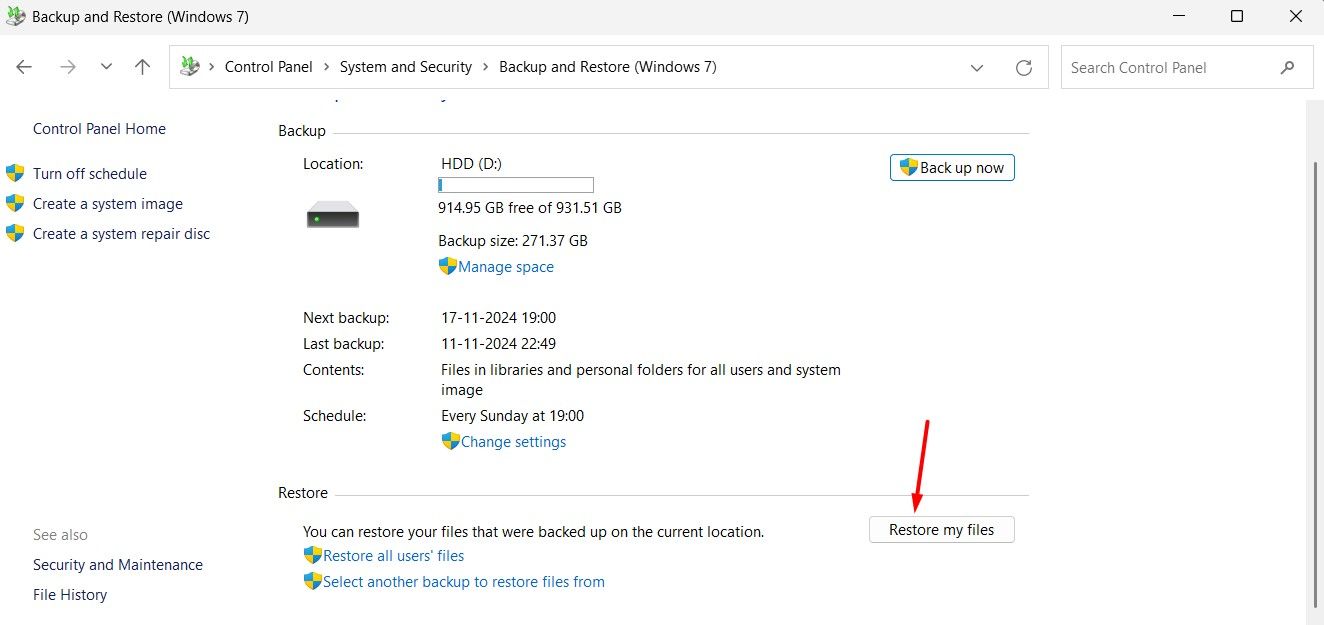
In the future, when you need to restore Windows, simply click the “Restore My Files” option and follow the on-screen instructions.
That’s everything on how you can back up Windows to external storage. Once again, I recommend considering Backup and Restore (Windows 7) as a last resort and preferring either the File History method or a third-party tool.
Source link


