The Element Inspector in your browser seems like a tool only meant for developers, but you can do some cool things with it even if you don’t know any programming.
1
Download Images
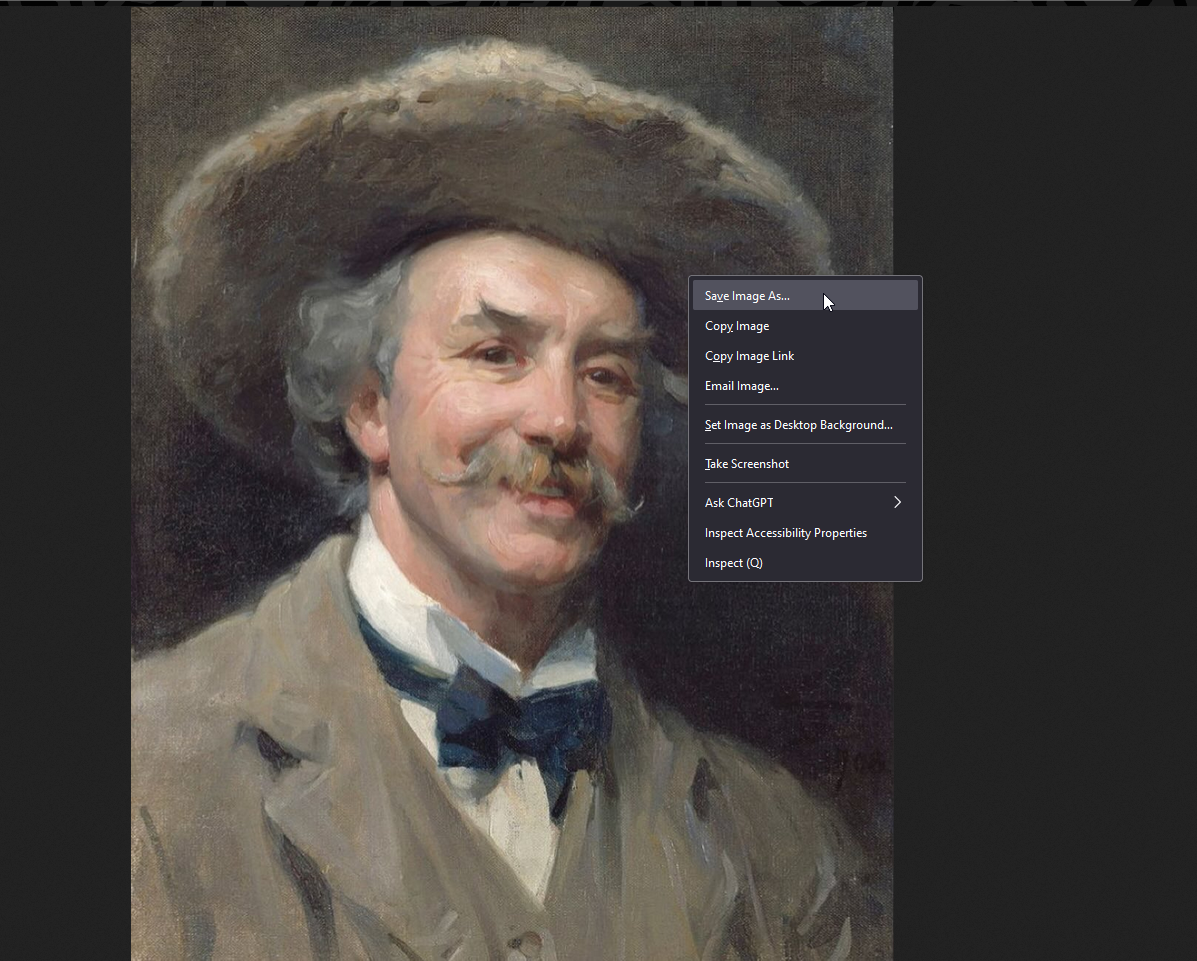
You might need to grab an image from a website. You try to right-click on it and press “Save Image,” only to find that right-click is disabled or the “Save Image” button isn’t available. Other times you may find that you can only download a small thumbnail preview of the image, and not the full-sized file. What gives?
Developers either disable that “Save Image” button on purpose, or they use a web framework that doesn’t support images like that. There’s a neat workaround for that in the element inspector. You can actually grab any image asset from a website, in full size, in three easy steps.
Sometimes these images are locked for licensing and copyright reasons, so be mindful of that and stick to fair use to avoid any legal trouble.
Step 1
Right-click anywhere on the page and click “Inspect Element” or “Inspect.” You can also find and use the specific keyboard shortcut for the inspector within your browser. F12 works for most browsers and operating systems. I’m using Firefox for this demonstration, but the steps are identical.
Step 2
Within the inspect element window, click the “Network” tab. The network tab should have “Images” as one of its sub-menus. Click “Images.”
Now reload the page, so all image assets appear in the “Images” tab. Use the refresh button next to the address bar of your browser or press Ctrl+R.
Step 3
And there you have it. The entire image library should be loaded into the list. The list updates dynamically, so as more images load on the web page, they’ll show up here too.
You can hover over a file to see its preview and dimensions. Double-click it to open the file in the new tab, where you can save it with the right-click menu.
2
Download Videos
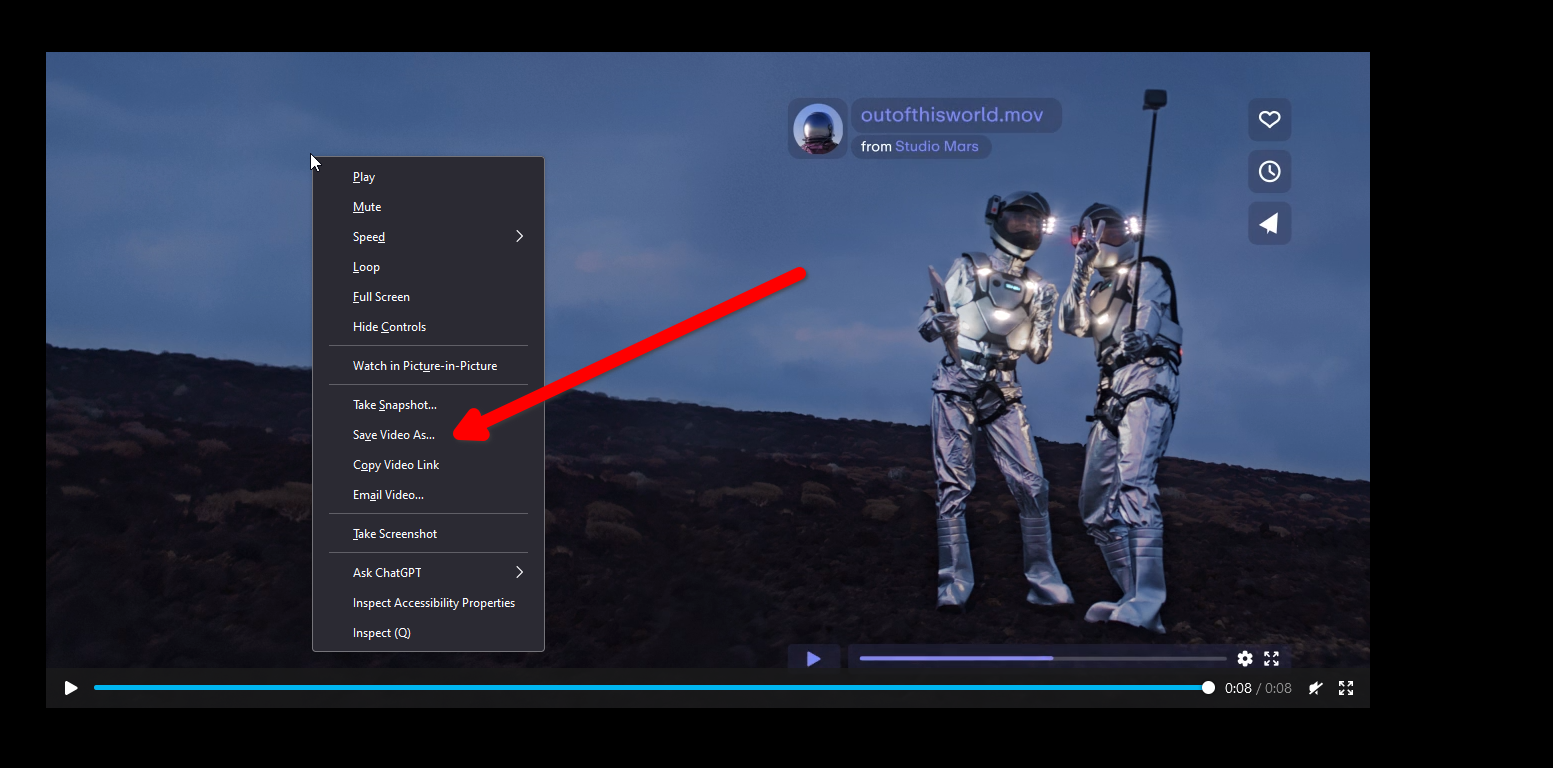
Just like image assets, sometimes websites don’t let you directly download videos. But you can download them by loading them inside the element inspector. Once they’re loaded into the inspector, you can simply double-click on a file name to open it in a new tab.
Step 1
Open the inspect element window by pressing the F12 keyboard shortcut (it should work for most systems). Alternatively, you can right-click anywhere on the web page and select “Inspect.” The element inspector window should pop up.
Step 2
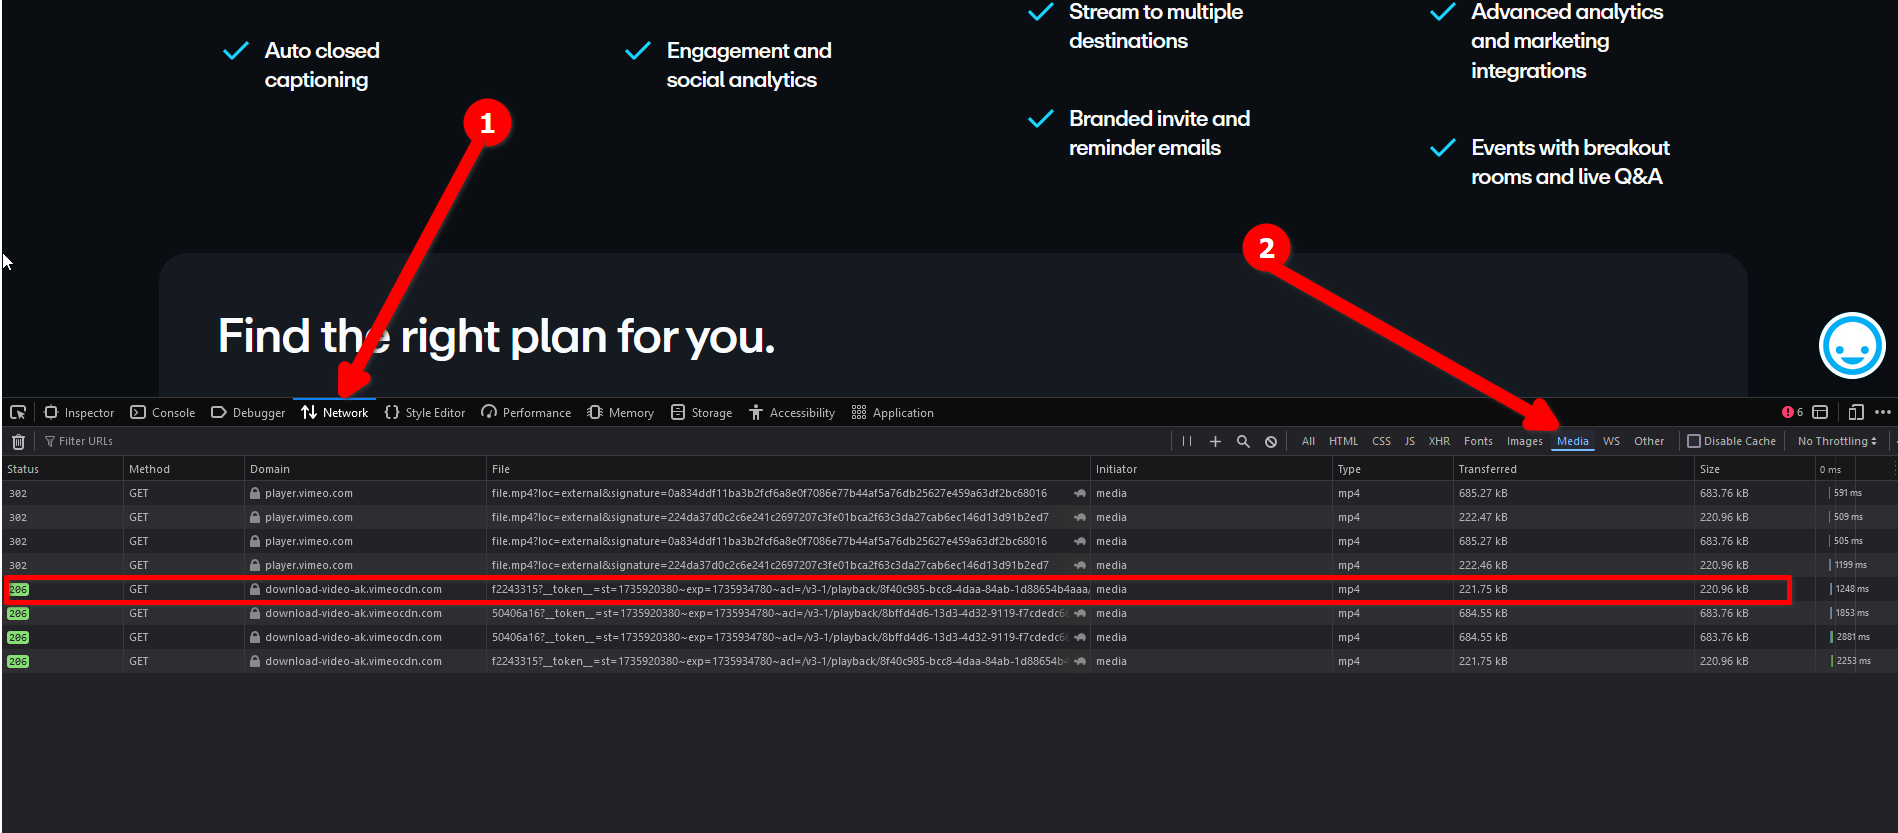
Click the “Network” tab, and then click “Media” to filter out everything except video files. Reload the page. Either click the browser refresh button or press Ctrl+R.
Step 3
The video files should be loaded into a list. You can’t preview them instantly, but you can double-click on a file to open it in a new tab. Here, you can simply right-click and download it.
3
Capture Full-Page Screenshots
If you want to save a whole web page, you can quickly download it as a PDF or an HTML file. But what if you want to take a regular image snapshot of the whole page? Here’s how.
Firefox has a dedicated screenshot tool in the regular context menu, so I’m going to show you how to do this in Google Chrome and other browsers.
Open the inspector tool by right-clicking anywhere on the page or pressing F12.
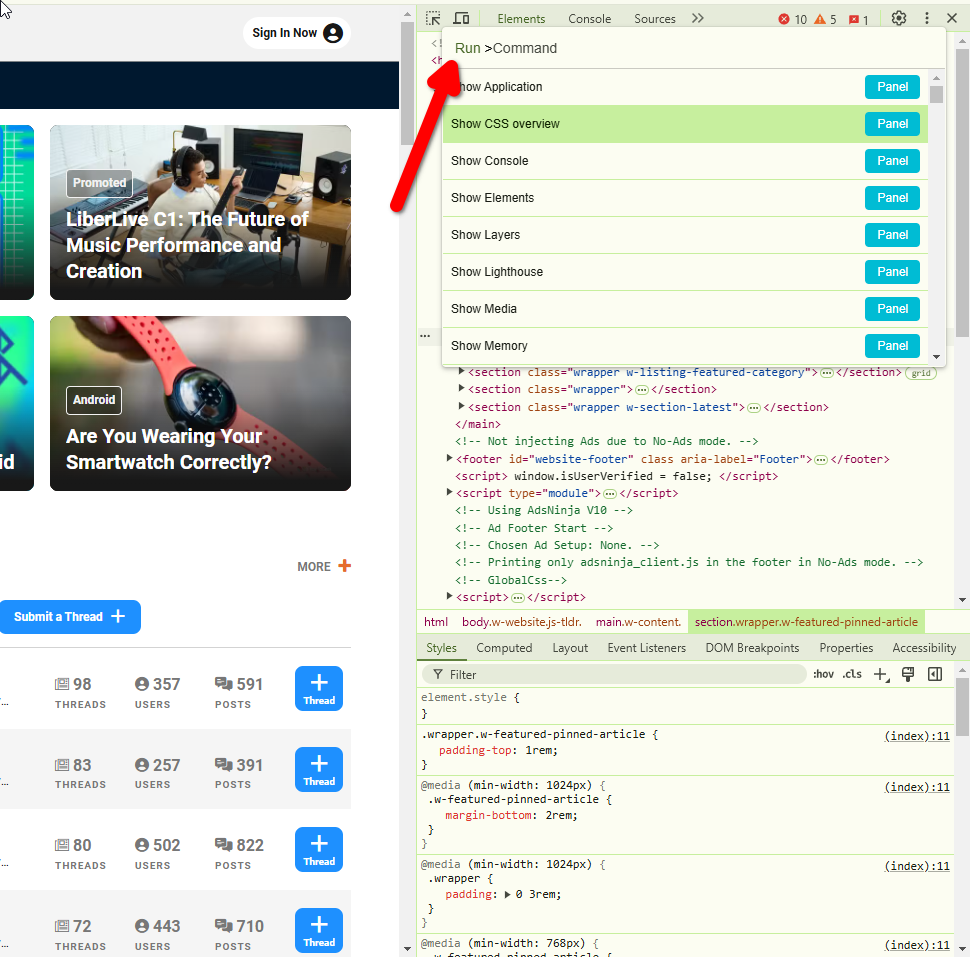
Press Ctrl+Shift+P to open the Run window. Type Capture full size screenshot in this window. Click it.
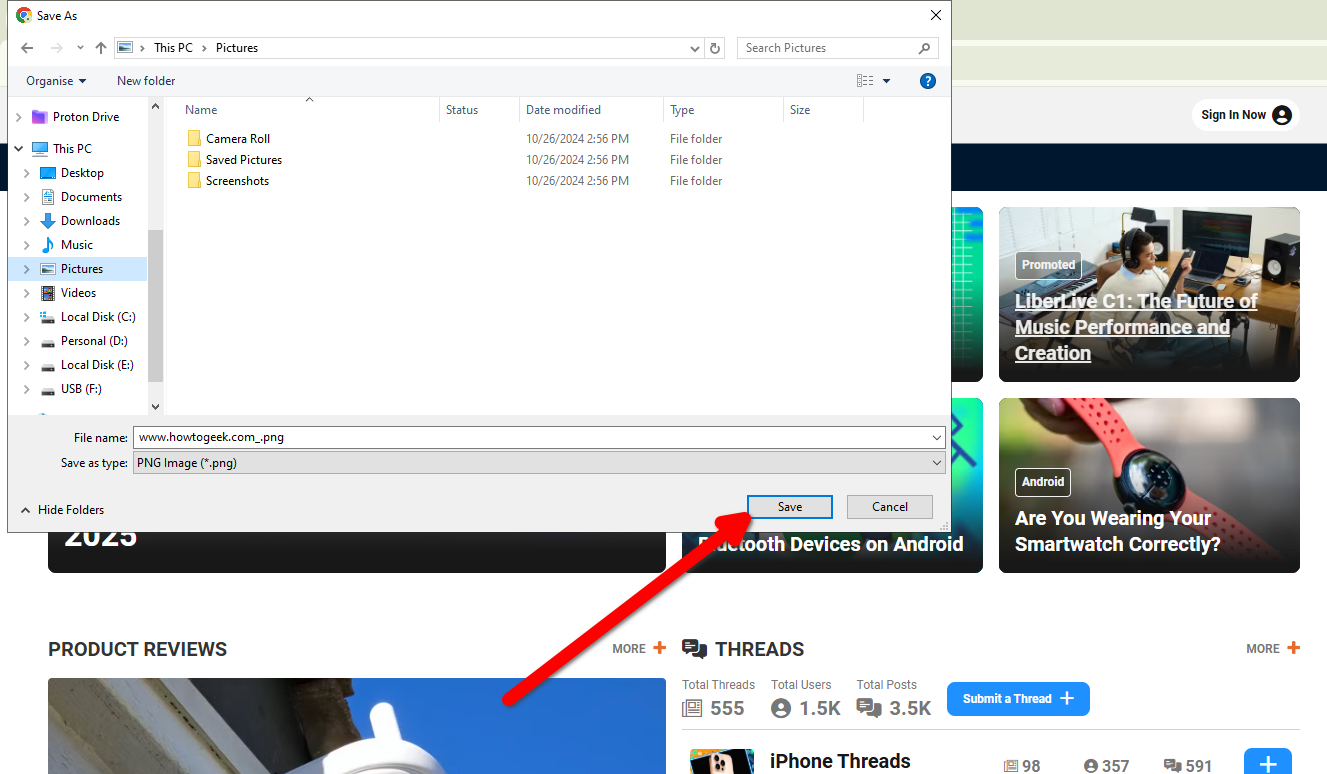
A “Save As” window should appear instantly that’ll let you save the full-page screenshot in JPG format.
4
Pretend You’re On a Phone
Most websites load differently based on the device type and screen size. If you want to trick the website into thinking you’re on a different device (for whatever reason), you can easily do that with the inspector tool.
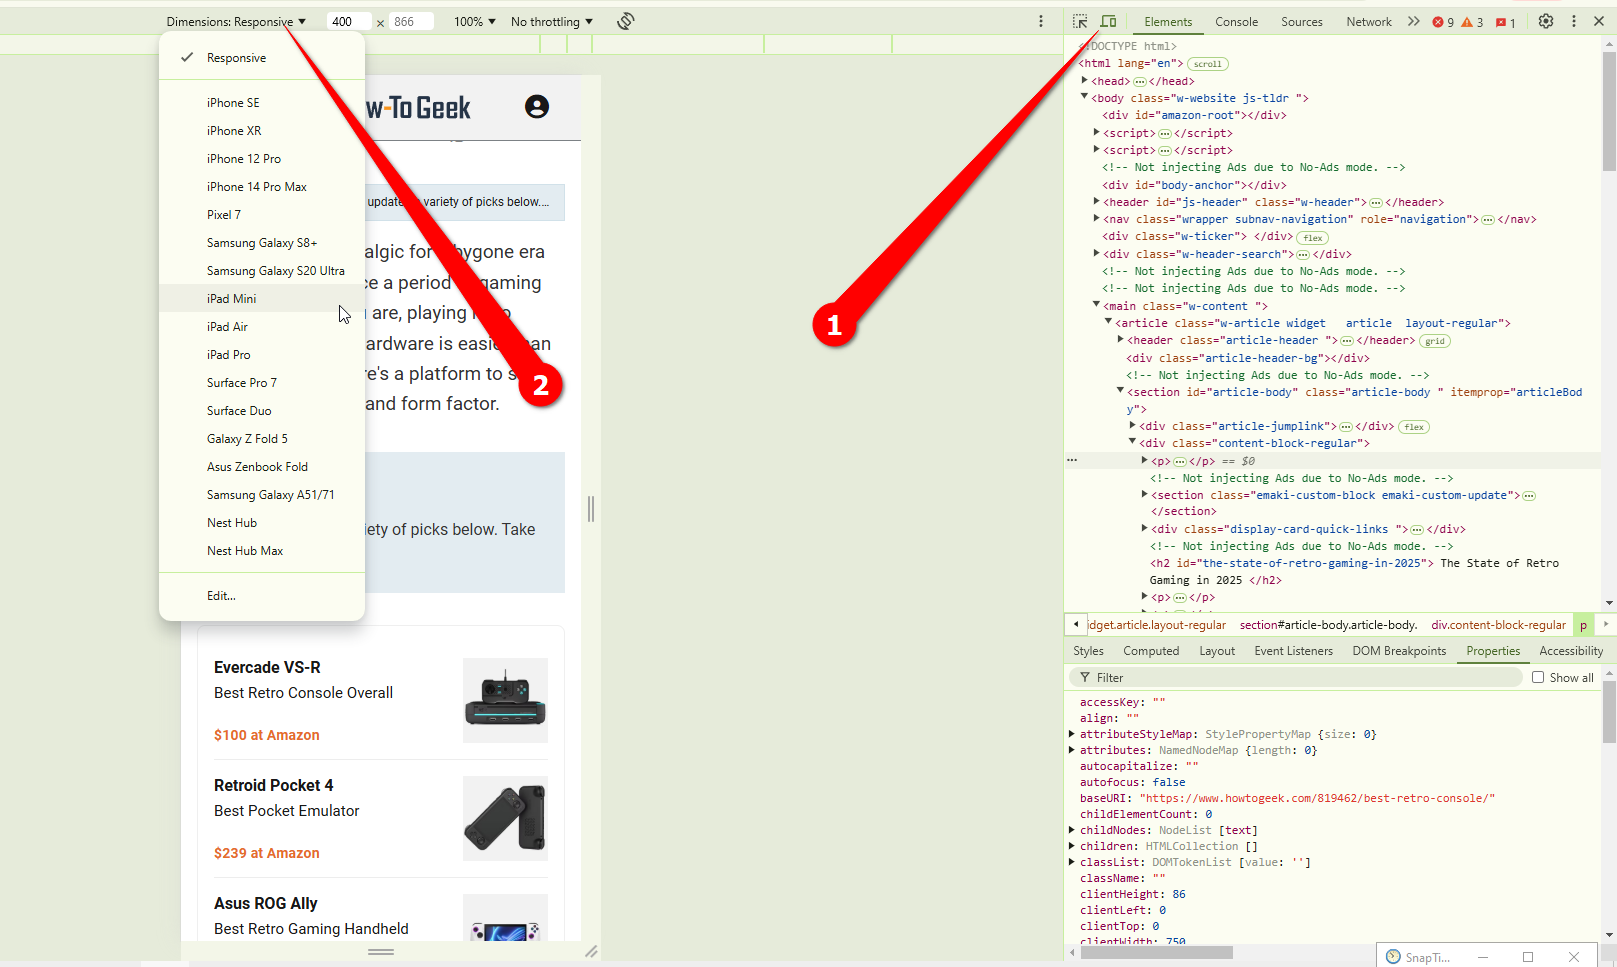
In Chrome, open the Inspect Element window from the right-click context menu or with F12. Then click the tiny laptop and phone icon in the top-left corner. Firefox has a similar button, called Responsive Design Mode (Ctrl+Shift+M).
You’ll get a list of devices you can emulate, and you can manually adjust the screen size too.
Once you’ve chosen a mobile device, you’ll notice that your browser is simulating touch gestures too.
5
Identify Fonts
This one’s for the creatives, but anybody who gets curious about the fonts on a website can use this trick. You can use the inspector tool to identify and sometimes even download fonts.
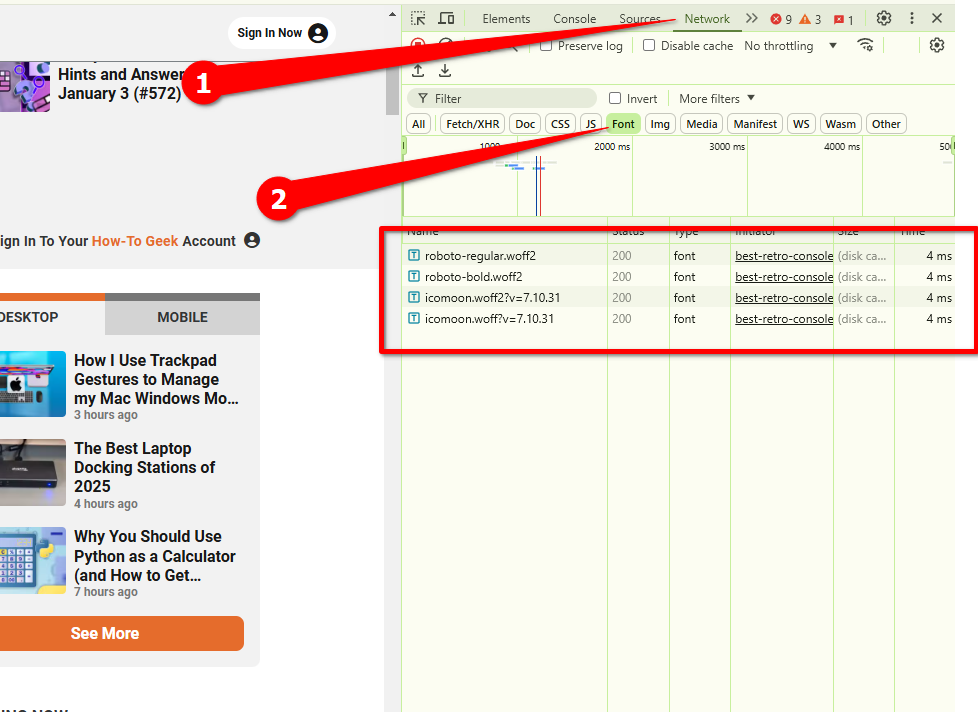
First open the inspect element tool. Next, click the “Network” tab (it might be hidden in the overflow menu) and select “Font.”
Then press Ctrl+R. The rendered fonts will load in the list, most likely in the WOFF format. You can download them directly by double-clicking on the font name. For example, How-To Geek uses Roboto as the default font.
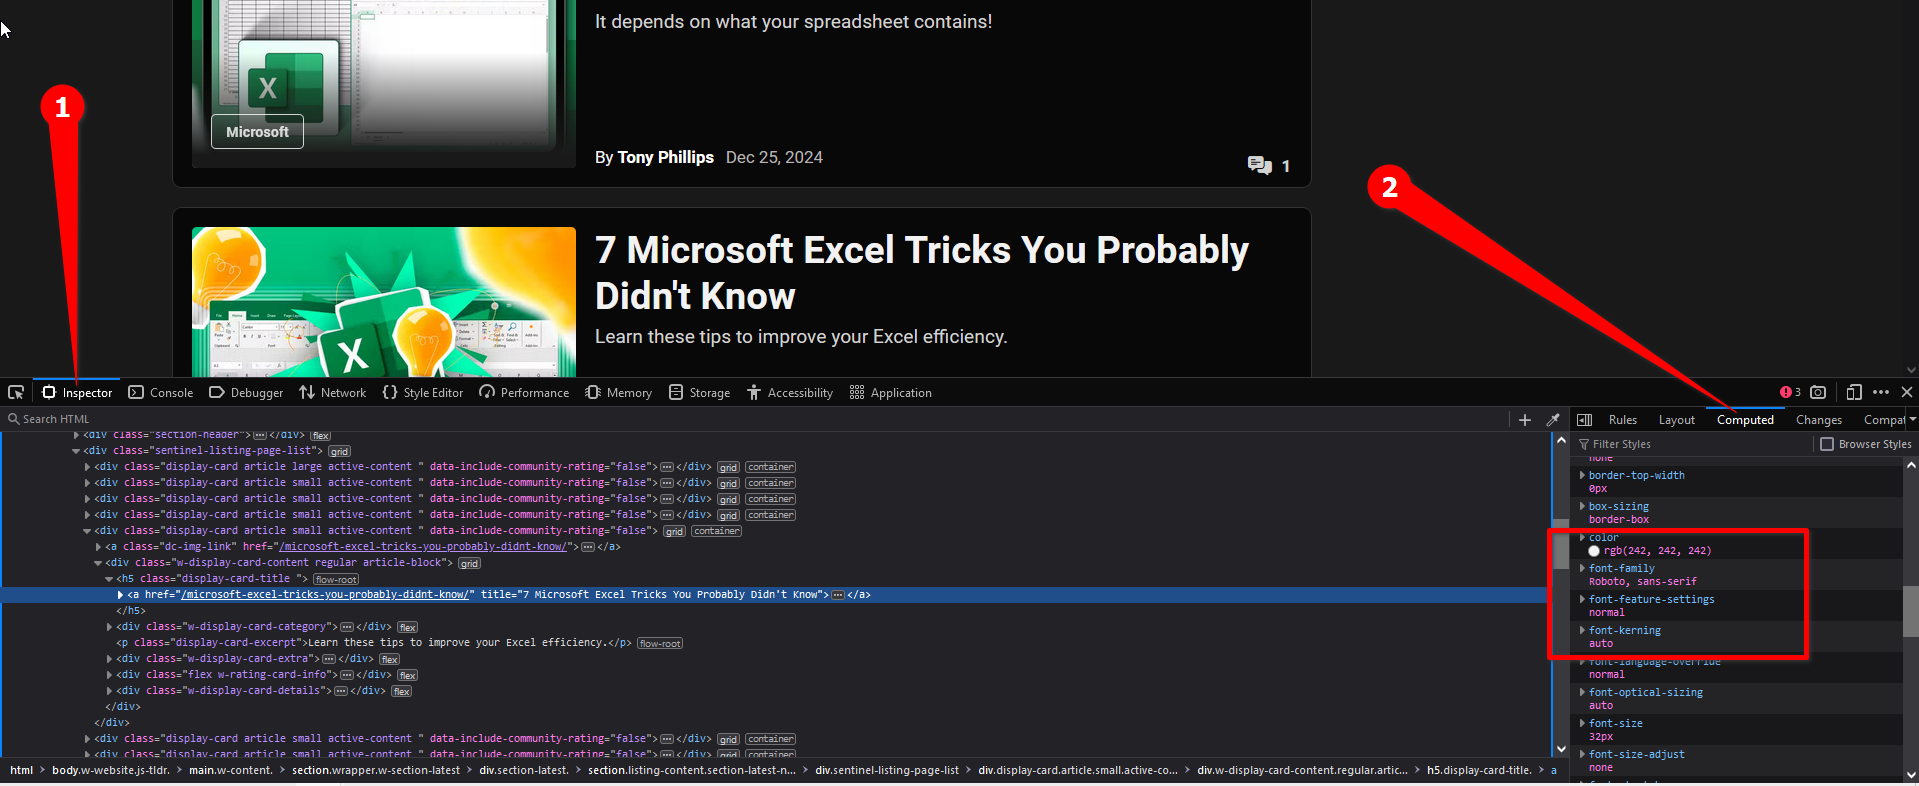
If you need more detailed font info, go to the “Elements” tab and select “Styles.” Scroll down to the font family property and click it. The corresponding text will light up on the web page. This way you can identify a font exactly.
6
Edit Text On a Page (Temporarily)
Did you know you can temporarily edit just about anything on a web page using the inspector? This tool lets us edit the code that makes up the website, so if you know the code, you can make the website look like anything (just on your machine though, until you refresh the page).
Even if you don’t know anything about coding, you can edit basic text on any web page. It can be a fun little prank to play on your friends.
Highlight the text on the page that you want to edit and right-click on it. Then click “Inspect” or “Inspect Element.”
The relevant chunk of text should show up on the Elements tab. Just double-click it and replace the text with anything you want.
Close the element inspector and you’re done! Remember, refreshing the page will undo your changes.
7
Delete Elements
Just like editing text, you can also remove specific elements from a web page. Once again, the changes only last until you refresh the page.
Right-click on the element you want to remove, and then click “Inspect” or “Inspect Element.”
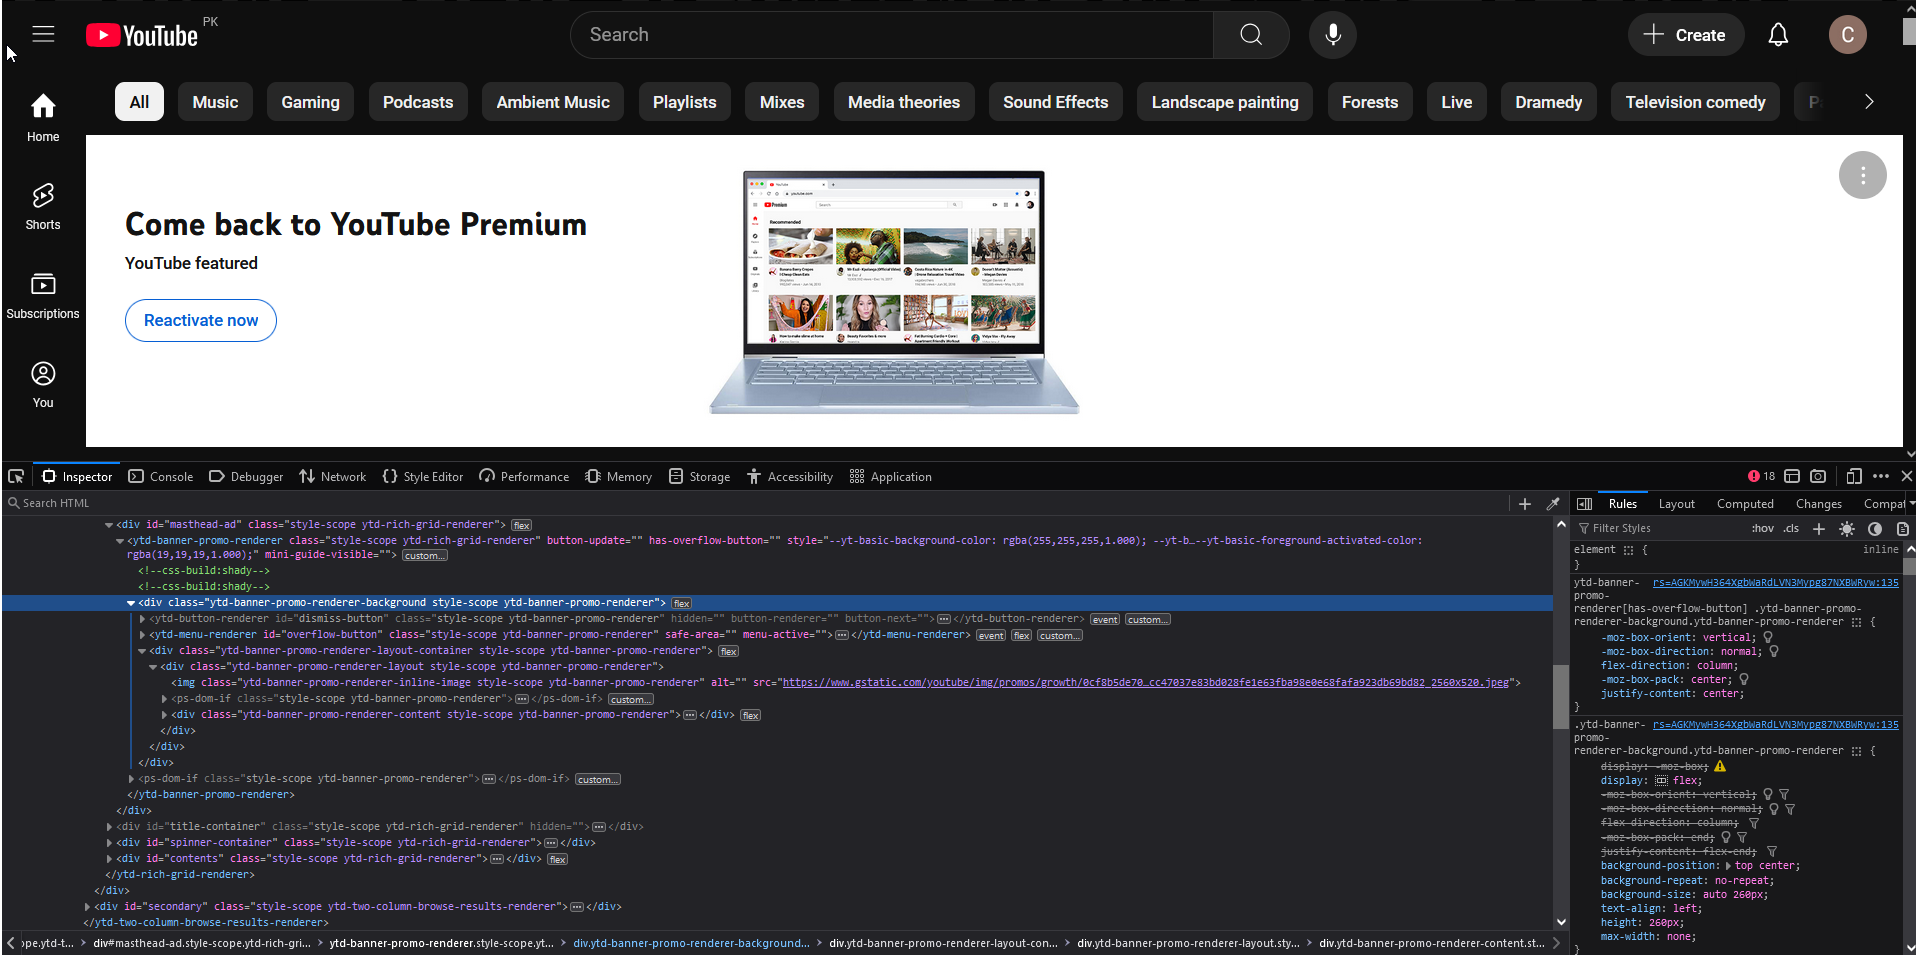
Hover over the “
Just like that, it’s gone.
8
Identify Color Values
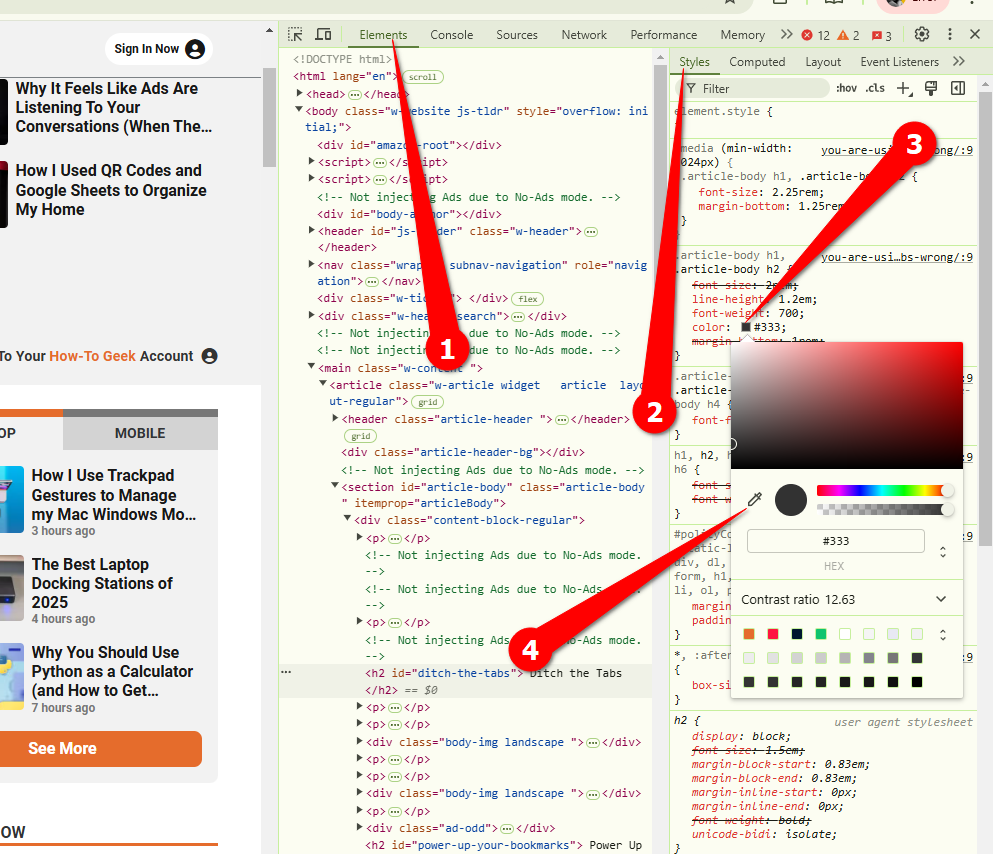
Another tip for the creatives: you can pull RGB and HEX values for any color on a webpage with the eyedropper tool you’ll find in the element inspector.
Right-click anywhere on the page and open the Inspector. By default, the Rules window opens inside the Inspector tab. Scroll down to find any property labeled color.
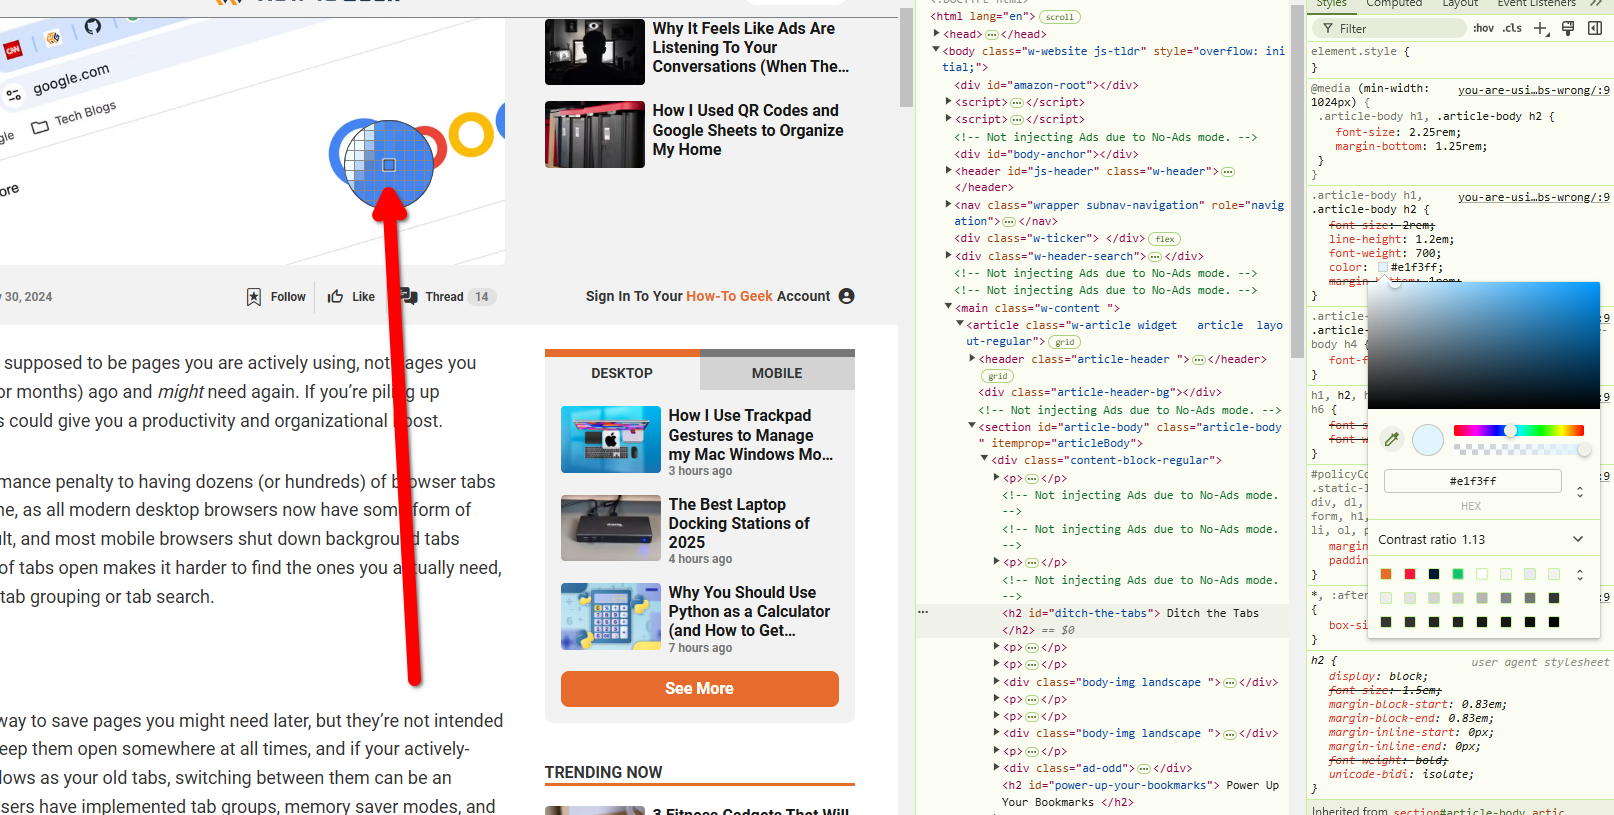
The color property should have a colored circle or square next to it. Click it to open the color picker and press the eyedropper icon next to it.
You can hover this eyedropper anywhere on the page to look up color values. Clicking the eyedropper autofills the property with the color value you just picked. From here you can copy it easily.
These tips only scratch the surface of what’s actually possible using the Element Inspector. If you want to dabble further in web development, here’s a guide to get you started.
Source link


