Expands Sources, Adds Audio Features
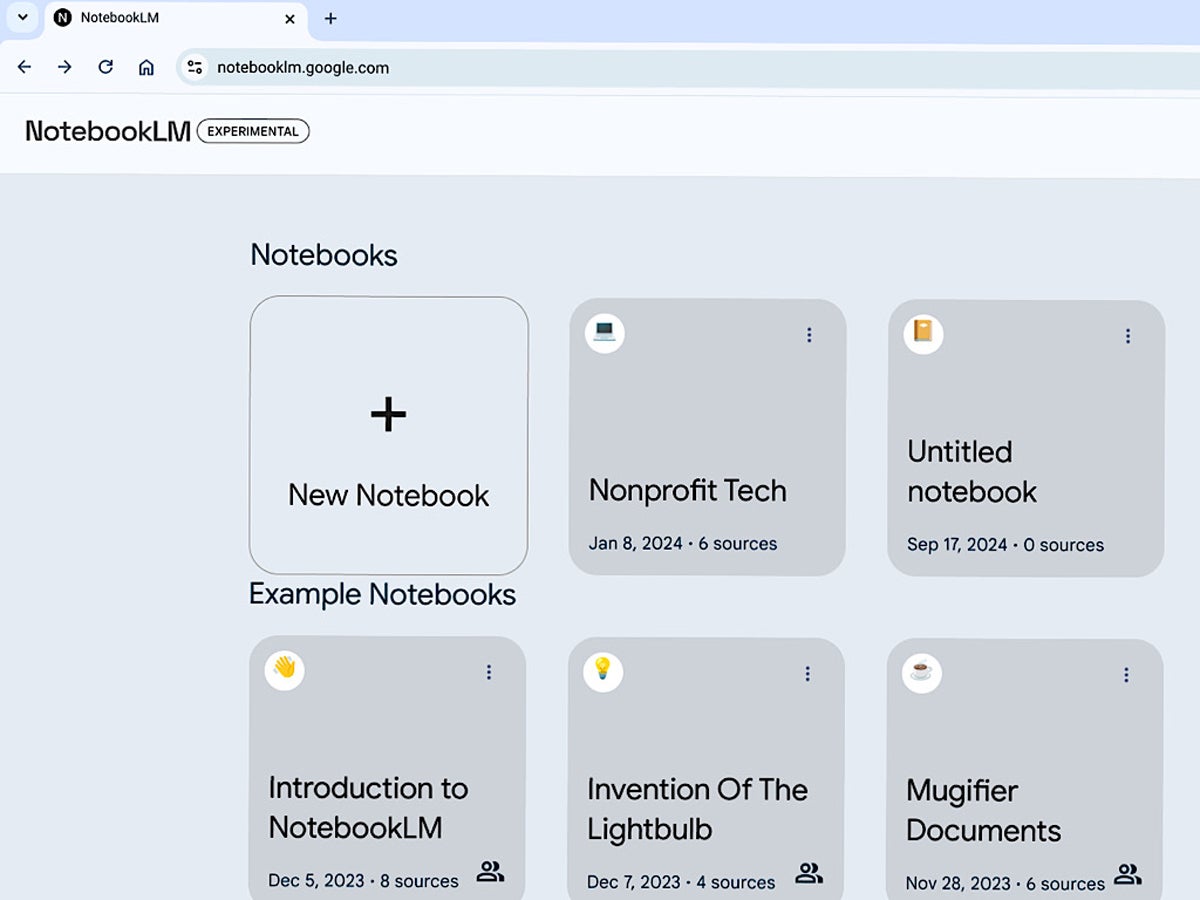
Google’s NotebookLM allows you to experiment with an AI chat system focused on sources you select. The tool leverages Google Gemini, a highly capable AI system, not only to generate chat responses based on your sources but also to help you organize and explore the content within your sources.
For example, you may add multiple lines to a notebook, then use NotebookLM to generate a customized study guide based on a specific selection of those notes.
In September 2024, NotebookLM added an option to create an audio overview, which builds a podcast-style conversation drawn from your sources. This combination of AI tools, including chat and notes-related features, makes NotebookLM one of the most effective tools for exploring ideas found in a focused set of sources.
Users of NotebookLM must:
- Be at least 18 years old.
- Have a Google account.
- Be in one of the 180 regions where the Gemini API is available.
NotebookLM is free to use, and Google does not use your data to train NotebookLM. However, NotebookLM is experimental and, like most AI services, may sometimes provide incorrect information. Five core capabilities of Google’s NotebookLM — as of September 2024 — are covered below. Visit NotebookLM and sign in with a Google account to get started.
SEE: Google Chrome: Security and UI tips you need to know (TechRepublic Premium)
How do you use Google’s NotebookLM?
While Google emphasizes chat and other AI-powered features of NotebookLM, the ability to work with notes alongside sources can also be useful. It also has the ability to create an audio overview, providing a different way to process your content.
Add sources
After creating a new notebook and naming it, you may add up to 50 sources. These sources can include various content, including Google Docs, Google Slides, texts, PDFs, and web links. However, each source must be no more than 500,000 words long. For context, that’s nearly the combined word count of the three “Lord of the Rings” books by J.R.R. Tolkein. Therefore, file length likely will not be a concern for most business or school uses.
Additionally, NotebookLM includes image understanding, which means it can process and analyze information in images included in your sources.
Access a source summary
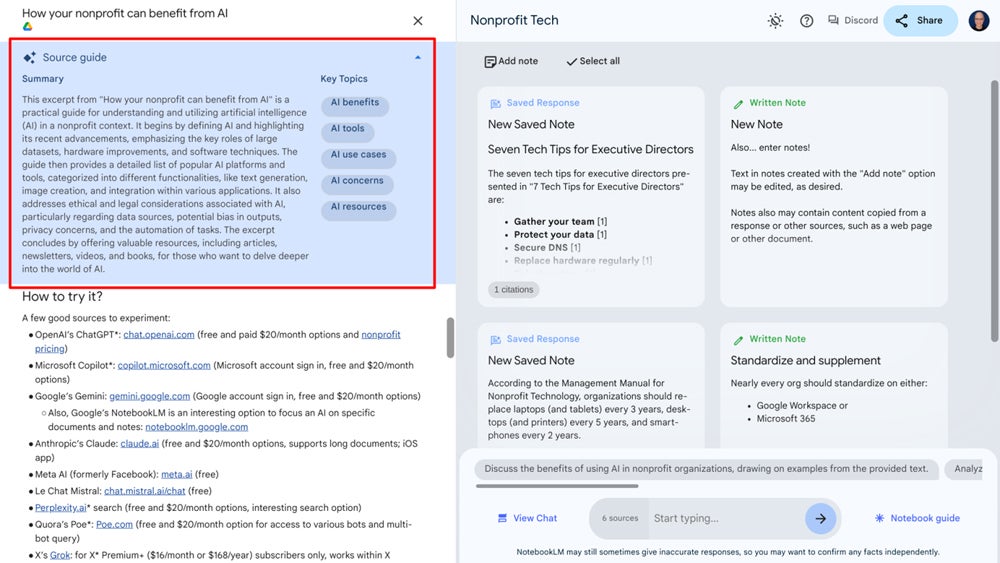
Select any source from the left-side list, and NotebookLM will display two AI-generated sections — a summary and key topics — above the source content. The summary seeks to capture the core concepts of the source in several sentences. In contrast, the key topics can be seen as auto-generated prompts: Select a key topic from the list, and NotebookLM starts a new chat. For example, a click on a key topic of “Collaborative tools” starts a chat with a “Discuss collaborative tools” prompt.
Chat with your sources
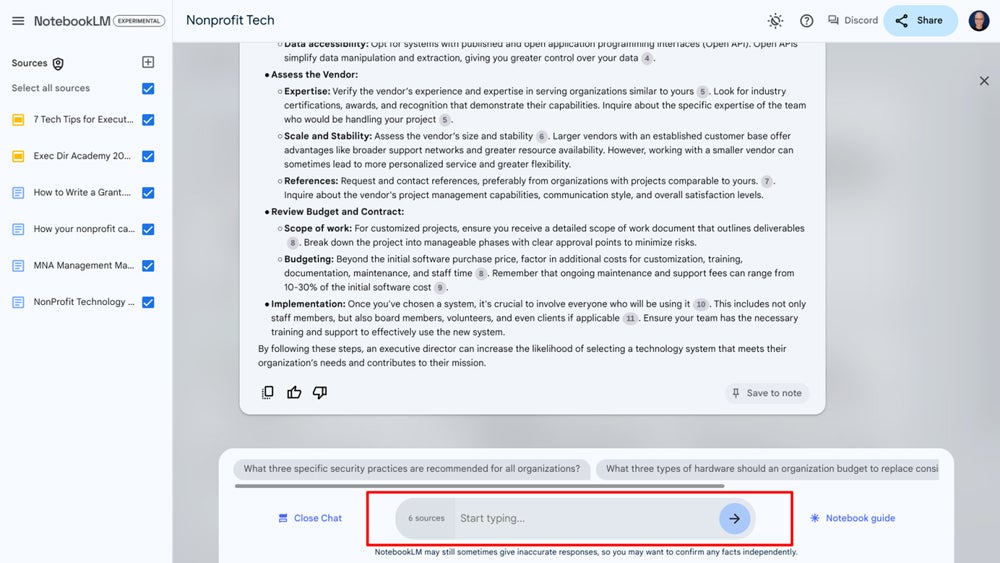
NotebookLM generates chat responses based on your sources, making it an effective tool to interrogate a set of documents, slides, and links. Ask a question, and the generated response may include information from your sources, with numbered citations in the response that link directly to the related content.
Not sure what to ask? Select any of the suggested prompts that display above the prompt box. Want to edit a response for later use? Select the copy button in the lower left, then paste the response in any standard text field elsewhere — but please note that citations are omitted when you copy-and-paste a response in this manner. You also may save a response to a note.
Make notes
There are two ways to add notes in NotebookLM:
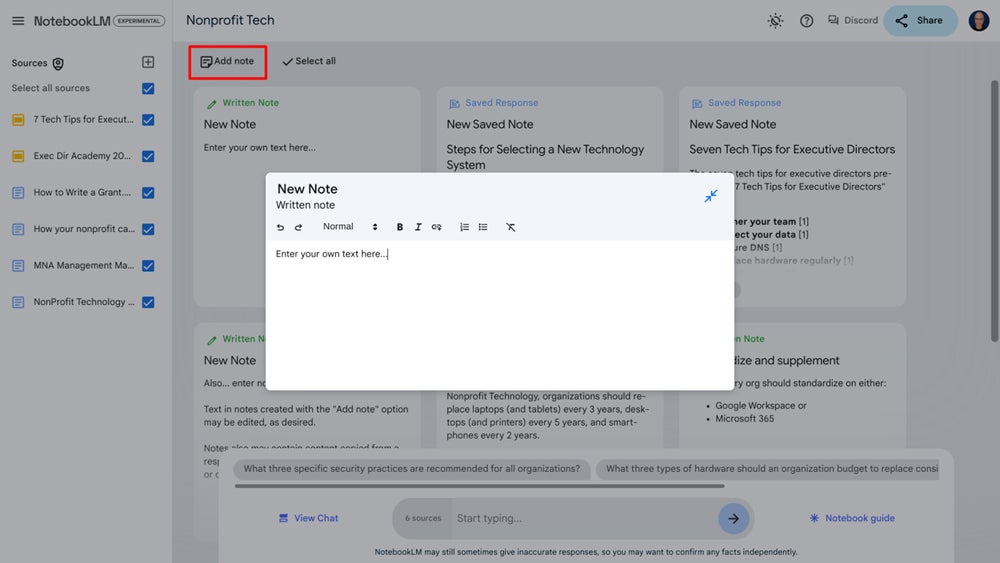
- To make a new note manually, select the “Add note” icon, and then add your text. Once saved, you may later select and edit the title and contents of any manually created note.
- To save any AI generated chat response to a note, select the “Save to note” button in the lower corner of a chat response. Notes created from an AI chat response may be selected and viewed later, but the system won’t let you edit the generated content in the note.
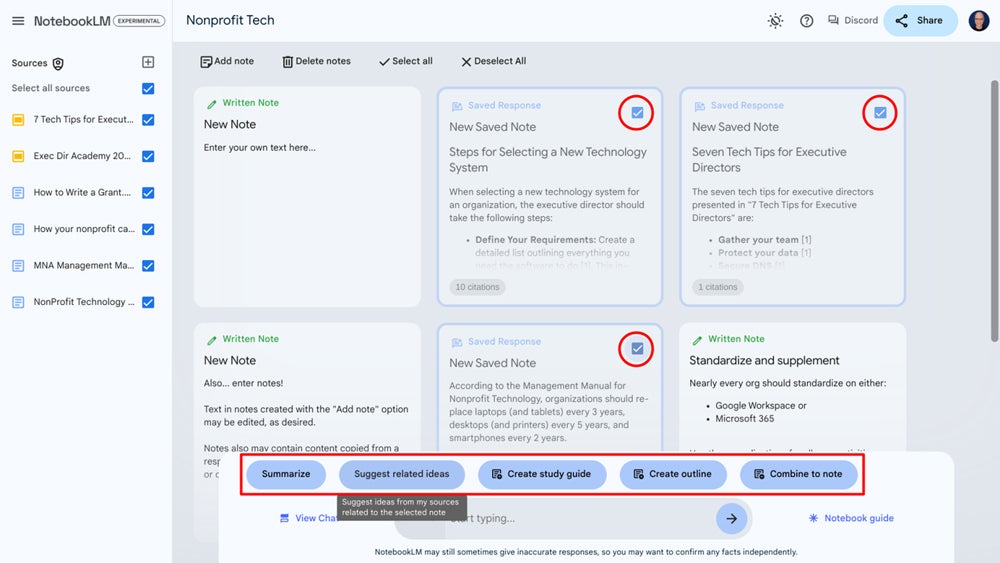
Creating and managing notes alongside source content offers a capability that many students, writers, and researchers might find helpful. Select the checkbox in the upper-right corner of one or more notes, and NotebookLM displays text-buttons with actions to take on the notes.
The note action buttons can:
- Summarize the selected notes.
- Suggest related ideas.
- Create a study guide.
- Create an outline.
- Combine the selected notes into a single note.
Generate guides — including audio!
The Notebook guide option — located in the lower-right area of the display — provides access to a summary of all sources, along with options to generate several types of documents or an audio overview of your sources. The types of documents that NotebookLM can create are similar to the note actions: FAQ, Study Guide, Table of Contents, Timeline, and a Briefing Doc. When you select one of these, the system generates a new note that contains the type of content requested.
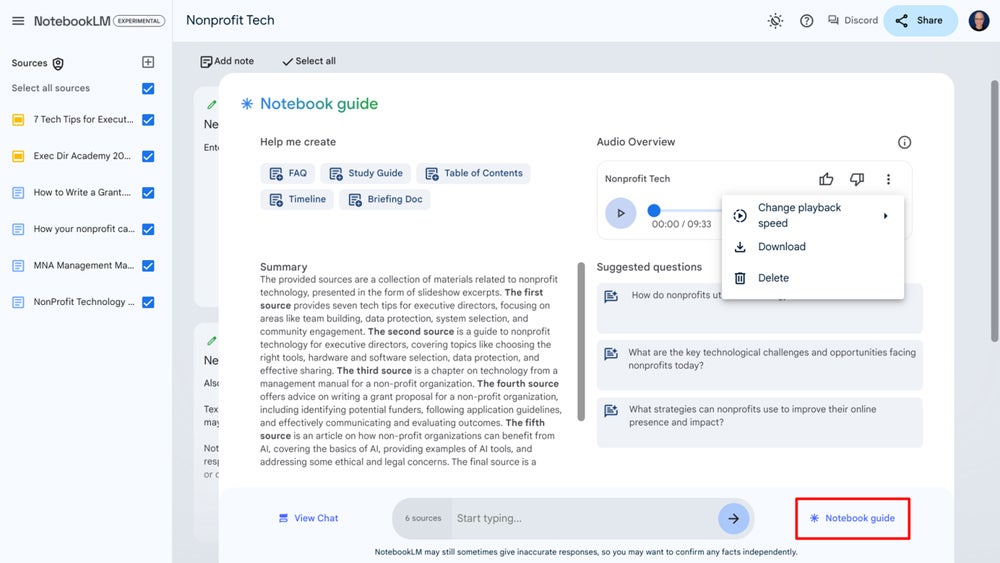
Select the “audio overview” option for the system to create a podcast-style discussion with simulated voices about your content. The overview may take some time to generate. After requesting it, you can close your browser and continue with other tasks. Even when an audio overview is ready, it takes a bit of time to load the generated audio. The generated audio does an impressive job of portraying hosts conversing about your content.
Audio overview selectively focuses on portions of your content. Think of it as a small sampler of your sources rather than comprehensive coverage of every detail. For example, in one of my tests involving four documents and two presentations, the generated audio overview ran for more than nine minutes. The conversation captured at least three major components of the content but also covered some minor details that a human editor likely would have omitted.
Source link


