PDFs were designed to be a universal, easy-to-read document format, and they serve that purpose well. If you have a collection of images—say, documents you scanned into your computer as JPEGs—you can combine them into a PDF document for easy sharing.
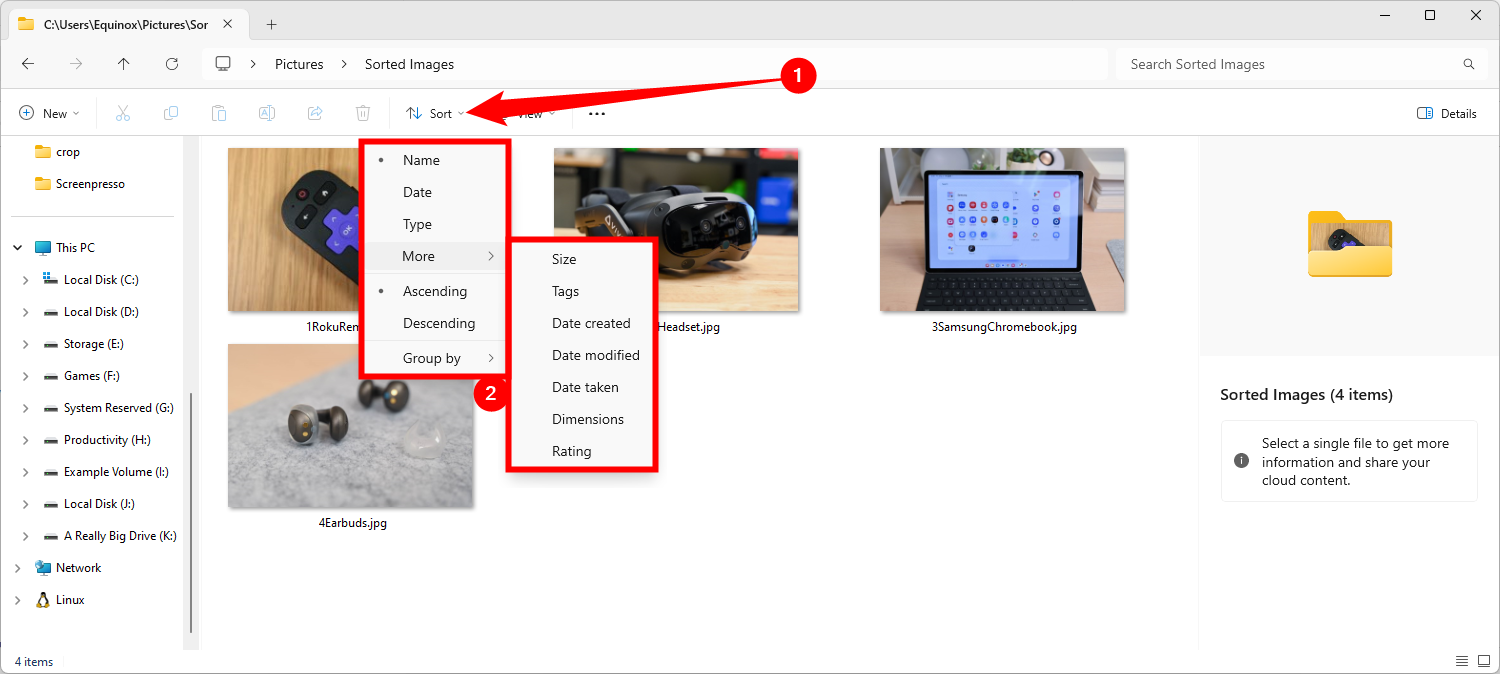
How to Sort Files in File Explorer
Windows 10 and Windows 11 include an option to print to a PDF file natively in File Explorer. You can simply select a bunch of image files and print them to a PDF file. If you want them to appear in the PDF in a particular order, however, you’ll need to do a bit of work in advance.
The below screenshots are from Windows 11, but it works exactly the same in Windows 10.
Windows will always sort by special characters (!@#$%^&*()) first, then numbers (123456), and then alphabetically. So, if you had seven files, 1a, 2a, 3k, 1z, 2b, 3d, and aa, and you told File Explorer to sort them in ascending order by name, you’d get:
- 1a
- 1z
- 2a
- 2b
- 3d
- 3k
- aa
Any number as the leading character will always take precedence over any letter of the alphabet. Special characters aren’t sorted in any intuitive way, so they’re best avoided.
The easiest way to manually order your images is to add numbers to the front of the file names.
The print function will respect whatever sorting method you choose though, so you can also use any of those if you prefer.
How to Print to a PDF File on Windows 10 or Windows 11
To combine a group of images into a PDF file in Windows 10 or 11, first, you need to make sure your files are listed in File Explorer in the order you want them to appear in the PDF file. If you rename them first, you can guarantee sorting them by name will put them in the order you want.
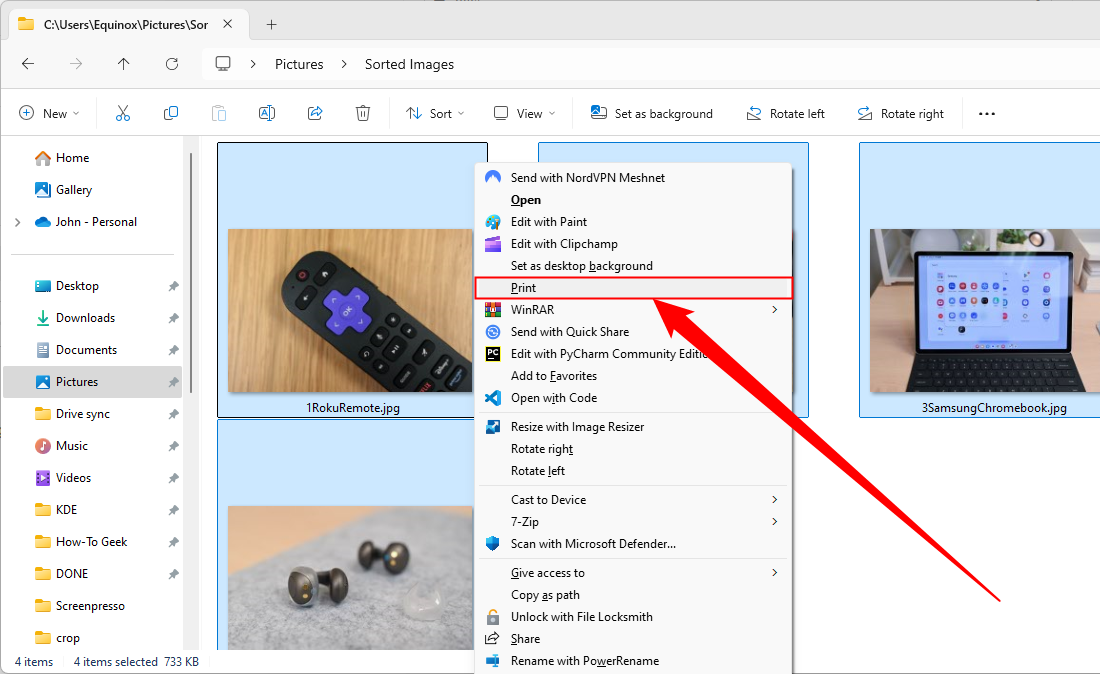
Once you have your images in the right order, select them all, right-click on any of them, and select “Print” from the right-click context menu. If you’re using Windows 11, you need to hold Shift when you right-click to display the Print option—it isn’t visible otherwise.
You can hold Ctrl while clicking to select multiple objects, Shift to select ranges of objects, or press Ctrl+A to select every object in a folder.
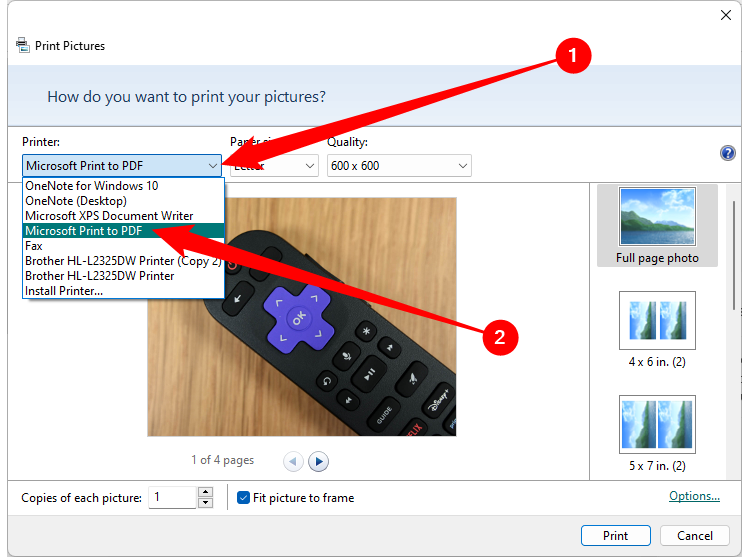
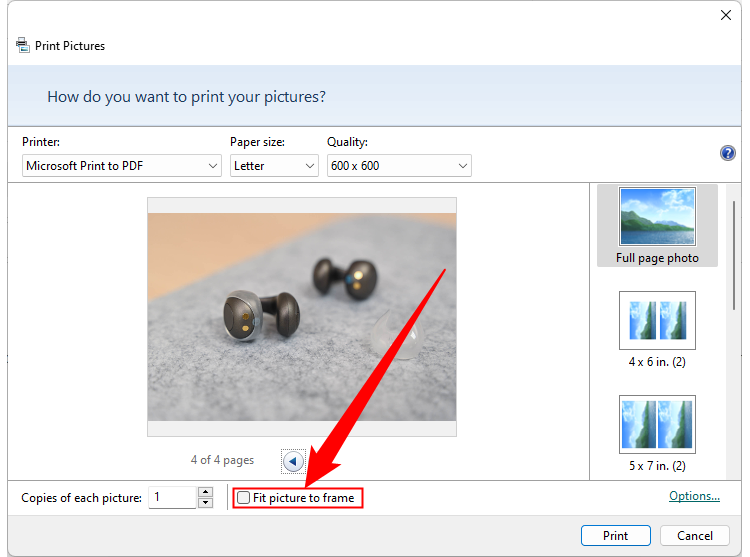
The Print Pictures dialog box displays. Select “Microsoft Print to PDF” from the “Printer” drop-down list.
Microsoft’s Print to PDF option should be enabled by default on any
recent version of Windows
. If it isn’t available to you for some reason, check out the last section of this article, where we go through the steps of manually enabling it.
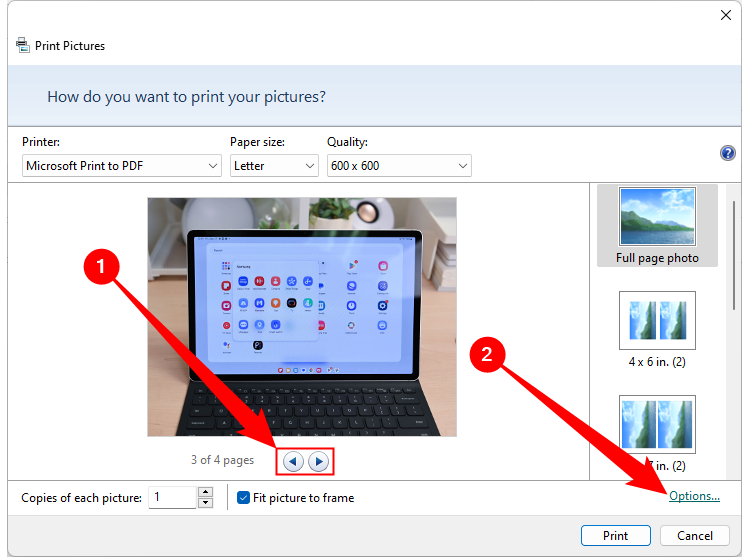
Use the right and left arrow button below the image to scroll through the images that will be added to the PDF file. Click the “Options” link in the lower-right corner of the dialog box to access additional options for the PDF file.
The images may look cut off, but don’t worry. We’ll show you how to fix that a bit later.
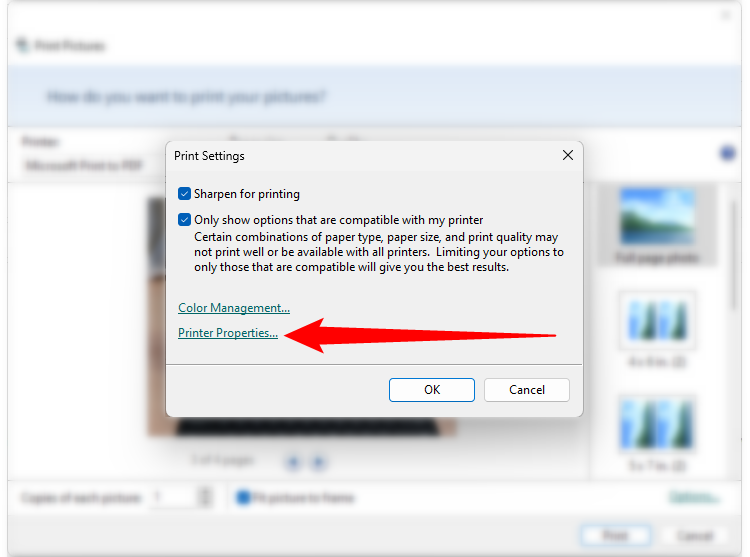
In the Print Settings dialog box, you can choose to sharpen the images for printing, if you know the PDF file will be printed. If you also know you will be printing the PDF file on your own printer most of the time, leave the “Only show options that are compatible with my printer” option selected to get the best results.
You can access properties for your printer from here by clicking the “Printer Properties” link.
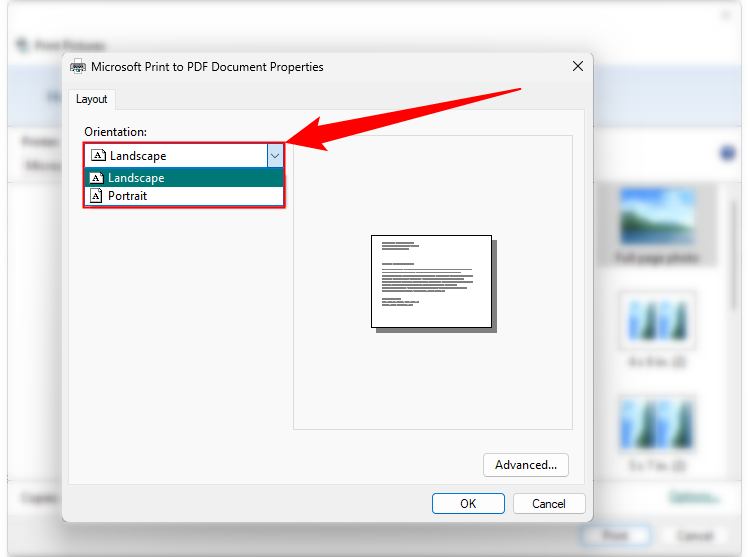
In the Microsoft Print to PDF Document Properties dialog box, you can select whether you want the document to be “Landscape” or “Portrait” from the Orientation drop-down list. Click “OK” to accept the change, or click “Cancel” if you don’t want to save the change, or you didn’t change the orientation.
You are returned to the Print Pictures dialog box. If you noticed earlier that the sides of your images seem to be cut off, click the “Fit Picture to Frame” check box so there is no checkmark in the box. You should see the entire image now. Enabling or disabling the Fit picture to frame option affects all the images you’re adding to the PDF file.
Click “Print” to create your PDF file.
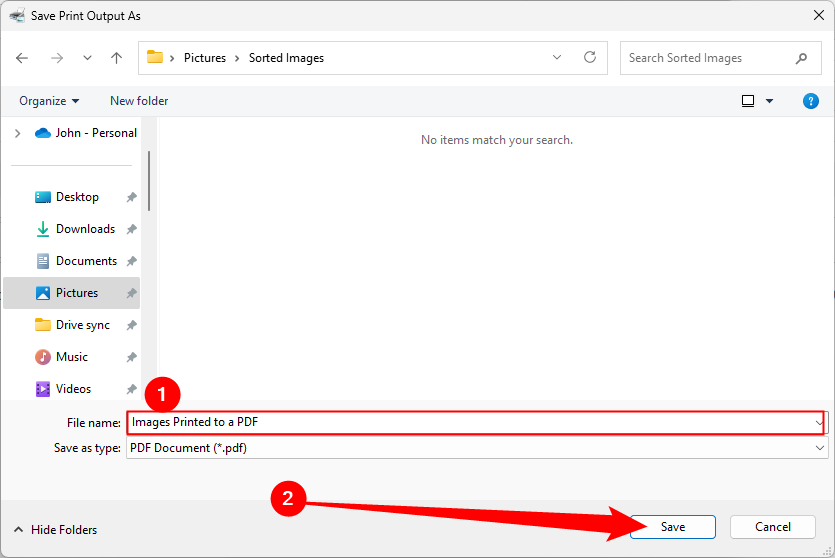
The Save Print Output As dialog box will pop up. Navigate to the location where you want to save the PDF file. The same directory where the images are stored is selected as the default location, but you can change that. Enter a file name for the PDF file in the “File Name” edit box, and click “Save.”
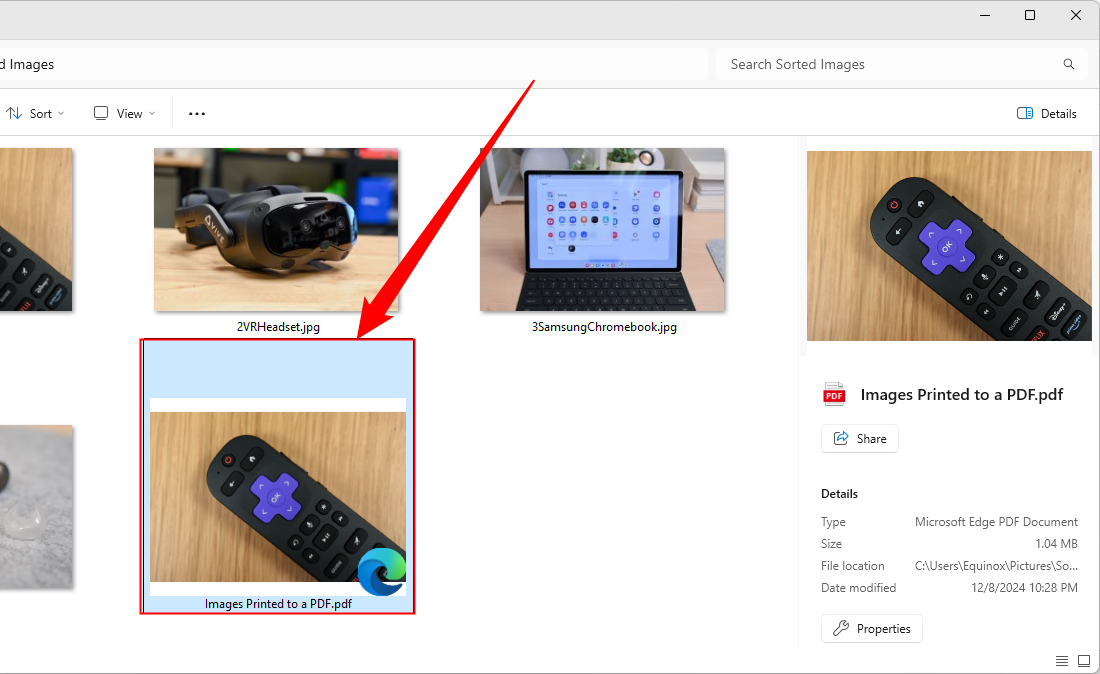
You’re done! The PDF file is created in the selected folder, and you can open it in the default PDF viewer in Windows—or in any other PDF reader you have installed.
How to Activate the Microsoft Print to PDF Option
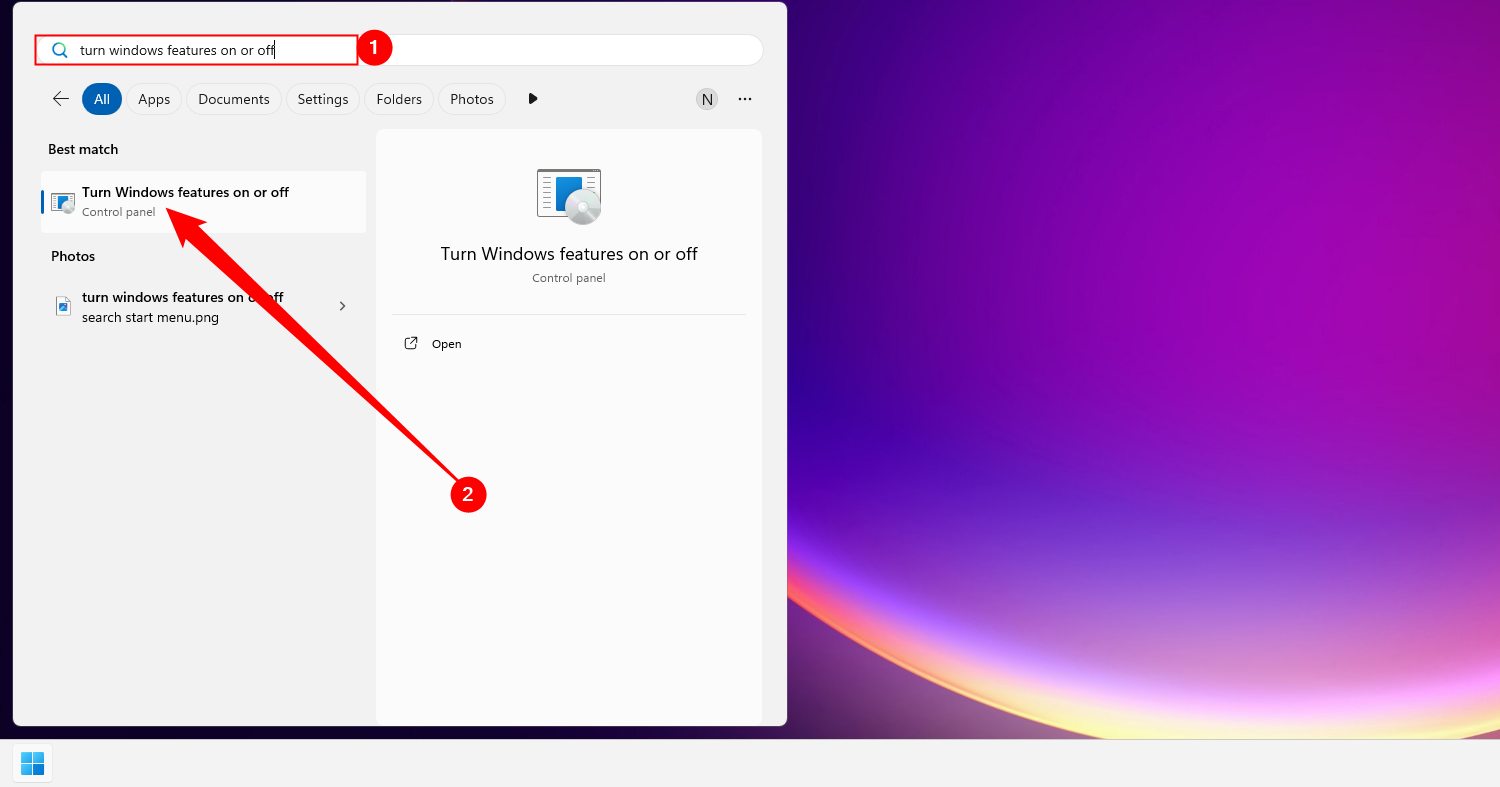
If the Microsoft Print to PDF option is not available in the Printer drop-down list on the Print Pictures dialog box, you can easily enable it. Open up the Start Menu, search for Turn Windows Features On or Off, and then open that result.
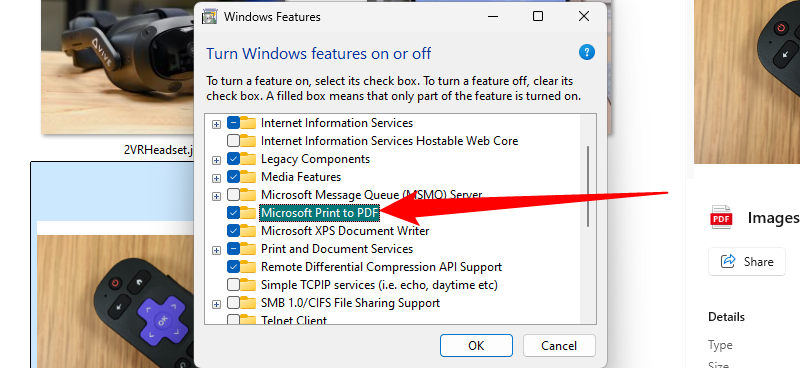
Scroll through the list, tick the box next to “Microsoft Print to PDF,” then click “OK.”
You’ll see a new window pop up that says Windows is searching for new features, then applying the changes. When it is done, just click “Close.”
Remember, PDF printer drivers can also be used to create a PDF file from any document that can be sent to a physical printer, not just images. Simply select the PDF driver as the device on the Print dialog box, rather than your standard printer.
Source link


