How to create an image backup of a USB flash drive on Windows
- To create an image of a USB flash drive, download and open the “USB Image Tool,” connect the removable storage, click on “Backup,” and save the image as a “.img” file.
- You can also use the tool to restore image backup to the USB flash drive.
On Windows 11 (or 10), you can use the “USB Image Tool” to create an image backup of any USB flash drive, and in this guide, I will explain how to complete this process.
Although you can always transfer the files from a removable drive to your computer, sometimes, you may want an exact copy of the storage, depending on how it’s been configured, and for these cases, the “USB Image Tool” can come in handy.
“USB Image Tool” is a legacy application that works on Windows 11 and older versions, such as Windows 10, and it offers an interface to backup and restore the partition and contents of the flash drive using the “.img” file format.
In this guide, I will explain the steps to backup and restore the contents of a flash drive on Windows 11. These instructions also work on Windows 10.
Warning: Although this app works as advertised, it’s a third-party tool. As such, use it at your own risk.
Create USB image backup on Windows
To create an image backup of a USB flash drive, use these steps:
-
Click the download option for the latest version and save the file on your computer.
-
Open and extract the Zip file using File Explorer.
-
Open the folder location with the extracted files.
-
Right-click the “USB Image Tool.exe” file and select the Open option.
Quick note: If you get a warning, click the run anyway option.
-
Connect the USB flash drive to the computer.
-
Click the Rescan button (if applicable).
-
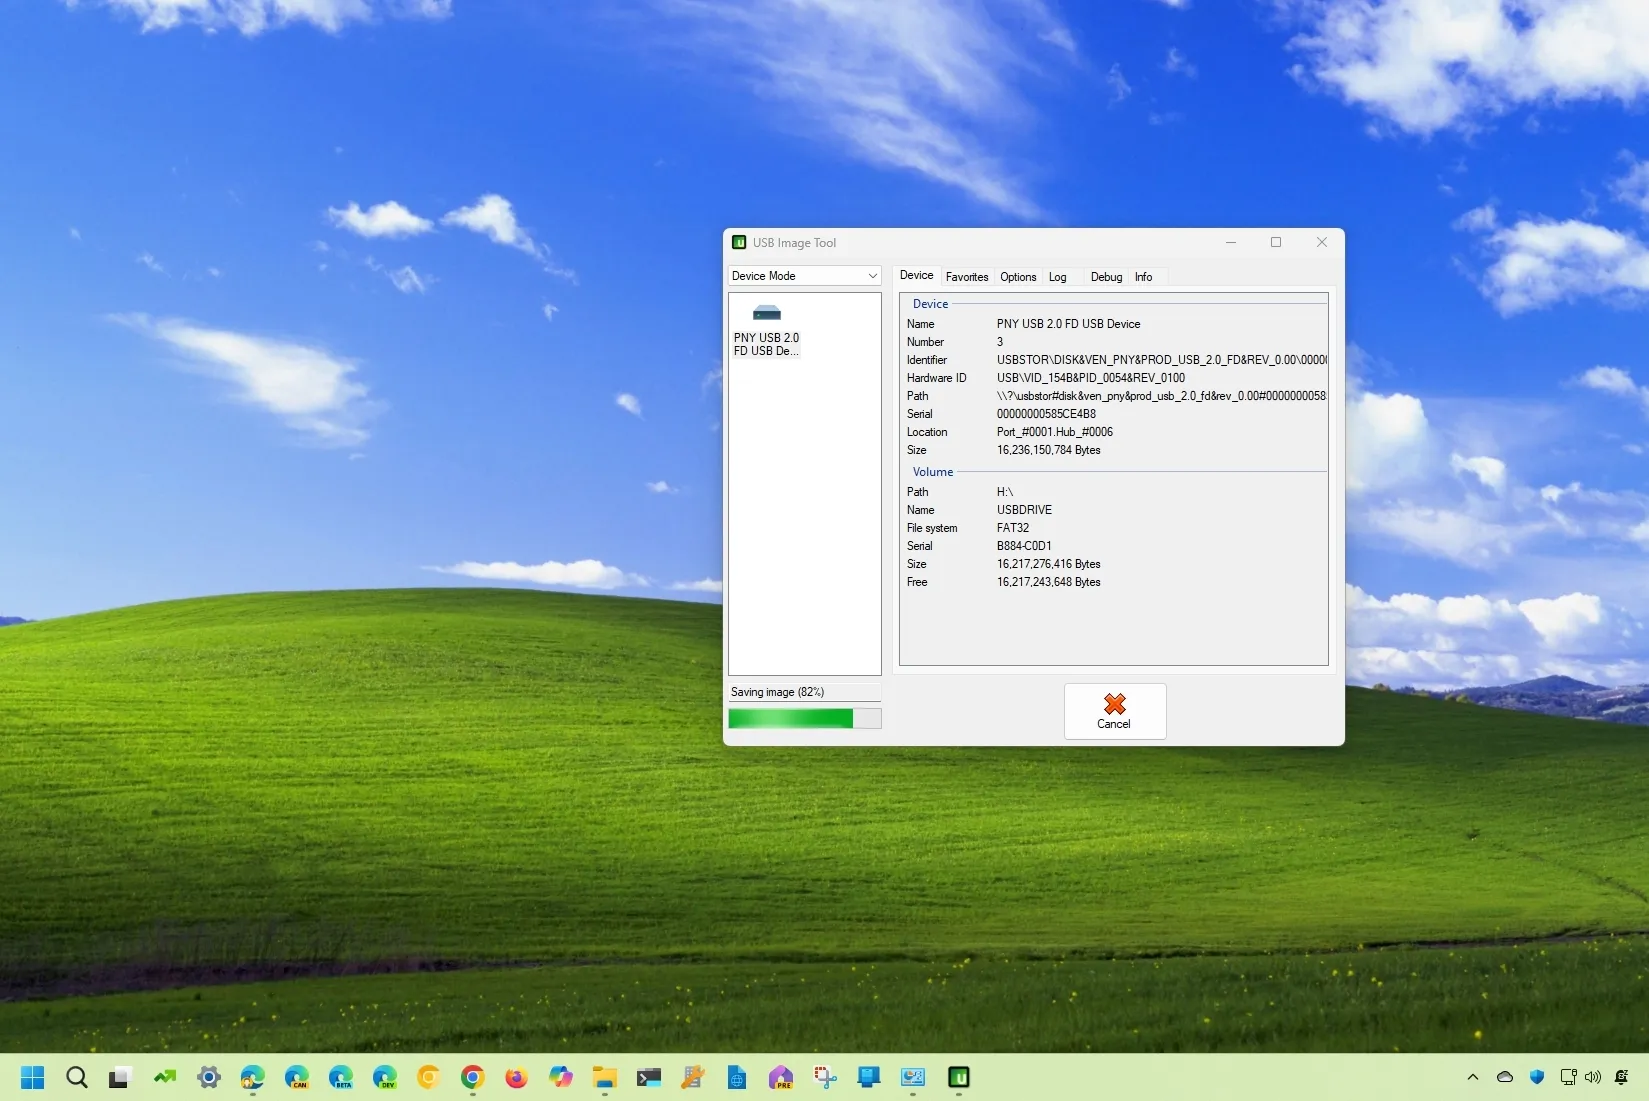
Choose the Device Mode from the drop-down menu on the top left corner.
-
Select the USB flash drive from the left pane.
-
Click the Backup button.
-
Confirm the name for “.img” backup file.
-
Click the Save button.
Once you complete the steps, the tool will capture an image of the entire drive and save it as a “.img” file. This process can take a long time since the technology of these types of drives is not fast.
If you’re working, the difference between a file backup and an image backup is that the file backup makes a copy of the files, while the image backup makes an exact copy of the entire storage, whether it includes data or not.
Restore USB image backup on Windows
To restore a backup image to a USB flash drive, use these steps:
-
Open File Explorer.
-
Open the folder location with the extracted files.
-
Right-click the “USB Image Tool.exe” file and select the Open option.
-
Connect the USB flash drive to the computer.
-
Click the Rescan button (if applicable).
-
Choose the Device Mode from the drop-down menu on the top left corner.
-
Click the Restore button.

-
Select the backup image from the saved location.
-
Click the Open button.
After you complete the steps, the tool will restore the backup, erasing anything currently on the drive. Once the process is complete, the USB flash drive will be restored to its original state when you create the backup.
It’s important to note that this is not an application designed to create a backup of your entire computer. If you want to protect your setup and data, you should be using another tool like the full backup tool available on Windows 11 (and 10) and cloud services like OneDrive.
Update August 29, 2024: This guide has been updated to ensure accuracy and reflect changes to the process.
Why You Can Trust Pureinfotech
The author combines expert insights with user-centric guidance, rigorously researching and testing to ensure you receive trustworthy, easy-to-follow tech guides. Review the publishing process.
Source link
