How to create local account on Windows 11
- To create a local account on Windows 11, open Settings > Accounts > Other users (or Family & other users), click “Add account,” choose “I don’t have this person’s sign-in information,” select “Add a user without a Microsoft account,” confirm the account information.
- Another way to create a local account is to run the “net user USER-NAME PASSWORD /add” on Command Prompt (admin) or the “New-LocalUser “NEW-ACCOUNT-NAME” -Password $Password -FullName “USER-FULL-NAME” -Description “DESCRIPTION” on PowerShell (admin).
- Alternatively, you can use Computer Management and the legacy User Accounts (netplwiz) settings.
On Windows 11, you can create a local account to avoid using the Microsoft account. This means that your settings and files will only be available locally on the device for a more private and secure experience.
Typically, you would want to set up a device with a Microsoft account since it offers more benefits, like seamless integration with various services and syncing for files and settings across devices. However, if you feel that the cloud-powered account type is not for you, creating a local account that doesn’t connect to the Microsoft services using the Settings app, Computer Management, User Accounts (netplwiz), Command Prompt, and PowerShell is possible.
These instructions focus on creating additional local accounts from the desktop. If you want to set up Windows 11 without a Microsoft account, you will have to perform this configuration from the “Windows Setup,” and the options will be different depending on whether you have Windows 11 Home or Pro. You can also use Rufus to create a custom installation media to bypass the Microsoft account requirements.
In this guide, I will teach you three different approaches to creating a local account on Windows 11.
Create local account on Windows 11
To create a local account from the Settings app on Windows 11, use these steps:
-
Open Settings on Windows 11.
-
Click on Accounts.
-
Click the Other users tab.
-
Click the Add account button under the “Other users” section.
-
Click the “I don’t have this person’s sign-in information” option.

-
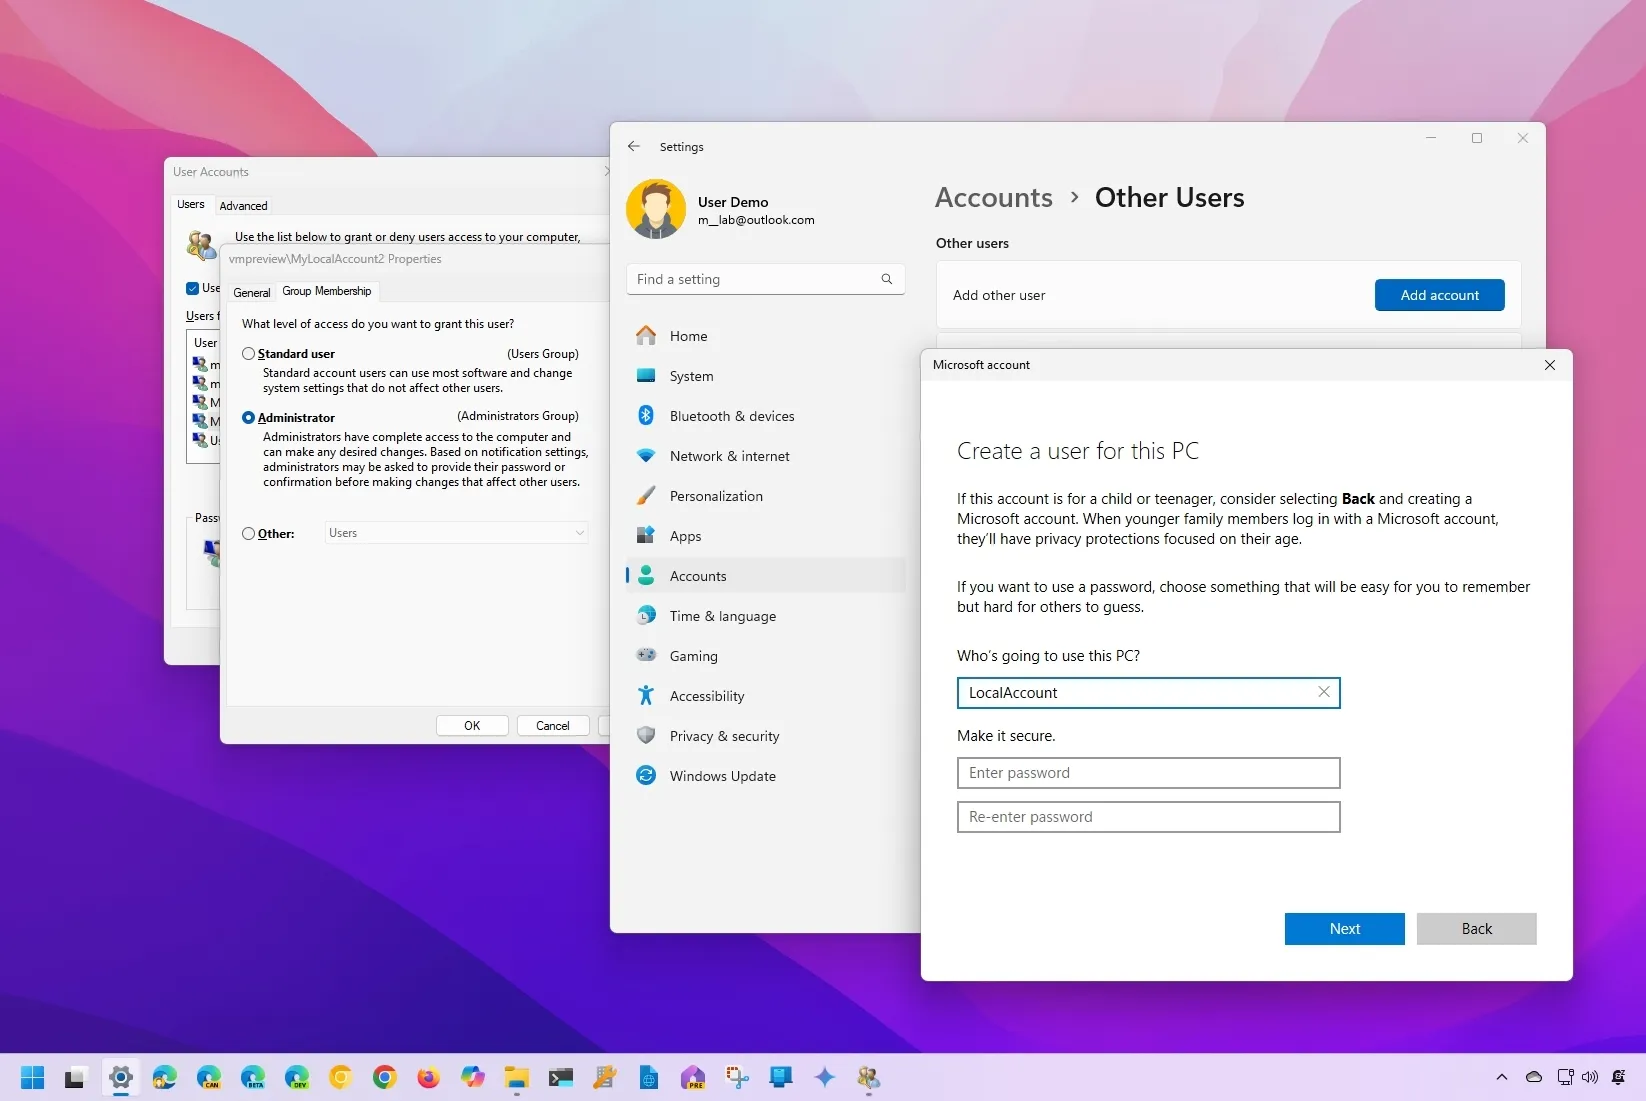
Click the “Add a user without a Microsoft account” option.

-
Create a Windows 11 local account by confirming a name and password.

-
Configure the security questions to recover the account if the password is lost.
-
Click the Next button.
-
(Optional) Select the newly created account and click the “Change account type” button.

-
Use the “Account type” drop-down menu and select the Administrator option.

-
Click the OK button.
Once you complete the steps, the new account will appear on Windows 11, and the new user should be able to log in as a standard user or administrator, depending on the account type settings.
The Settings app option is the official way to set up new accounts. You can still access the “User Accounts” settings from the Control Panel, but the option to create a new account will open the “Other Users” page in the Settings app.
You can also follow these instructions in my video tutorial on my YouTube channel. (Remember to like and subscribe.)
Create local account from Computer Management
Another easy way to create accounts is through the Computer Management app. When you use this tool, you will be able to create a local standard account without the security questions. Also, this interface has been designed to speed up the setup process, as clicking the “Create” button will add a new account and clear the interface so you can continue creating accounts.
To create a local account on Windows 11 through Computer Management, use these steps:
-
Open Start.
-
Search for Computer Management and click the top result to open the app.
-
Open the following path:
System Tools > Local Users and Groups > Users.
-
Right-click on Users and choose the New User option.

-
Confirm the account name in the “User name” setting.

Quick tip: Usually, you want to use one word for the username. You can specify the complete name in the optional “Full name” setting.
-
Create and confirm the password.
-
(Optional) Clear the “User must change password at next logon” option.
-
Click the Create button.
-
Continue creating additional accounts or click the Close button.
-
(Optional) Right-click the newly created account and choose the Properties option.
Quick note: The system creates accounts as standard users. If you want to give the account administrative privileges, continue with the steps below.
-
Click the Member Of tab.
-
Click the Add button.

-
Type “Administrators” in the “Enter the object name to select” setting.

-
Click the Check Name button.
-
Click the OK button to make the account administrator.
-
Click the Apply button.
-
Click the OK button.
After you complete the steps, the new local account without a connection to the Microsoft services will be created on your computer.
Create local account from legacy User Accounts
Also, it’s still possible to create a local account through the legacy User Accounts (netplwiz) settings, and here’s how:
-
Open Start.
-
Search for netplwiz and click the top result to open the User Accounts settings.
-
Click the Add button.

-
Click the “Sign in without a Microsoft account” option.

-
Click the Local account button.

-
Confirm the username in the “User name” setting.

-
Create and confirm a password.
-
Create a hint to remember your password in the “Password hint” settings.
-
Click the Next button.
-
Click the Finish button.
-
(Optional) Select the newly created account and click the Properties button.

Quick note: The system creates accounts as standard users. If you want to give the account administrative privileges, continue with the steps below.
-
Click the Group Membership tab.
-
Choose the Administrator option.

-
Click the Apply button.
-
Click the OK button.
Once you complete the steps, the local account will be created on Windows 11, and it will be ready from the Lock Screen.
Create local account from Command Prompt
It is faster to create and manage an account using Command Prompt if you are comfortable typing commands.
To create a local standard or administrator account on Windows 11 with Command Prompt:
-
Open Start.
-
Search for Command Prompt, right-click the top result, and select the Run as administrator option.
-
Type the following command to create a new account and press Enter:
net user USER-NAME PASSWORD /add

In the command, change USER-NAME and PASSWORD with the credentials you want to use for the new user account.
-
(Optional) Type the following command to add the newly created account to the “Administrators” group and press Enter:
net localgroup administrators USER-ACCOUNT /add
In the command, replace USER-ACCOUNT with the account name you want to add to the administrators’ group.
If you want to test the new changes, sign out. You will notice the new user account in the screen’s bottom-left corner. Then, select the new user account and sign in.
Create local account from PowerShell
To create an account without a Microsoft account with PowerShell, use these steps:
-
Open Start.
-
Search for PowerShell, right-click the top result, and select the Run as administrator option.
-
Type the following command to temporarily store the password inside a string in the “$Password” variable and press Enter:
$Password = Read-Host -AsSecureString
-
Type the password for the new Windows 11 account and press Enter.
-
Type the following command to create the new account with PowerShell and press Enter:
New-LocalUser "NEW-ACCOUNT-NAME" -Password $Password -FullName "USER-FULL-NAME" -Description "DESCRIPTION"

In the command, change NEW-ACCOUNT-NAME for the account name and USER-FULL-NAME for the user’s full name. Also, replace DESCRIPTION with the description you want to use for the account.
-
Type the following command to add the Windows 11 account to the correct user group and press Enter:
Add-LocalGroupMember -Group "Administrators" -Member "NEW-ACCOUNT-NAME"

In the command, change NEW-ACCOUNT-NAME for the account name. In the above command, we add the new account to the Administrators group, which gives the user full access to the device. If you want the user to have limited access, add the account to the Users group, making the account a “Standard User.”
Once you complete the steps, the new local account will be available on Windows 11 with full access using administrative privileges.
Update September 20, 2024: This guide has been updated to ensure accuracy and reflect changes to the process.
Source link
