How to customize Windows Terminal Profiles
Whether you’re running PowerShell for system tasks, using Command Prompt for legacy applications, or working with Linux and WSL (Windows Subsystem for Linux), Windows Terminal allows you to customize each environment with unique settings and visual styles. In this guide, I’ll explain every option available in the profiles’ settings interface. From time to time, I’ll also give you some ideas for real-world scenarios to help you see how these changes can improve your productivity and make your terminal sessions more enjoyable. Let’s start:
NOTE: Before reading this guide, I strongly recommend you check out the information shared here: How to customize Windows Terminal. It gives you a better understanding of what options are available in Windows Terminal, as well as how to get to them.
Windows Terminal Profiles: Defaults and Individual Profiles
When you open Windows Terminal, you’re greeted with multiple profiles. These profiles are like separate workspaces:
- Defaults: These are the base settings that apply to every profile, offering a uniform look and behavior to all the command-line apps you use.
- Individual profiles: Each profile (for example, Windows PowerShell, Command Prompt, Azure Cloud Shell, or Ubuntu) can be adjusted individually. This is useful, for instance, if you want your PowerShell and CMD windows to look in a way optimized for system management, while your Ubuntu profile is optimized for coding.
Moreover, let’s say you’re a developer who needs to frequently switch between testing scripts in PowerShell and compiling code in Linux. In such a situation, setting unique profiles with specific color schemes, fonts, and starting directories can definitely make it easier for you to instantly recognize where you’re headed next and move on to the right command-line environment with just one click.
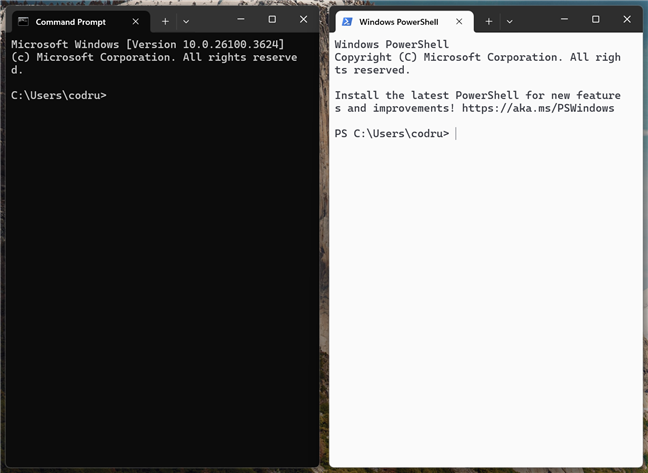
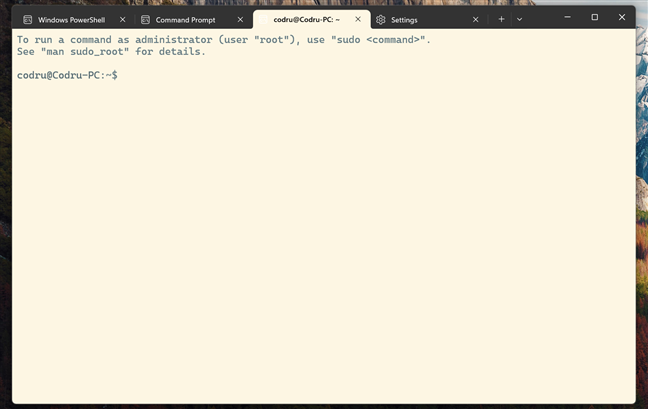
Two different Windows Terminal profiles for Command Prompt and PowerShell
To access the Profiles (both Defaults and individual settings) in Windows Terminal, start by opening the app and clicking the downward arrow next to the tab bar to access Settings. Alternatively, you can use the Ctrl + , (comma) keyboard shortcut to gain instant access to the Settings in Windows Terminal.
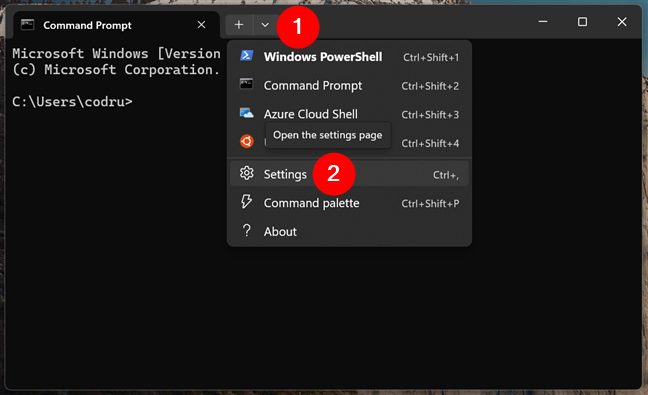
Access the Windows Terminal Settings
In Settings, look at the left sidebar: there’s a section labeled Profiles. Under it, you find an entry called Defaults, which contains the global settings that apply to all profiles. Below that, each individual profile, like Windows PowerShell, Command Prompt, Azure Cloud Shell, or Ubuntu, is listed separately.
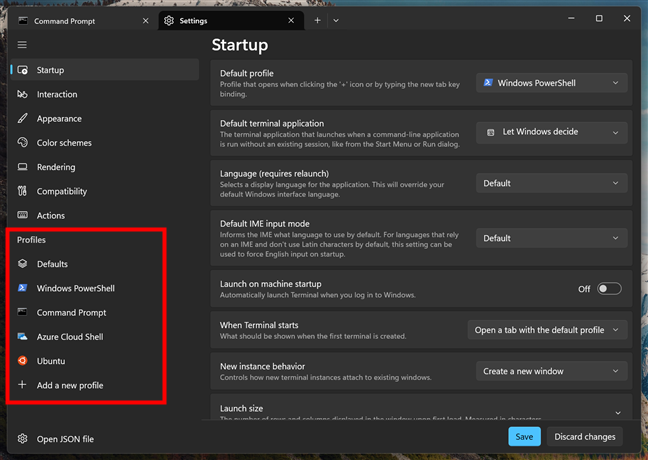
The Profiles area in the left sidebar of Windows Terminal
Let’s take a look at what you can customize in Defaults and then see what you can adjust in the individual profiles:
How to customize the Windows Terminal Profiles Defaults
As I’ve just said, clicking/tapping Defaults lets you set baseline configurations, while clicking any named profile allows you to adjust that environment with unique settings such as custom fonts, color schemes, and starting directories.
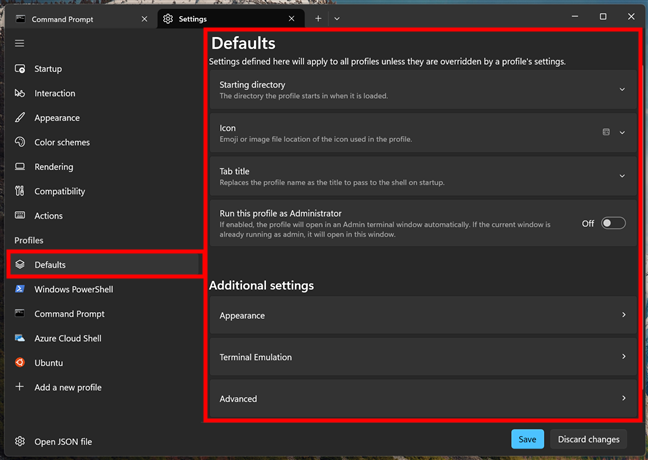
The Defaults settings of Windows Terminal Profiles
Here’s what you find under Defaults:
Starting Directory: This defines where your Windows Terminal opens when you launch a new session. By default, it opens in the parent folder of the command-line application you’re using. However, you can specify any other folder you prefer from your computer.

Use parent process directory
For example, if you’d like your command-line applications to start in your user home folder, you could specify it like this:
C:\Users\YourName
…or using an environment variable:
%USERPROFILE%
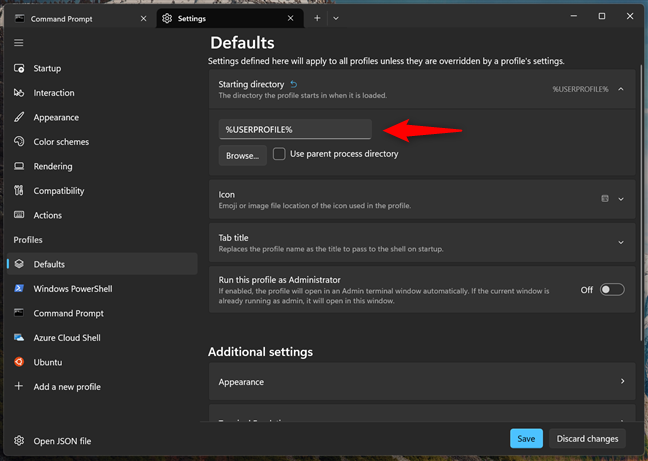
Specifying a different starting directory
Icon: This setting lets you set the default icon used by command-line apps in Windows Terminal. This is the icon used by profiles that don’t specify a different icon in their individual profiles from Windows Terminal.
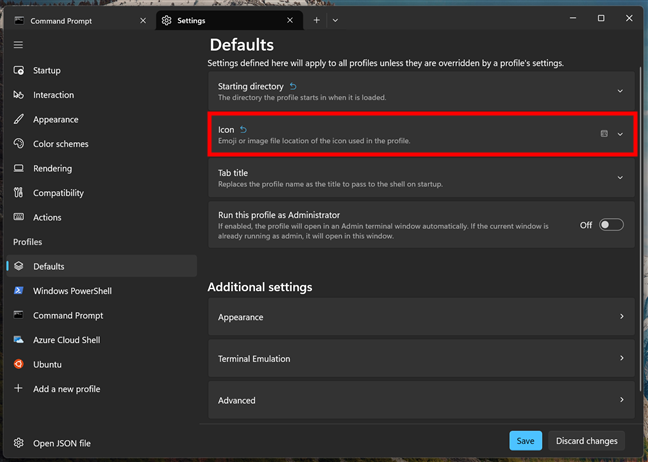
Icon settings for Windows Terminal profiles
Tab Title: Lets you change the default name that appears on each tab. You can set it to anything you want.
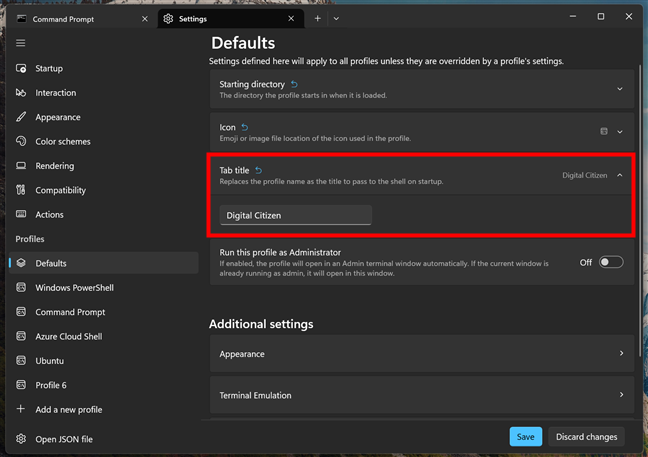
Default Tab title setting for Windows Terminal profiles
Run this profile as Administrator: Sometimes, you need extra privileges to perform system tasks like installing software, running system diagnostics, or modifying protected files. If you frequently run tasks that require administrative privileges, enabling this option for your Windows Terminal profiles means you always start with the necessary permissions, saving you some time, as you no longer have to right-click and select “Run as administrator” every time.
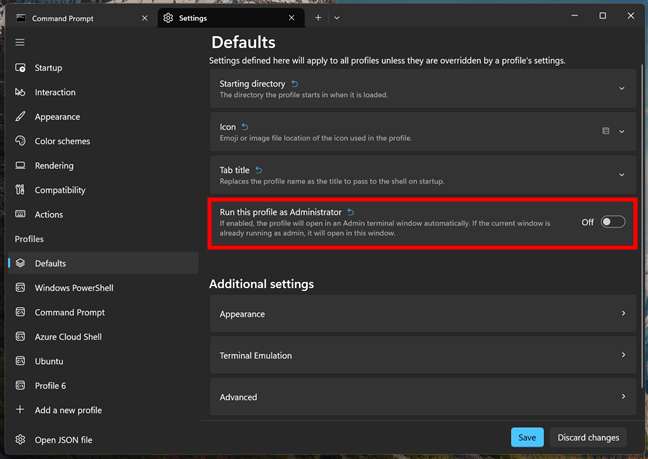
Run this profile as Administrator
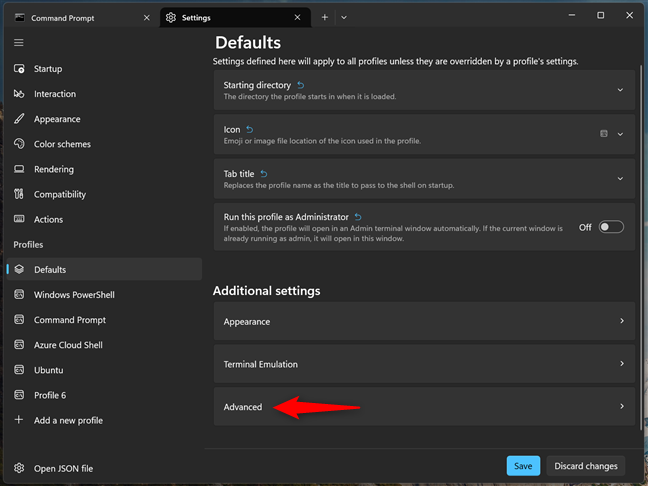
Next, you get a list of three different categories of Additional settings that apply to all profiles unless overridden by a profile’s settings.

Additional settings for profiles in Windows Terminal
Let’s check out all the additional settings…
How to adjust the Profiles Appearance Additional settings
First, there’s the Appearance settings. They can transform the look and feel of your terminal, making command-line more attractive, if that’s possible. 🙂 Click or tap Appearance to access the Profiles visual settings in Windows Terminal.
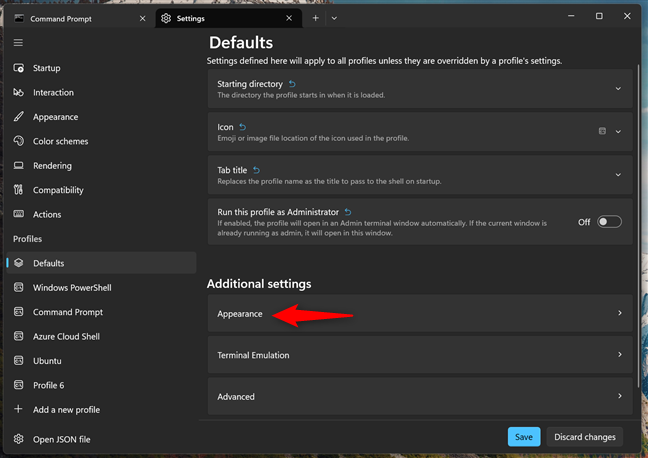
Access Appearance settings for Windows Terminal profiles
Within the Profiles Appearance settings, you find a whole bunch of different settings that you can adjust.
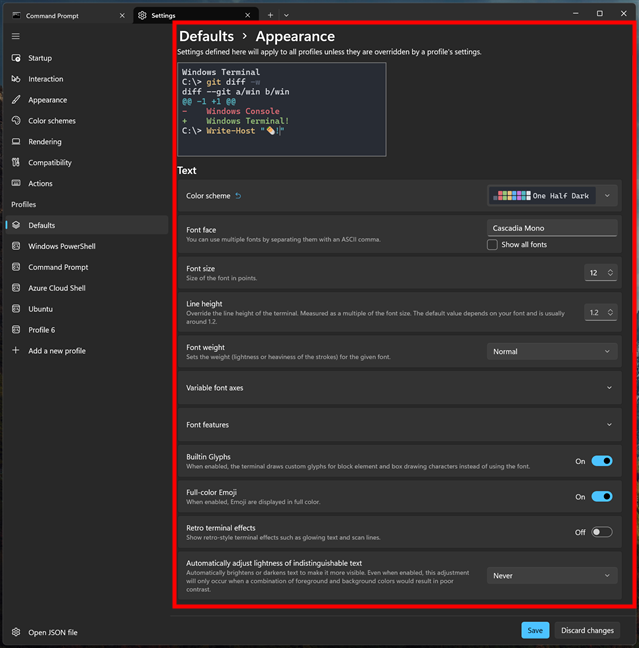
Appearance settings for Windows Terminal profiles
Here they are:
- Text:
- Color scheme: A good color scheme isn’t just about the looks. It directly affects readability and eye comfort. It defines background and foreground colors, as well as various accent colors used for prompts, errors, and command outputs. If you’re working late at night, a darker color scheme (like One Half Dark) can reduce eye strain. In contrast, a light color scheme might be more suitable during the day, in a bright office.
- Font face: The font you choose also has a major effect on readability, as well as on the overall look of your Windows Terminal. Some fonts, for example, are great for making sure text aligns perfectly, while others are better at reducing eye strain.
- Font size: Can be adjusted to ensure that text is clear and legible based on your monitor’s resolution. A slightly larger font can help reduce visual fatigue during extended work sessions.
- Line height: This setting affects the spacing between lines of text. Adjusting this helps prevent the text from feeling too crowded.
- Font weight: Changing this can make your text appear bolder or lighter.
- Variable font axes: Allows you to fine-tune specific visual features of variable fonts, such as width, slant, or weight. It gives you more granular control over how text looks in Windows Terminal, but only if you’re using a font that supports such advanced options.
- Font features: Lets you enable or disable advanced typographic options provided by your chosen font.
- Built-in Glyphs: Glyphs are the special symbols used for drawing box characters or other special symbols. When built-in glyphs are enabled, Windows Terminal uses its own set instead of the one included in your system fonts.
- Full-color Emoji: Emojis can be fun and expressive, and you can also have them in your command-line interface. 🙂
- Retro terminal effects: If you’re nostalgic, these effects can simulate the look of old CRT monitors with scanlines and glow effects.
- Automatically adjust lightness of indistinguishable text: This setting enhances the contrast between the text and background automatically. If your chosen colors are too similar, this feature ensures that the text remains readable by adjusting the brightness accordingly.
- Cursor:
- Cursor shape: The shape of the cursor in Windows Terminal can be customized for better visibility. By default, it’s a Bar (|), but you can choose to have it show up in other shapes too, like Underscore (_) or Filled box (▮).
- Background image:
- Background image path: Setting a background image in the Windows Terminal can make the environment more beautiful and more welcoming.
- Text Formatting:
- Intense text style: This setting affects how bold or vibrant text designated as “intense” is rendered. It can be useful when you want things like error messages, for instance, to catch your eye.
- Transparency:
- Background opacity: Adjusting the opacity changes how much you see your desktop or background image through the Windows Terminal. A lower opacity can give a more modern and attractive look, but might reduce readability.
- Enable acrylic material: This adds a subtle blur effect behind the Windows Terminal.
- Window:
- Padding: This is the space between the terminal text and the edge of the window.
- Scrollbar visibility: If you’re often reviewing long pages of code, keeping the scrollbar visible might be handy. Alternatively, if you don’t, or if you simply prefer using keyboard shortcuts, you might prefer to auto-hide the scrollbar in Windows Terminal.
How to adjust the Profiles Terminal Emulation Additional settings
Terminal Emulation settings ensure that Windows Terminal behaves correctly with different applications, especially those designed for older systems. They provide compatibility and can be useful in some situations. To get to them, click or tap the Terminal Emulation entry under Additional settings in the Defaults tab from Profiles.
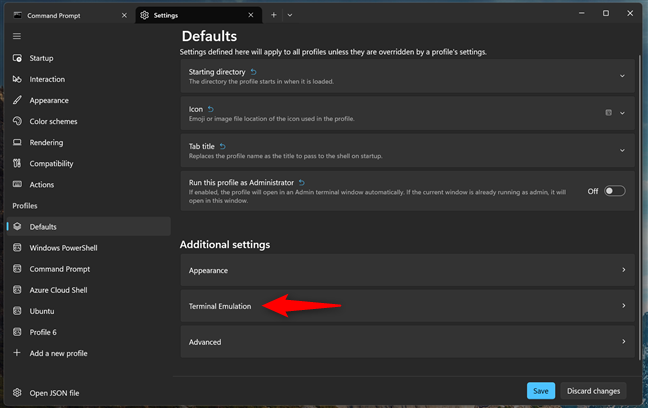
Access Terminal Emulation settings
These are the things you can adjust in Terminal Emulation:
- Suppress title changes: Some programs might try to change the tab title based on the current operation. You can block such changes and keep the title you set.
- Use the legacy input encoding: Some older applications may expect a certain input encoding. Enabling this option can resolve input issues with legacy software.
- Allow DECRQCRA (Request Checksum of Rectangular Area): This setting is relevant only for a very few number of legacy applications. If you know you’re working with a particular legacy application that requires DECRQCRA for proper display, then you can enable it.
- Allow OSC 52 (Manipulate Selection Data) to write to the clipboard: This might be useful if you’re copying and pasting text from remote sessions.
- ENQ (Request Terminal Status) response: The ENQ response setting is a way to define what information your terminal returns when a device status request (ENQ) is received. Most users can leave this as default.
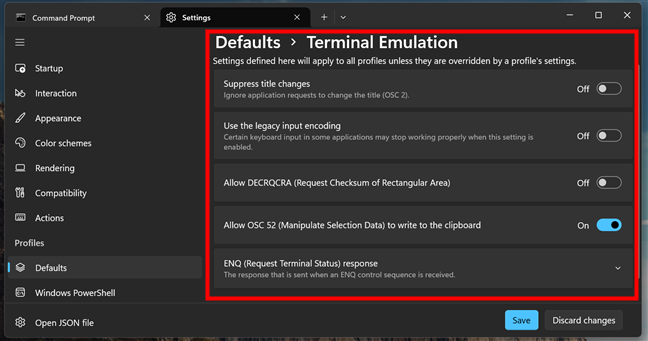
Terminal Emulation settings for Windows Terminal profiles
How to adjust the Profiles Advanced Additional settings
These advanced options fine-tune the way Windows Terminal behaves. To access them, click or tap the Advanced entry under Additional settings in the Defaults tab from Profiles.
Access Advanced settings in Additional settings
These are the advanced settings available for you to change:
- Text antialiasing: Antialiasing smooths the edges of text, making it easier on your eyes.
- AltGr aliasing: If you type in languages that require special characters, AltGr aliasing treats Ctrl+Alt as AltGr.
- Scroll to input when typing: If you’ve scrolled up to read previous output and then start typing, this setting automatically brings you back to the prompt.
- History size: This setting controls how many lines of output your terminal will remember, letting you scroll back as far as you need.
- Profile termination behavior: This option determines what happens when the shell or command you’re running completes. If you’re running a script that might close the terminal too quickly to read the results, you can set Windows Terminal to stay open in order to be able to review the output.
- Bell notification style: The bell setting configures how the terminal alerts you when a BEL character is sent.
- Display a menu on right-click: When enabled, right-clicking in the terminal will show a context menu with options like copy, and paste.
- Display marks on scrollbar: This option adds visual markers on the scrollbar for things like search results.
- Automatically mark prompts on pressing Enter: This automatically marks the prompt when you press Enter on the keyboard.
- Launch this application with a new environment block: This ensures that every new Windows Terminal session starts with clean environment variables.
- Experimental: Reposition the cursor with mouse clicks: If you enable this option, you can simply click in the Windows Terminal window to move the text cursor.
- Path translation: This setting can be useful if you’re working with both Windows and Linux file paths in WSL, as the correct path format is used every time.
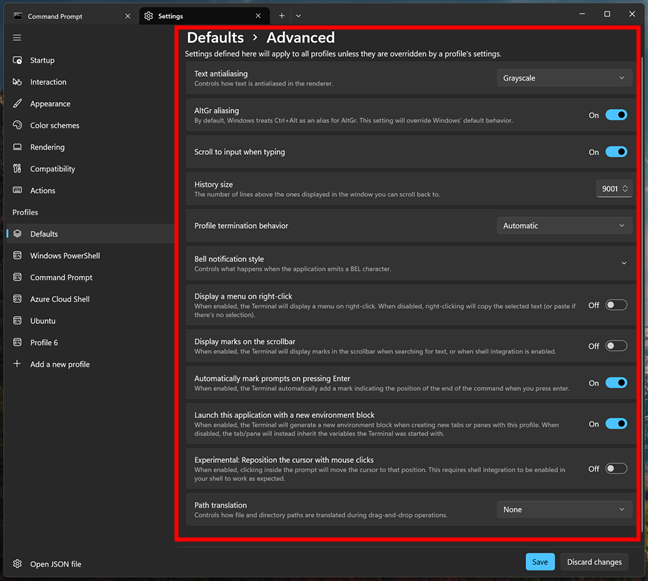
Advanced settings for Windows Terminal profiles
That was quite a lot, but it’s almost over now! 🙂 I say almost, because there’s one more thing worth highlighting:
How to customize the Windows Terminal Individual Profiles
Each profile in Windows Terminal, like PowerShell, Command Prompt, or Ubuntu, has its own dedicated settings panel. These individual profile settings override anything defined in the Defaults section, which means you can shape each environment to match its purpose.
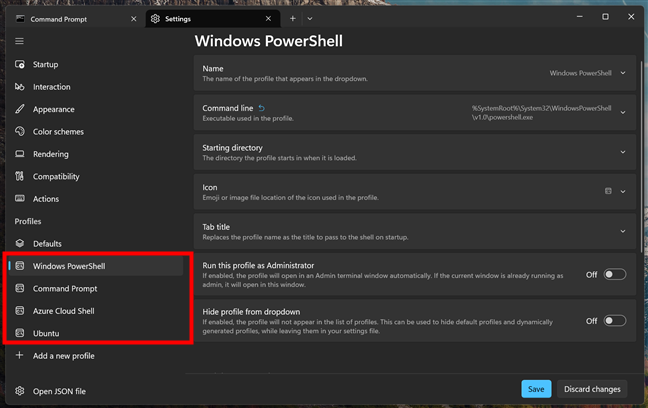
Individual profiles in Windows Terminal
For example, while your PowerShell profile might be customized for system administration tasks, featuring a neutral color scheme, you might prefer configuring your Ubuntu profile specifically for development. That may mean a bright theme, a large font size for readability, and a starting directory that takes you straight into your work folder.
A bright profile for Ubuntu in Windows Terminal
All the settings I’ve presented for the Defaults section in the Profiles section of Windows Terminal also apply to each individual profile. Once more, the settings you choose for an individual profile override the baseline ones under Defaults. Furthermore, each individual profile also includes a couple of other options:
- Name: This is the display name of the profile. It’s what shows up in the dropdown menu when you click the “+” button to open a new tab or look through available profiles.
- Command line: This is the full path to the executable that runs when the profile starts.
- Hide profile from dropdown: When turned on, this profile won’t appear in the dropdown menu, even if it still exists in your Windows Terminal settings.
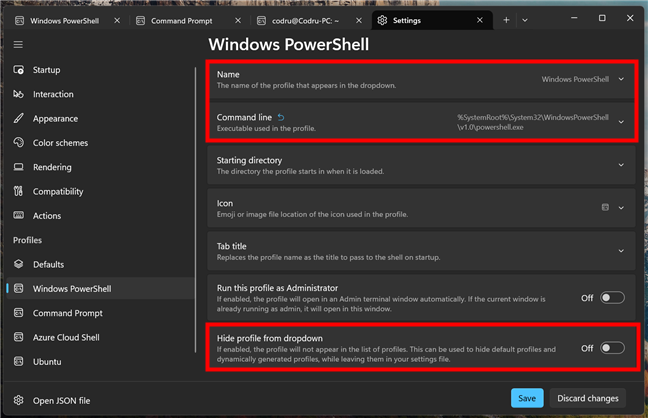
Additional options available for individual profiles
Once you’ve made your changes, don’t forget to click the Save button in the lower-right corner.
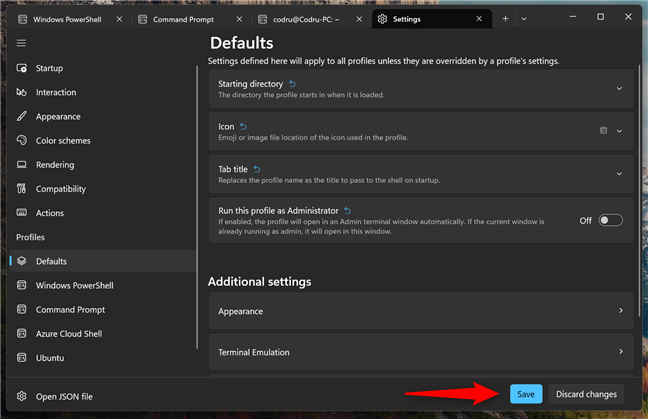
Save your settings
The updates take effect immediately, and new tabs open with your personalized settings.
Did you customize your Windows Terminal?
If you spend some time customizing your profiles in Windows Terminal, you can create a more organized, more beautiful, and more functional command-line environment. Whether for coding, troubleshooting, or simply running system tasks, these profile settings can help you work faster and more efficiently. Feel free to experiment, and when you’re done, let me know what you chose to change about how your Windows Terminal works.
Source link