How to disable automatic updates on Windows 11
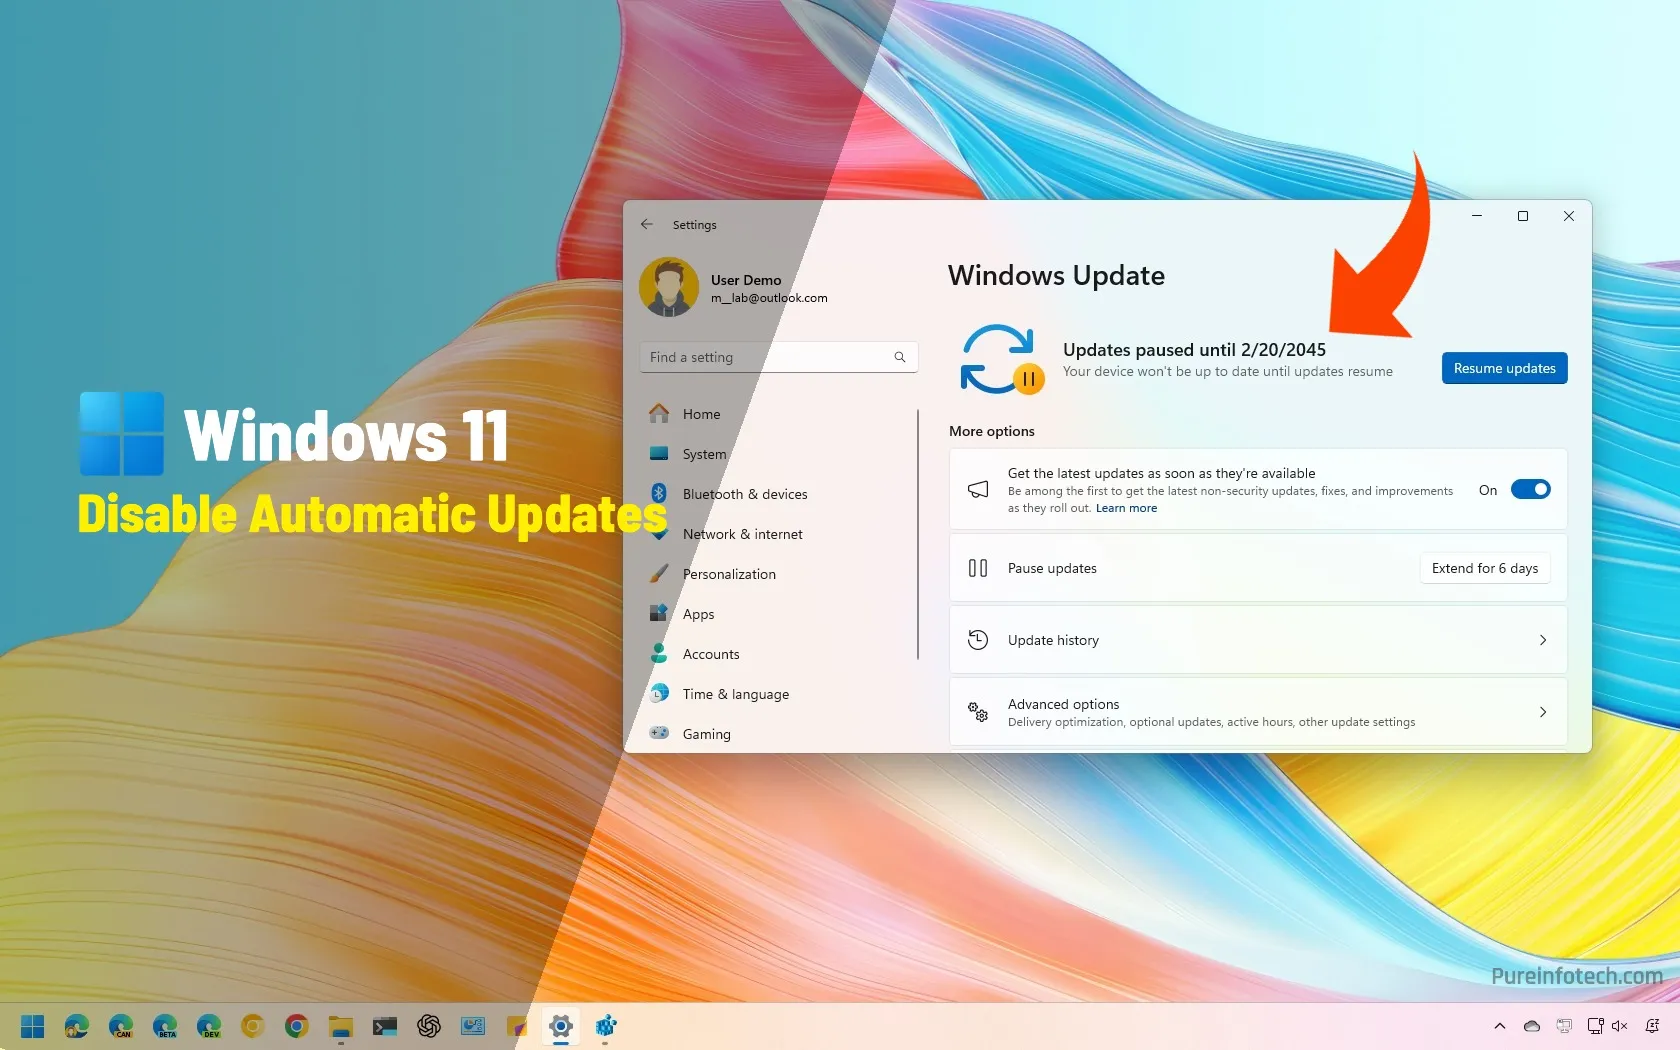
- To disable Windows 11 automatic updates, open Settings > Windows Update, and click the “Pause for 1 week” button to disable updates.
- To prevent updates from downloading automatically, open Group Policy > Computer Configuration > Administrative Templates > Windows Components > Windows Update, open the “Configure Automatic Updates” policy and disable it.
- On Windows 11 Home, you can use the Registry to disable updates from
HKEY_LOCAL_MACHINE\SOFTWARE\Policies\Microsoft\Windows, creating the “WindowsUpdate” and “AU” keys and then setting the “NoAutoUpdate” DWORD to “1.” - You can also modify the “FlightSettingsMaxPauseDays” Registry key to modify the “Pause updates” options to stop updates for up to 20 years.
UPDATED 3/3/2025: On Windows 11, you can disable automatic updates (permanently or temporarily), and in this guide, I’ll outline three ways to accomplish this configuration whether you use the Pro or Home edition of the operating system.
Although system updates were optional in older versions, starting on Windows 10 and continuing on Windows 11, updates download and install automatically to help keep your computer and data secure and ensure you have the latest features, improvements, and fixes. However, it has now become normal for Microsoft to roll out updates with bugs and errors that negatively affect the experience and performance.
If you want to take control and temporarily pause or permanently disable Windows Update, you have a few options. For example, you can temporarily prevent the system from getting updates using the “Windows Update” settings. The default setting allows you to pause updates for a week, but you can modify this option to pause updates for up to 20 years.
If you want to disable updates permanently, you can change the automatic updates policy through Group Policy or Registry.
Although the Group Policy and Registry options will stop the system from downloading updates automatically, you will continue to be able to install updates manually.
In this guide, I will teach you the steps to prevent updates from being installed on Windows 11. If you have a Windows 10 device, you can use these instructions to disable automatic updates.
Disable automatic updates on Windows 11 (Pro/Home) from Settings
To disable Windows 11 automatic updates, use these steps:
-
Open Settings on Windows 11.
-
Click on Windows Update.
-
(Optional) Turn off the “Get the latest updates as soon as they’re available” toggle switch under the “More options” section.
-
Click the “Pause for 1 week” button to disable automatic updates for the “Pause updates” setting.
Once you complete the steps, Windows 11 updates will stop downloading on your computer for at least one week or until you click the “Resume updates” button.
Block automatic download for a specific update
To prevent a particular update from downloading on Windows 11, use these steps:
-
Download the “Show or hide updates troubleshooter” file on your computer.
-
Double-click the “wushowhide.diagcab” file to launch the tool.
-
Click the Next button.
-
Click the “Hide updates” option.

-
Select the Windows 11 update or driver to block.

-
Click the Next button.
-
Click the Close button.
After you complete the steps, the update will no longer be available through Windows Update. However, when a newer version of the update becomes available, Windows Update will automatically download and install it.
Disable automatic updates on Windows 11 (Pro) from Group Policy
You can also permanently stop updates from downloading automatically by configuring the Windows Update settings in the Group Policy Editor. However, this option is only available on Windows 11 Pro, as the Home edition does not include this tool.
If you’re using Windows 11 Home, you can still disable updates by modifying the Registry.
To disable automatic updates permanently from Group Policy on Windows 11, use these steps:
-
Open Start.
-
Search for gpedit and click the top result to open the Group Policy Editor.
-
Open the “Manage and user experience” folder in the path:
Computer Configuration > Administrative Templates > Windows Components > Windows Update > Manage end user experience
-
Double-click to open the “Configure Automatic Updates” policy.

-
Choose the “Disabled” option to disable automatic Windows Update permanently.

-
Click the Apply button.
-
Click the OK button.
Once you complete the steps, Windows Update will no longer download and install system updates automatically on Windows 11. However, you can still check for updates manually through the Settings app.
If you want to undo the changes, you can re-enable automatic updates using the same instructions, but in step 5, select the “Not Configured” option.
Disable automatic updates on Windows 11 (Pro/Home) from Registry
Alternatively, you can stop automatic Windows 11 Home or Pro updates from the Registry.
To stop Windows 11 from downloading updates automatically from the Registry, use these steps:
-
Open Start.
-
Search for regedit and click the top result to launch the Registry Editor.
-
Navigate to the following path:
HKEY_LOCAL_MACHINE\SOFTWARE\Policies\Microsoft\Windows
-
Right-click the Windows (folder) key, select New, and choose the Key option.

-
Name the key WindowsUpdate and press Enter.
-
Right-click the newly created key, select New, and choose the Key option.

-
Name the key AU and press Enter.
-
Right-click the AU key, select New, and choose the “DWORD (32-bit) Value” option.

-
Name the new key NoAutoUpdate and press Enter.
-
Double-click the newly created key and change its value from 0 to 1.

-
Click the OK button.
-
Restart the computer.
After you complete the steps, Windows Update will stop automatically downloading updates for Windows 11. However, you can still check for updates manually through the Settings app as necessary.
If the system is already downloading an update, you can stop and delete the pending system updates on Windows 11 by stopping the “Windows Update” services and clearing the contents from the “SoftwareDistribution” folder.
Disable automatic updates on Windows 11 (Pro/Home) for 20 years
Alternatively, you can also edit the Registry to modify the “Pause updates” options in the Settings app to pause system updates for up to 1042 weeks (or 20 years), which technically disables the “Windows Update” system permanently since Microsoft usually supports a version of its operating system for 10 years.
To disable automatic updates for Windows 11 by pausing system updates for 20 years, use these steps:
-
Open Start.
-
Search for regedit and click the top result to launch the Registry Editor.
-
Navigate to the following path:
HKEY_LOCAL_MACHINE\SOFTWARE\Microsoft\WindowsUpdate\UX\Settings
-
Double-click the FlightSettingsMaxPauseDays key and change its value to 00001c84.

-
Click the OK button.
-
Restart the computer.
-
Open Settings.
-
Click on Windows Update.
-
Select the “Pause for 1042 weeks” option in the “Pause updates” setting.

Once you complete the steps, the system won’t try to download updates for 20 years. However, you can always choose another time range. For example, every 52 weeks, this option will make sure your device gets updated every year.
Why are you disabling updates in the operating system? What method did you use? Let me know in the comments.
Update March 3, 2025: This guide has been updated to ensure accuracy and reflect changes to the process.
Source link