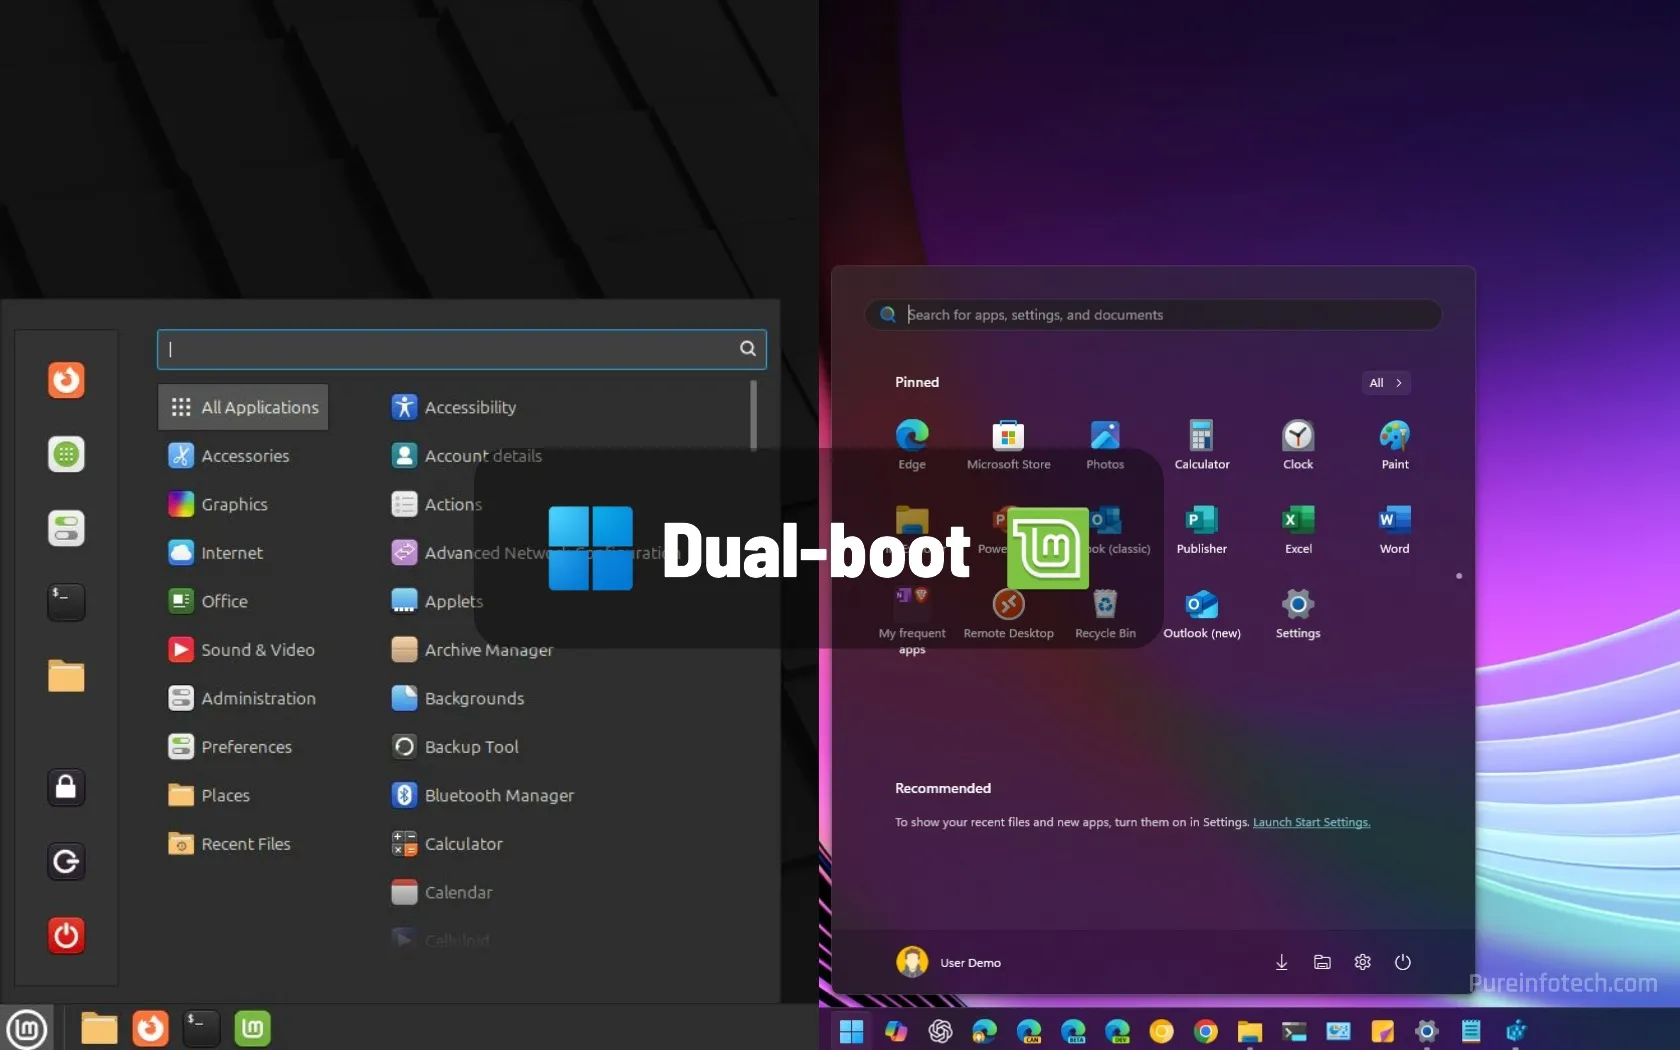
How to dual-boot Windows 11 (or 10) and Linux Mint
If you have a computer running Windows 11 (or 10), you can set up a dual-boot configuration with Linux Mint, and in this guide, I’ll explain the steps to complete this process.
Although you can run Linux Mint (and other distributions) alongside Windows 11 using the Windows Subsystem for Linux (WSL) or a virtual machine, it’s also possible to install this distro in a dual-boot system to have full access to the hardware capabilities.
Or, if you’re still using Windows 10, you can configure a dual-boot system to test Linux Mint as the replacement operating system, as Windows 10 will retire on October 14, 2025.
In this guide, I will explain how to set up a dual-boot system using Windows and Mint. (You can follow these instructions to dual-boot Windows 11 and Ubuntu.)
Dual-boot Linux Mint and Windows 11
Setting up a dual-boot system involves three main steps. First, create a Linux Mint bootable USB drive. Next, shrink the current Windows installation to allocate space for Linux. Finally, install Linux Mint alongside Windows 11 (or 10) on the same computer.
If your computer uses drive encryption, it’s recommended that you temporarily disable BitLocker before proceeding. Once Linux is installed, you can re-enable BitLocker.
Create Linux Mint USB bootable media
The easiest way to create a bootable USB drive that works with both BIOS and UEFI systems is by using the Rufus tool. Rufus is user-friendly and widely recommended for this purpose.
To create a bootable Linux USB drive, follow these steps:
-
Click the Download button for the Cinnamon Edition.
-
Click the download link closer to your location under the “Download mirrors” section.

-
Save the ISO file on your computer.
-
Click the link to download the latest version under the “Download” section.
-
Choose the USB flash drive from the “Device” setting.
-
Double-click the executable to launch the tool.
-
Click the Select button.

-
Select the Linux Mint ISO file.
-
Click the Open button.
-
Continue with the default settings after the download.
-
(Optional) Specify a name for the drive under the “Volume label” setting.
-
Click the Start button.
-
Click the OK button with the default option.

-
Click the Yes button.

-
Click the OK button.
After completing the steps, you can proceed with the steps below to create a dual-boot system with Linux Mint and Windows 11.
Alternatively, you can use the Ventoy utility to make any installation media bootable by dragging and dropping the ISO file into a USB flash drive.
Shrink Windows 11 partition
Although the Linux Mint setup has the option to install alongside Windows 11 (or 10), this feature may not always work. For that reason, you may want to manually shrink the Windows partition to create space to install the Linux distro.
Alternatively, you can use a secondary internal drive for the Linux Mint setup. This approach keeps each operating system on a separate physical drive, avoiding the need to modify the existing drive partition and reducing the risk of accidental data loss.
If your device does not currently have an operating system installed, perform a clean installation of Windows 11 (or use these steps for Windows 10). Once the installation is complete, proceed with the instructions below to set up a dual-boot configuration.
To shrink a partition on Windows 11 or 10 using Disk Management, follow these steps:
-
Open Start.
-
Search for Create and format hard disk partitions and click the top result to open the Disk Management console.
-
Right-click the drive you want to change its partition size and select the Shrink Volume option.
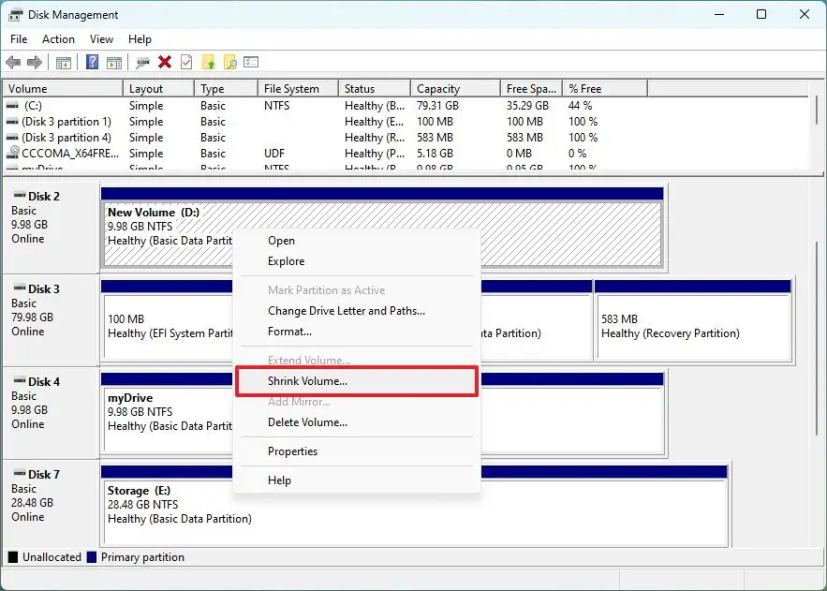
-
Confirm the amount of space to shrink the partition (in megabytes).

Quick note: Linux Mint requires at least 20GB of available space, but the rule of thumb is to reserve at least 100GB.
-
Click the Shrink button.
Once you complete the steps, you’ll have a smaller partition and some unallocated space to install Linux Mint.
Dual-boot Windows 11 and Linux Mint
After shrinking the system partition and creating a bootable Linux Mint installer, you can proceed with the dual-boot installation
To dual-boot Windows 11 and Linux Mint, follow these steps:
-
Start the PC with the Linux Mint USB flash drive.
Quick Tip: If your computer is not starting into the setup, you may need to access the system BIOS to change the boot settings to start from USB. Typically, you can change these settings by pressing one of the functions (for example, F2, F8, F12), Delete, or ESC key. However, check your computer manufacturer’s support website for more details.
-
Select the “Start Linux Mint” option and press Enter.

-
Double-click the “Install Linux Mint” icon on the desktop.

-
Select the installation language.

-
Click the Continue button.
-
Select the keyboard layout.

-
Click the Continue button.
-
(Optional) Check the “Install multimedia codecs” option.

-
Click the Continue button.
-
Select the “Something else” option on the “Installation type” page.

-
Click the Continue button.
-
Select the free space option, which is the unallocated space created with the Disk Management tool on Windows 11.
-
Click the “+” (plus) button to open the partition wizard.

-
Select the “/” option in the “Mount point” setting. Otherwise, you will receive the “no root file system is defined” error during a Linux Mint installation.

-
Click the OK button to create a Linux Mint-compatible partition with the total remaining space using the default settings.
-
Click the Install now button.

-
Click the Continue button.
-
Select your region.

-
Click the Continue button.
-
Create a local account for the Linux Mint installation.

-
Click the Continue button.
-
Click the Restart now button.

-
Disconnect the USB flash drive from the computer and press Enter.
Once you complete the steps, Linux Mint will install on your device alongside Windows 11 (or 10).
It’s important to note that since you are installing Linux as the second operating system, the Linux Mint installation will make the GRUB (Grand Unified Bootloader) the default experience.

Also, this setup will make the Linux Mint the default operating system. If you want to start the computer on Windows 11 (or Windows 10), you will have to select the “Windows Boot Manager” option.
Source link