How to enable new Start menu design on Windows 11
- To enable the new Start menu on Windows 11, use ViveTool to manually activate the hidden feature IDs.
- Open Command Prompt as administrator, navigate to the ViveTool folder, and run the
vivetool /enable /id:47205210,49221331,49381526,49402389,49820095,55495322,48433719command.
Microsoft has officially unveiled a new Start menu design for Windows 11. You can try it now on any device enrolled in the Dev or Beta Channel of the Windows Insider Program. In this guide, I’ll show you how to complete this configuration.
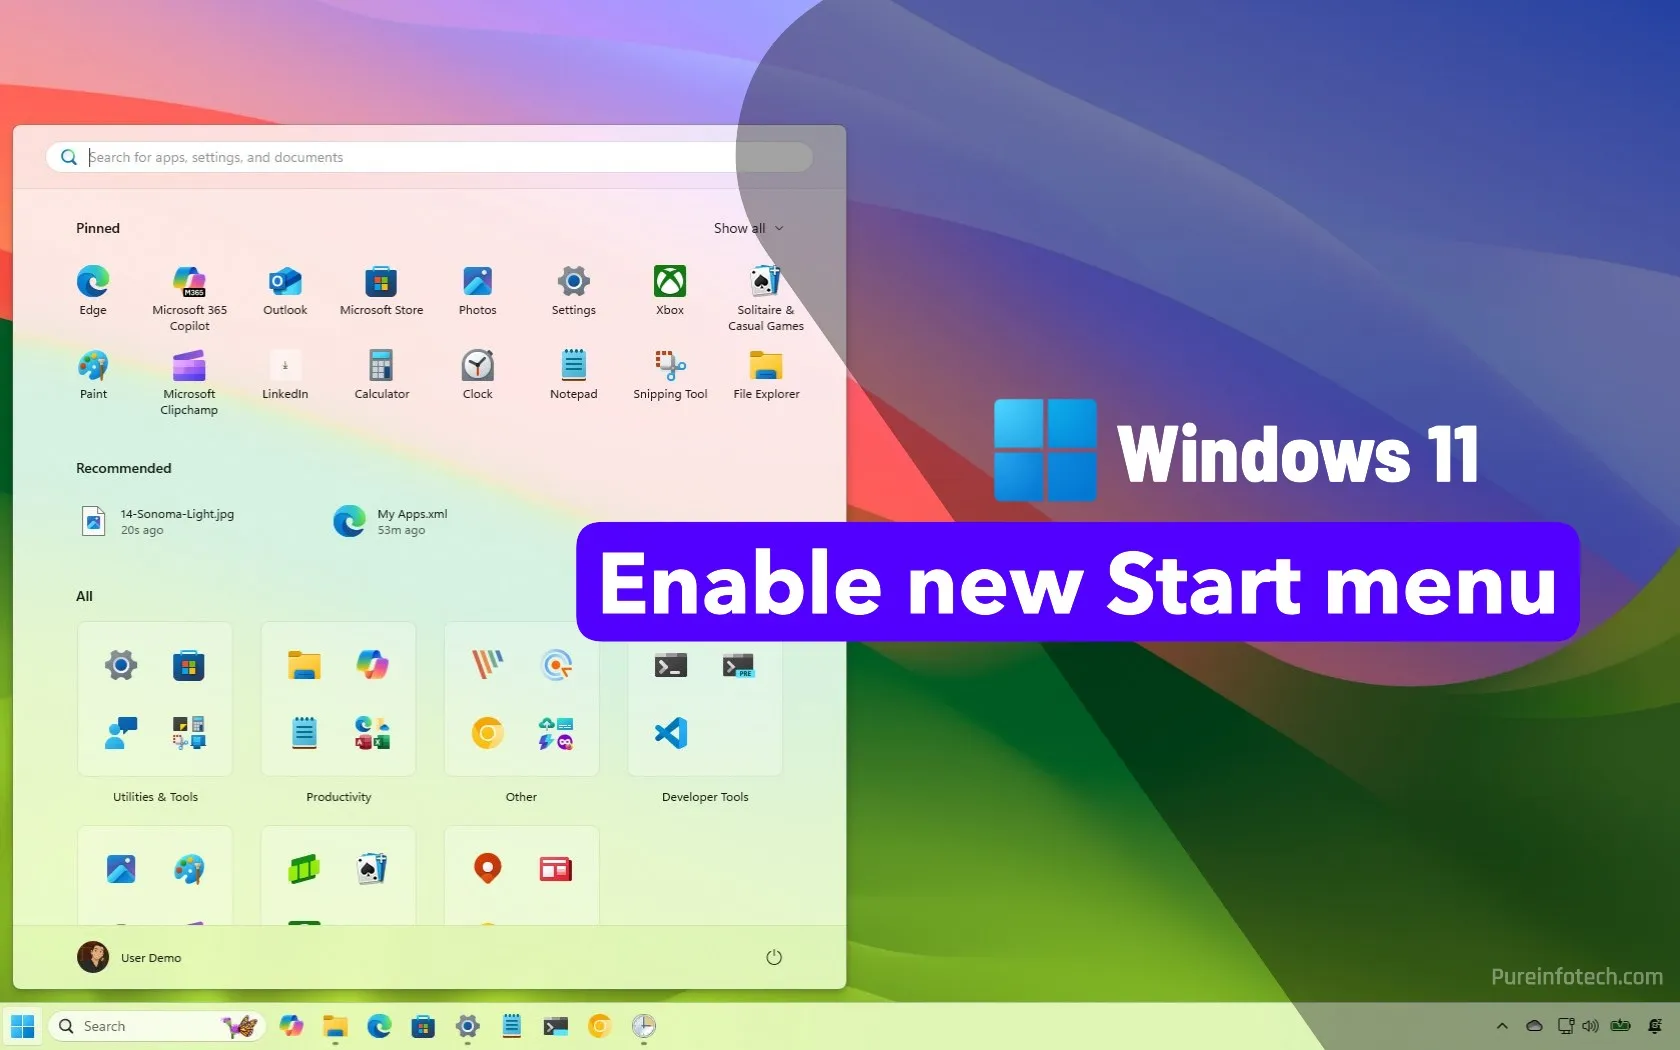
The redesigned Start menu combines the “Pinned” and “Recommended” sections with the “All” menu in a single scrollable experience, and it adapts depending on the screen size automatically. In addition, you can change the view of the “All” section with three options, including category, grid, and list. Furthermore, this new design finally allows you to remove the “Recommended” section.
This is still a work in progress, and Microsoft is rolling it out gradually. However, if you don’t have the new design, you can enable it manually using the ViveTool.
In this guide, I’ll outline the steps to enable the menu on your Windows 11 setup.
To enable the new Windows 11 Start menu, follow these steps:
-
Download the ViveTool-vx.x.x.zip file to enable the new Start menu design.
-
Double-click the zip folder to open it with File Explorer.
-
Click the Extract all button.
-
Click the Extract button.
-
Copy the path to the folder.
-
Open Start.
-
Search for Command Prompt, right-click the top result, and select the Run as administrator option.
-
Type the following command to navigate to the ViveTool folder and press Enter:
cd c:\folder\path\ViveTool-v0.x.x
In the command, remember to change the path to the folder with your path.
-
Type the following command to enable the Start menu design and press Enter:
vivetool /enable /id:47205210,49221331,49381526,49402389,49820095,55495322,48433719
-
Restart the computer.
Once you complete the steps, the new design will appear the next time you open the Start menu. You can always customize the experience for the updated “Start” settings page.
Here are answers to common questions about the new Start menu in Windows 11.
Can I hide or remove the “Recommended” section in the new Start?
Yes, it’s possible to turn off the “Recommended” section by turning off these features:
- Show recommended files in Start, recent files in File Explorer, and items in Jump Lists.
- Show recently added apps.
- Show most used apps.
- Show recommendations for tips, shortcuts, new apps, and more.
Can I change the size of the new Start menu?
Yes, but the operating system doesn’t include an option like Windows 10. Instead, the Start menu automatically changes size depending on the screen size.
Can I show more pins in the redesigned Start menu?
Yes, you can click the “Show all” button at the top-right corner. Alternatively, in the “Start” settings page, you can turn on the new “Show all pins by default” toggle switch.
Can I revert to the old Start menu design?
Yes, if you want to undo the changes, you can follow the same instructions outlined above, but in step 10, run the vivetool /disable /id:49402389,49221331,47205210,48433719 command.
What channels support the new Start menu?
The new Start menu is available in the Dev and Beta Channels of the Windows Insider Program.
Why You Can Trust Pureinfotech
The author combines expert insights with user-centric guidance, rigorously researching and testing to ensure you receive trustworthy, easy-to-follow tech guides. Review the publishing process.
Source link