How to format a USB drive as FAT32 on Windows
- To format a drive with FAT32 on Windows 11 (or 10), open File Explorer, click on “This PC,” right-click the drive, choose “Format,” select “FAT32,” confirm label, and click “Start.”
- You can also use the Command Prompt and PowerShell to convert a USB flash drive larger than 32GB with the FAt32 file system.
- File Explorer limits the format size to 32GB, but starting on Windows 11 build 27686, you can format drives up to 2TB.
On Windows 11 (and 10), you can format drives FAT32, and in this guide, I will show you multiple ways to complete this configuration through File Explorer, Command Prompt, and PowerShell.
Although you would typically use NTFS as the file system for drives connected to Windows, sometimes, you may still need to use FAT32 since this file system is often required on USB flash drives to store the BIOS file to update the firmware on your computer’s motherboard. Printers may require the file system to read images you want to print directly from the USB. If you have a digital camera, you may need to format the SD Card with FAT32 to make the storage available on the device. Other platforms may also need this file system.
What’s FAT32?
FAT32 (File Allocation Table 32) has been a widely used older file system format for many years due to its simplicity and compatibility (Windows, macOS, Linux, etc.). It’s still relevant today, especially for devices that require broad compatibility, as I previously mentioned.
However, it has some limitations. For example, it has a 4GB limit size for files, meaning you cannot store those larger than 4GB. The maximum partition size can be 32GB, but in the latest version of Windows 11, the Format tool has been updated to support up to 2TB drives. Also, it has a slower performance than the NTFS file system.
Usually, you would use FAT32 for external and USB flash drives, not for the primary or secondary internal drives. The Format tool in File Explorer only allows you to use FAT32 for removable drives.
FAT32 vs. exFAT?
In addition to FAT32, you will also find the exFAT (Extensible File Allocation Table) option, a similar file system, which has been created to overcome the limitations of FAT32. For example, exFAT has a file limit of 16EB, while the partition can be as big as 128PB.
What’s a file system?
A file system is like a librarian for your computer. It organizes and manages the system and your files and folders stored on a drive so you can easily find and access them.
In this guide, I will explain the quick steps to format a drive using the legacy file system on Windows 11 as well as on Windows 10.
Format USB flash drive using FAT32 on Windows
To format a USB flash drive (of up to 32GB) using the FAT32 file system, connect the storage to the computer and use these steps:
-
Open File Explorer.
-
Click on This PC from the left pane.
-
Right-click the USB flash drive and choose the Format option.
-
Choose the FAT32 option in the “File system” setting.

-
Use the default size for the “Allocation unit size” setting.
-
Confirm a name for the drive in the “Volume label” setting.
-
Check the Quick Format option.
-
Click the Start button.
-
Click the OK button.
-
Click the OK button again.
Once you complete the steps, the storage will be formatted using FAT32.
It’s important to note that starting on Windows 11 build 27686, Microsoft is updating the tool to support drives up to 2TB. If you have an older version of the operating system, you can still format a driver larger than 32GB, but you will have to use PowerShell.
It’s important to note that Windows will usually choose the default allocation unit size based on the disk size and file system. For most users, sticking with the default is recommended. The “Allocation unit size” is the smallest unit of storage space a file system can allocate on a disk. A smaller allocation unit size is better for storing many small files, preventing wasted space. A larger allocation unit size can improve performance when storing large files.
If the Format tool is not showing a specific drive, this is expected behavior since the tool only allows removable storage under 32GB. Only on devices running Windows 11 build 27686 and higher releases will you see drives larger than 32GB and less than 2TB. If you must format a specific storage that doesn’t appear in the graphical tool, then you can use the Command Prompt or PowerShell options.
Format USB flash drive using FAT32 with Command Prompt
To format a USB flash drive (of up to 2TB) using the FAT32 file system, connect the storage to the computer and use these steps:
-
Open Start.
-
Search for Command Prompt, right-click the top result, and choose the Run as administrator option.
-
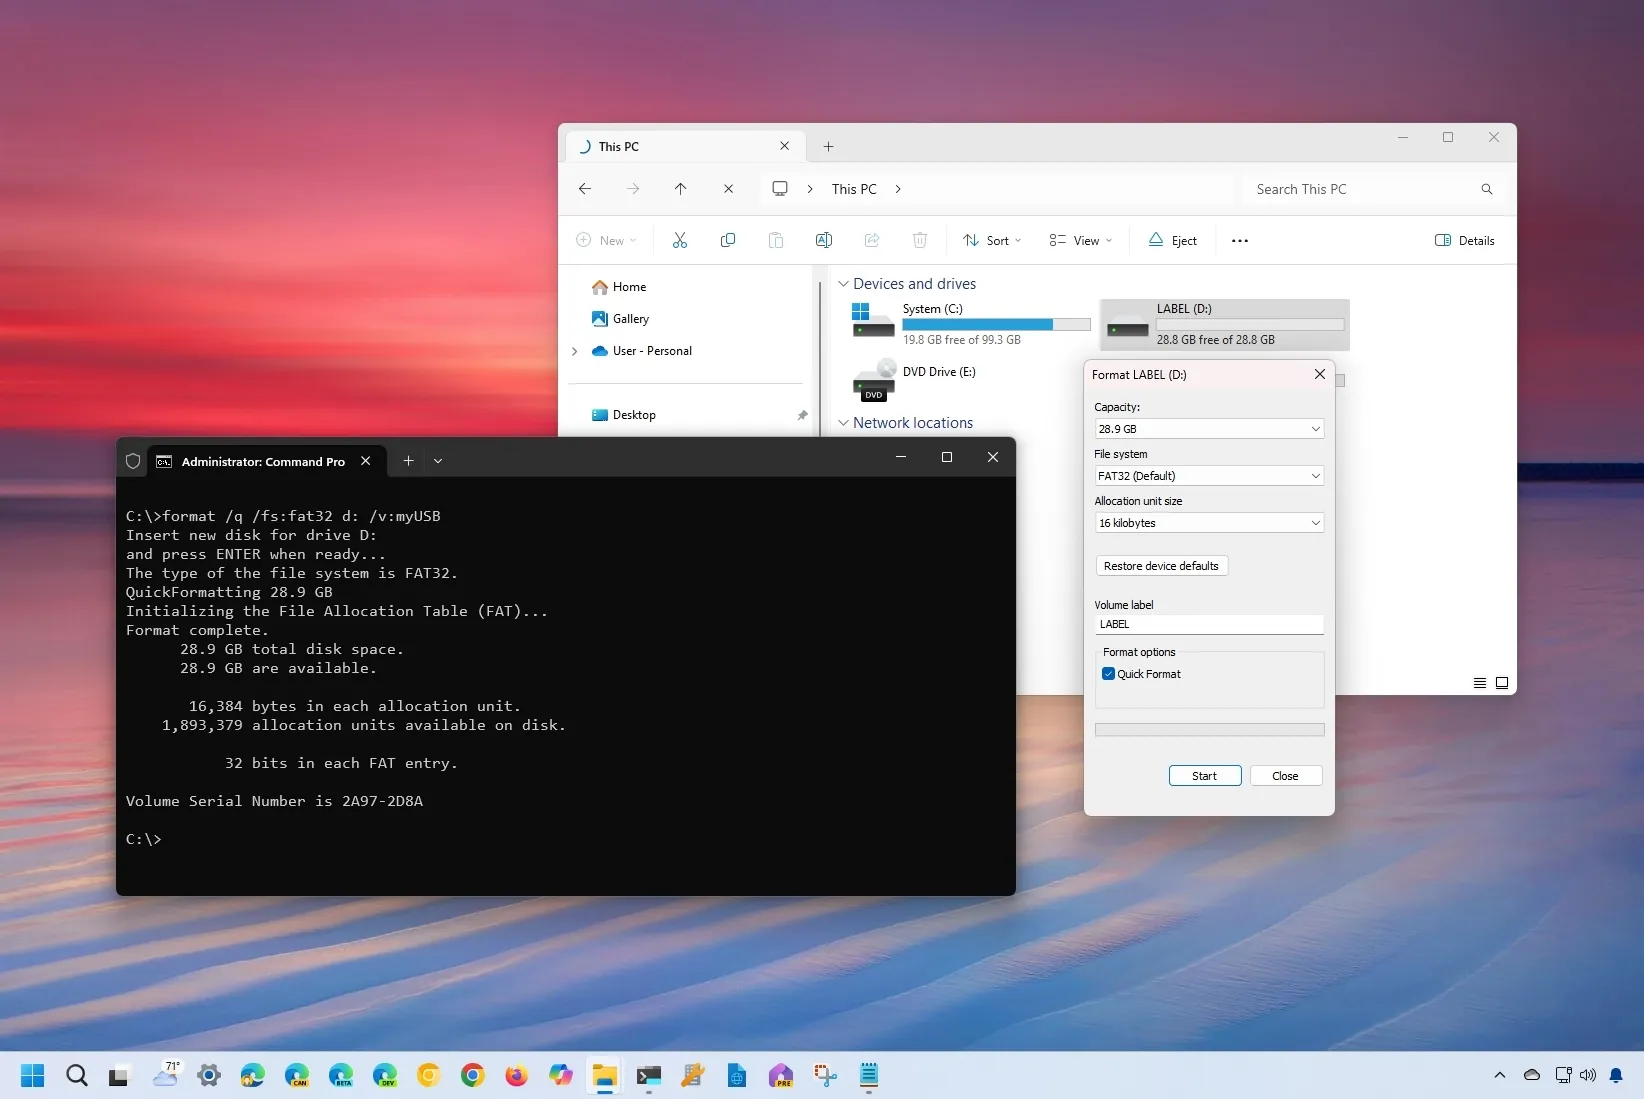
Type the following command to format the USB drive using FAT32 on Windows 11 (or 10) and press Enter:
format /q /fs:fat32 d: /v:label

In the command, change “d:” for the drive letter of the drive you want to format. Also, change the “label” for the name you want to use on the drive. The “q” option is to perform a “quick” format. If you don’t use this option, the full format can take a long time.
-
Press Enter to continue.
After you complete the steps, the existing partition will be formatted with the FAT32 file system using the default allocation unit size.
Format USB flash drive using FAT32 with PowerShell
To format a flash drive using the FAT32 file system through PowerShell, connect the storage to the computer and use these steps:
-
Open Start.
-
Search for PowerShell, right-click the top result, and choose the Run as administrator option.
-
Type the following command to format the USB drive using FAT32 and press Enter:
Format-Volume -DriveLetter D -FileSystem FAT32 -NewFileSystemLabel label

In the command, change “D” for the drive letter of the drive you want to format. Also, change the “label” for the name you want to use on the drive. If you want to perform a full format, you also have to append the
-Full-Forceoptions. For example,Format-Volume -DriveLetter D -FileSystem FAT32 -NewFileSystemLabel label -Full -Force. -
Press Enter to continue.
Once you complete the steps, the command will perform a quick format using the FAT32 file system.
You can use these instructions as long as the drive has an existing partition. If the drive is empty, it won’t even appear on File Explorer, and you must create a partition before you can format it.
Source link