How to install Windows Subsystem for Linux (WSL) on Windows 11
- To install WSL on Windows 11, open PowerShell or Command Prompt (admin), run the “wsl –install” command, and restart the computer to set up the Windows Subsystem for Linux alongside the Ubuntu Linux distribution.
- To install WSL with a specific distro, run the “wsl –install -d DISTRO-NAME” command.
- To install WSL from the Microsoft Store, enable the “Virtual Machine Platform” feature and then download the WSL app from the Store.
On Windows 11, Microsoft streamlines the installation process of the Windows Subsystem for Linux (WSL) to only one command to download and install all the required components, including the virtual machine platform and Linux GUI apps. In this guide, I’ll teach you how to complete this process.
In addition, the command also installs the latest Ubuntu distro by default. If you prefer another Linux distribution, you can add an option to install any supported distributions in the command. Also, through the command-line experience, you can update the kernel more easily. Alternatively, you can install WSL using the download available from the Microsoft Store.
What’s WSL on Windows 11?
The Windows Subsystem for Linux is an optional feature that allows you to run different distributions of Linux on Windows 11 (and 10) without the need for a second computer, dual-boot setups, or virtual machines. Once you install WSL, the system adds the different components to create a virtualization layer using the Microsoft Hyper-V hypervisor to install and run Linux distros (such as Ubuntu, Debian, or Fedora) natively on your computer.
The Linux subsystem provides a fully functional environment, including the Linux kernel, system calls, and libraries, allowing you to run the apps as if they were on a native Linux system.
Microsoft also integrates WSL with Windows, allowing you to access files and apps from the Linux environment. In addition, you can access the distros files directly from File Explorer without any additional configuration.
Although you will primarily use WS for running command-line applications, this virtualization layer also allows you to install and run GUI (Graphical User Interface) apps leveraging tools like X11 or Wayland.
In this guide, I will teach you the easy steps to install the WSL platform on your computer. In addition, I will outline the steps to update the Linux kernel on Windows 11.
Install WSL on Windows 11
To install WSL on Windows 11 from Command Prompt (or PowerShell), use these steps:
-
Open Start on Windows 11.
-
Search for Command Prompt (or PowerShell), right-click the top result, and select the Run as administrator option.
-
Type the following command to install the WSL on Windows 11 and press Enter:
wsl --install
-
Restart your computer to finish the WSL installation on Windows 11.
-
Continue with the Linux distro setup as necessary.
Once you complete the steps, the required Linux components will install automatically on Windows 11 and the latest version of the Ubuntu Linux distribution.
In my experience, the install command may or may not work correctly, depending on your Windows setup configuration. If you receive the error code 14107, confirm the message to determine the components that the system cannot turn on. For example, the “Virtual Machine Platform.” If this is the case, open Settings > Optional features > More Windows features, check the “Virtual Machine Platform,” and click the “OK” button to add the components. You can now run the WSL install command one more time.
Update WSL kernel
To update the WSL kernel from Command Prompt on Windows 11, use these steps:
-
Open Start.
-
Search for Command Prompt (or PowerShell), right-click the top result, and select the Run as administrator option.
-
Type the following command to update the WSL kernel and press Enter:
wsl --update

After you complete the steps, if an update is available, it will download and install on your computer.
Install WSL with a specific distro on Windows 11
To install WSL with a specific Linux distro on Windows 11, use these steps:
-
Open Start.
-
Search for Command Prompt, right-click the top result, and select the Run as administrator option.
-
Type the following command to view a list of available WSL distros to install, and press Enter:
wsl --list --online
Quick note: You can install Ubuntu, Debian, Kali Linux, openSUSE, OracleLinux, and SUSE Linux Enterprise Server.
-
Type the following command to install the WSL with a specific distro on Windows 11 and press Enter:
wsl --install -d DISTRO-NAME

In the command, remember to replace “DISTRO-NAME” with the name of the distro to install on the device, such as Debian.
-
Restart your computer to finish the WSL installation on Windows 11.
-
Continue with the Linux distro setup as necessary.
Once you complete the steps, the Windows Subsystem for Linux components will be installed along with the Linux distro you specified.
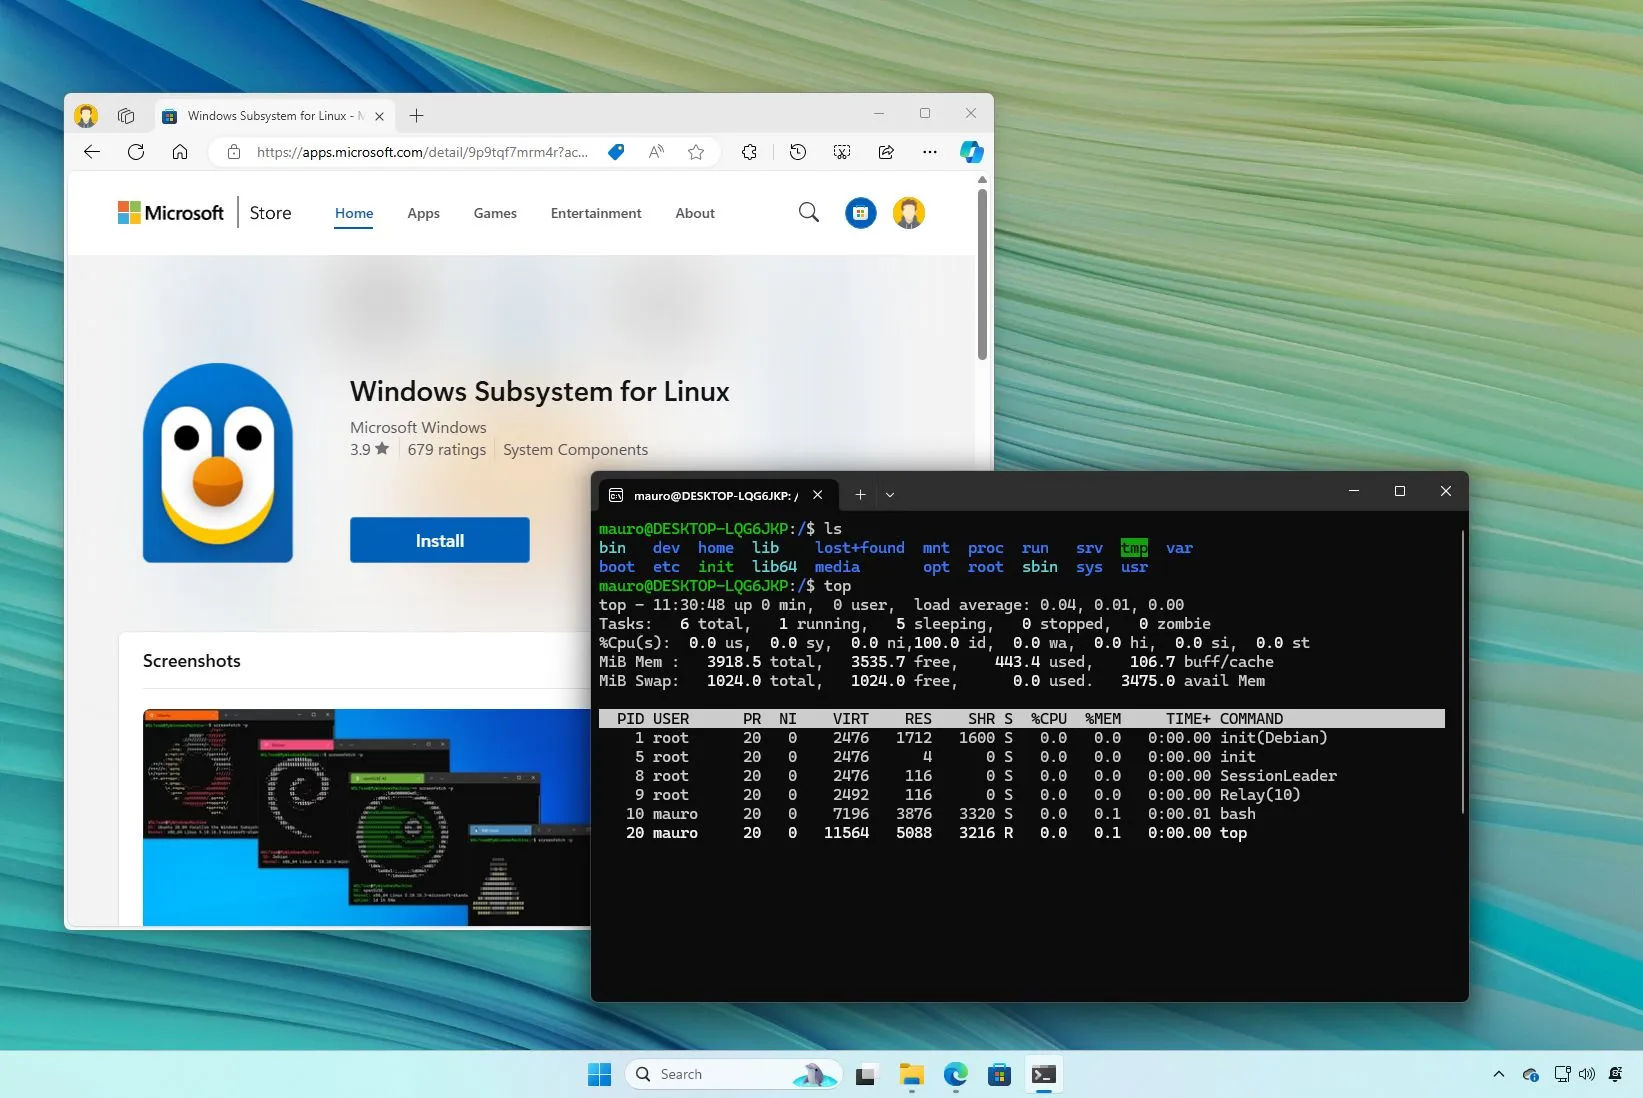
Install WSL from the Microsoft Store
If you want to install the Windows Subsystem for Linux and distros from the Microsoft Store, you’ll first have to install the required components from the “Windows Features” interface, then download and install WSL from the Store, and then you have to install the desired flavor of Linux.
1. Enable WSL required components
To install the required system components to run Linux on Windows 11, use these steps:
-
Open Start.
-
Search for Turn Windows Features on or off and click the top result to open the app.
-
Check the “Virtual Machine Platform” option.

-
Check the “Windows Subsystem for Linux” option.
-
Click the OK button.
-
Click the Restart button.
After completing the steps, you can proceed with the steps to download the app from the Microsoft Store.
Although the Microsoft Store option should enable and install all the required components, you may still have to turn on the “Virtual Machine Platform” and “Windows Subsystem for Linux” modules manually because you can run a Linux distribution. Otherwise, you may get the error code 14107 or 0x8004032d.
2. Install Windows Subsystem for Linux app
To install the WSL layer on Windows 11, use these steps:
-
Click the Install button.
-
Click the “Open Microsoft Store” button (if applicable).
-
Click the Install button again.

3. Install Linux distro
To install a Linux distribution from the Microsoft Store, use these steps:
-
Open the Microsoft Store app.
-
Search for Linux distros, such as Debian.
-
Click the Get button.

-
Click the Open button.
Once you complete the steps, WSL will install on Windows 11, including the support for Linux GUI apps and the Linux distribution.
Update September 12, 2024: This guide has been updated to ensure accuracy and reflect changes to the process.
Source link