How to Passthrough an NVIDIA GPU to a Fedora 40 Proxmox VE Virtual Machine
If you passthrough an NVIDIA GPU to a Fedora 40 Proxmox VE virtual machine, you get many benefits, such as:
-
Stream the virtual machine’s display directly on the monitor connected to the NVIDIA GPU.
-
Add a USB keyboard and a mouse to the virtual machine and use it like a real desktop computer.
-
Get near-native 3D performance on the virtual machine.
In this article, I will show you how to passthrough an NVIDIA GPU to a Fedora 40 Proxmox VE virtual machine and use the virtual machine just like a real desktop computer.
Configuring Proxmox VE for NVIDIA GPU Passthrough
Before you can passthrough an NVIDIA GPU to your Proxmox VE virtual machine, you must configure Proxmox VE for GPU and PCI/PCIE passthrough.
I have written a detailed guide on configuring Proxmox VE for GPU and PCI/PCIE passthrough. You can read it here.
Creating a Fedora 40 Virtual Machine
Once you’ve set up your Proxmox VE server for NVIDIA GPU passthrough, create a new Fedora 40 virtual machine if you don’t have one already.
Passthrough an NVIDIA GPU to the Proxmox VE Fedora 40 Virtual Machine
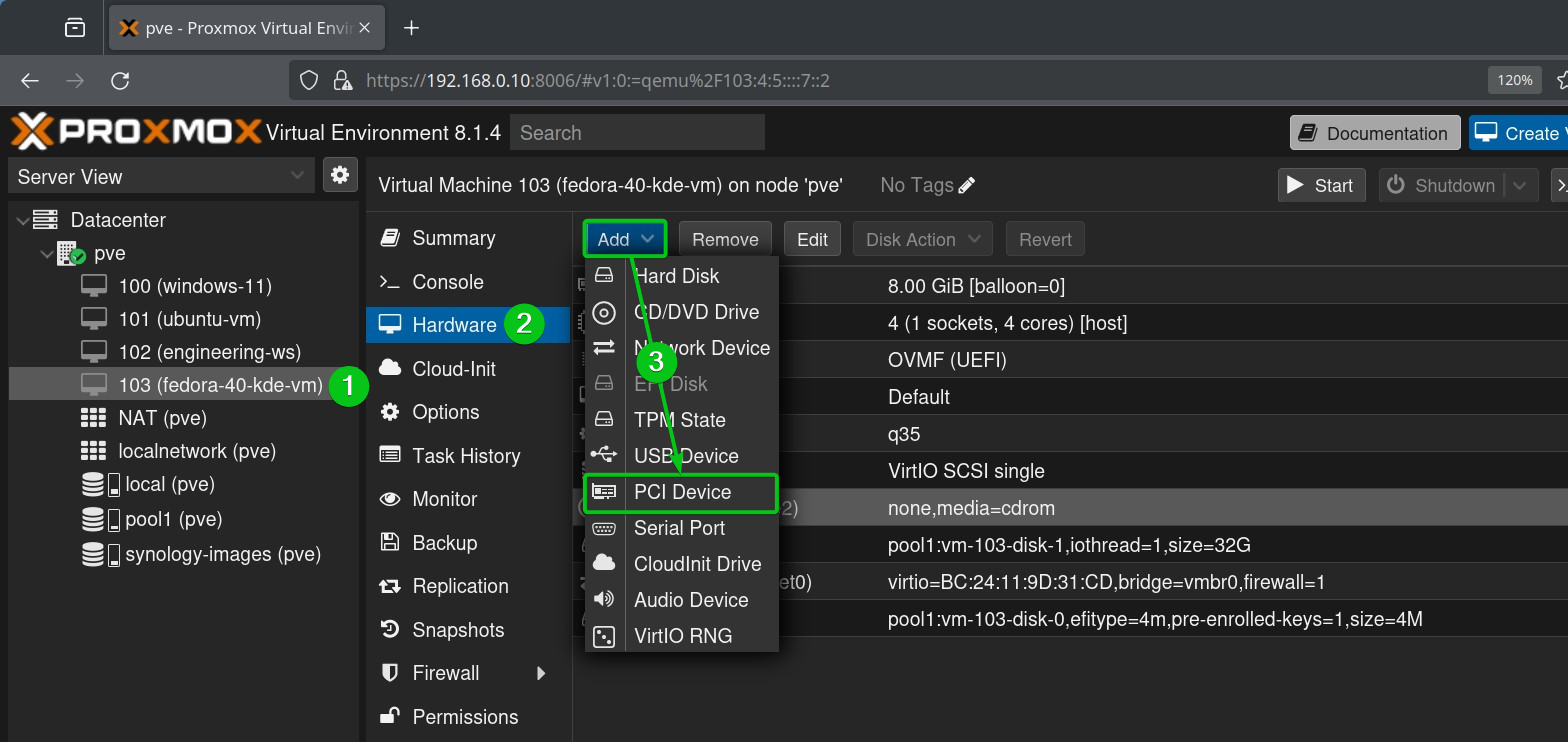
To passthrough an NVIDIA GPU to the Proxmox VE Fedora 40 virtual machine, open the virtual machine in the Proxmox VE web management interface[1], navigate to the Hardware section of the virtual machine[2], and click on Add > PCI Device[3].
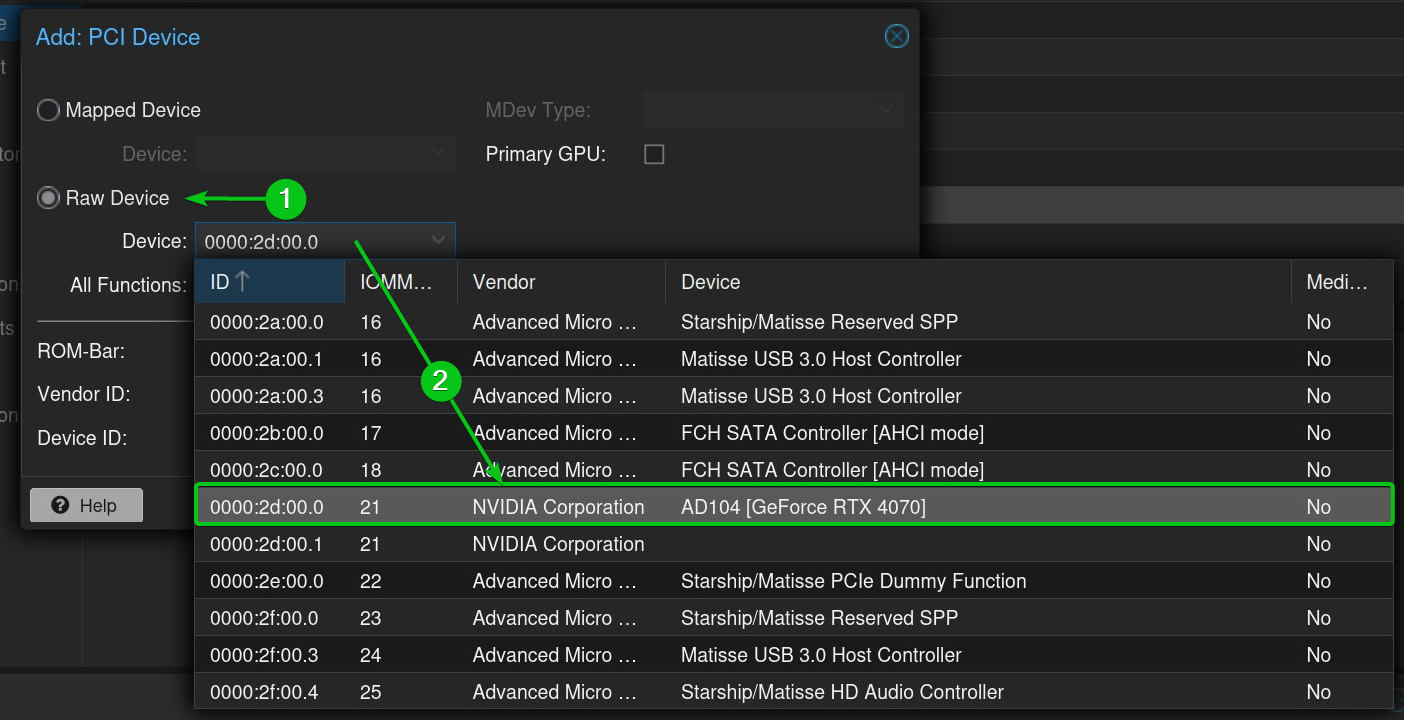
Select Raw Device[1] and select your NVIDIA GPU from the Device dropdown menu[2].
In this case, I am selecting the NVIDIA GeForce RTX 4070 GPU for the passthrough.
Make sure to tick All Functions[1], ROM-Bar[2], and PCI-Express[3]. Keep Primary GPU unticked as of now because you still need access to the virtual display/console of the virtual machine for installing the NVIDIA GPU drivers[4].
Once you’re done, click on Add[5].
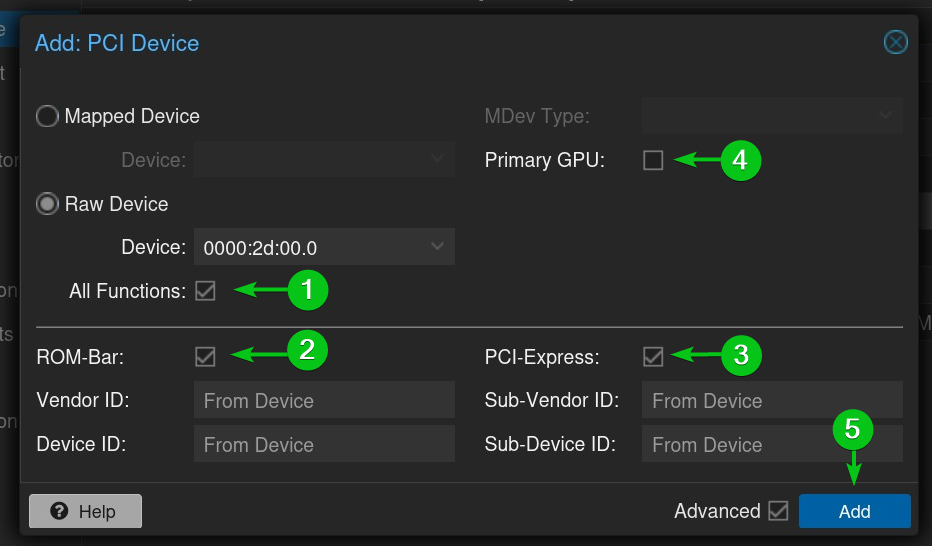
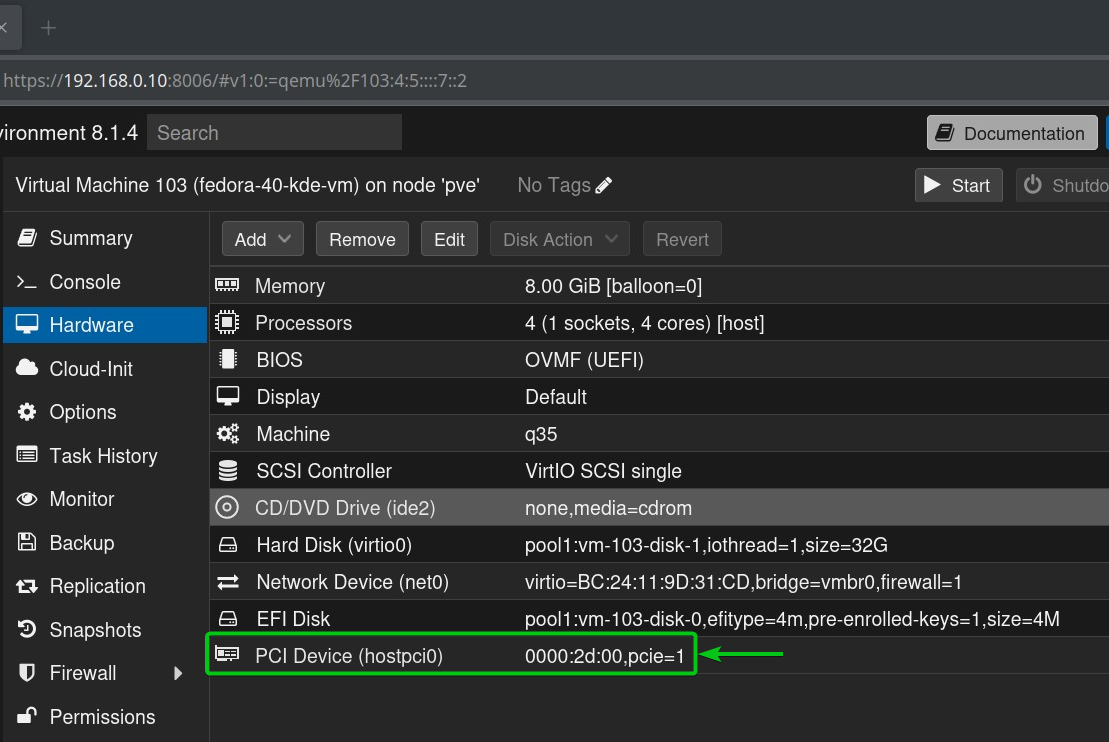
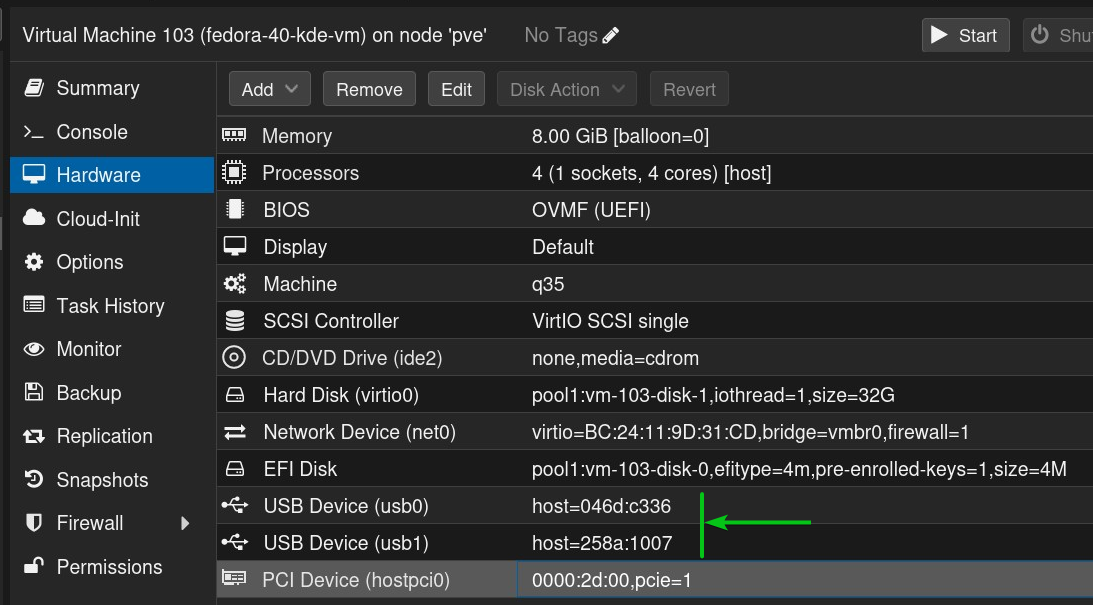
The NVIDIA GPU should be added to the virtual machine.
Passthrough a USB Keyboard and Mouse to the Proxmox VE Virtual Machine
You should also add a USB keyboard and a mouse to the virtual machine so that you can use the Fedora 40 virtual machine like a real computer once everything is configured.
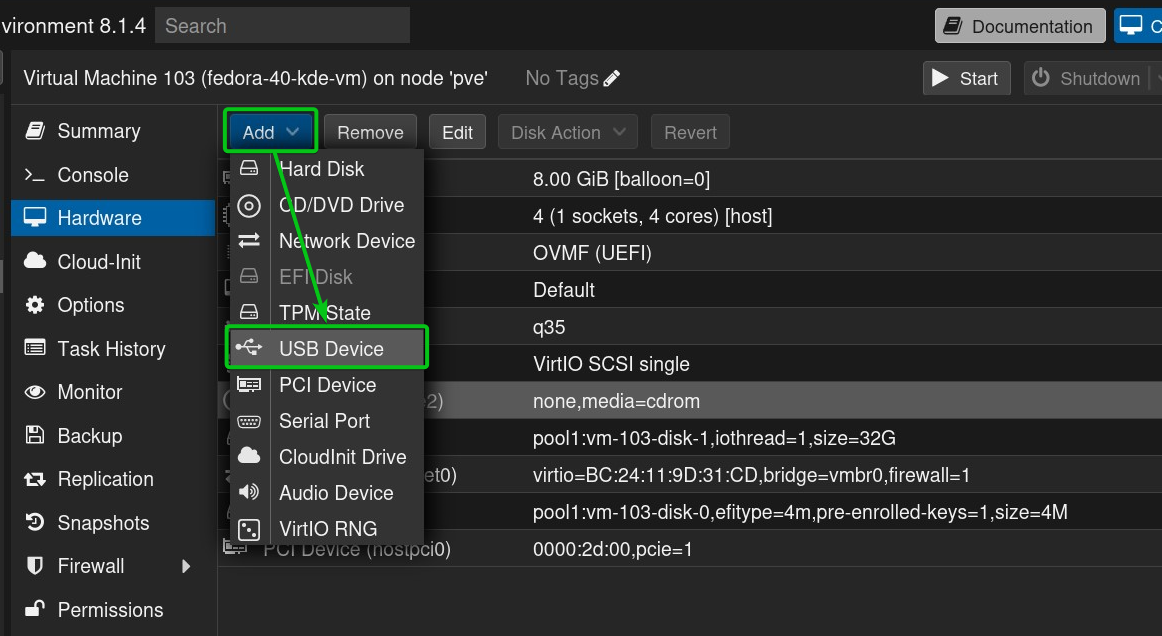
To add a USB device to the virtual machine, click on Add > USB Device from the Hardware section of the virtual machine.
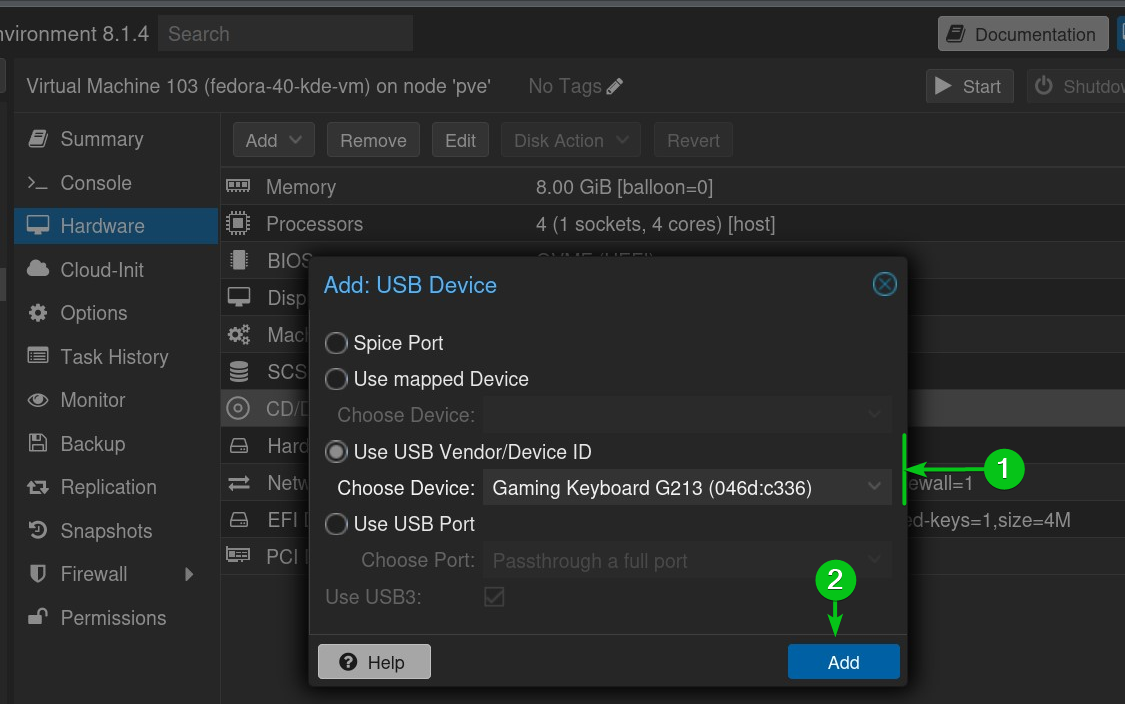
Select Use USB Vendor/Device ID and select your USB keyboard from the Choose Device dropdown menu[1].
Once you’re done, click on Add[2].
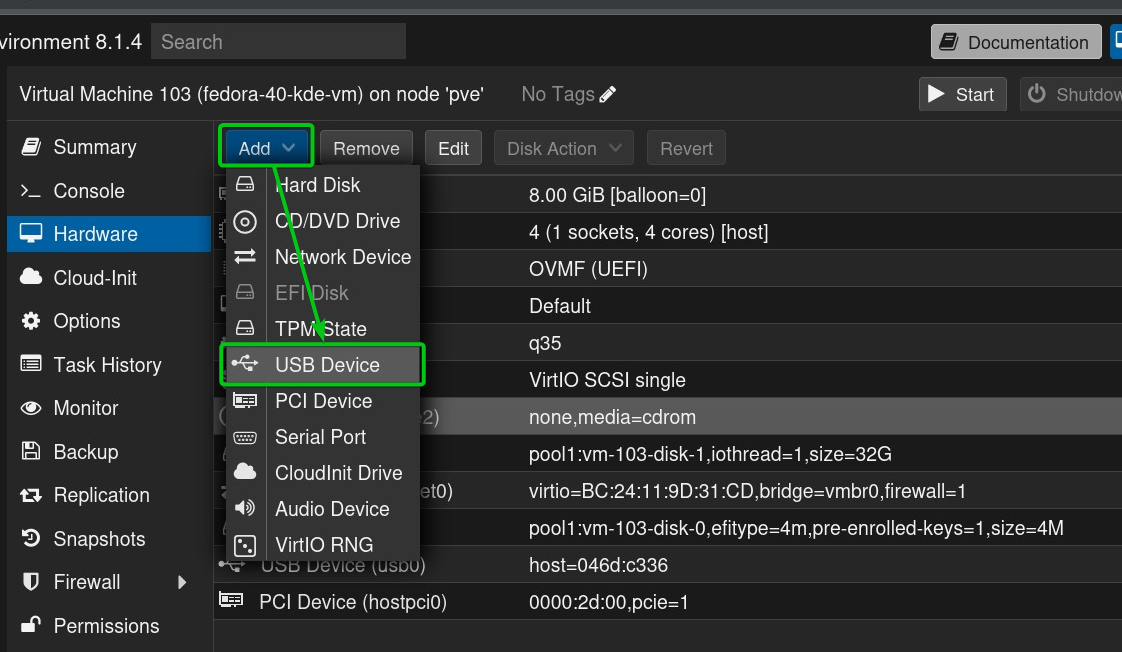
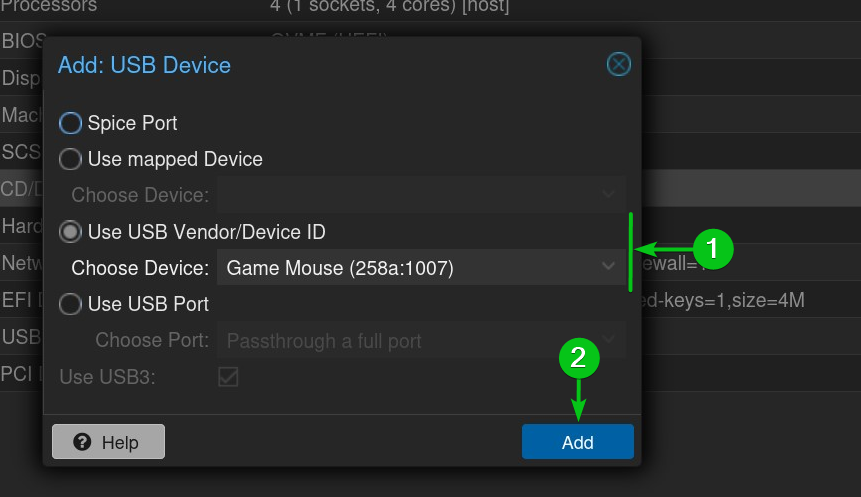
To add another USB device to the virtual machine, click on Add > USB Device.
Select Use USB Vendor/Device ID and select your USB mouse from the Choose Device dropdown menu[1].
Once you’re done, click on Add[2].
Your USB keyboard and mouse should be added to the Fedora 40 Proxmox VE virtual machine.
Installing NVIDIA GPU Driver on Fedora 40 Proxmox VE Virtual Machine
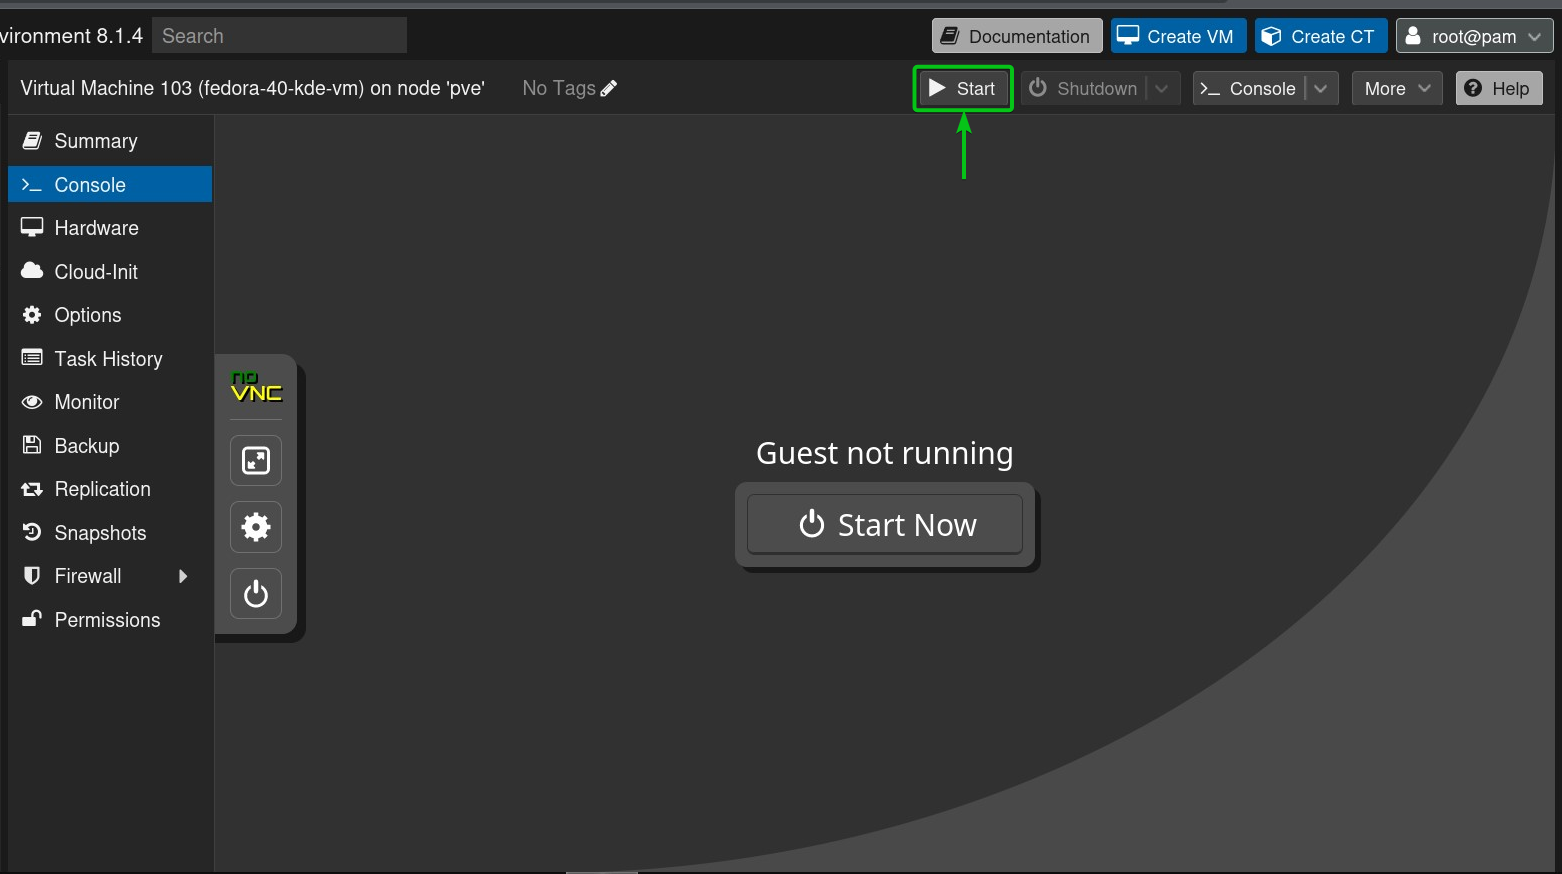
Once you’ve added an NVIDIA GPU, a keyboard, and a mouse to the Fedora 40 virtual machine, navigate to the Console section and start the virtual machine. You should see the virtual machine’s display in the Proxmox VE console.
UEFI Secure Boot will be enabled by default on your Fedora 40 virtual machine. You will have difficulty getting the NVIDIA GPU driver to work with UEFI Secure Boot enabled on the Fedora 40 virtual machine. So, you should disable the UEFI Secure Boot on the Fedora 40 virtual machine from the BIOS of the virtual machine.
Once you’ve disabled the UEFI Secure Boot on the Fedora 40 virtual machine, install the NVIDIA GPU driver on the Fedora 40 virtual machine.
Read this article to learn how to disable the UEFI Secure Boot on your Fedora 40 Proxmox VE virtual machine.
Read this article for detailed instructions on installing the NVIDIA GPU driver on the Fedora 40 Proxmox VE virtual machine.
Setting the NVIDIA GPU as the Primary GPU for the Proxmox VE Virtual Machine
Once the NVIDIA GPU driver is installed on the Proxmox VE virtual machine, you should set the NVIDIA GPU as the primary GPU for the virtual machine for the best user experience.
First, power off the Fedora 40 virtual machine.
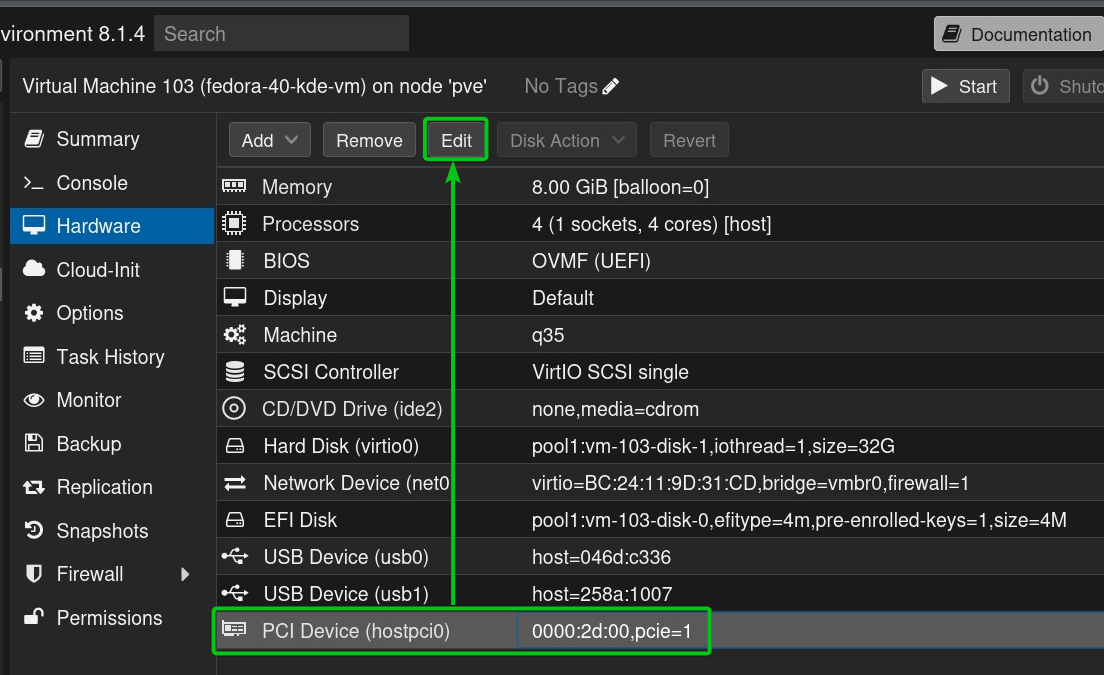
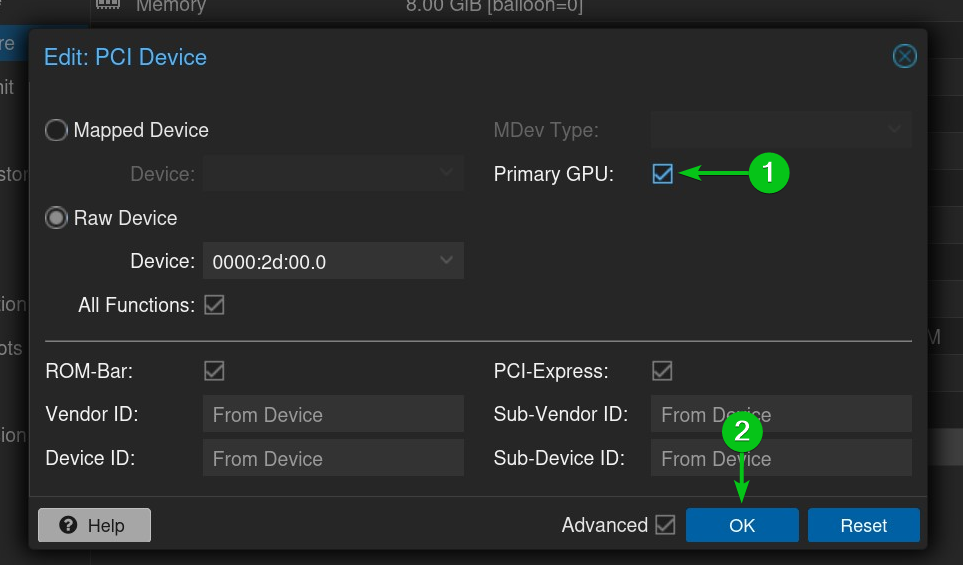
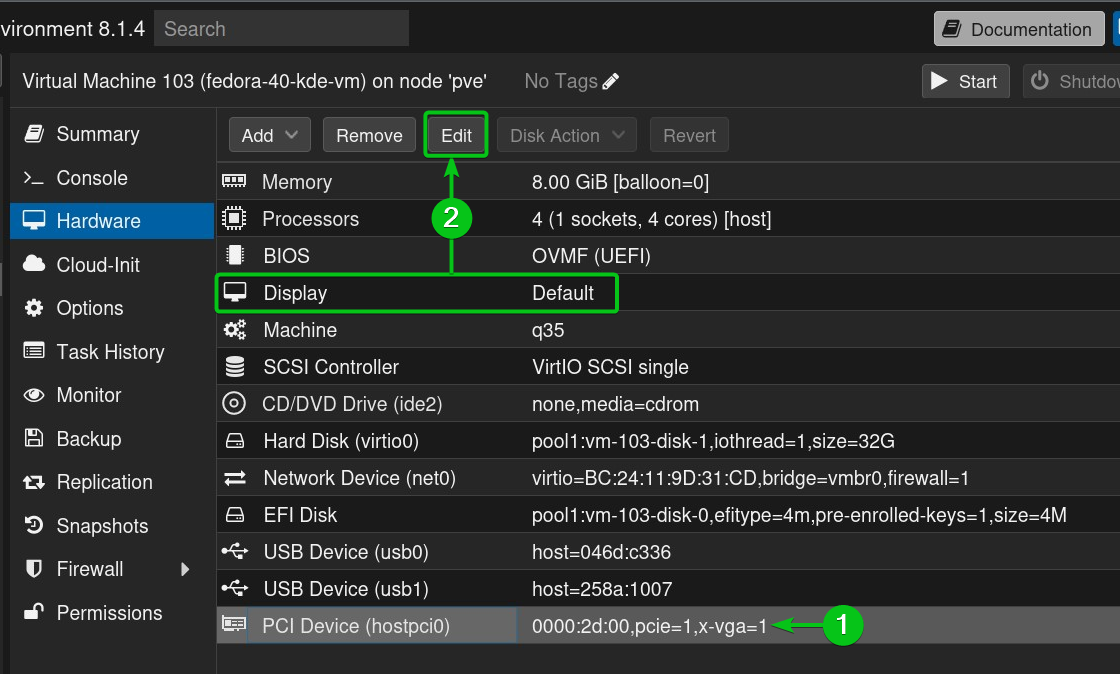
Then, navigate to the Hardware section of the virtual machine, select the NVIDIA GPU PCI Device, and click on Edit.
Tick Primary GPU[1] and click on OK[2].
The NVIDIA GPU should be set as the Primary GPU of the Fedora 40 virtual machine[1].
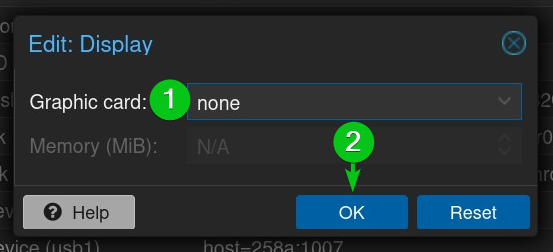
Select the Display hardware and click on Edit[2].
Set Graphic card to none[1] and click on OK[2].
The virtual graphics of the Fedora 40 virtual machine should be disabled.
Checking if the NVIDIA GPU is Working on the Fedora 40 Proxmox VE Virtual Machine
To test if the NVIDIA GPU is working correctly on the Fedora 40 Proxmox VE virtual machine, start the Fedora 40 virtual machine.
You should see the display of the Fedora 40 virtual machine on the monitor connected to your NVIDIA GPU. The keyboard and mouse should also work on the Fedora 40 virtual machine, just like a real computer.

Conclusion
This article demonstrated the methods of passing an NVIDIA GPU, a USB keyboard, and a mouse to a Fedora 40 Proxmox VE virtual machine so that you get near-native 3D performance on the virtual machine and use it just like a real desktop computer.
Source link