How to Upgrade to Windows 11 From Windows 10 (4 Methods)

Microsoft is officially ending support for Windows 10, forcing millions of users to upgrade to Windows 11. However, most users are stuck on Windows 10 due to the strict system requirements for installing Windows 11. So whether your PC meets the requirements or not, you can follow our in-depth tutorial to upgrade to Windows 11 from Windows 10. We have added four methods for both eligible and unsupported Windows 10 PCs. On that note, let’s dive in.
1. Upgrade to Windows 11 From Windows 10 on Supported PCs
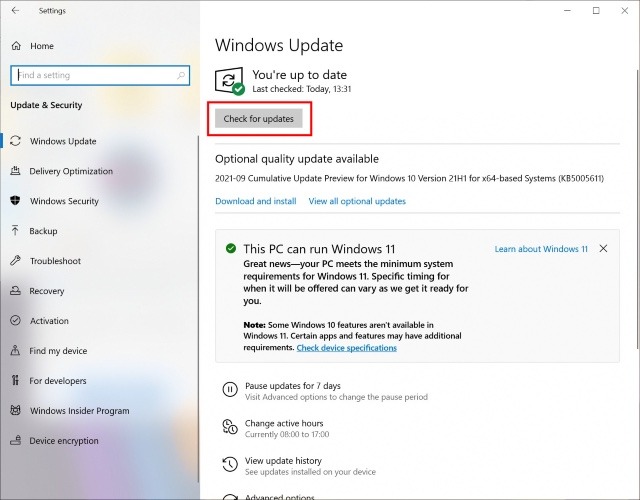
The easiest way to upgrade to Windows 11 from Windows 10 is via Windows Update. Eligible Windows 10 PCs are being offered the Windows 11 update officially. Follow the below steps and you can quickly transition to Windows 11 in no time while keeping all your files and programs intact.
- If your Windows 10 PC is eligible for Windows 11, a banner will appear saying “This PC can run Windows 11”.
- Now, click on “Check for updates” and download Windows 11.
- Once the update is installed, restart your PC and you will be upgraded to Windows 11 seamlessly.
2. Upgrade From Windows 10 Using the Windows 11 Installation Assistant
If for some reason, Windows Update is not offering you the Windows 11 update, you can use Microsoft’s Windows 11 Installation Assistant. The tool automatically performs an in-place upgrade and moves eligible Windows 10 PCs to Windows 11. This process keeps all your files and programs and doesn’t delete anything.
- Go ahead and download the Windows 11 Installation Assistant from Microsoft’s website.
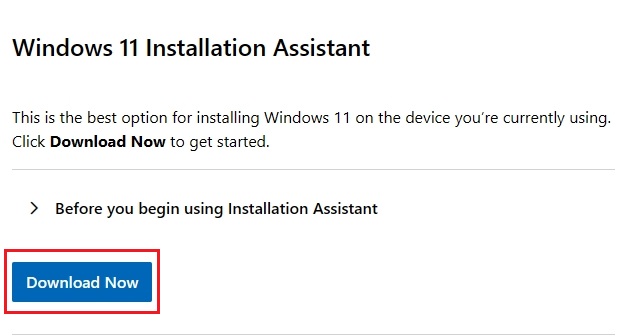
- Next, run the tool on Windows 10 and follow the on-screen instructions.
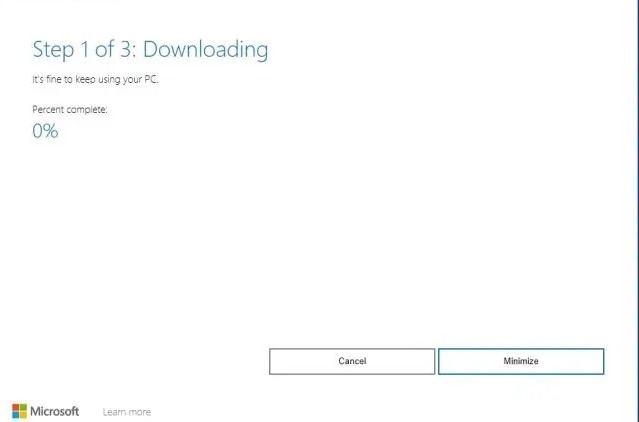
- If your PC is eligible, it will start downloading the Windows 11 update.
- Once the update is installed, it will automatically restart your PC and upgrade to Windows 11.
3. In-place Upgrade to Windows 11 on Unsupported PCs
In case you are facing the “This PC doesn’t meet the minimum system requirements to install Windows 11” error, it means your Windows 10 PC is not eligible for Windows 11. But do not worry, you can use the Rufus tool to bypass Windows 11 system requirements, be it TPM, Secure Boot, or 4GB+ RAM requirement. The best part is that you can perform an in-place upgrade meaning your files and programs will remain intact, just like before. Here are the steps to follow.
- Go ahead and download the official Windows 11 ISO from Microsoft’s website.
- Now, download the Rufus tool from here.
- After that, launch Rufus and click on “Select” to load the Windows 11 ISO image.
- Now, plug in a USB drive and click on “Start”. A pop-up will appear.
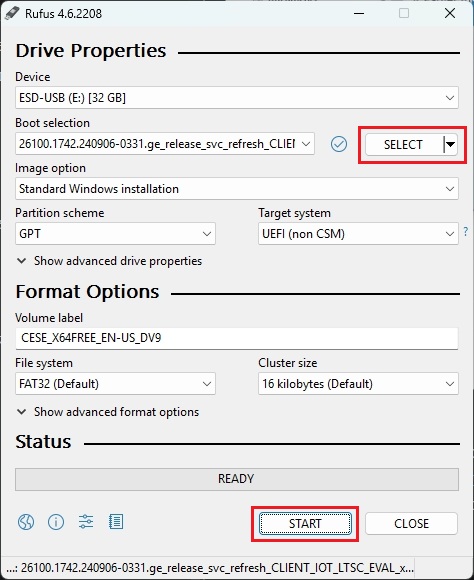
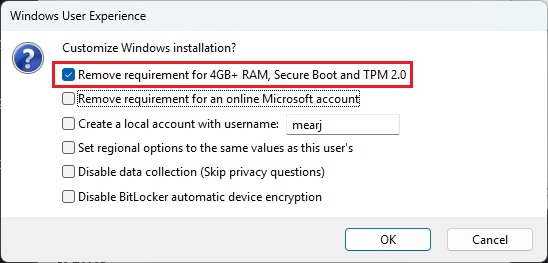
- Here, enable “Remove requirement for 4GB+ RAM, Secure Boot, and TPM 2.0”.
- Now, click on “OK” and let Rufus flash the USB drive.
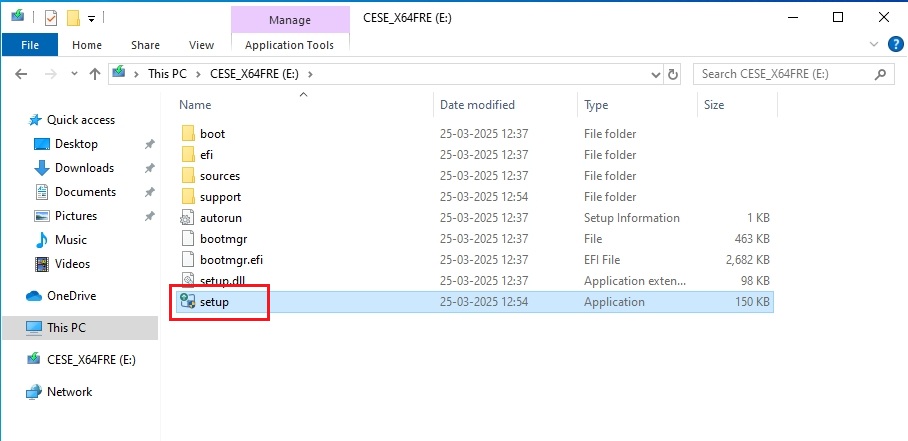
- After the flashing process, keep it connected to your Windows 10 PC and open File Explorer.
- Here, open the USB drive and you will find a “setup.exe” file. Open it.
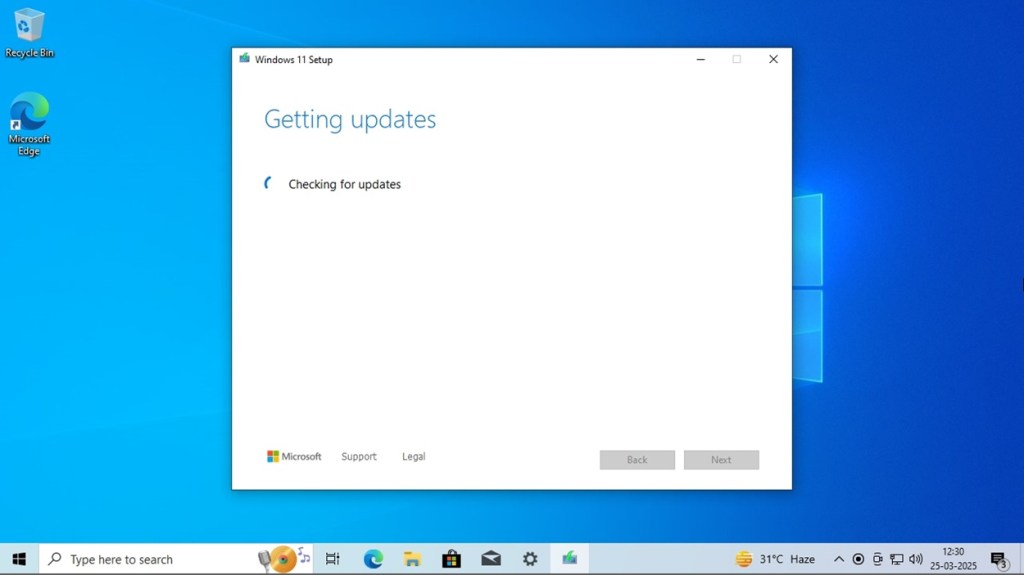
- Now, follow the on-screen instructions and it will let you perform an in-place installation of Windows 11.
- It will automatically restart your PC and install Windows 11 on your unsupported PC without deleting anything.
4. Clean Install Windows 11 on Unsupported Windows 10 PCs
Those who want to clean install Windows 11 on unsupported Windows 10 PCs can follow this method. It also uses the Rufus tool to bypass hardware requirements but performs installation via the WinRE environment. This way, you will get a clean and fast experience on Windows 11. However, all your files and programs will be deleted from the C drive so make a backup before you proceed.
- Similar to the above method, download the Windows 11 ISO image and flash it using Rufus.
- Make sure to select “Remove requirement for 4GB+ RAM, Secure Boot, and TPM 2.0”.
- You can also choose to remove the Microsoft account requirement during the setup process.

- Now, plug the USB drive into your Windows 10 PC and restart your computer.
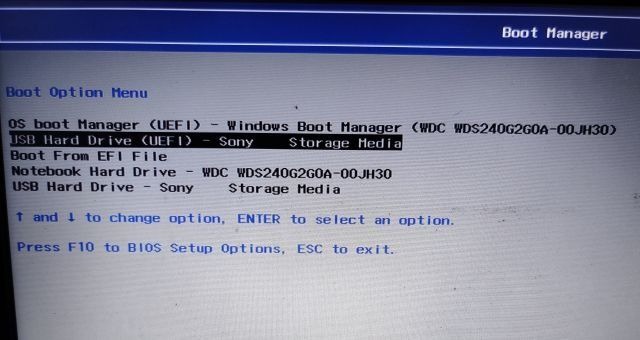
- Enter the BIOS on Windows and choose the USB drive to boot from.
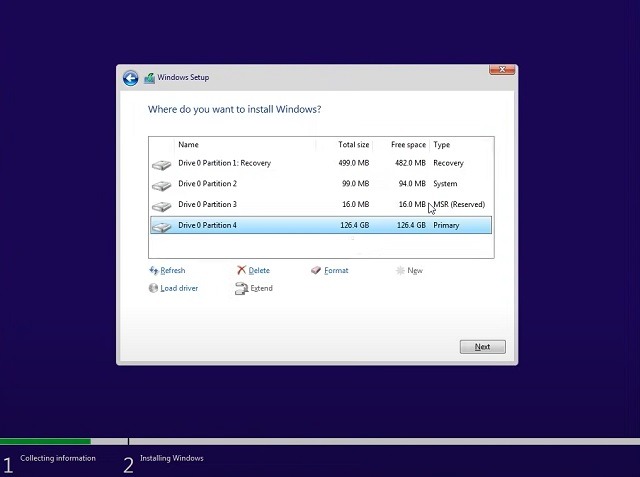
- Now, follow the on-screen instructions and choose the partition where you want to install Windows 11.
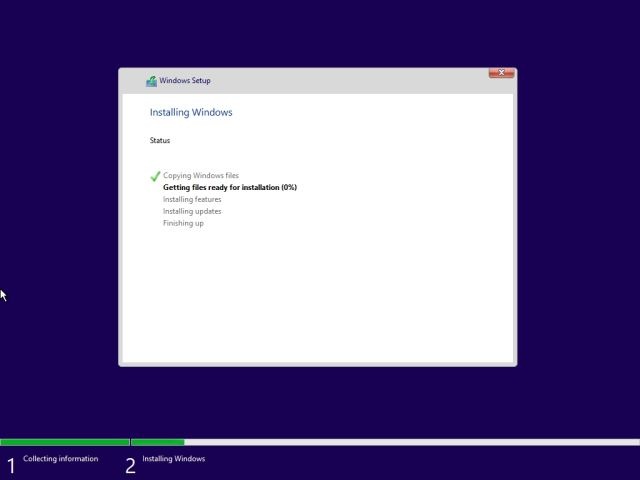
- The installation will begin, and this time, you won’t face any hardware requirement error.
- Finally, your PC will upgrade to Windows 11 without any issues.
So, that is how you can effortlessly upgrade to Windows 11 from Windows 10 on supported and unsupported PCs. I would recommend that users free up disk space after upgrading to Windows 11 to have their machines running smoothly. If you have any questions, let us know in the comments section below, and we will try to help you out.
Source link