How to use Google Pixel 9 reimagine feature

The Google Pixel 9 introduces a revolutionary AI-powered Reimagine tool, setting a new standard in smartphone photo editing. This innovative feature transforms elements within your photos, going far beyond basic adjustments.
This is not just about editing; it’s about reimagining entire scenes with AI assistance. Combined with the new game-changing Add me feature, the Pixel 9 opens up a world of creative possibilities for mobile photographers.
Whether you’re a casual snapper or a dedicated enthusiast, mastering the Pixel 9’s reimagine tool can elevate your photos to new heights. Let’s explore how to harness this powerful feature on your Google Pixel 9.
1. Open your photo
(Image: © Future)
Launch the photo-editing app on your device and select the image you want to edit. Ensure you’re working with a high-quality photo for the best results.
2. Access the editing tools
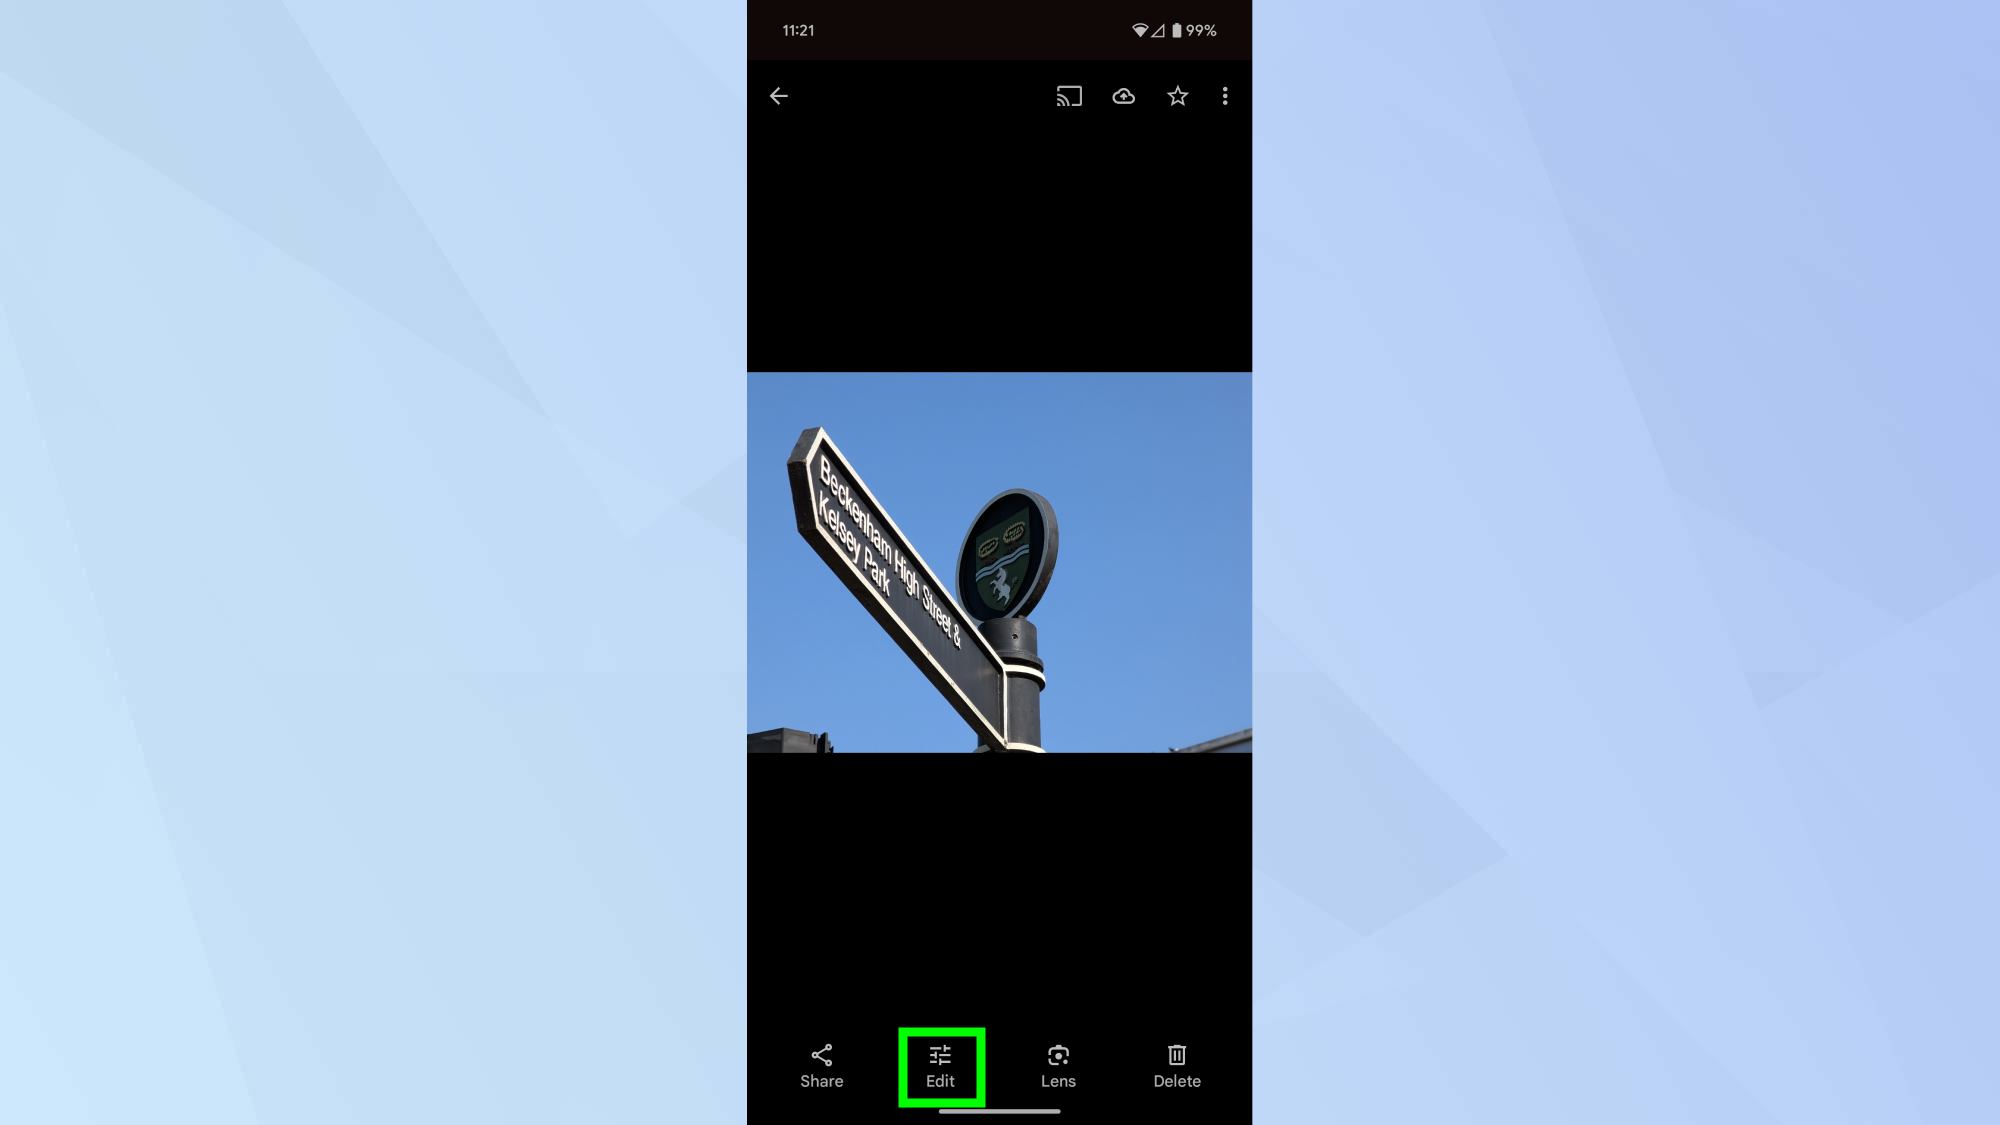
(Image: © Future)
Tap the Edit button to bring up the various editing options available in the app.
3. Select elements to reimagine
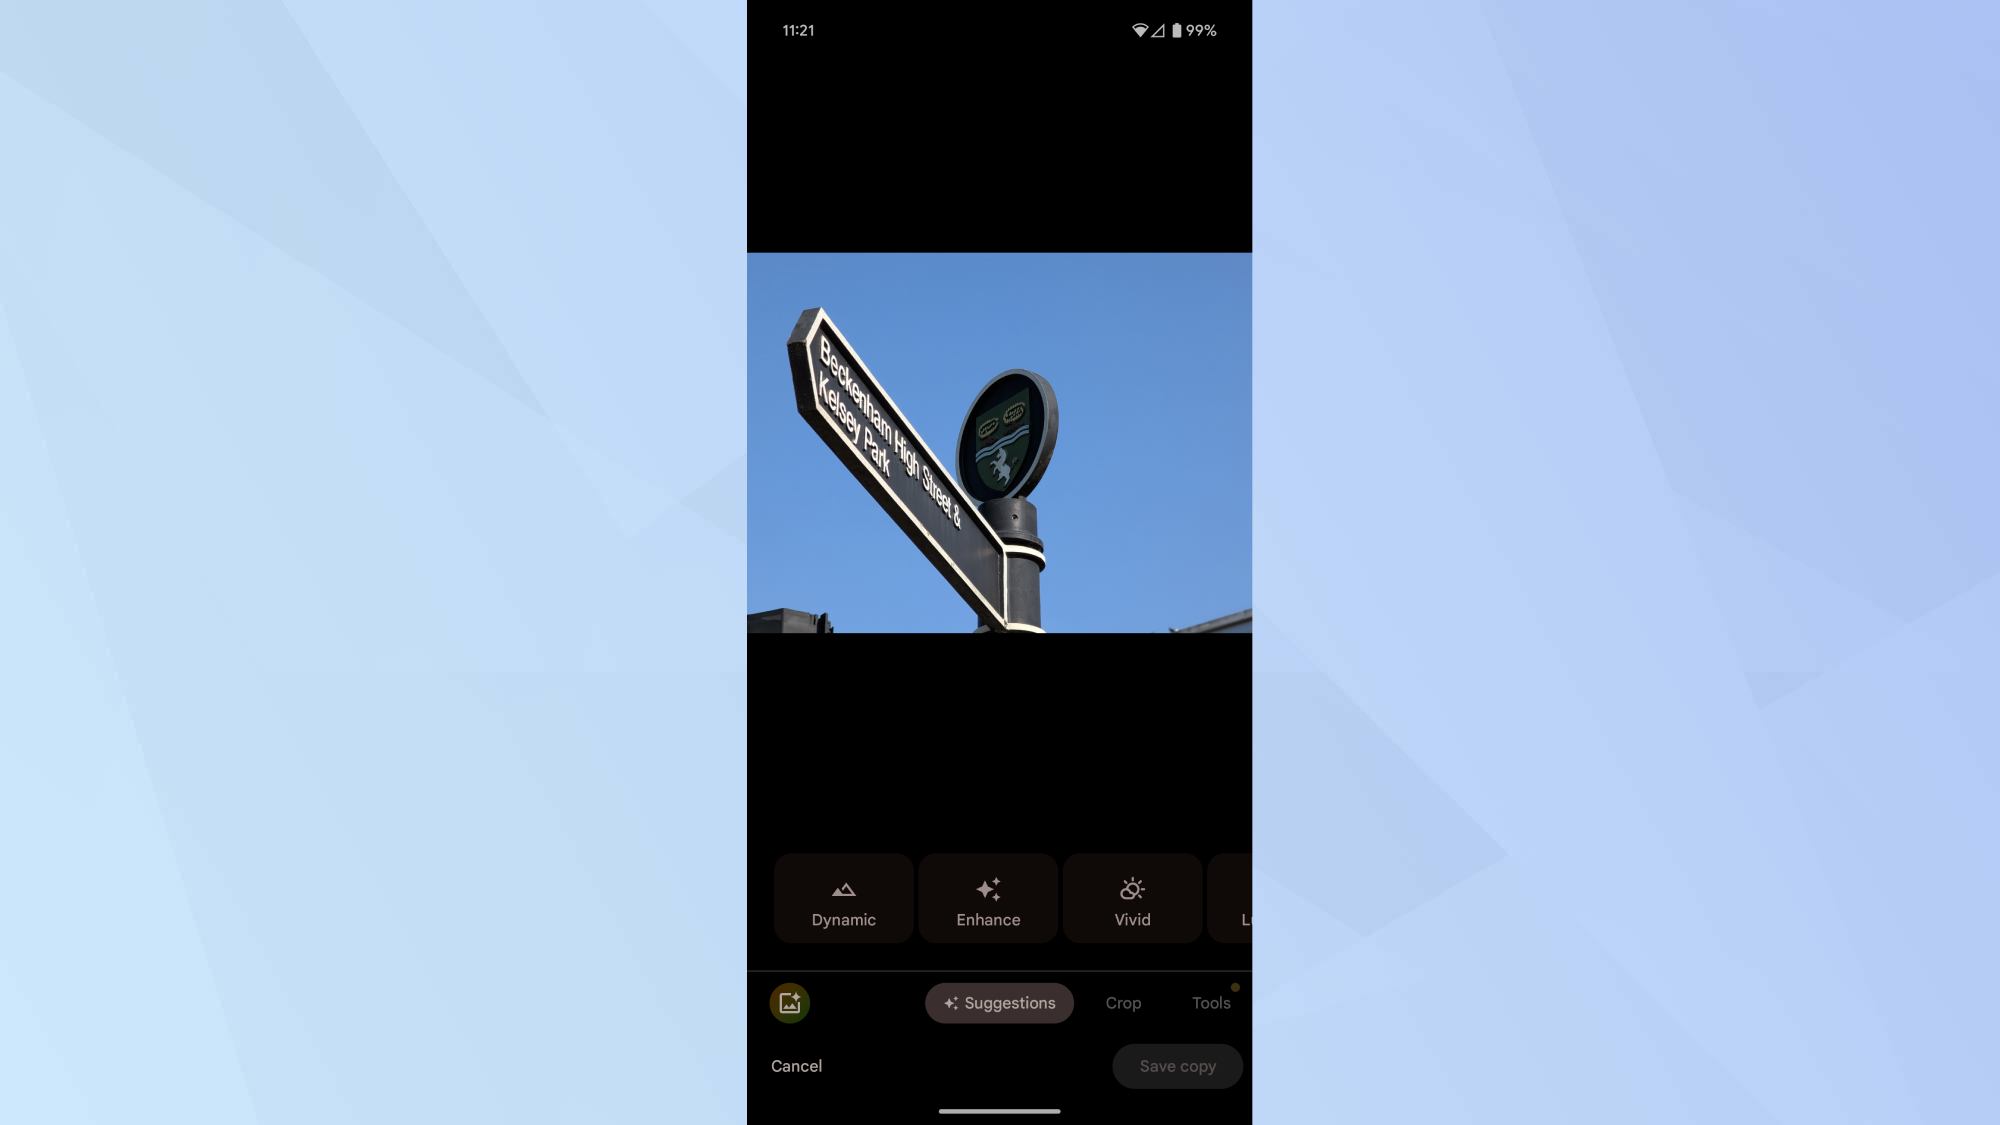
(Image: © Future)
Locate and tap the Magic Editor tool, often represented by a distinctive icon in the bottom-right corner of the screen.
4. Initiate reimagine
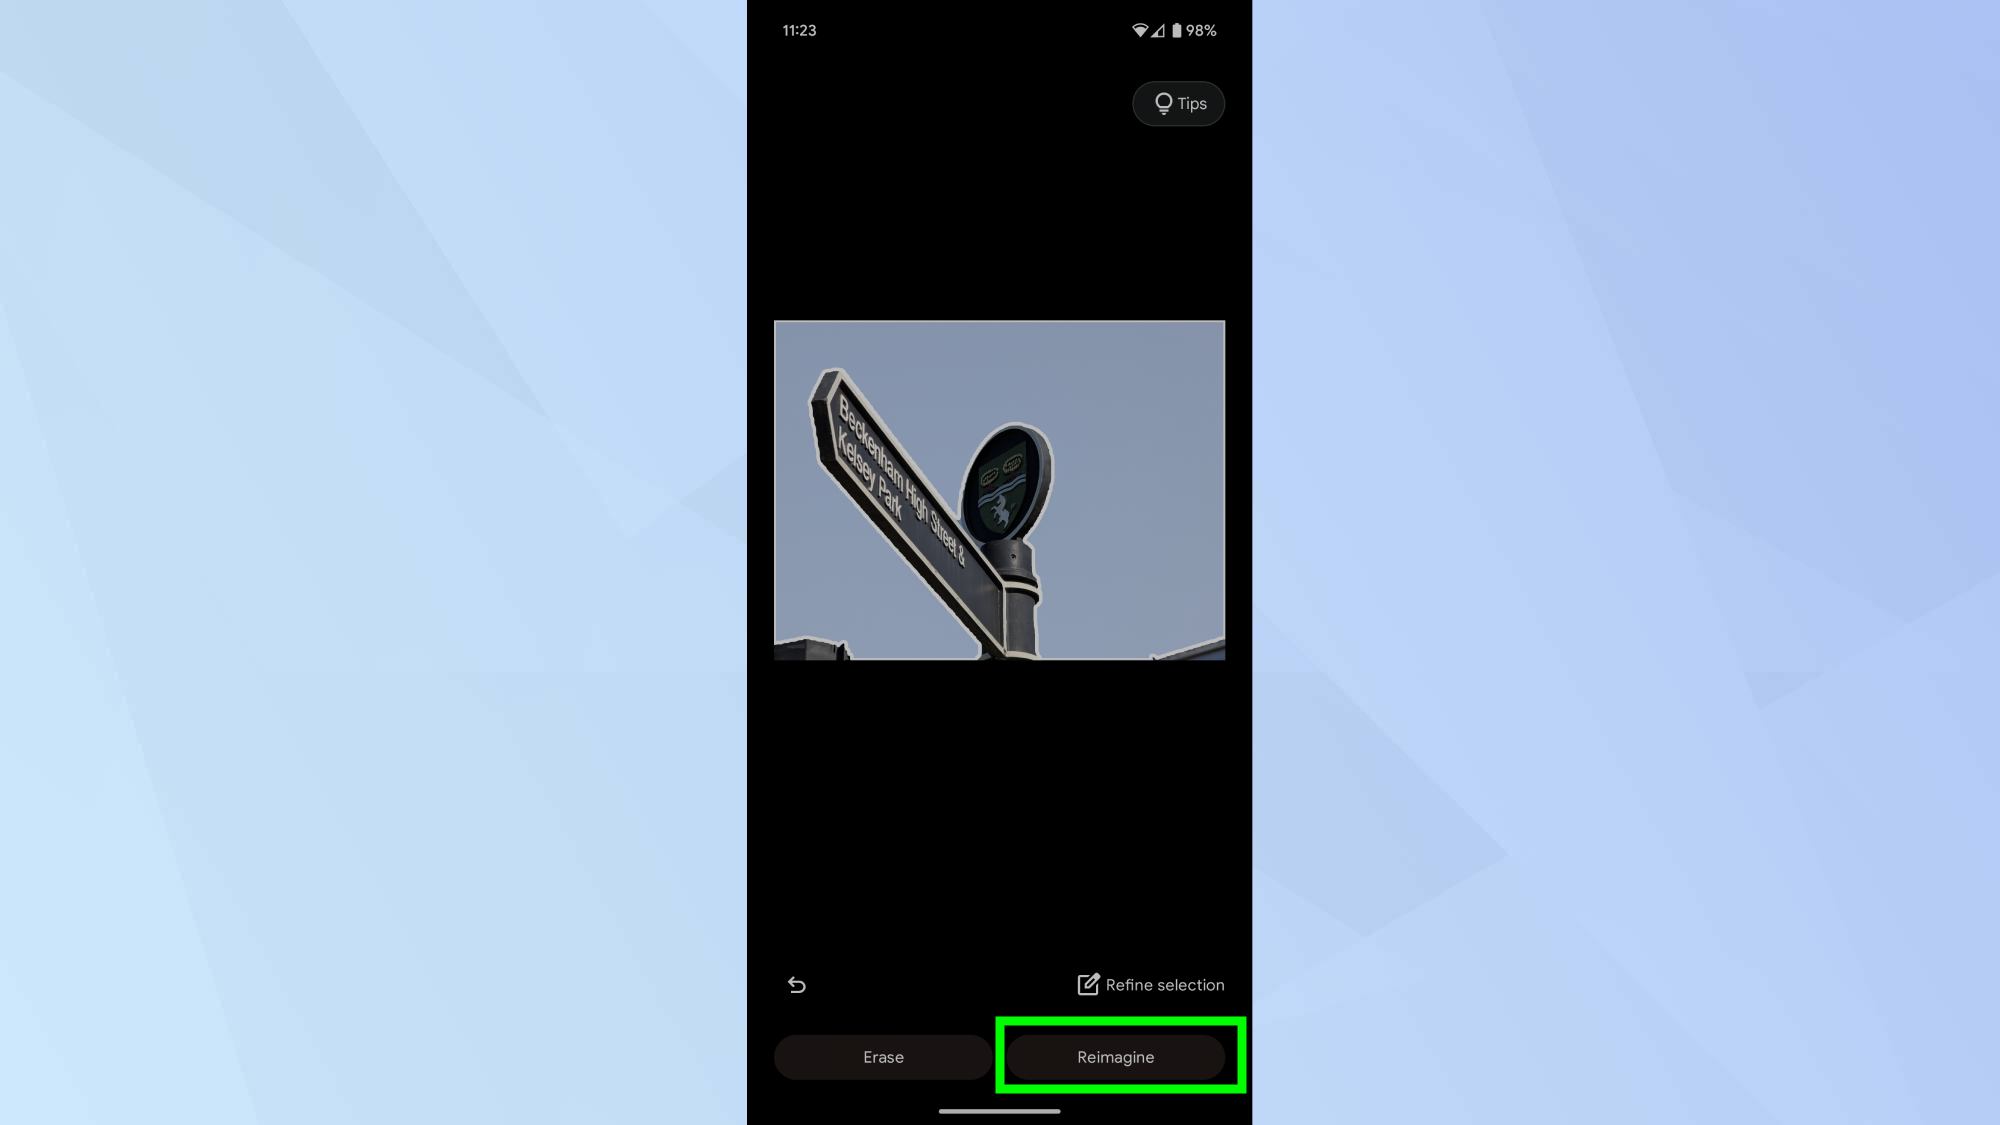
(Image: © Future)
Tap on the object(s) in the photo that you want to transform. This will isolate these elements, showing you what’s been selected with a translucent white overlay. After selecting all the elements you wish to change, tap the Reimagine button.
5. Describe your changes
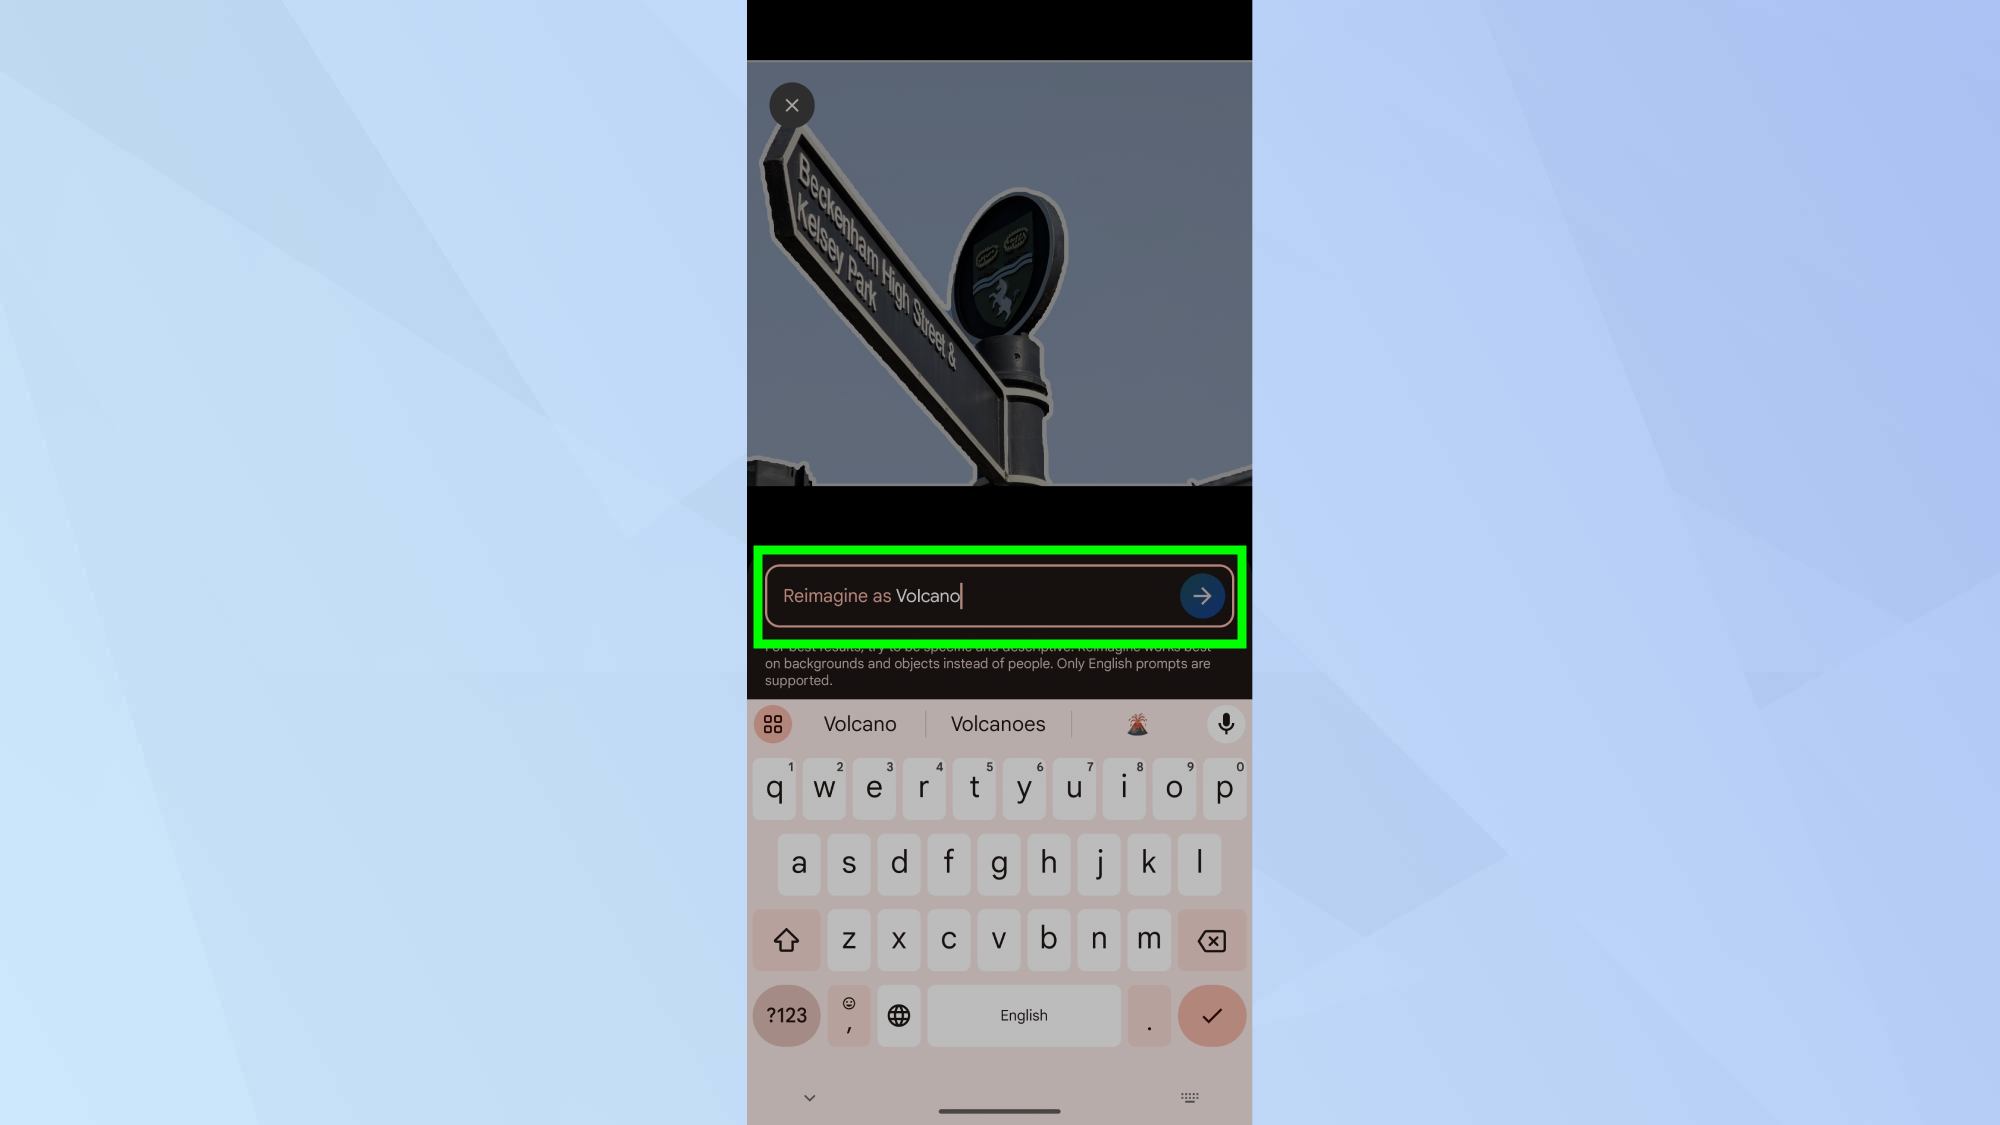
(Image: © Future)
When prompted, enter a text prompt of how you want to transform the selected elements. Be as specific or creative as you like – this is where the magic happens!
6. Review and save your creation

(Image: © Future)
Wait for the AI to process your request and generate the reimagined image. Once complete, review the result. If you’re satisfied, save your edited photo. If not, you can try again with a different description or selection.
Ultimately, the Google Pixel 9 has lots of AI features — and Pixel Screenshots looks like a game changer — but Reimagine is definitely up there. For more, see our Google Pixel 9 review, Pixel 9 Pro review and Pixel 9 Pro XL review to check out all the pros and cons.
Source link


