Key Takeaways
- Color Filters can be used to help cut down on screen time, to make certain colors seem more vibrant, and as more intese version of Night Shift for evening iPhone use.
- Turn on Color Filters in Settings > Accessibility > Vision to customize display colors including Grayscale.
- Use Color Filters shortcuts for easy access, adjusting intensity & automating filter changes.
Color Filters are an iPhone accessibility feature that can help users with vision problems or color blindness differentiate between colors. These filters can do a lot of things: from changing your phone’s display to black and white to emphasizing a group of colors (or even muting some). Here are my favorites.
How to Turn On Color Filters
Tinkering with your iPhone settings can sometimes lead to unexpected yet welcome results. As you have probably figured out, beyond accessibility, Color Filters can be used to change the way your display colors look (including pictures and videos) to suit your needs and preferences.
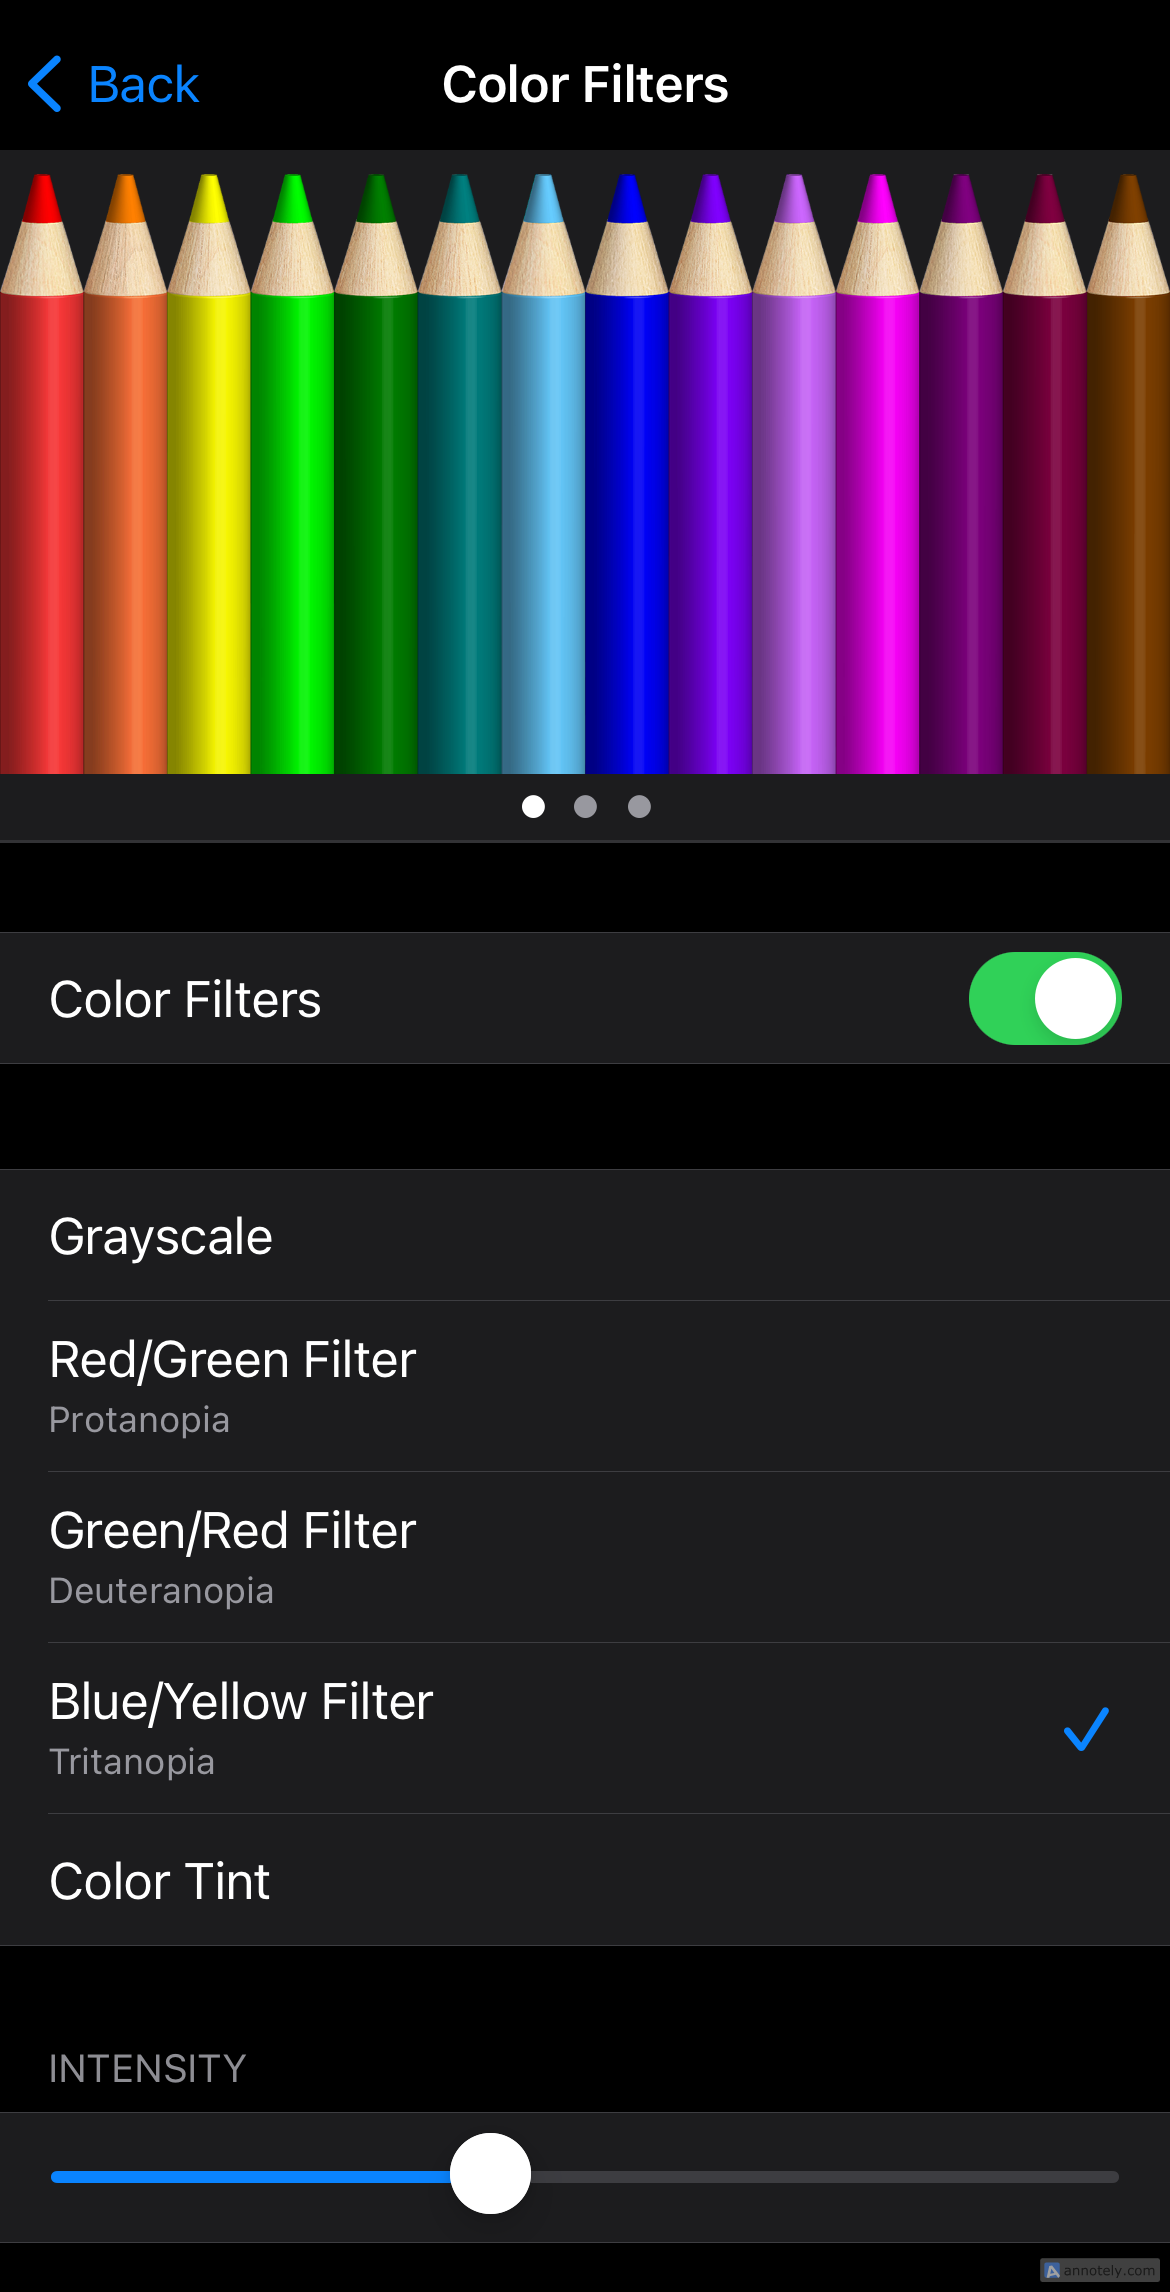
You can explore the available options and turn on Color Filters by going to Settings > Accessibility > Vision > Display & Text Size > Color Filters. Here, you can pick from a short list of filters, between Grayscale, Red/Green Filter, Green/Red Filter, Blue/Yellow Filter, and Color Tint.
You can also adjust the filter’s intensity by dragging your finger across the scroll bar to customize the effect according to your needs.
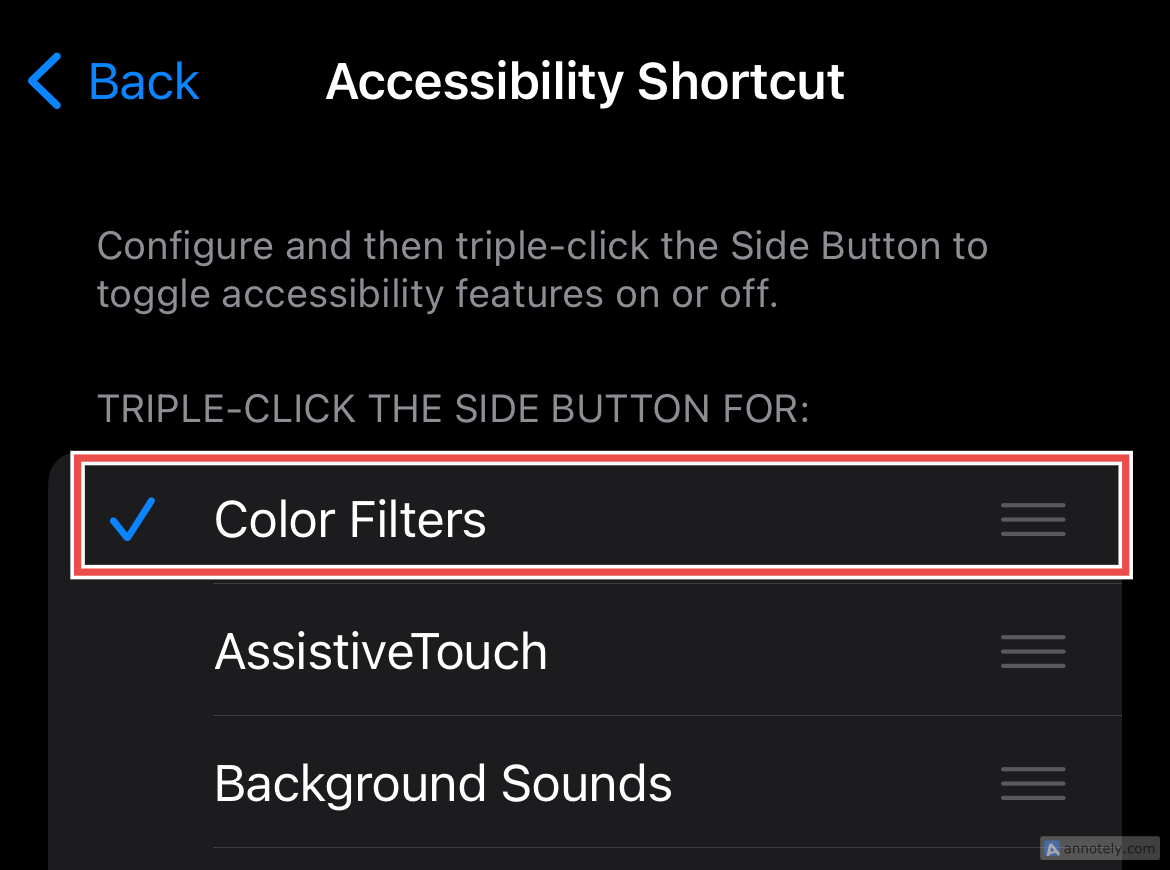
One more thing I like to do is set up an accessibility shortcut to activate my preferred color filter so that I can turn it on when I want with a simple action. Go to Settings > Accessibility > Accessibility Shortcut. Click on “Color Filters.”
Now, once you have turned on your preferred color filter, you only need to triple-click your phone’s side button to toggle it on. Triple-click the button again to revert your iPhone’s display to its default colors.
Now that you know how to navigate Color Filters, here are my favorite iPhone Color Filters, and why you might want to try them.
Grayscale
When I need to reduce my iPhone screen time and prevent myself from falling into a doomscrolling trap, enabling the Grayscale filter is the most foolproof way to shift my attention to other (more important) things.
This filter essentially takes away much of the visual stimulus that your iPhone’s display colors provide. I find that this mutes the experience of looking through images and videos that are visually appealing, like a YouTube video or the contents of the TikTok For You page. I find that turning on Grayscale makes me put my phone down in about 10 or 15 minutes because a display without colors doesn’t hold your attention in quite the same way.
An alternative accessibility feature that you can try is Classic Invert, which reverses the colors of your display. To turn this on, go to Settings > Accessibility > Display & Text Size > Classic Invert.
Smart Invert, which you can find under Display & Text Size, is a similar option that reverses display colors except for images, media, and a few apps that use dark color styles. This prevents media from looking too strange while inverting everything else.
Color Tint
The Color Tint filter can serve a different yet important purpose. I find that turning this on past 7 p.m. makes the display easier on the eyes at night since I can tint the display colors with a reddish hue that has the same effect as Night Shift. It can be a bit more saturated and way warmer than the Night Shift’s display, so if that is something that you are not a big fan of, I would recommend just sticking with the latter.
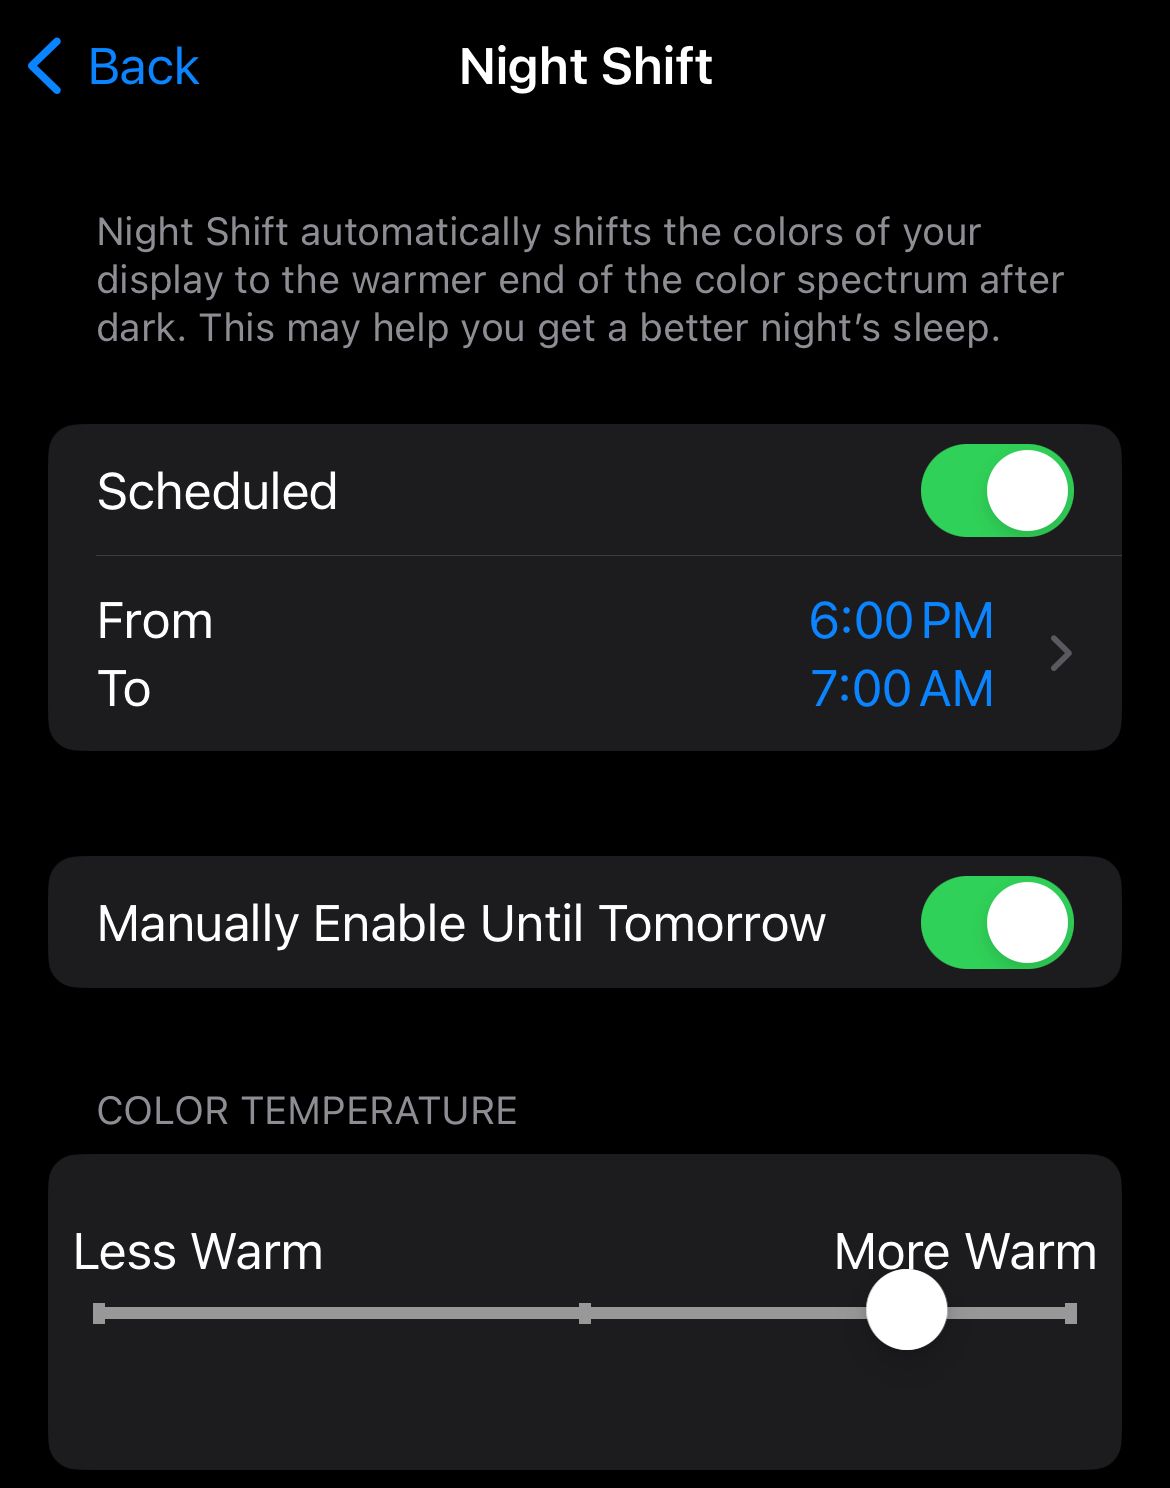
If you want to turn on Night Shift, go to Settings > Display & Brightness > Night Shift. Here, you can set a schedule that triggers it on and off and control the color temperature to make it less or more warm.
Blue/Yellow Filter
The final filter on my favorites list is the Blue/Yellow Filter, which makes your display a lot more vibrant than the default settings. It really makes the blue shades on your phone pop, which I liked when I was watching high-quality videos or scrolling through apps like Instagram or Pinterest.
One thing to be wary of with this filter is that shades of purple are muted, which I did not have a problem with, but if you do not like the look of how your display looks with certain colors muted, this might not be the filter that you are looking to try.
Using Shortcuts to Automate Color Filters
An easy way to turn Color Filters on and off is through the Shortcuts app. By doing this, the filter that you have chosen can be activated automatically at a particular time. To do this, you need to create an automation.
Open Shortcuts and click the “Automation” button on the bottom of your screen. Now, press the plus “+” button in the top right corner.
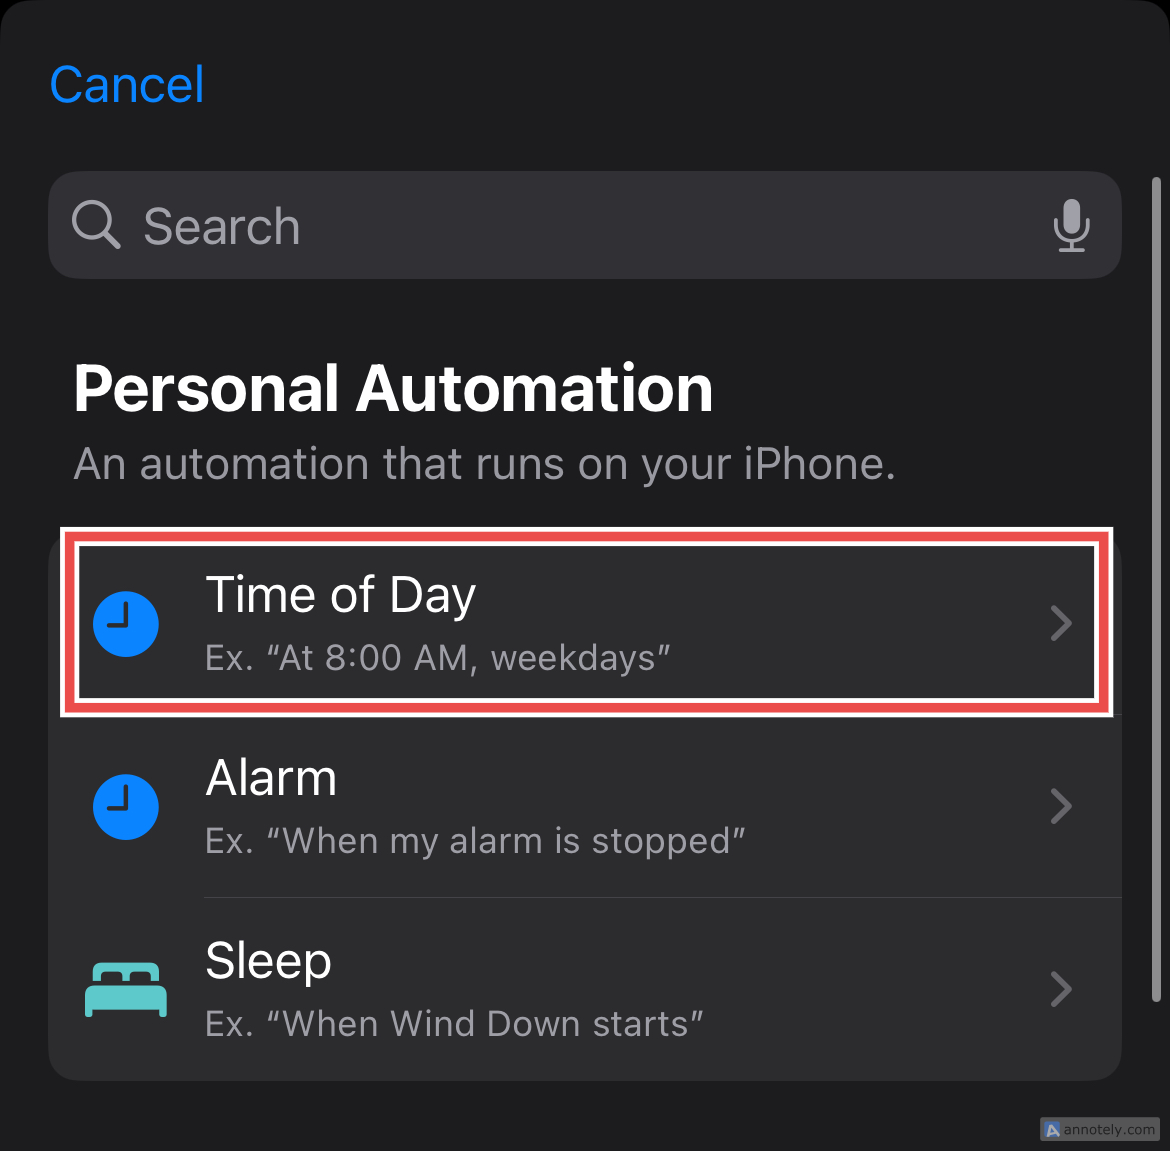
Under “Personal Automation,” select “Time of Day.”
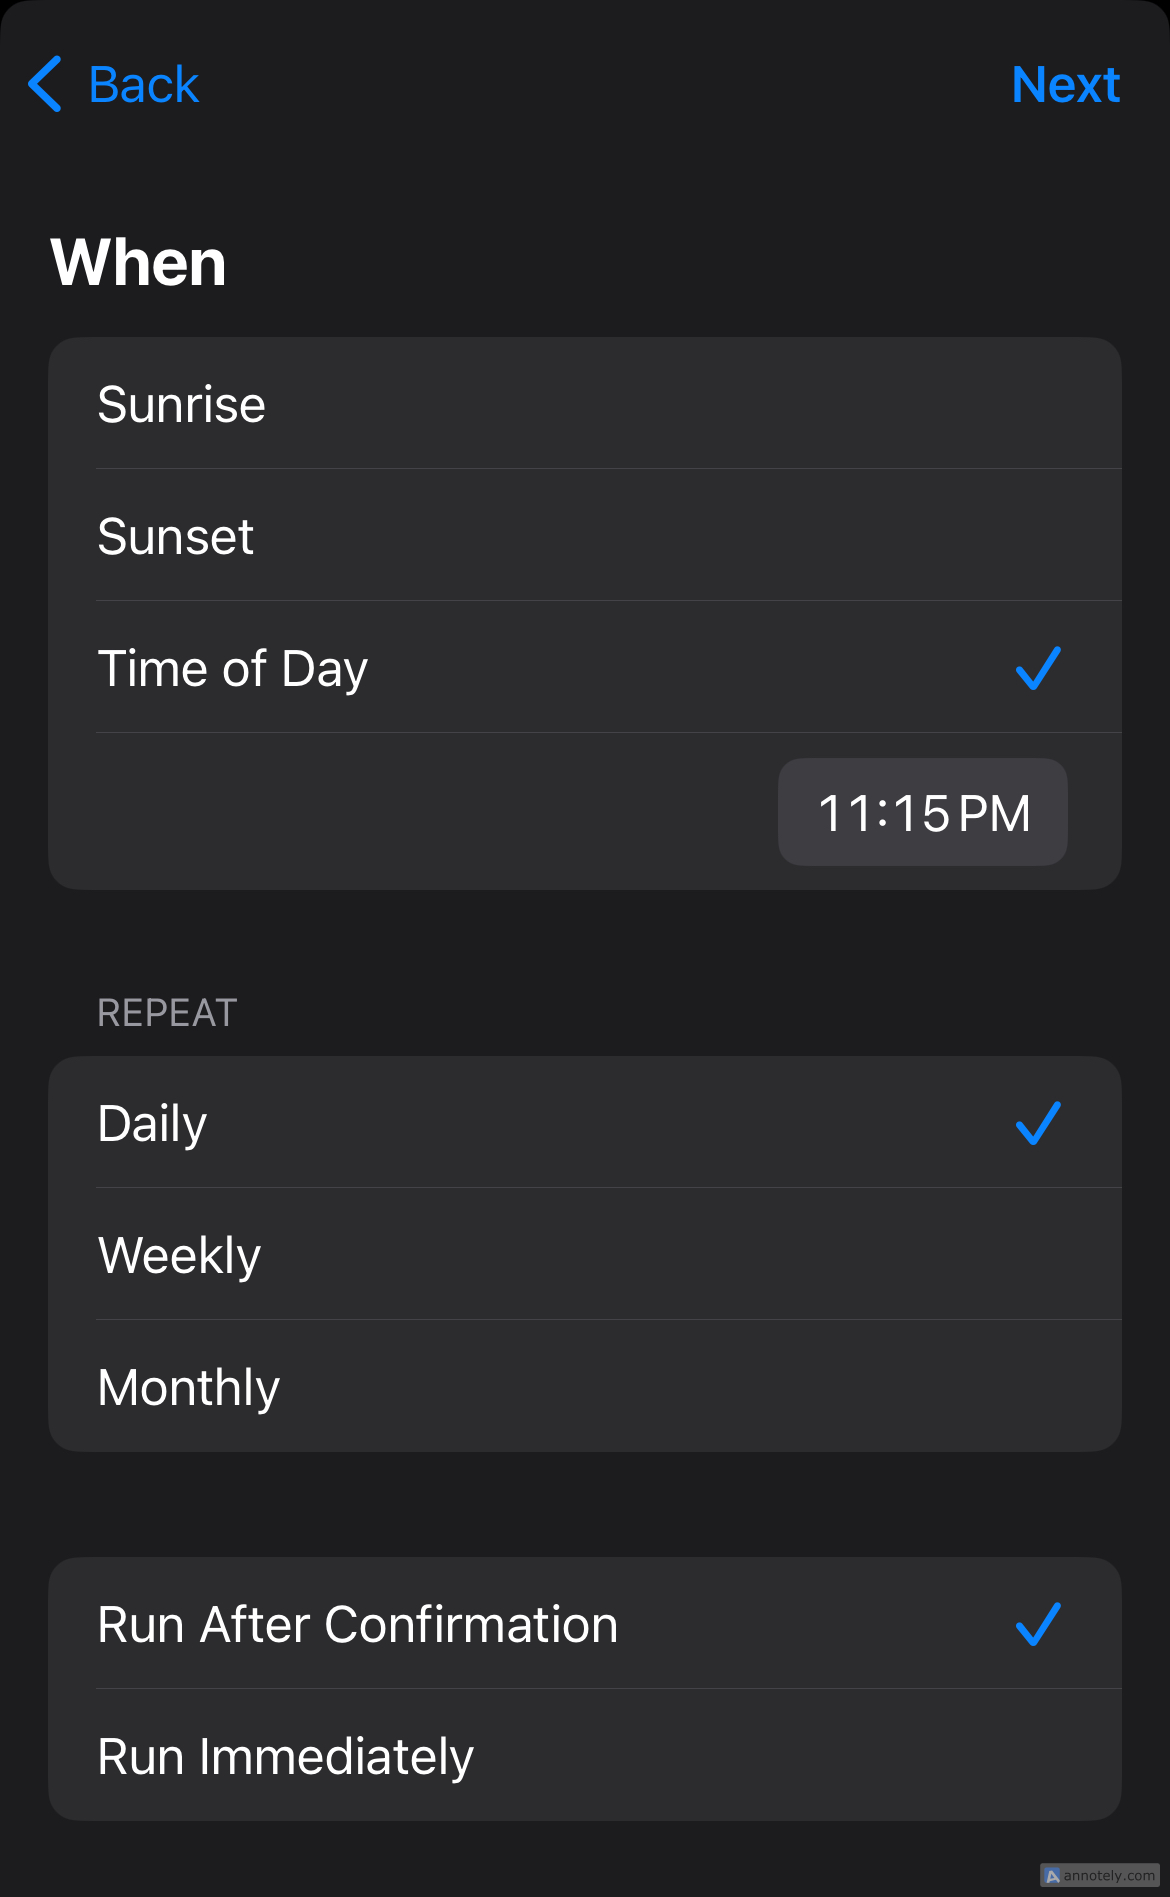
Set the time when you want the filter you have selected from Settings to turn on (Sunset or Sunrise, or the time of day you set up according to your liking). You can also choose how often you want this action to occur (daily, weekly, or monthly). Press “Next.”
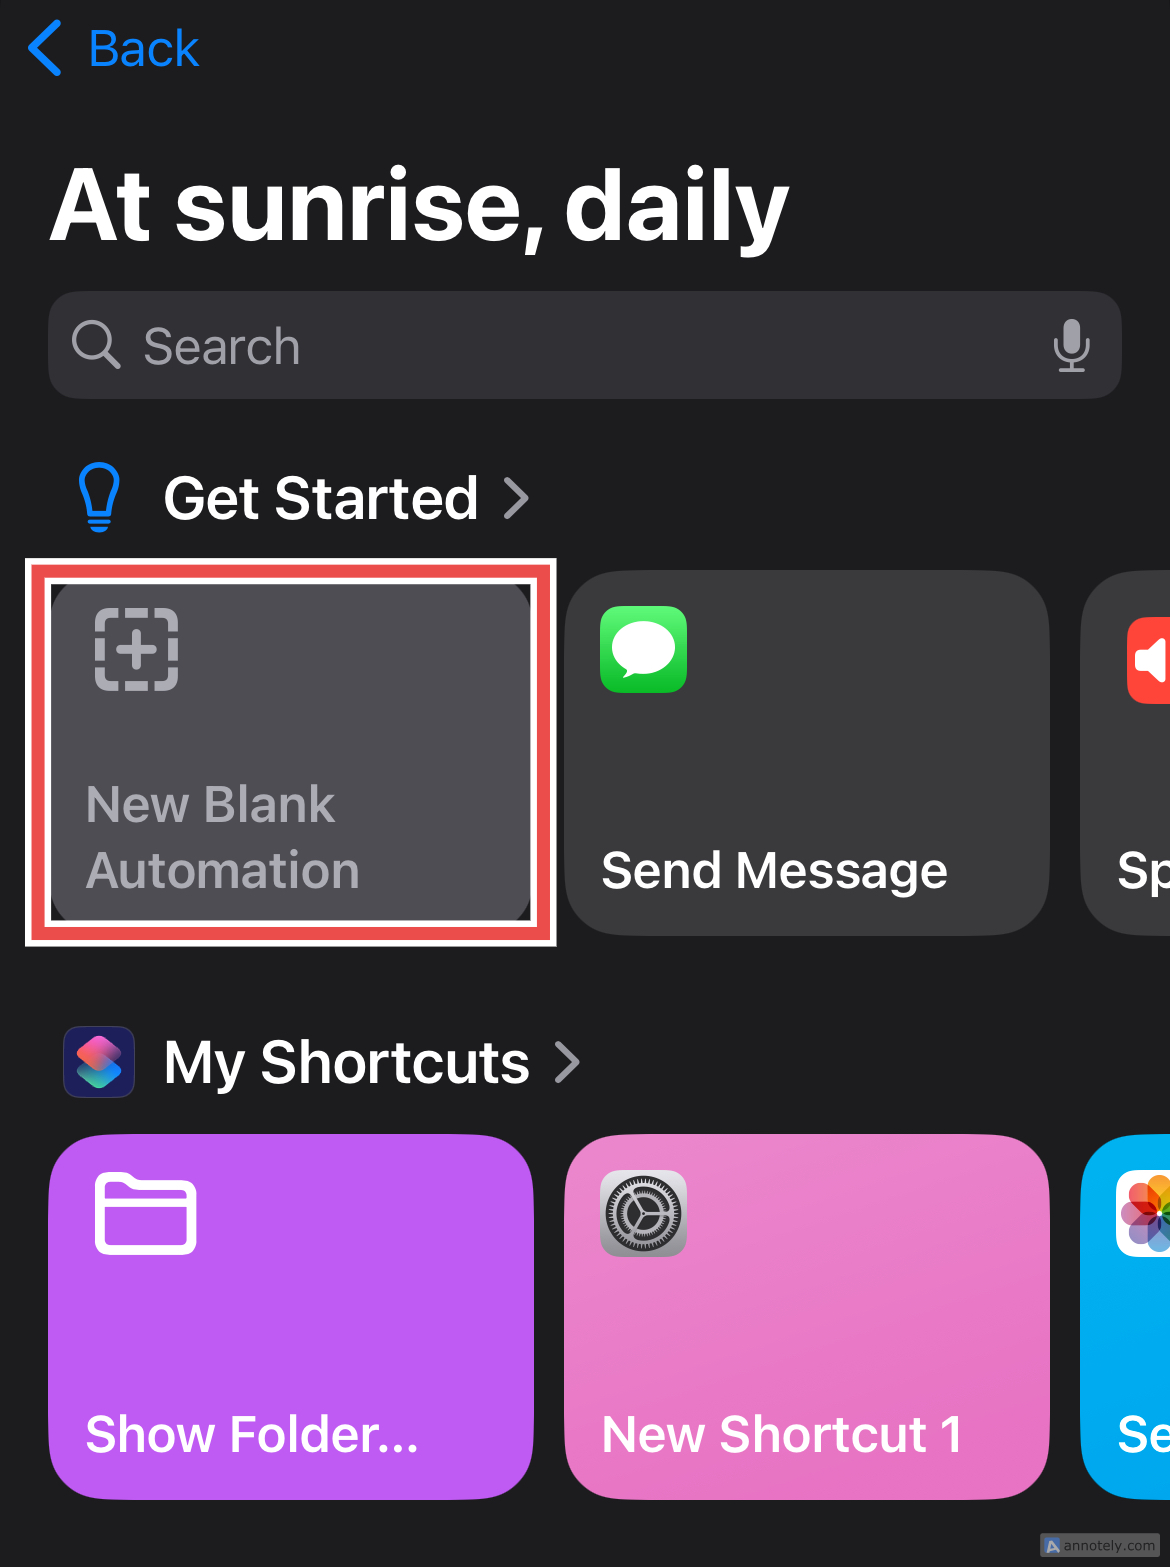
Now, select “New Blank Automation.”
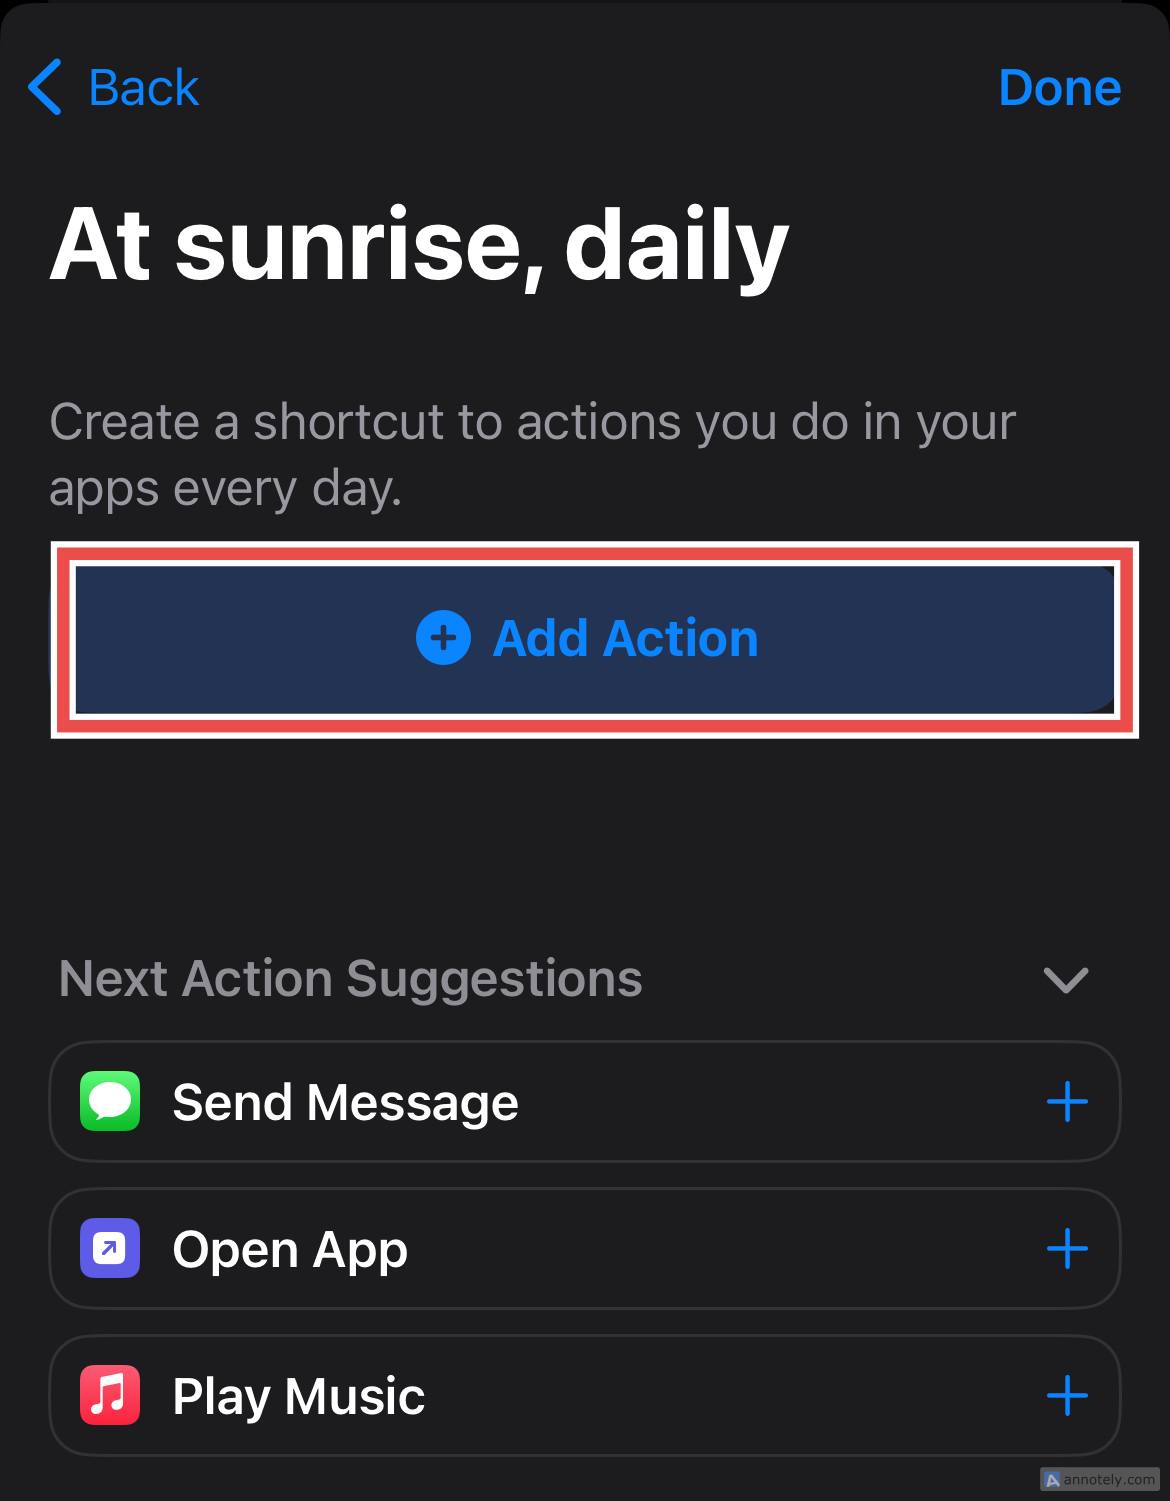
Then, click on “Add Action.”
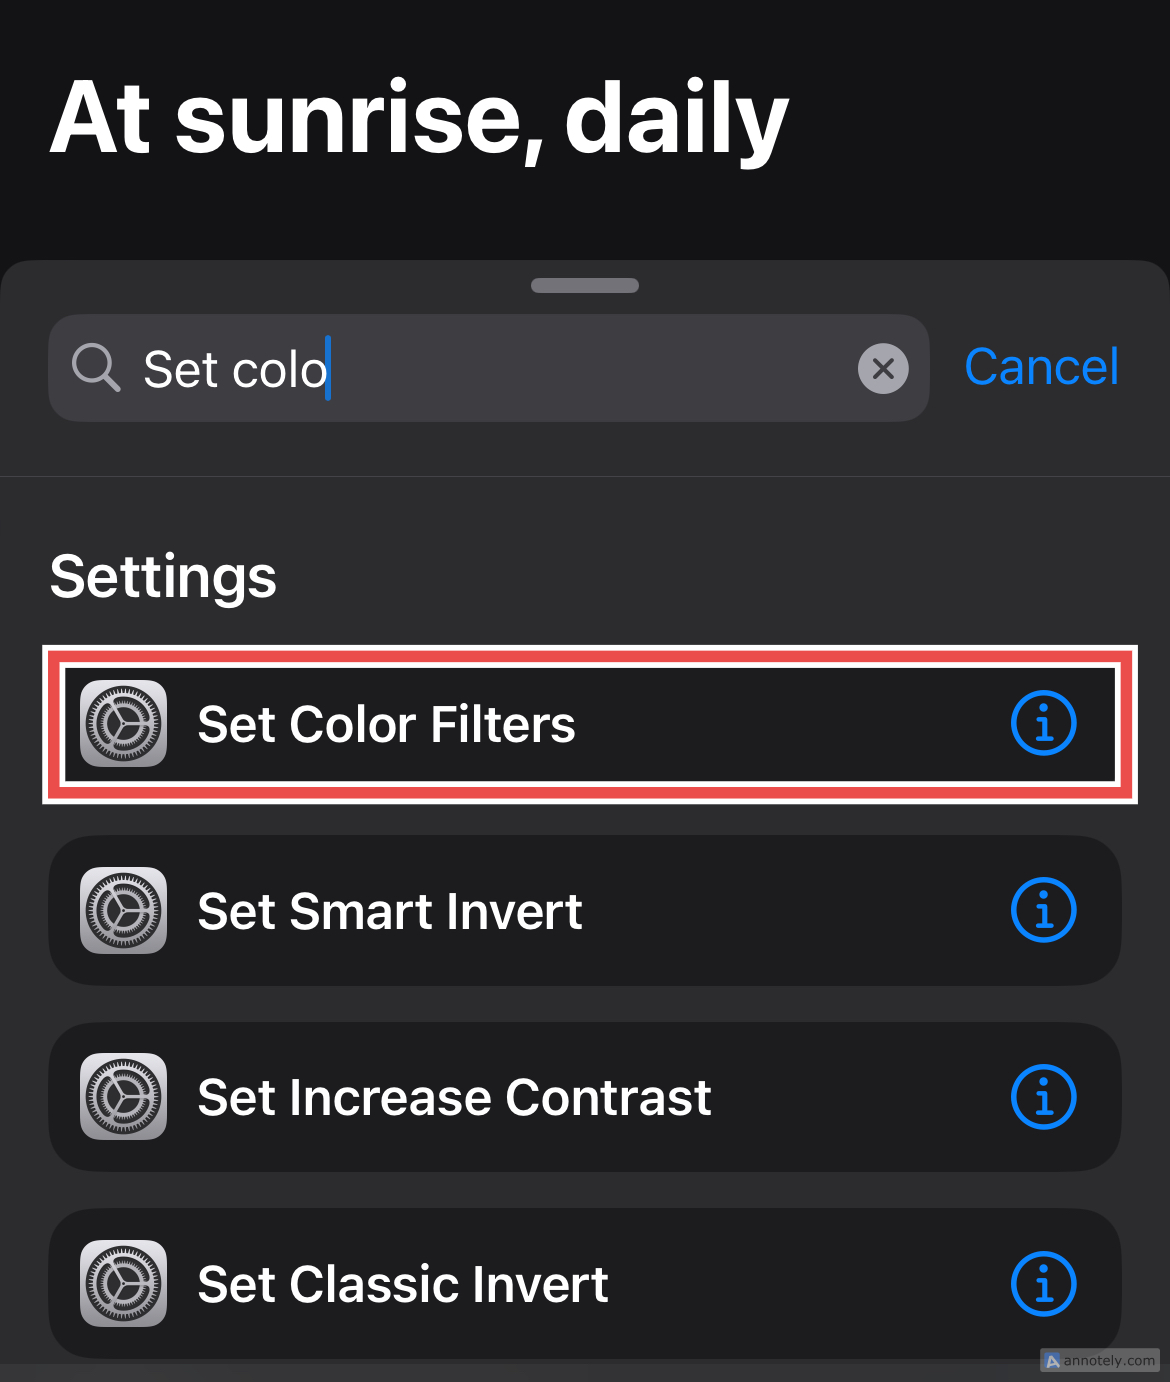
Search for the “Set Color Filters” action and click on it.
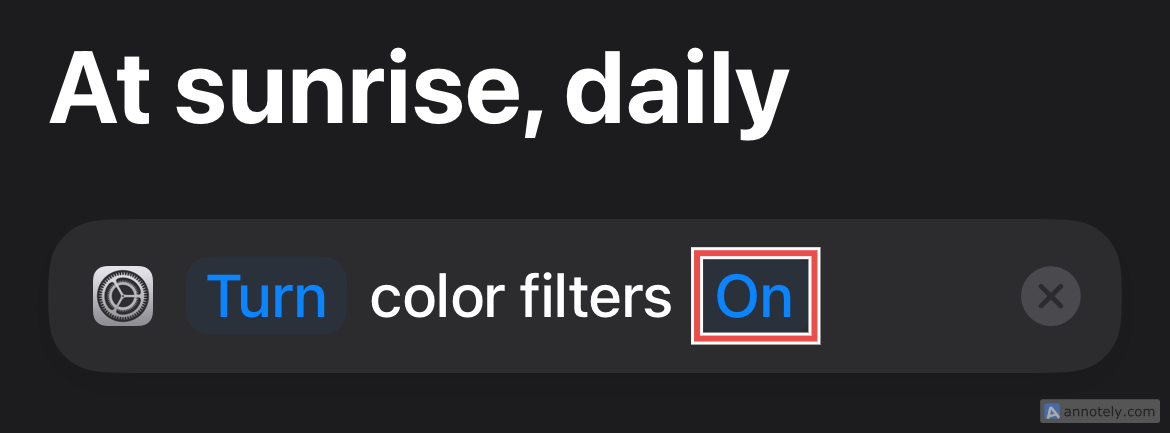
Make sure that the automation says “Turn color filters On.” Click “Done.”
The first part of your automation is completed. You also need to set up a shortcut to turn off Color Filters at your preferred time. To do this, follow the same process you did when setting up the automation for turning on Color Filters, but choose a different option under “Time of Day” of your preference.
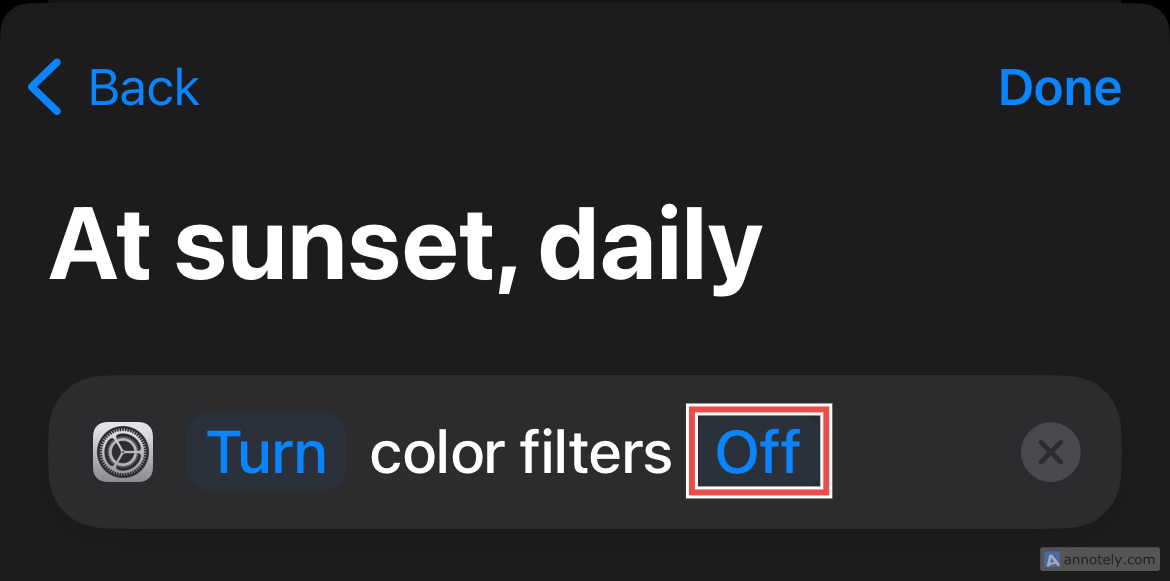
Proceed with adding the rest of the automation. In the final step, make sure you change the automation to say “Turn color filters Off.” The automation is now complete.
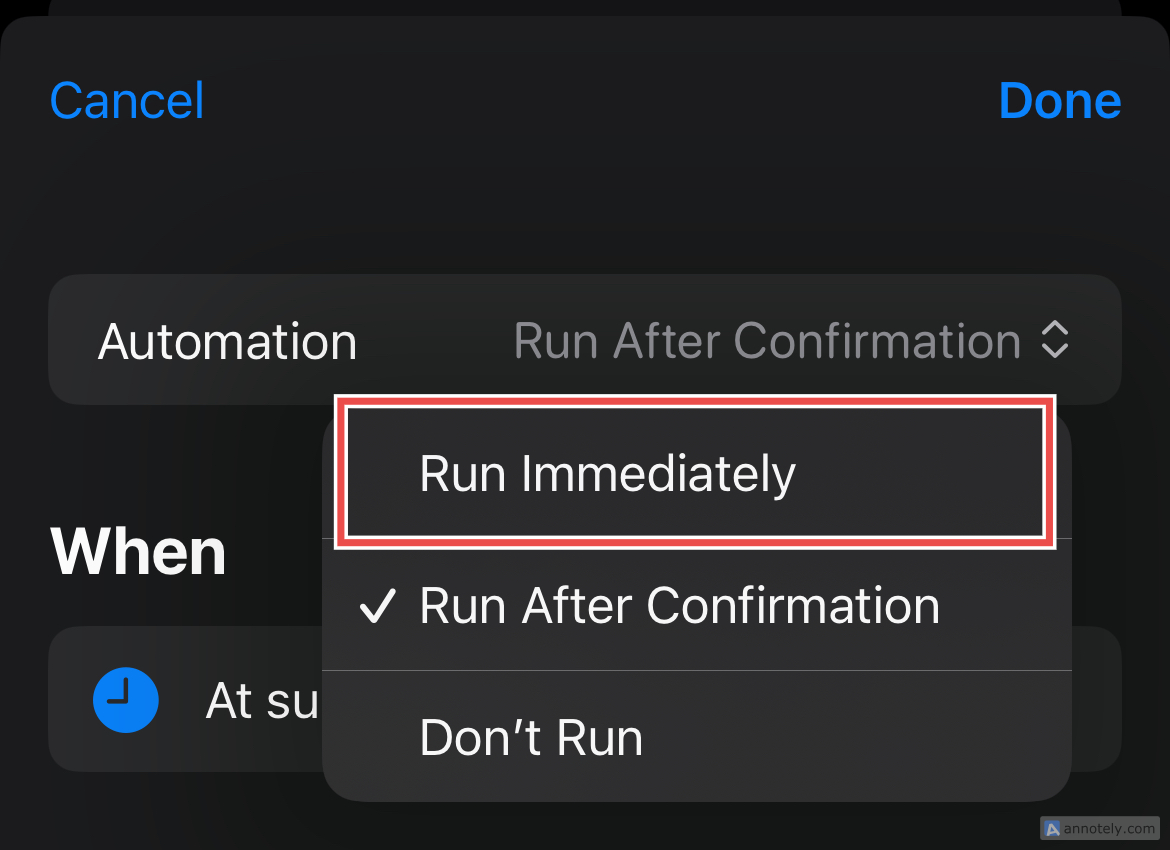
For both automations, make sure that the automation has “Run Immediately” turned on, instead of “Run After Confirmation” to avoid being asked every time this automation is set to be triggered. You can also turn on notifications that let you know when the shortcut has been run.
Your Color Filters shortcut has successfully been set up! Remember, you can always customize the time when you want the filter to activate.
You can also try out the Red/Green and Green/Red filters and see if the display is something you like. With these filters, adjusting the intensity means that the possibilities are endless; customizing your iPhone’s display has never been this easy.
Source link


