I went ‘all-in’ on Logitech’s MX Master Series for my new desk setup — and this accessory was the real game changer
There’s something oh so satisfying about having the right tools for the job. With them, everything just seems to fall into place in such a way that you can do your best work almost from muscle memory. But what if you’re behind a screen all day working at a desk? Then the right keyboard, mouse and a few extra accessories can make all the difference.
As someone who both writes and tests new gadgets for a living, I always have one of the best mechanical keyboards underneath my fingers. Then to the right, I use a trackball mouse as doing so helps me avoid unnecessary wrist strain but that wasn’t always the case. I used to use a standard mouse before upgrading to what many call the gold standard for productivity: Logitech’s MX Master wireless mouse. However, it was my old MX Master 2S that inspired me to try out the company’s MX Ergo trackball which led to me ditching traditional mice for good.
At CES earlier this year though, I had a chance to try out the new MX Master 4. The perfect evolution of what makes this mouse the gold standard, what impressed me even more was having a chance to finally go hands-on with the rest of Logitech’s MX Master Series devices. From the highly tactile MX Creative Console to the high-end MX Brio webcam, I loved how all of these devices worked together seamlessly, could be connected using a lone USB dongle and how you could customize them right from within a single app.
A quick hands-on behind closed doors just wasn’t enough though. When Logitech offered to send over a collection of MX Master Series peripherals for me to test out at home, I jumped at the offer. Of course, for accessories this specialized, I knew I’d have to put together a brand new desk setup to do them justice. So that’s exactly what I did.
Here’s what it’s been like going all-in on Logitech’s MX Master Series for the past week along with which of the professional tools surprised me the most and earned a permanent spot on my desk.
About to be professional
Although there are now more than a dozen different accessories — from keyboards to mice to webcams and more — in Logitech’s MX Master Series collection, I hand picked these four based on my workflow.
After placing my hand on the new MX Master 4, it felt just like riding a bike after a years-long hiatus.
Although I’ve been using the new MX Ergo S trackball mouse for the past year or so, I decided to ditch my thumb-operated trackball to go back to where my productivity-focused peripheral journey started. It has been a while since I had my MX Master 2S but after placing my hand on the new MX Master 4, it felt just like riding a bike after a years-long hiatus. With its new Haptic Sense Panel there was a slight learning curve, albeit a fun and very customizable one.
Everything in this desk setup

I’ve used Logitech webcams for years now but the last time I tried out a new one was over four years ago when I picked up the Logitech C925-e back when I first started at Tom’s Guide. I still really like that webcam’s wider lens but I do have one big pet peeve with it: the non-detachable cable. Lucky for me, the MX Brio has a USB-C port at the back and you can use whatever cable you want, that is as long as it’s rated USB 3.0 or higher which is necessary for high resolution and high frame rate video.
Then for the Logitech gadget I’ve always wanted to try since I first laid eyes on it: the MX Creative Console. While the Elgato Stream Deck did initially popularize this category, I was excited to see Logitech’s take on it. Unlike the Stream Deck though, the MX Creative Console takes things to the next level with a companion wireless dialpad. Although I’ve yet to scratch the surface of its true capabilities yet, it’s as fun to play with as it is beautiful to look at on your desk.
With my new Logitech MX Master Series peripherals unboxed, it was time to do what I do best: build a new desk setup around them. For that, I took an existing idea, ran with it and added one of the best mini PCs as well as one of my overall favorites so far to power as well as tie everything together.
Going all in (on screens and peripherals)

The best desk setups are constantly evolving and mine certainly have over time. While I thought an ultrawide monitor would give me more than enough screen real estate to work with, boy was I wrong. To keep up with work chats on a separate screen, I first added a portable monitor underneath my ultrawide which served me well for a few years in fact.
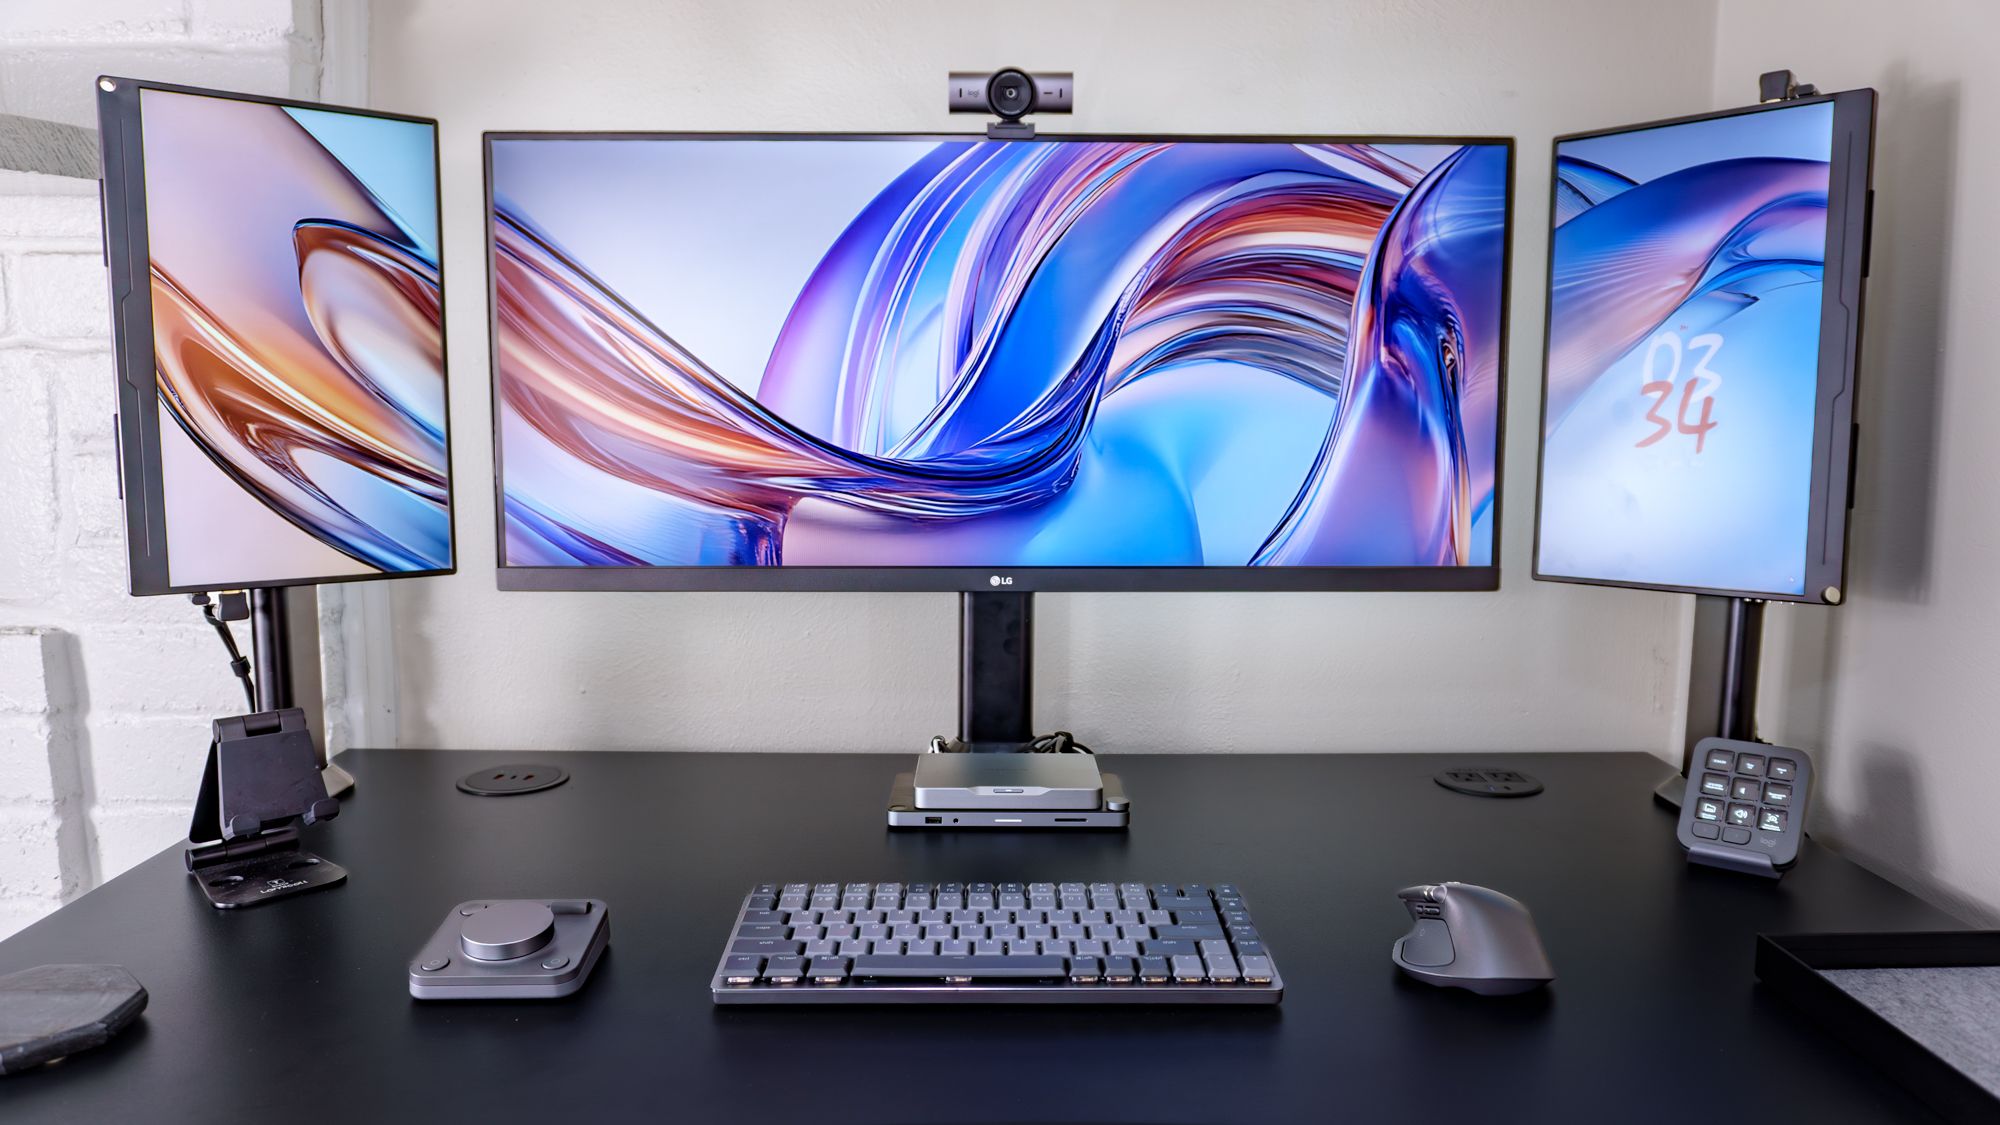
One evening though, I had the realization that when turned sideways, a small 15.6-inch portable monitor was the exact height of my ultrawide’s display. I had to try this out for myself, so I added a portable monitor next to my main display. It didn’t take up that much space at all on the left side of my desk which made me realize I had room for one more on the right side.
Now if my desk was a bit thinner, I could have gotten the bezels of my two portable monitors and my ultrawide to line up perfectly like back when I tried out a triple monitor setup. Instead, there’s a small one inch gap between them but honestly, it bothers me a whole lot less than I initially thought I would. With my displays mounted and all of my cables managed, it was time to add the PC that would tie everything together.

The Khadas Mind is one of my favorite mini PCs yet and for good reason. It’s incredibly small and looks more like an external SSD than a computer, plus there’s a whole ecosystem of accessories for it which use the proprietary Mind Link expansion port on the bottom of the device. Here, I have it connected to the Mind Dock which in addition to a fingerprint scanner on the left and a volume knob on the right, adds a bunch of extra ports around back including two HDMI ports. With the HDMI port on the back of the device and these two extra ones, it’s able to drive this less than conventional triple-monitor setup.
Instead of the original Khadas Mind though, I’m using the significantly more powerful Khadas Mind 2S. With an Intel Core Ultra 7 255H processor, 64GB of RAM and a 2TB SSD under the hood, it’s handled everything my workflow can throw at it and the Mind 2S hasn’t let me down yet.

On the top of my ultrawide, I set up the Logitech MX Brio for video calls. It’s a huge upgrade over the Osbot Meet 2 webcam I was using before thanks to its slightly larger (though still quite small) footprint. What really surprised me when I first tried it out was how well it performed in low light. Even though it was late in the evening with no actual lights on, I still showed up clearly on the camera and everything was in focus.
As for the rest of my Logitech MX Master Series peripherals, I put the MX Mechanical Keys Mini right at the center of my desk with the MX Master 4 next to it. On the left side of my keyboard, I have the MX Creative Dialpad for quick access to both a smaller dial for vertical scrolling and a larger one for horizontal scrolling. Then on the right edge of my desk, I have the MX Creative Keypad with a few key shortcuts programmed to it that I can launch with the press of a button.
With my new productivity-focused, Logitech MX Master Series-inspired triple monitor setup all put together, it was finally time to take it for a spin.
Dialed in without distractions
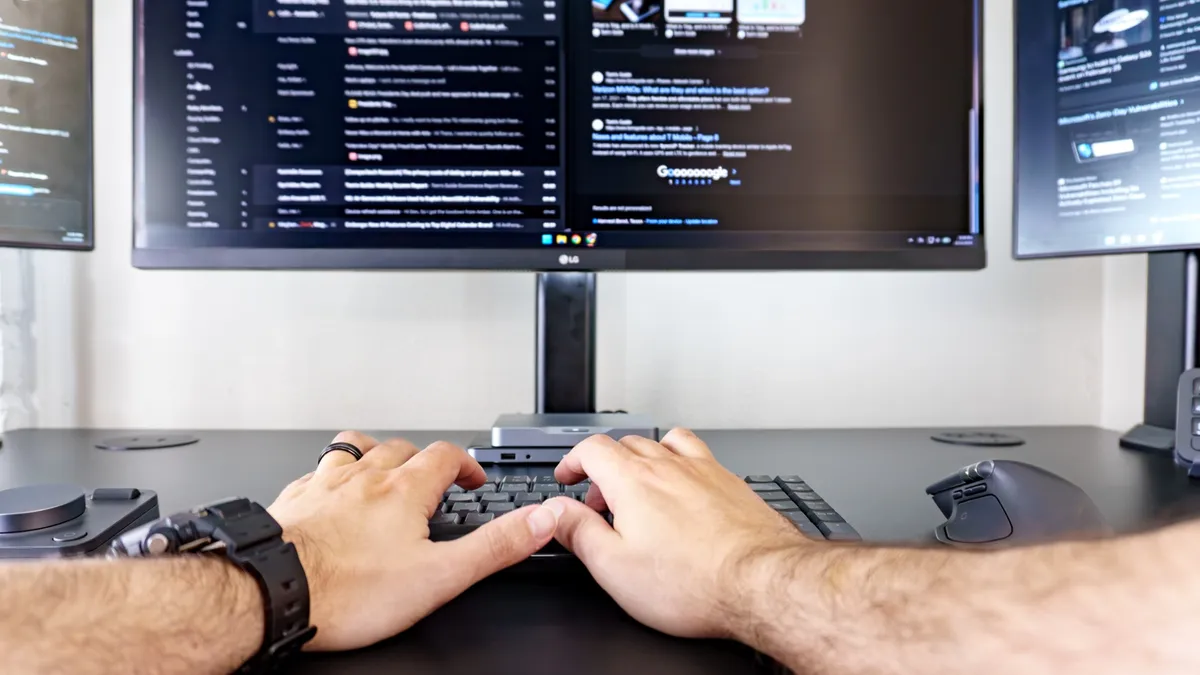
Having one screen off to the side for notes and keeping up with chats was great but having two immediately made a world of difference. I could work with two side by side windows on my main display and have a full-sized window open on the others. Since I angled both of those portable monitors towards me, it almost feels like I’m sitting in a cockpit with my new Logitech MX Master Series peripherals acting as the instruments.
Having one screen off to the side for notes and keeping up with chats was great but having two immediately made a world of difference.
The MX Mechanical Keys Mini is a joy to type on while being quiet enough that I won’t bother anyone else in my house during my late-night writing sessions. Since this is a low-profile keyboard, there’s less travel distance when pressing down the keys and as such, they almost feel like they’re springing back into place, eagerly awaiting my next keystroke.
I also really like the handy shortcuts Logitech has worked into its function row to let me quickly take a screenshot, mute or unmute the microphone on the MX Brio and more. One thing I still want to try with this keyboard though is its multi-device connectivity. With a tap on F1, F2 or F3, you can quickly switch between multiple computers without the need for a separate KVM switch. In fact, once I eventually break this setup down, I’m thinking of putting together a dual Windows/Mac one with my Mac mini M4 and the MX Mechanical Keys Mini might just be the perfect keyboard for it.
As for the MX Master 4, what else can I really say? It’s a fantastic mouse for productivity and I really like the new Haptic Sense Panel. With a quick press, I can open up Logitech’s Actions Ring which has eight programmable shortcuts. However, when you hover over some of them, you’re taken to another submenu on the outer edge of the ring with even more options.
I still need to dive into the Action Ring further but for now, I’m using the rest of customizable buttons on the MX Master 4 for my favorite keyboard shortcuts and to quickly do things like press Enter without having to take my hand off the mouse.

The MX Creative Keypad and the MX Creative Dialpad were the two accessories from Logitech’s MX Master Series that I’ve wanted to test out from the moment I laid eyes on them. At first, I thought I’d constantly be pushing buttons on the keypad to launch apps and perform other shortcuts but surprisingly, that hasn’t been the case.
You see, when I first set it up, there were a lot of static actions like the time and date preprogrammed to its keys. Instead of changing them, I leaned into their info at a glance functionality and added a few more. As you can see above, I have the time along with the day and week of the year set to the keys on the top row. Then under that, I have the date, the current moon phase and a stopwatch. Then on the bottom row, I have Windows Explorer and Windows Screenshot just a press away with my current system volume in the middle.
Honestly, I thought I’d be pressing all of these keys a lot more often but as someone that used to have a smart display underneath my main monitor, I really like being able to turn my head to the side of my desk and see how far along in the year we currently are. This helps put things in perspective while I love having a stopwatch handy to help keep track of how long it takes me to do certain tasks throughout the day.

For the past few years now, I’ve had a trackpad on the left side of my keyboard even though I mainly use a mouse. This lets me quickly scroll horizontally or vertically without having to take my other hand off my keyboard. The MX Creative Dial has since replaced that trackpad as it lets me use it the exact same way. Out of the box, its larger wheel at the center is set to control your computer’s volume. However, since the Mind Dock already has a knob for that, I’m using the larger one on the MX Creative Dial for horizontally scrolling while I use the smaller roller on the top for vertical scrolling.
Like I mentioned before, I’ve just scratched the surface of what’s possible with the MX Master Series devices Logitech sent over. I currently have the set up for general use across all of the different apps I use everyday. However, there are also app-specific customization options for Adobe and Apple’s creative apps with more integrations for other ones being added at a steady pace.
For now though, I like knowing that regardless of what app or site I have open, all of these extra buttons and dials will do exactly the same thing.
Form meets function
As you would expect from high-end, productivity-focused peripherals, the Logitech MX Master Series ones on my new desk setup look fantastic even when my computer finally gets turned off. Although they are available in pale gray too, the graphite colorway I went with blends in quite well with the black top I currently have on the Uplift V3 standing desk. The same can be said for the Space Gray-like color of the Khadas Mind 2S and the Mind Dock underneath it at the center of my setup.
In addition to looking great though, Logitech’s MX Master Series devices have helped take my productivity to a whole new level thanks to their customization. Instead of a few extra clicks or keyboard presses here and there, I have all of my favorite and most used keyboard shortcuts and actions mapped to their various customizable buttons.
In fact, I almost have too many choices when it comes to accomplishing the same thing. For instance, while I could reach over and press the screenshot button on the MX Creative Keypad, I can also just move my finger up a few rows on the MX Mechanical Keys Mini to take a screenshot instead. Still, it’s great to have options and even if you only add one device from the MX Master Series to your own desk setup, you’ll have plenty.
Now would I recommend going all in on Logitech’s MX Master Series like I did? Well, it depends. If you have a particular keyboard or layout that you love, then you might be better off sticking with that and pairing it with an MX Master 4 mouse. On the other hand, if you want a suite of peripherals you can control and configure from a single app (with a single dongle no less), then you might just want to try going all in as you won’t find a peripheral ecosystem focused on productivity that’s this cohesive anywhere else.
Whether you’re a video editor constantly scrubbing through your timeline or a programmer going through lines and lines of code or even a writer like me, the customization possibilities are almost endless with a full suite of MX Master Series devices. I can’t wait to see what Logitech adds to the lineup next but for now, I’m off to customize the Action Ring on my MX Master 4.

Follow Digitpatrox on Google News and add us as a preferred source to get our up-to-date news, analysis, and reviews in your feeds.
More from Digitpatrox
Source link