What is Relight in Microsoft Photos, and how to use it? AI image editing feature for Windows 11 explained.
- Relight in the Photos app uses AI-powered lighting controls to correct poorly lit portraits by adding and positioning up to three customizable light sources, adjusting color, brightness, focus, and intensity on the fly.
- The feature offers quick-access presets like Golden Hour for warm, natural light or Cyberpunk for dramatic neon tones, and you can effortlessly apply creative lighting effects without advanced editing software.
On Windows 11, the Photos app now includes the “Relight” feature, which allows you to control the lighting effects within an image to enhance underexposed portraits, adding creative effects like Cyberpunk, Golden Hour, etc. In this guide, I’ll explain how this feature works and how to use it.
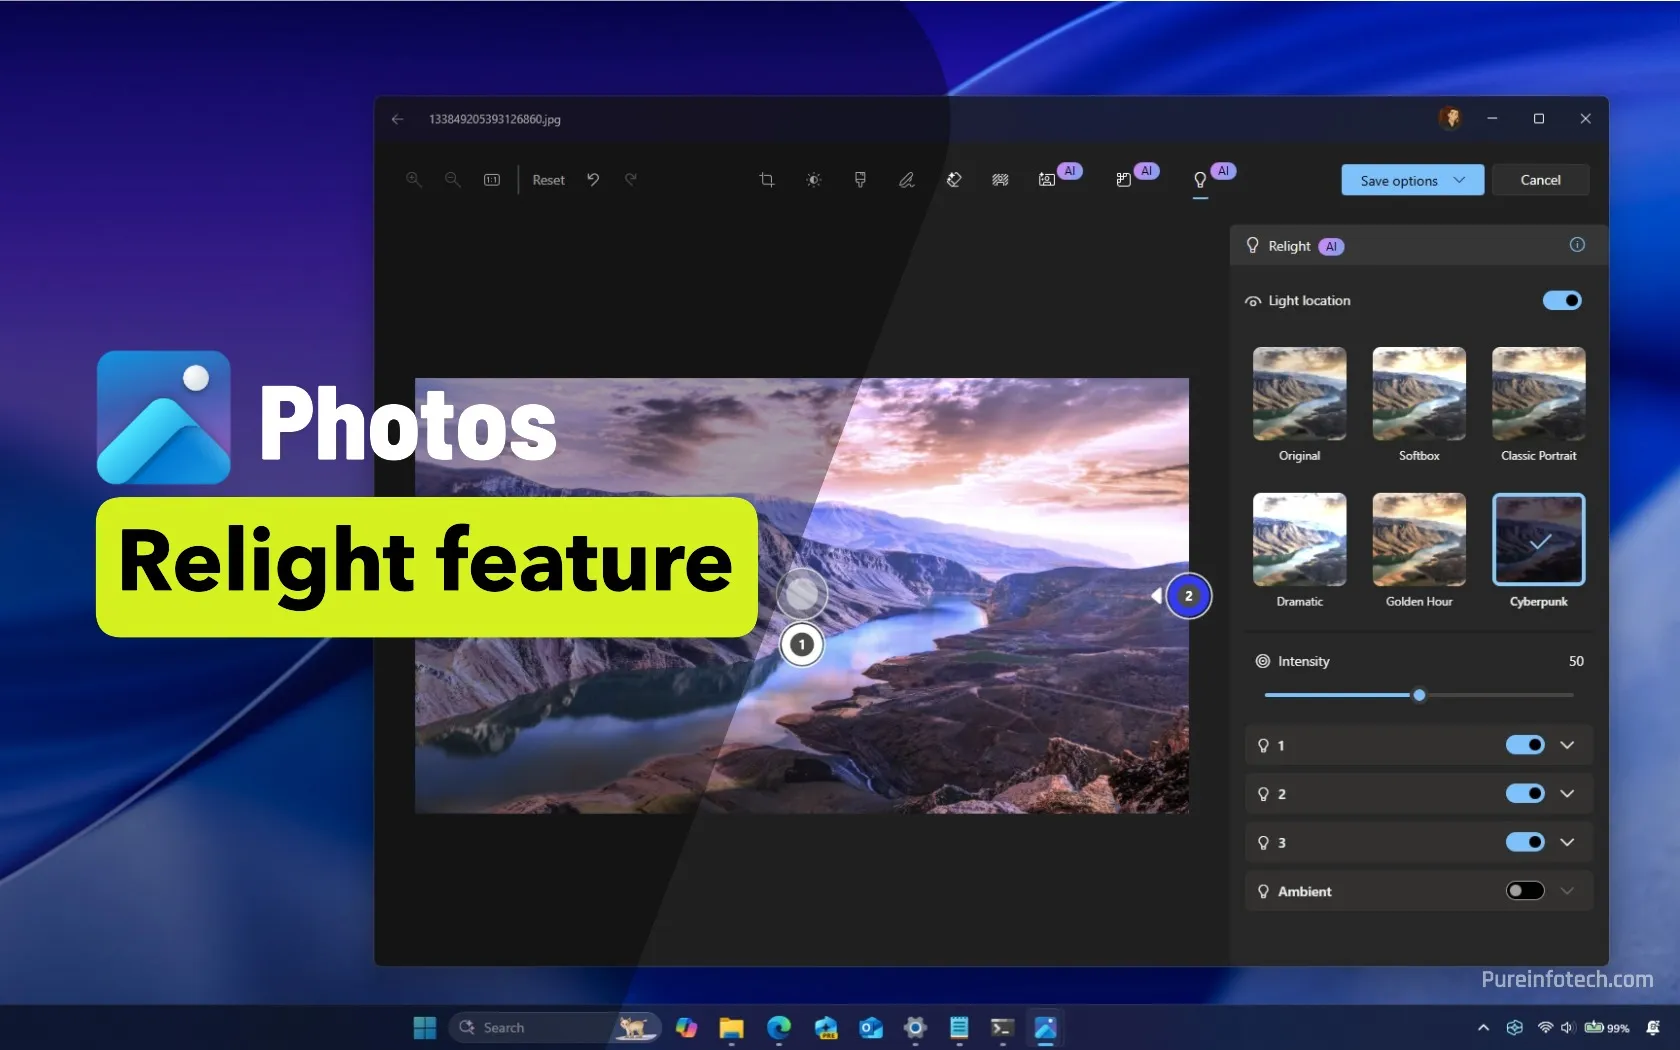
In the Photos app, Relight is a feature that uses the AI capabilities of your Copilot+ PC to allow you to add up to three light sources and automatically change the light color and focus point of the lights. This feature also provides brightness and intensity controls for additional image tuning.
Usually, this process involves special software and a combination of these steps to achieve the desired effect. However, the Relight feature has been designed to simplify the process with six presets and easy-to-use controls to change lighting styles with one or only a few clicks.
In this guide, I’ll explain the steps to get started with this AI-powered photo editing tool on Windows 11.
Change image lighting in the Photos app for Windows 11
To change the lighting sources on a picture, follow these steps:
-
Open the Photos app.
-
Select the image and click the Edit button.
Quick tip: You can also right-click and image in File Explorer and choose the “Edit with Photos” option from the “Photos” submenu.
-
Click the Relight button from the toolbar.
-
Turn on the Light location toggle switch (if applicable).
-
(Option 1) Choose one of the available lighting presets, including Softbox, Classic Portrait, Dramatic, Golden Hour, and Cyberpunk.
-
(Option 2) Turn on the light source number one.

-
Change the brightness, softness, and color of the light source.
-
Turn on the light source number two.
-
Change the brightness, softness, and color of the light source.
-
Turn on the light source number three.
-
Change the brightness, softness, and color of the light source.
-
Turn on the Ambient toggle switch to control the brightness and color of the ambient lighting.

-
Adjust the lighting intensity with the “Intensity” option.
-
Click the Save options and choose the “Save as copy” option to save a copy of the file while keeping the original image unchanged.
Once you complete the steps, you will have an image with enhanced lighting adjustments based on your custom settings. This will make the subject stand out with better brightness, contrast, and color tones. Whether correcting poor lighting or adding creative effects, the Relight feature ensures your image has the perfect illumination for a more polished look.
Relight is available now for the Photos app on Copilot+ PCs with Snapdragon processors, but the company plans to roll out this feature for Copilot+ PCs featuring AMD and Intel processors in the future.
Also, currently, this feature is only available as a preview across all the channels of the Windows Insider Program.
If the feature isn’t available on your computer, confirm that you have a Snapdragon Copilot+ PC enrolled in the Release Preview, Beta, Dev, or Canary Channel, and check for updates with the Microsoft Store app.
In my setup, the feature appears with version 2025.11060.5006.0 and higher releases.
Additionally, Microsoft has improved photo search in the Photos app, enabling natural language search, so you can find images by describing them, like “sunset at the beach” or “family outdoor fun.”
This is not the only AI feature in Photos. The company has been proactively adding features powered by AI, including “Restyle,” to turn a picture into artwork, “Super Resolution” to enlarge and fix low-resolution pictures, and “Erase” to remove objects from the images.
Source link