Windows 11 installation has failed? Fix explained – Ultimate guide
When upgrading or installing Windows 11, you can encounter many errors and problems. Some are known issues expected due to custom configurations or software or hardware compatibility problems. In contrast, others could be caused by known or unknown issues with a newer version of the operating system, such as bugs and other problems with features, drivers, apps, and hardware.
Although errors can occur when upgrading Windows 11 to a newer release, the chances of an installation failing increase when upgrading from an older version (such as Windows 10, 8.1, or 7) because you would be dealing with older hardware that may have limited or no support. Also, choosing the in-place upgrade over a clean installation exposes the device to even more problems.
If your computer is having issues during the installation process of Windows 11, there are many troubleshooting recommendations you can try to resolve them.
In this guide, I’ll outline different troubleshooting tips to fix the most common installation problems on Windows 11.
Resolve failed installation of Windows 11
A Windows 11 installation error can be frustrating. It can happen at any time to anyone, regardless of their technical level. To address it, follow these comprehensive troubleshooting steps, depending on the error.
1. Fix device driver errors
Device driver errors during Windows 11 installation, whether from another version of Windows 11 or older versions like 10, 8.1, or 7, can originate from several issues.
1.1 Error 0xC1900101
When you’re in front of a driver issue, you’re likely to come across one of the “0xC1900101” error codes, including the 0xC1900101 – 0x2000c, and the other variants ending on – 0x30018, – 0x3000D, – 0x4000D, – 0x40017, 0x20017, or 0x30017.
If this is the case, you can use multiple troubleshooting steps, including making sure that the hard drive has at least 20GB of available storage to process the upgrade.
1.1.1 Free up drive space
One effective method is to free up space in the current Windows 11 setup. If this is a Windows 10 setup, you can use these instructions.
To free up storage space on Windows 11 by deleting temporary files, use these steps:
-
Open Settings.
-
Click on System.
-
Click the Storage page on the right side.
-
Click the Temporary files setting under the “Local Disk” section.
-
Select the temporary files to remove from Windows 11.
-
Click the Remove files button.

Once you complete the steps, the temporary and necessary files will be removed from your computer, freeing up space to resolve storage-related installation problems.
1.1.2 Install system updates
Also, the system could be missing software and hardware updates. As a result, the recommendation is to check for updates manually to ensure the system and drivers are up-to-date.
To update Windows 11 manually, use these steps:
-
Open Settings.
-
Click on Windows Update.
-
(Optional) Check the “Get the latest updates as soon as they’re available” toggle switch to download updates before they roll out automatically to everyone.
-
Click the Check for updates button.

-
Click the “Download and install” option to apply a preview of an upcoming Windows 11 update (if applicable).
-
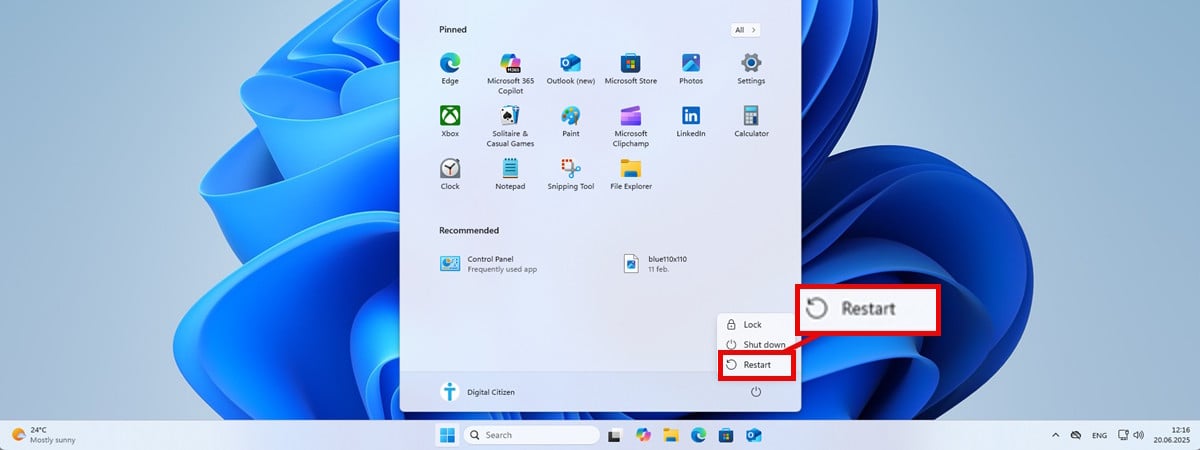
Click the Restart now button.
After you complete the steps, the computer will download and install any missing system and driver updates that may help you proceed with the upgrade process.
If the computer is still on Windows 10, you can use these steps to update the system manually.
1.1.3 Install driver updates
If a particular driver isn’t available through the “Windows Update” settings, you must download and install it manually. If you don’t know which device has issues, check “Device Manager” and confirm that any components have a yellow mark.
Before proceeding, you must download the driver package from the computer or hardware manufacturer and then follow these steps:
-
Open Start.
-
Search for Device Manager and click the top result to open the app.
-
Right-click the device missing the driver and select the Update driver option.
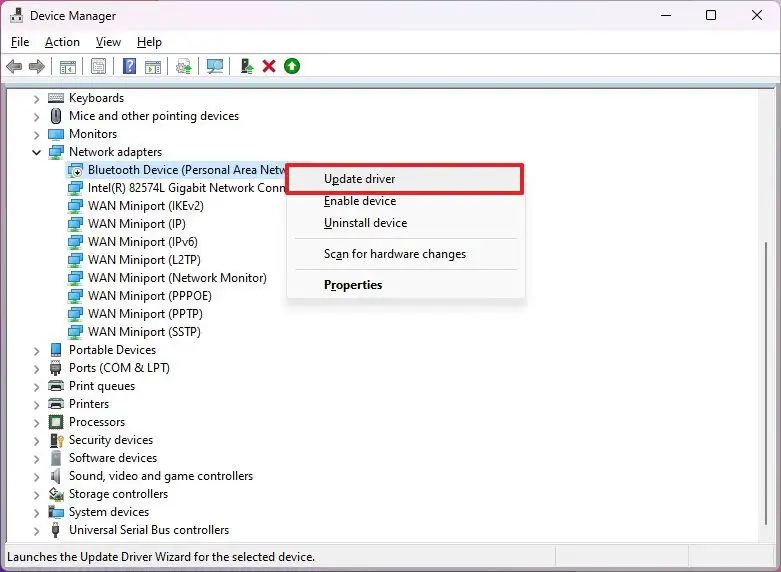
Quick note: The device in question may appear with a yellow mark and be labeled as unknown.
-
Click the “Browse my computer for drivers” option.

-
Click the Browse button and select the folder containing the files for the missing driver.

-
Click the OK button.
-
Check the Include subfolders option.
-
Click the Next button.
-
Continue with the on-screen directions (if applicable).
Once you complete the steps, the device driver update will be applied to the computer. Although it may not be required, I recommend restarting the device before trying the Windows Setup again.
You can also follow this comprehensive guide to learn more details on how to install missing drivers on Windows 11.
1.1.4 Uninstall conflicting security apps
Third-party security software, such as an antivirus (other than Microsoft Defender Antivirus), can cause problems during installation. If you have a third-party antivirus or another type of security software, uninstall it and try to upgrade again.
To uninstall a conflicting app on Windows 11, use these steps:
-
Open Settings.
-
Click on Apps.
-
Click the Installed apps tab.
-
Select the app to remove.
-
Click the app menu (three dots) button and choose the “Uninstall” button.

-
Click the Uninstall button again to confirm.
-
Continue with the on-screen directions (if applicable).
After you complete the steps, the problematic application will be uninstalled, allowing you to proceed with the installation of Windows 11.
1.1.5 DISM and SFC fixes
If the computer shows one of the 0xC1900101 error codes, the system could also have missing or corrupted files. You may resolve this problem using the DISM and SFC command-line tools.
The Deployment Image Servicing and Management (DISM) is used to repair the files from the local image containing system files, and the System File Checker (SFC) tool is used to repair the setup using the local image you repaired with the DISM tool.
These instructions work on Windows 11 as well as Windows 10.
To fix Windows 11 installation issues with the DISM and SFC command tools, use these steps:
-
Open Start.
-
Search for Command Prompt, right-click the top result, and select the Run as administrator option.
-
Type the following command and press Enter:
dism /Online /Cleanup-image /Restorehealth

-
Type the following command to repair the installation and press Enter:
SFC /scannow

-
(Optional) Type the following command and press Enter:
chkdsk/f c:

-
Type “Y” and press Enter to schedule a scan.
-
Restart the computer.
Once you complete the steps, the DISM command will repair the files inside the system’s local image, and the SFC command will use the local image to repair the files of the Windows 11 (or 10) setup. The logs will be located in the C:\Windows\Logs\CBS folder inside the “CBS.log.”
The ChkDsk command will resolve the logical and physical errors on the storage.
The “0xC1900101 0x20017” and “0xC1900101 0x30017” errors will usually describe a driver problem. In this case, it’s recommended that third-party antivirus software and any security programs be temporarily removed. Also, disconnect any peripherals connected to the computer. You only need the monitor, keyboard, and mouse.
1.2 Error 0x800F0923
If the device shows the “0x800F0923” error code during the installation of Windows 11, it could also indicate a compatibility problem with a driver or application.
In this case, the option is to uninstall the driver or application before proceeding with the upgrade. You may be able to reinstall them again after the installation.
1.2.1 Uninstall incompatible app
To uninstall an incompatible application, use these steps:
-
Open Settings.
-
Click on Apps.
-
Click the Installed apps tab.
-
Select the app to remove.
-
Click the app menu (three dots) button and choose the “Uninstall” button.
-
Click the Uninstall button again to confirm.
-
Continue with the on-screen directions (if applicable).
After you complete the steps, the app causing the 0x800F0923 error will be removed from your computer.
1.2.2 Uninstall incompatible driver
To uninstall an incompatible driver from Device Manager, use these steps:
-
Open Start.
-
Search for Device Manager and click the top result to open the app.
-
Expand the category with the device driver to remove.
-
Right-click the device and select the Uninstall device option.

-
(Optional) Check the “Delete the driver software for this device” option (if applicable).
Quick note: If you don’t check this option, the system will uninstall the device, but it’ll keep the driver files if you need to reinstall it. However, removing and downloading it again is best if the driver has problems.
-
Click the Uninstall button.
Once you complete the steps, the incompatible driver will be uninstalled from the system.
You can also remove a driver causing problems through the Settings app and Control Panel.
2. Fix feature update download issues
If you’re trying to upgrade the system using the “Windows Update” settings, the device may output a few error messages, including the “0xc1900223,” “0x80073712,” or “0x800F0922.” You may also receive two messages, including “Error: We couldn’t complete the updates. Undoing changes. Don’t turn off your computer” and “Error: Failure configuring Windows Updates. Reverting changes.”
2.1 Fix 0xc1900223
The “0xc1900223” error code always indicates a problem downloading and installing a specific update. This code applies to feature updates and quality updates that the system receives from the Windows Updates settings.
This error code doesn’t have specific instructions. You can wait and try again later.
2.2 Fix 0x80073712
Similar to the “0xC1900101” error, the code “0x80073712” indicates missing or damaged system files, but in this case, the problem is with the files required by Windows Update.
You can resolve this issue using the DISM and SFC command-line tools by following these steps:
-
Open Start.
-
Search for Command Prompt, right-click the top result, and select the Run as administrator option.
-
Type the following command and press Enter:
dism /Online /Cleanup-image /Restorehealth
-
Type the following command to repair the installation and press Enter:
SFC /scannow
-
(Optional) Type the following command and press Enter:
chkdsk/f c:
-
Type “Y” and press Enter to schedule a scan.
-
Restart the computer.
After you complete the steps, the DISM command will repair the local image files, and the SFC command will use the local image to fix the corruption or missing files of the Windows 11 (or 10) setup.
2.3 Fix 0x800F0922
The “0x800F0922” error means the computer can’t connect to the Microsoft servers to download the update package using the “Windows Update” settings.
Usually, this problem happens when trying to update the system when the device is connected to a Virtual Private Network (VPN).
You can resolve this issue by disconnecting from the VPN and trying to update it again.
On Windows 11 and 10, you can open the VPN settings and click the “Disconnect” option from the active connection.
2.4 Fix error messages
The “Error: We couldn’t complete the updates. Undoing changes. Don’t turn off your computer” and “Error: Failure configuring Windows Updates. Reverting changes” error messages only alert you to a problem during the update process. They don’t provide details about the actual issue.
In this case, you must check the Windows Update History settings to determine the error message. You can then use the error code to search online to find a solution. In recent times, Microsoft has been releasing updates that failed to install more frequently.
To confirm the error causing the problem, use these steps:
-
Open Settings.
-
Click on Windows Update.
-
Click the Update history page.

-
Click the Quality Updates setting.

-
Confirm the error for the update that failed to install. (It usually starts with “0x” followed by numbers and letters, for example, “0x800F0922”).
Once you know the problem, you may have to research the error online to find a solution.
3. Fix app compatibility problems
If you encounter the “0xC1900208 – 0x4000C” error, it is a common error rather than a bug. It indicates a compatibility problem with an application that is blocking the installation.
If your computer has an antivirus other than Microsoft Defender Antivirus or another security program, it’s recommended that you disable or temporarily uninstall the app to complete the Windows 11 installation without issues.
Older apps designed for previous versions of the operating system can also cause compatibility problems. Therefore, make sure to uninstall any software that causes issues during installation. You can always reinstall it after the upgrade.
To uninstall an incompatible application, follow these steps:
-
Open Settings.
-
Click on Apps.
-
Click the Installed apps tab.
-
Select the app or security software to remove.
-
Click the app menu (three dots) button and choose the “Uninstall” button.
-
Click the Uninstall button again to confirm.
-
Continue with the on-screen directions (if applicable).
After you complete the steps, you can proceed with the installation of Windows 11 one more time.
4. Fix storage problems
As part of the common errors that can occur during an installation of Windows 11, you may get error codes 0x80070070 – 0x50011, 0x50012, or 0x60000 using Windows Update, Media Creation Tool, or the Installation Assistant, which indicates that the device doesn’t have enough space to complete the upgrade successfully.
Windows 11 comes with “Reserved Storage,” a feature that pre-allocates part of the available space on the drive for updates to avoid problems. However, even with this feature, the computer may experience one of the 0x80070070 errors.
To resolve this issue, you can do three things:
5. Fix hardware compatibility issues
When installing Windows 11, you may encounter several errors, such as 0x80300024, 0x80070002, 0x20009, 0xC1900200 – 0x20008, and 0xC1900202 – 0x20008, which could indicate different hardware issues.
5.1 Fix 0x80300024
The error code 0x80300024 during installation usually means Windows cannot be installed in the selected location. This often indicates issues with the hard drive partition or disk configuration.
In this case, you can try different troubleshooting steps to fix the problem, including disconnecting the hard drives and leaving only the storage on which you intend to install Windows 11.
If you plan to upgrade from Windows 10 to 11, the computer may still use a combination of BIOS (legacy) and UEFI (modern) firmware types. If this is the case, you should access the motherboard’s firmware and change the settings to UEFI only, as Windows 11 only supports this type of firmware.
It’s important to note that if your previous installation was using the legacy firmware type, the partition would use the MBR partition type, which is not compatible with Windows 11. If this is the case, you will have to delete the partition and then let the installation create the appropriate partitions using the GPT type to support the newer operating system.

Alternatively, you can try entering the UEFI and changing the boot order, making the drive you intend to install Windows 11 the first boot drive in the system. However, this will require access to the boot menu to start from the USB bootable media.
5.1.2 Access BIOS from Windows 11
To access the BIOS on your computer from Windows 11, use these steps:
-
Open Settings.
-
Click on System.
-
Click the Recovery page.
-
Click the Restart now button for the “Advanced startup” setting.

-
Click the Restart now button again.
-
Click on Troubleshoot.
-
Click on Advanced options.
-
Click the UEFI Firmware settings option.

-
Click the Restart button.
After you complete the steps, you will have access to the motherboard’s firmware to proceed with the necessary troubleshooting steps.
5.1.3 Access BIOS from Windows 10
To enter the BIOS from Windows 10, use these steps:
-
Open Settings.
-
Click on Update & Security.
-
Click on Recovery.
-
Click the Restart now button under the “Advanced startup” section.

-
Click on Troubleshoot.
-
Click on Advanced options.
-
Click the “UEFI Firmware settings” option.

-
Click the Restart button.
Once you complete the steps, you will have access to the motherboard’s firmware to proceed with the necessary troubleshooting steps.
If the computer is still on the legacy version of the BIOS, you won’t have an option from within the Windows desktop. In this case, you will have to restart the computer, and during the process, you will have to press one of the function keys like F2, F11, etc, or the Delete or ESC key to access the firmware.
Since most systems are different, you may have to consult your manufacturer support website for more specific details and confirm whether the motherboard supports switching from BIOS to UEFI.
5.2 Fix 0xC1900200
The error code 0xC1900200 typically means that your computer doesn’t meet the minimum system requirements to download or install Windows 11. This error has two variants, including the error codes 0xC1900200 – 0x20008 and 0xC1900202 – 0x20008.
In addition, you may also notice the “Error this PC doesn’t currently meet Windows 11 system requirements” message, which indicates a compatibility problem.
To resolve this issue, you must ensure your device has capable hardware. Windows 11 has the following minimum system requirements:
- Processor: 1GHz or faster CPU or System on a Chip (SoC) with two or more cores and 64-bit architecture.
- Memory: 4GB (16GB recommended).
- Storage: 64GB (256GB SSD recommended)
- System firmware: UEFI with Secure Boot support.
- TPM: Trusted Platform Module (TPM) version 2.0.
- Graphics: Compatible with DirectX 12 or later with WDDM 2.0 driver.
- Display: High definition (720p) display larger than 9 inches diagonally, 8 bits per color channel.
If you’re using Windows 10, you can check the hardware specifications in Settings > System > About under the “Device Specifications” section. Otherwise, you can check your manufacturer’s support website to confirm the specifications.
5.2.1 Enable TPM and Secure Boot
If the computer supports TPM 2.0 and Secure Boot, you can enable these features in the UEFI firmware with these steps:
-
Open Settings.
-
Click on Update & Security.
-
Click on Recovery.
-
Click the Restart now button under the “Advanced startup” section.
-
Click on Troubleshoot.
-
Click on Advanced options.
-
Click the “UEFI Firmware settings” option.
-
Click the Restart button.
-
Open the security or boot settings and enable TPM and Secure Boot (as necessary).
If a motherboard lacks a dedicated Trusted Platform Module (TPM) chip, it may be integrated into the processor. On AMD processors, this feature is often labeled as “fTPM” or “AMD fTPM switch,” while on Intel processors, it’s known as “Platform Trust Technology” (PTT).
5.3 Fix setup problems
The error codes 0x8007042B 0x4000D and 0x800700B7 0x2000A encountered during Windows 11 installation or update indicate issues with another process running in the background.
You can troubleshoot and resolve the problem using Task Manager, uninstalling the app causing the issue, or perform a clean boot to determine the non-Microsoft process causing the problem.
5.3.1 Terminate process
To close a process with Task Manager, use these steps:
-
Open Start.
-
Search for Task Manager and click the top result to open the app.
-
Click on Processes.
-
Select the app.
-
Click the End task button.

- Repeat the steps (if applicable).
After you complete the steps, the conflicting process will be terminated, and you can continue with the installation process.
5.3.2 Windows 11 uninstall apps
To remove an app on Windows 11, use these steps:
-
Open Settings.
-
Click on Apps.
-
Click the Installed apps tab.
-
Select the app or security software to remove.
-
Click the app menu (three dots) button and choose the “Uninstall” button.
-
Click the Uninstall button again to confirm.
-
Continue with the on-screen directions (if applicable).
-
Repeat the steps (if applicable).
Once you complete the steps, the app will be uninstalled from Windows 11.
5.3.3 Windows 10 uninstall apps
To uninstall an app on Windows 10, use these steps:
-
Open Settings.
-
Click on Apps.
-
Click on Apps & features.
-
Select the app to remove under the “Apps & features” section.
-
Click the Uninstall button.

-
Click the Uninstall button again.
-
Continue with the on-screen directions (if applicable).
-
Repeat the steps (if applicable).
After you complete the steps, the application will be removed from Windows 10.
6. Check upgrade failure logs with SetupDiag
If you’re trying to upgrade to a newer version of the operating system, you can use the SetupDiag tool to determine the reason for the failure.
The SetupDiag is a diagnostic tool developed by Microsoft to help identify the root cause of failed upgrades.
When you run the tool, it examines the log files generated during the upgrade process for relevant information about the installation steps, encountered errors, and system configurations. Then, it compares the data with a built-in database of known issues.
The SetupDiag can pinpoint potential causes of upgrade failure, including hardware incompatibility, software conflicts, storage problems, and corrupted system files.
To use the SetupDiag tool to determine the root of the problem, use these steps:
-
Click the “Download the latest version of SetupDiag” button.

-
Select an empty folder to download the files, such as the “Downloads” folder.
-
Click the Save button.
-
Open Start.
-
Search for Command Prompt, right-click the top result, and select the Run as administrator option.
-
Type the following command to open the folder containing the tool and press Enter:
cd %USERPROFILE%\Downloads\SetupDiag
In the command, update the path according to your folder structure.
-
Type the following command to run the SetupDiag and press Enter:
SetupDiag.exe /Output:%USERPROFILE%\Downloads\SetupDiag\SetupDiagResults.log
In the command, update the path to the tool location.

-
Open File Explorer.
-
Open the folder with the tool files.
-
Right-click the SetupDiagResults.log file and select the Open option.
After you complete the steps, you will need to review the logs to determine the cause of the installation failure.
The first part of the file contains system information about your computer, including device name, manufacturer, firmware version, and more. Then, it lists the different errors and details.
If the failure was a known error in the local database, you will notice the error code with some details you can use with a search engine to troubleshoot and resolve the problem.
Were you able to resolve the installation problem? Do you have any other questions? Let me know in the comments.
Source link