
Bash (Bourne Again Shell) is a free and open-source shell and scripting language. Its journey started in the late 80s, and since then, the Bash has been adopted by routine Linux users and Linux SysAdmins.
Bash has automated the daily tasks of a Linux System Administrator. A Linux SysAdmin has to spend hours running scripts and commands. Not only the SysAdmins, but the simplicity and easy-to-learn capability of Bash have automated the tasks of a normal Linux user as well.
Inspired by this, we have today demonstrated the 10 most useful Bash scripts for Linux SysAdmins. These are chosen based on the general working of any Linux System Administrator (from a small scale to a larger scale).
10 Bash Scripts to Automate Daily Linux SysAdmin Tasks
A System Administrator can create as many scripts as required. We have automated some of the most common and most used tasks through Bash scripts. Let’s go through the prerequisites first and then the Scripts:
Prerequisite 1: Running a Bash Script | To be Done Before Running Each Script in This Post
Before we get into the scripts, let’s quickly go through the process to run a bash script.
Step 1: Make the Script Executable
A bash script is useless until it is made executable. Here, the scripts refer to the Linux sys admin, so we use the “u+x” with “sudo” to make the scripts executable for admin only:
sudo chmod u+x /path/to/script

Step 2: Execute the Script
Once the script is executable, it can now be run from the terminal using the command:
Click here to get more details on running a Bash script.
Prerequisite 2: Package Management Commands for Distros Other Than Debian/Ubuntu
To assist with Script 1, Script 2, and Script 3, we prepared a command cheat sheet for managing the packages on Linux distros other than Debian/Ubuntu and their derivatives. Here’s the table that lists the commands referring to each package manager of the Linux distro:
| Package Manager | Update/Upgrade | Install | Remove |
|---|---|---|---|
| pacman (Arch-based) | sudo pacman -Syu | sudo pacman -S | sudo pacman -R |
| zypper (SUSE-based) | sudo zypper update/sudo zypper upgrade | sudo pacman install | sudo zypper remove |
| dnf (Fedora/RHEL-based) | sudo dnf update/sudo dnf upgrade | sudo dnf install | sudo dnf remove |
| apt (Debian/Ubuntu-based) | sudo apt update/upgrade | sudo apt install | sudo apt remove |
Script 1: Update and Upgrade the System Repositories/Packages Index
“Update and upgrade” commands are the most used commands by any Linux SysAdmin or a routine user.
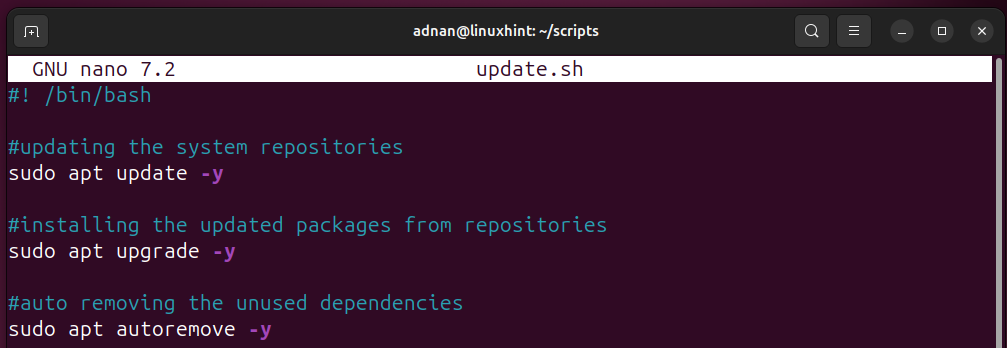
Here, the below script updates, upgrades, and autoremoves packages:
#updating the system repositories
sudo apt update -y
#installing the updated packages from repositories
sudo apt upgrade -y
#auto removing the unused dependencies
sudo apt autoremove -y
Note: Please refer to the table (Prerequisites 2) for Linux package management commands.

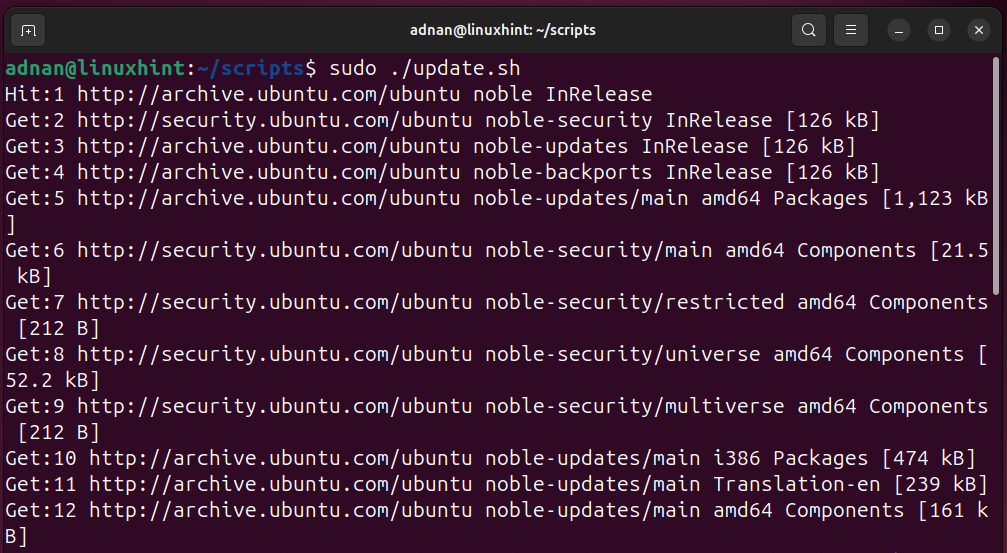
Let’s make it executable:


Permission Denied: Since the script belongs to the SysAdmin, we strictly kept the permissions to the sudo user only:


Here’s the update, upgrade, and autoremoval of packages:

Script 2: Install a Package on Linux
A Linux SysAdmin has to install and remove packages from the systems and keep an eye on this process. Each package installation requires a few commands to effectively install that package.
Note: Please refer to the table (Prerequisites 2) for Linux package management commands.
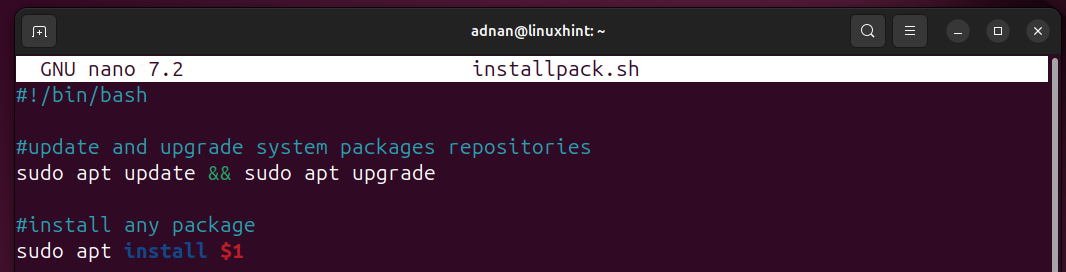
#update and upgrade system packages repositories
sudo apt update && sudo apt upgrade
#install any package
sudo apt install $1
Update and upgrade package repositories, followed by installing a specific package ($1, specify the package name while running the script):

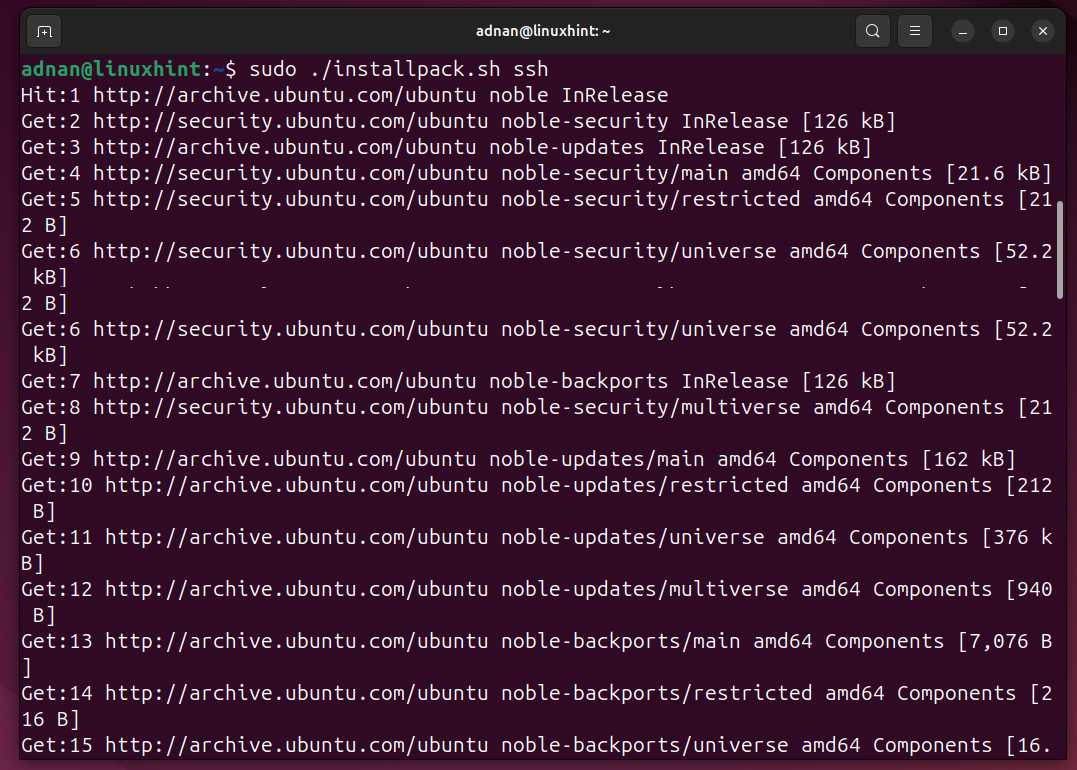
Here, we choose $1=ssh and run the script:

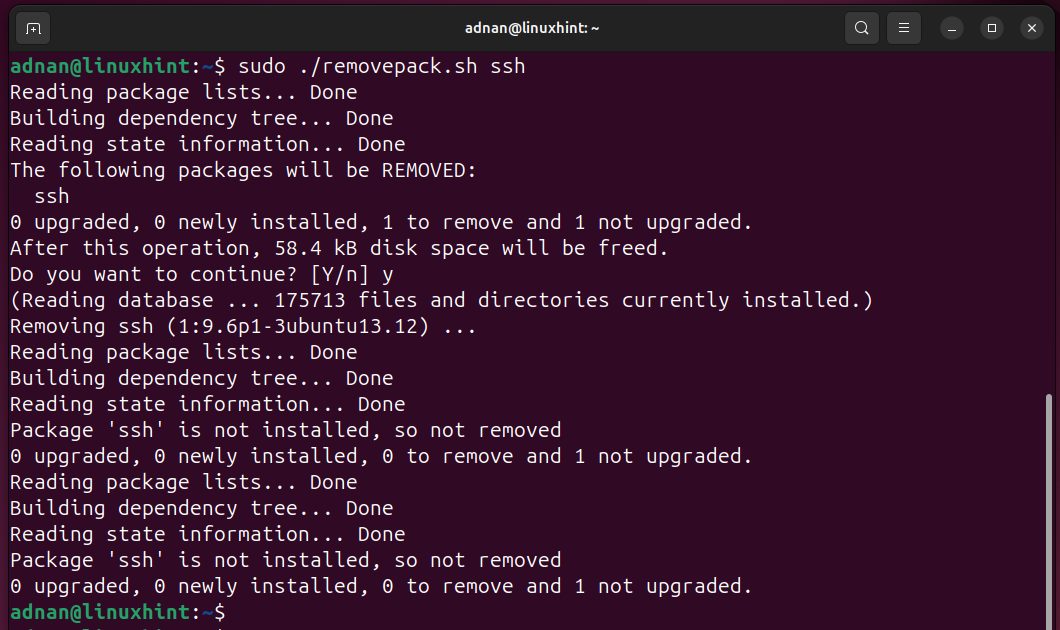
Script 3: Remove a Package
A complete removal of a package involves multiple commands. Let’s manage it through a single script:
Note: Go through the table (Prerequisites 2) for the commands of other Linux package managers:
#remove the package with only a few dependencies
sudo apt remove $1
#remove package and its data
sudo apt purge $1
#remove unused dependencies
sudo apt autoremove $1
Let’s execute it, i.e.,”$1=ssh”:

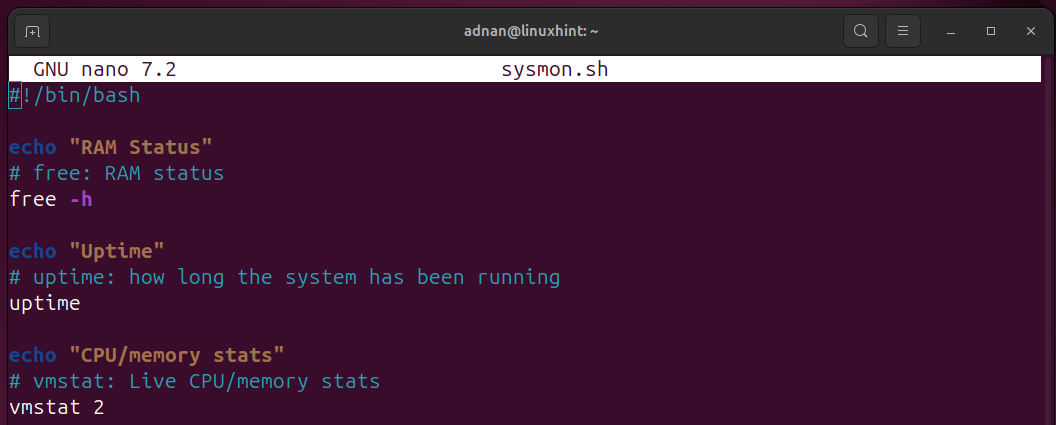
Script 4: Monitoring Systems Performance
A Linux sysadmin has to monitor and keep an eye on measurable components (CPU, RAM) of the system. These preferences vary from organization to organization.
Here’s the Bash script that checks the RAM status, Uptime, and CPU/memory stats, which are the primary components to monitor:
echo “RAM Status”
# free: RAM status
free -h
echo “Uptime”
# uptime: how long the system has been running
uptime
echo “CPU/memory stats”
# vmstat: Live CPU/memory stats
vmstat 2
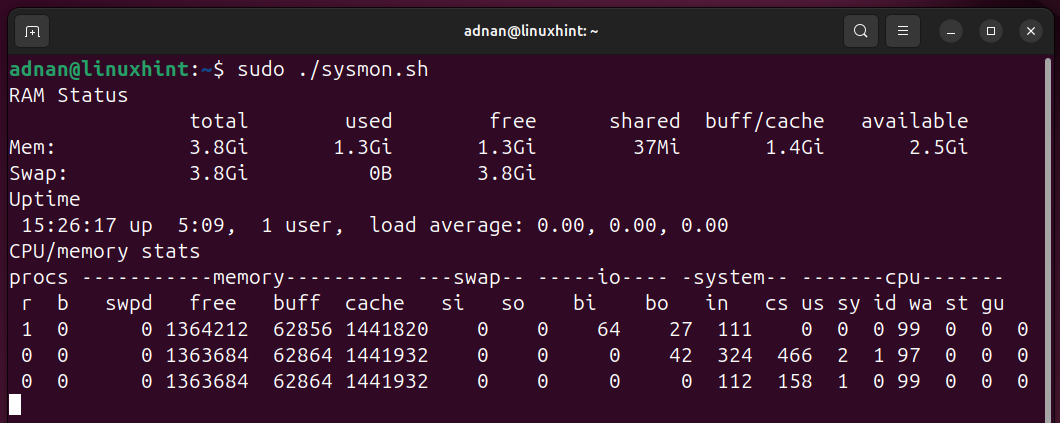
- free -h: RAM status in human-readable form.
- uptime: how long the system has been running.
- vmstat 2: Live CPU/memory stats, i.e., records every 2 seconds.

Once we run the command, the output shows the “Ram Status”, the “Uptime”, and the “CPU/Memory” status:

Script 5: Log Monitoring
A Linux SysAdmin has to go through different log files to effectively manage the system. For instance, the “/var/log/auth.log” file contains the user logins/logouts, SSH access, sudo commands, and other authentication mechanisms.
Here’s the Bash script that allows filtering these logs based on a search result.
cat /var/log/auth.log | grep $1
The $1 positional parameter shows that this script would be run with one argument:


We use “UID=0” as the variable’s value for this script. Thus, only those records are shown that contain UID=0:


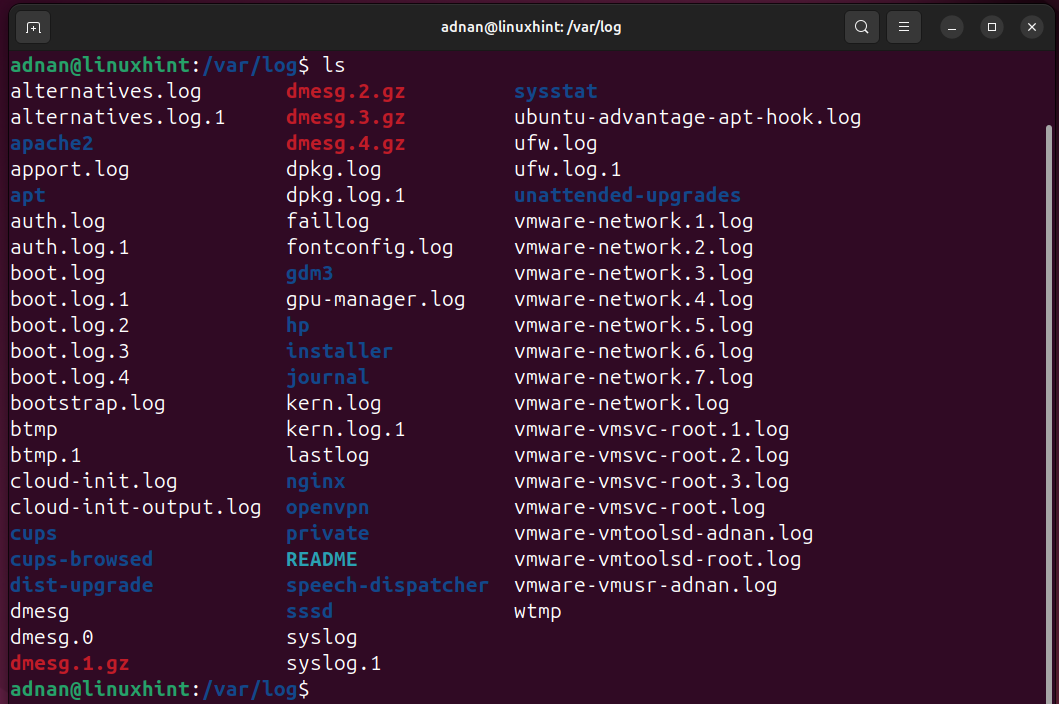
The log file can be changed in the script as per the requirement of the SysAdmin. Here are the log files associated with different types of logs in Linux:
| Log File/Address | Purpose/Description |
|---|---|
| /var/log/ | The main directory where most of the log files are placed. |
| /var/log//logapache2 | Refers to the Apache server logs (access and error logs). |
| /var/log/dmesg | Messages relevant to the device drivers |
| /var/log/kern.log | Logs/messages related to the Kernel. |
| /var/log/syslog | These are general system logs and messages from different system services that are available here |
There are a few more. Let’s open the “/var/log” directory and look at the logs that SysAdmin can use for fetching details inside each log file:

Script 6: User Management | Adding a New User, Adding a User to a Group
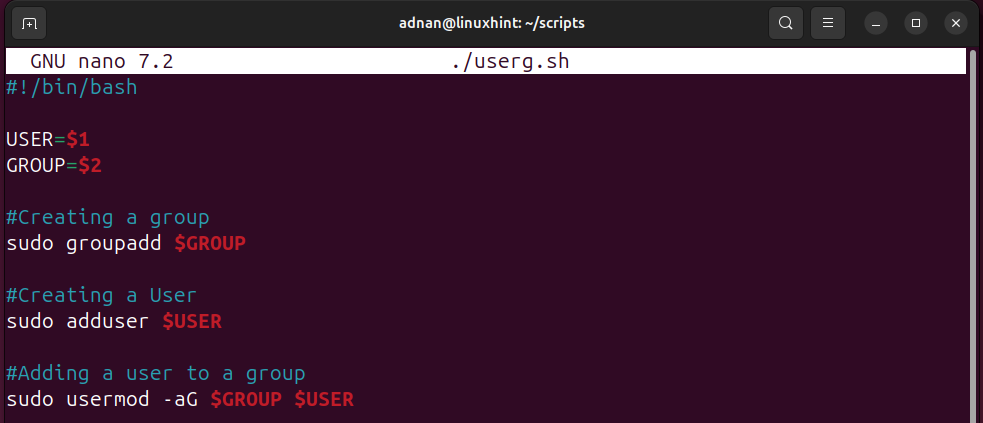
Adding a new user is one of the key activities in a Linux sysadmin’s daily tasks. There are numerous ways to add a new user with a Bash script. We have created the following Bash Script that demonstrates the user creation:
USER=$1
GROUP=$2
#Creating a group
sudo groupadd $GROUP
#Creating a User
sudo adduser $USER
#Adding a user to a group
sudo usermod -aG $GROUP $USER
- 2 positional parameters are initialized, i.e., $1 for user and $2 for group.
- First, the required group is created. Then, the user is created. Lastly, the newly created user is added to the group.

Since the script has positional parameters, let’s execute it with the required 2 arguments (one for username and the other for groupname):
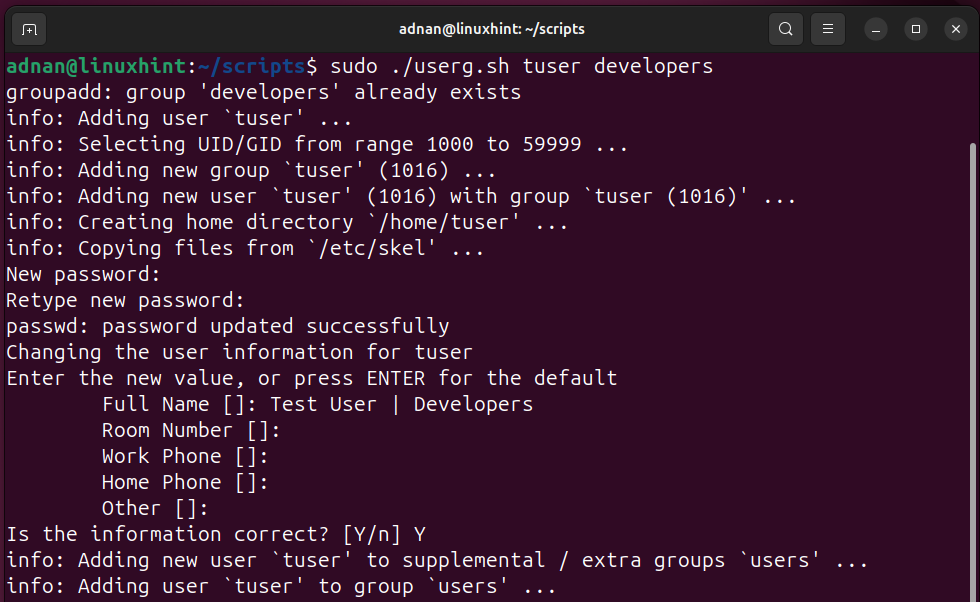

Similarly, the system administrator can create scripts to delete users as well.
Script 7: Disk Management
Disk management involves multiple commands, such as listing and checking the number of block devices. We run the “lsblk” command. To “mount” or “unmount” any filesystem, we run the “mount” and “umount” commands.
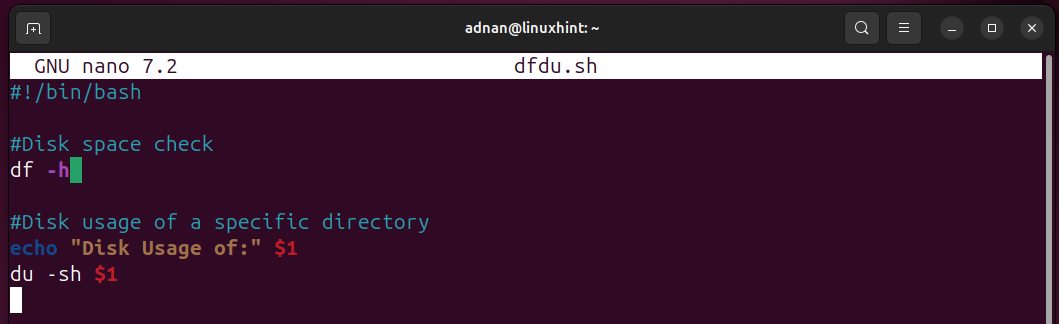
Let’s incorporate a few commands in a Bash script to view some data about disks:
#Disk space check
df -h
#Disk usage of a specific directory
echo “Disk Usage of:” $1
du -sh $1
$1 positional parameter refers to the address of the directory whose disk usage is to be checked:

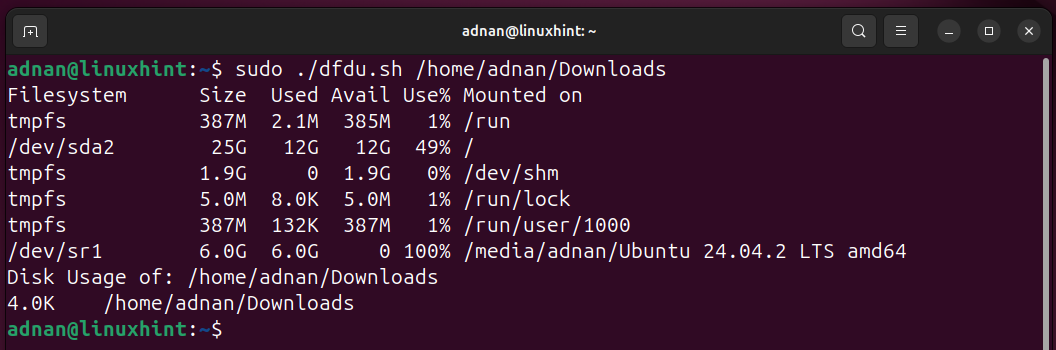
Let’s run the script:
sudo ./dfdu.sh /home/adnan/Downloads
Also, remember to provide the argument value, i.e., here, the “$1=/home/adnan/Downloads”:

Script 8: Service Management
To manage any service, the SysAdmin has to run multiple commands for each service. Like, to start a service, the SysAdmin uses the “systemctl start” command and verifies its status through “systemctl status”. Let’s make this task easy for Linux SysAdmins:
Start a Service
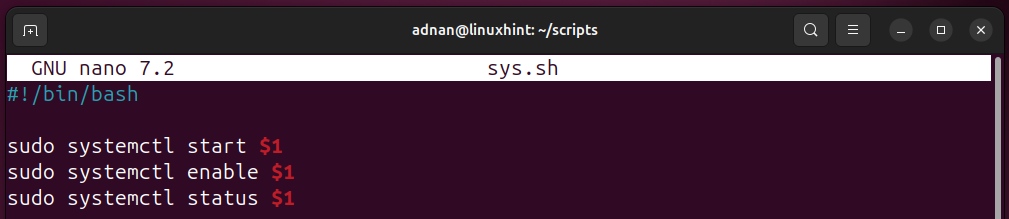
The following Bash script refers to only one service, i.e., every time the script only manages the NGINX service:
sudo systemctl start nginx
sudo systemctl enable nginx
sudo systemctl status nginx


For a more diverse use case, we declare a positional parameter to manage different services with each new run:

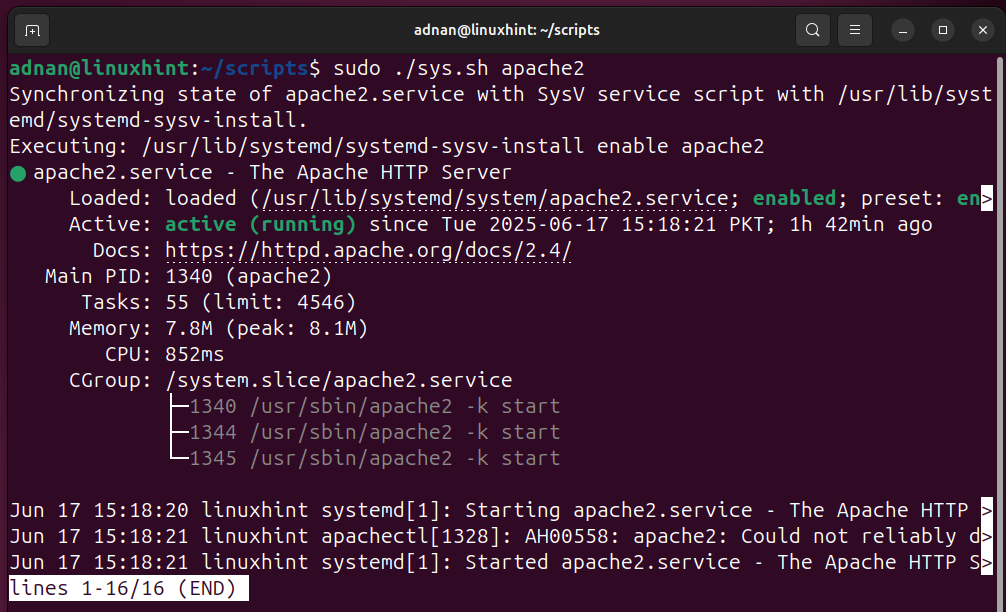
Now, pass the value of the positional parameter at the time of executing the script:
The “apache2” is the argument on which the script would run:

Stop a Service
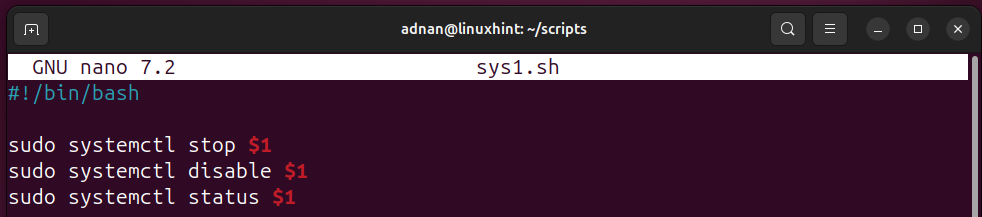
In this case, we use the positional parameter to make it more convenient for the Linux SysAdmins or the regular users:
sudo systemctl stop $1
sudo systemctl disable $1
sudo systemctl status $1
The $1 positional parameter refers to the specific service that is mentioned when executing a command:

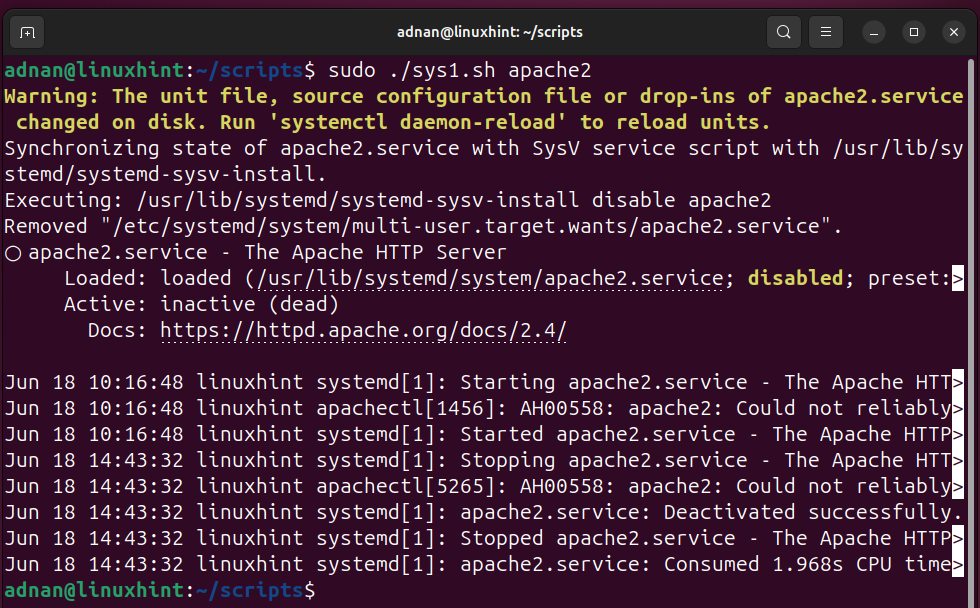
Let’s execute the command:

Script 9: Process Management
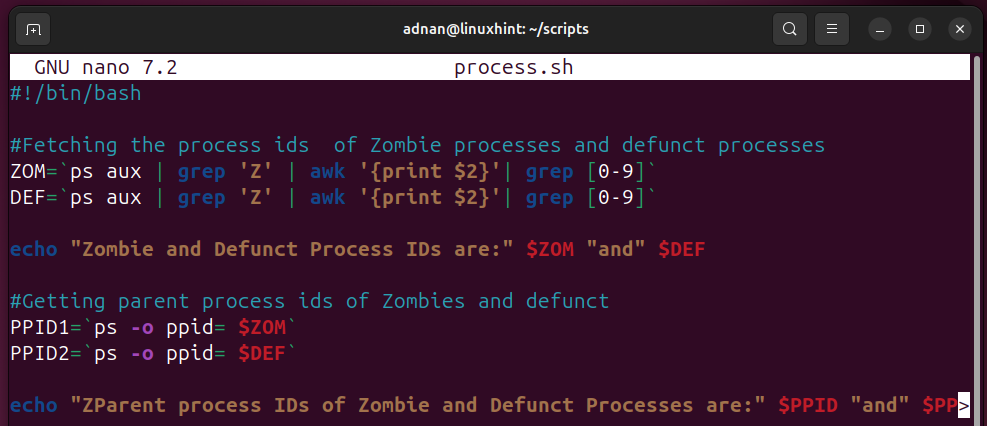
A Linux System Administrator has a keen eye on the processes and manages each category of process as per the requirement. A simple script can kill the specific processes. For instance, the script demonstrated here fetches the Zombie and Defunct processes, identifies the parent IDs of these processes:
#Fetching the process ids of Zombie processes and defunct processes
ZOM=`ps aux | grep ‘Z’ | awk ‘{print $2}’| grep [0–9]`
DEF=`ps aux | grep ‘Z’ | awk ‘{print $2}’| grep [0–9]`
echo “Zombie and Defunct Process IDs are:” $ZOM “and” $DEF
#Getting parent process ids of Zombies and defunct
PPID1=`ps -o ppid= $ZOM`
PPID2=`ps -o ppid= $DEF`
echo “ZParent process IDs of Zombie and Defunct Processes are:” $PPID “and” $PPID2.
- Zombie and Defunct process IDs are fetched and stored in a variable.
- The parent process IDs of the Zombie and defunct processes are fetched.
- Then, the parent processes can be killed

Let’s execute it:


Script 10: Allow or Deny Services Over the Firewall
A firewall is a virtual wall between your system and the systems connecting to your system. We can set the firewall rules to allow or deny what we want. Firewall has a significant role in managing the system. Let’s automate to allow or deny any service on your system:
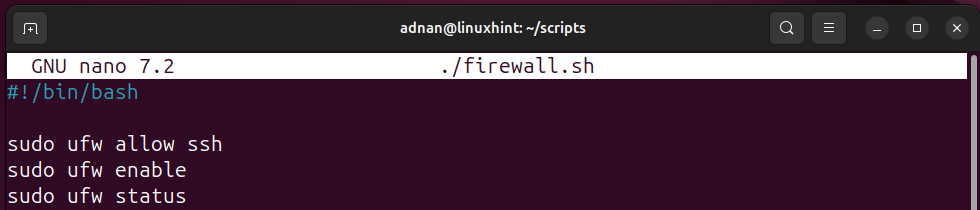
Allow a Service Through the Firewall
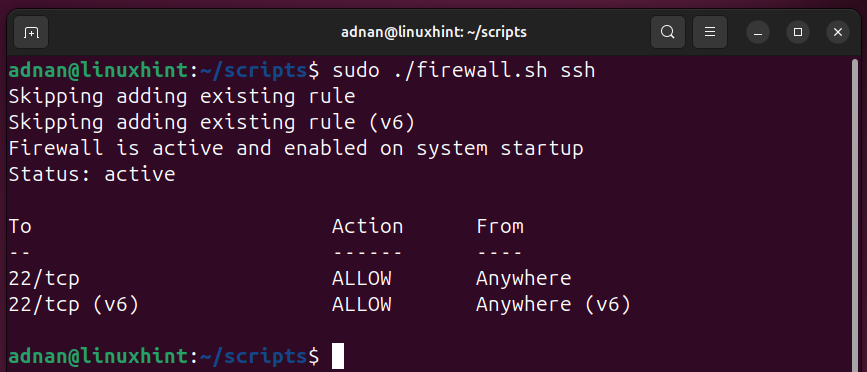
The following script enables SSH through the firewall:
sudo ufw allow ssh
sudo ufw enable
sudo ufw status

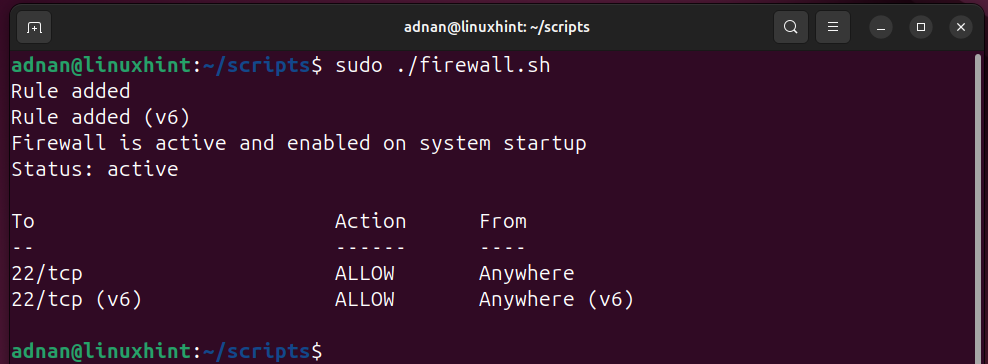
Let’s execute the script.

We can also include a positional parameter here to use the same script for multiple services to be allowed on the firewall. For instance, the script below has only one positional parameter. This parameter’s value is to be provided at the time of executing the script.
sudo ufw allow $1
sudo ufw enable
sudo ufw status
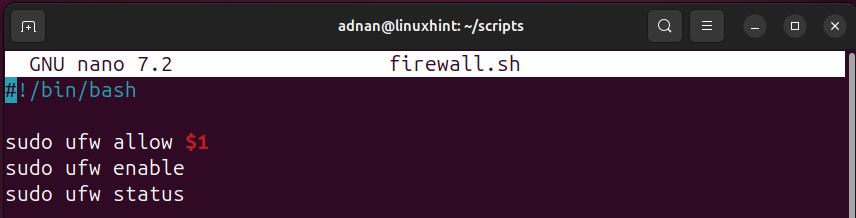

While executing, just specify the name of the service as an argument:

Deny a Service or Deny All:
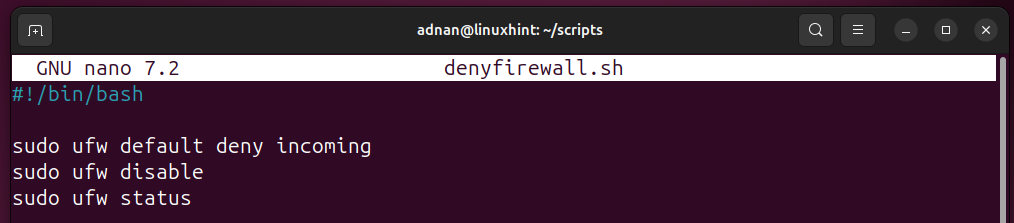
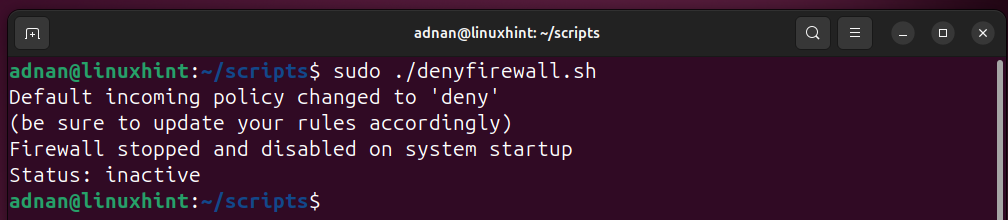
We can either deny one service or deny all the services attempting to reach our system. The below script updates the default incoming policy to deny, disables the firewall as well.
Note: These kinds of denial scripts are run when the overall system is in trouble, and we just need to make sure there is no service trying to approach our system.
sudo ufw default deny incoming
sudo ufw disable
sudo ufw status
sudo ufw default allow outgoing

Running the script:

Now that you have learned the 10 Bash scripts to automate daily SysAdmin tasks.
Let’s learn how we can schedule the scripts to run them as per our schedule.
Bonus: Automating the Scripts Using Cron
A cron job allows the SysAdmin to execute a specific script at a specific time, i.e., scheduling the execution of the script. It is managed through the crontab file.
First, use the “crontab -e” command to enter the edit mode of the crontab file:
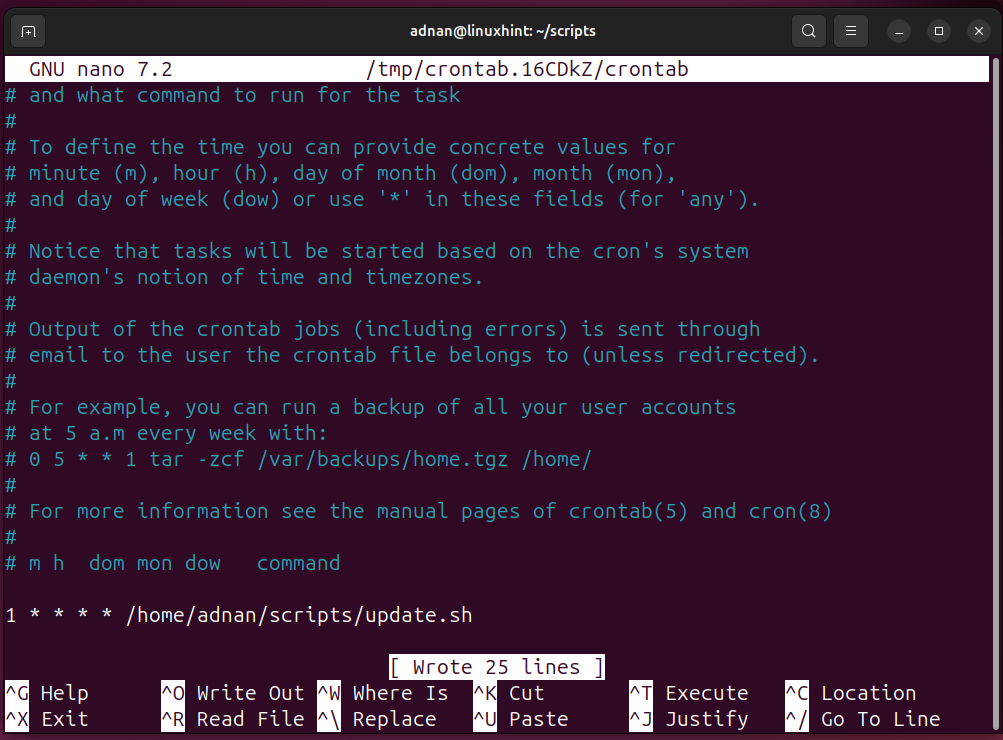

To put a command on a schedule with the cron file, you have to use a specific syntax to put it in the cron file. The below script will run on the 1st minute of each hour.


There are a total of 5 parameters to be considered for each of the commands:
- m: minute of a specific hour, i.e., choose between 1-59 minutes.
- h: hour of the day, i.e., choose between 0-23.
- dom: date of the month → Choose between 1-31.
- mon: foreach month → Choose between 1- 12
- dow: day of the week → Choose between 1-7


You can check the crontab listings using:


Important: Do you want a Linux Commands Cheat Sheet before you start using Bash? Click here to get a detailed commands cheat sheet.
Conclusion
Bash has eased the way of commanding in Linux. Usually, we can run a single command each session on a terminal. With Bash scripts, we can automate the command/s execution process to accomplish tasks with the least human involvement. We have to write it once and then keep on repeating the same for multiple tasks.
With this post, we have demonstrated the 10 Bash scripts to automate daily Linux System Administrator.
FAQs
How to run a Bash script as an Admin?
Use the “sudo /path/to/script” command to run the Bash script as an Admin. It is recommended to restrict the executable permissions of the Bash scripts to only authorized persons.
What is #!/bin/bash in Bash?
The “#!/bin/bash” is the Bash shebang. It tells the system to use the “bash” interpreter to run this script. If we don’t use this, our script is a simple shell script.
How do I give permissions to run a Bash script?
The “chmod” command is used to give permissions to run the Bash script. For a Linux sysadmin script, use the “sudo chmod u+x /path/of/script” command to give permissions.
What does $1 mean in Bash?
In Bash, $1 is a positional parameter. While running a Bash script, the first argument refers to $1, the second argument refers to $2, and so on.
Source link
-

-

-

-

-

-

-

-


