
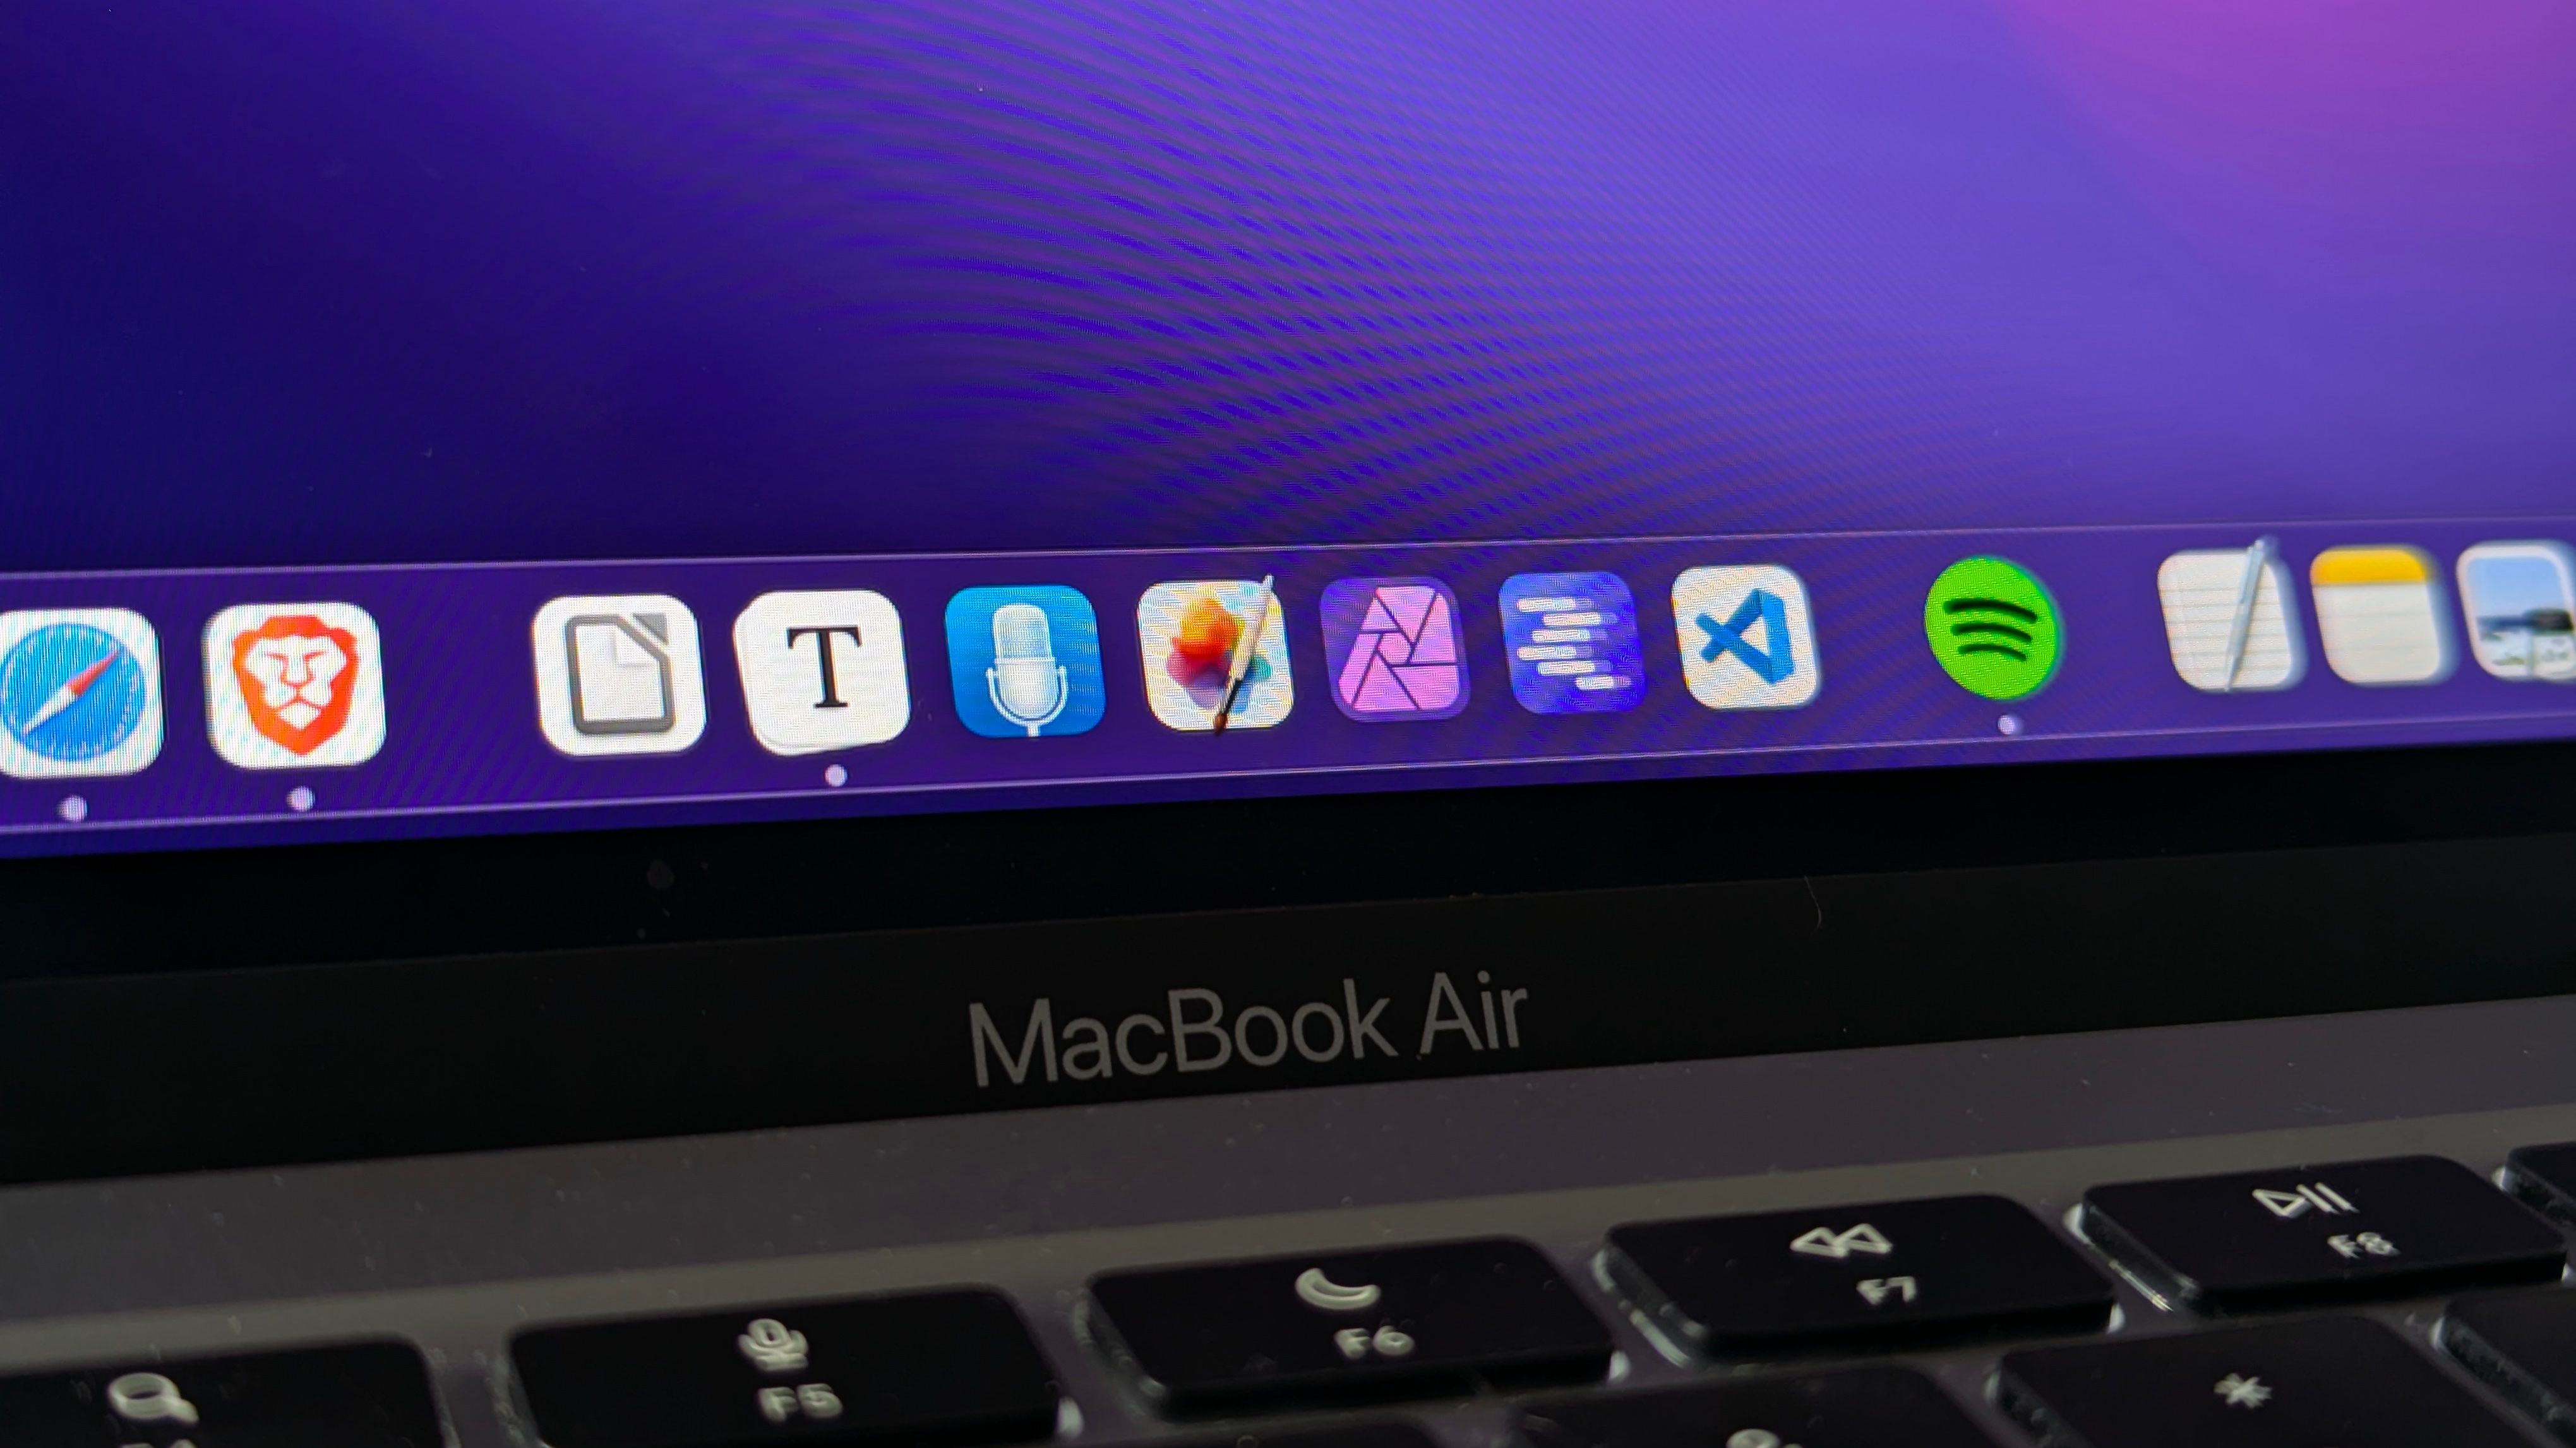
The Dock is one of the key tools for navigating the macOS interface. But there’s more to it than you might realize. Let’s take a look at the best ways to customize your Dock.
1
Add and Remove Items
Let’s begin with the basics. You can add apps, folders, and files to the Dock to make the things you need most often easily accessible.
To add an app to the Dock, open the Launchpad, find the app icon, and drag it into place. Alternatively, if the app is already open, you’ll see its icon on the right-hand side (or bottom) of the Dock. Either right-click on this and select Options > Keep in Dock or drag the icon leftwards into position.
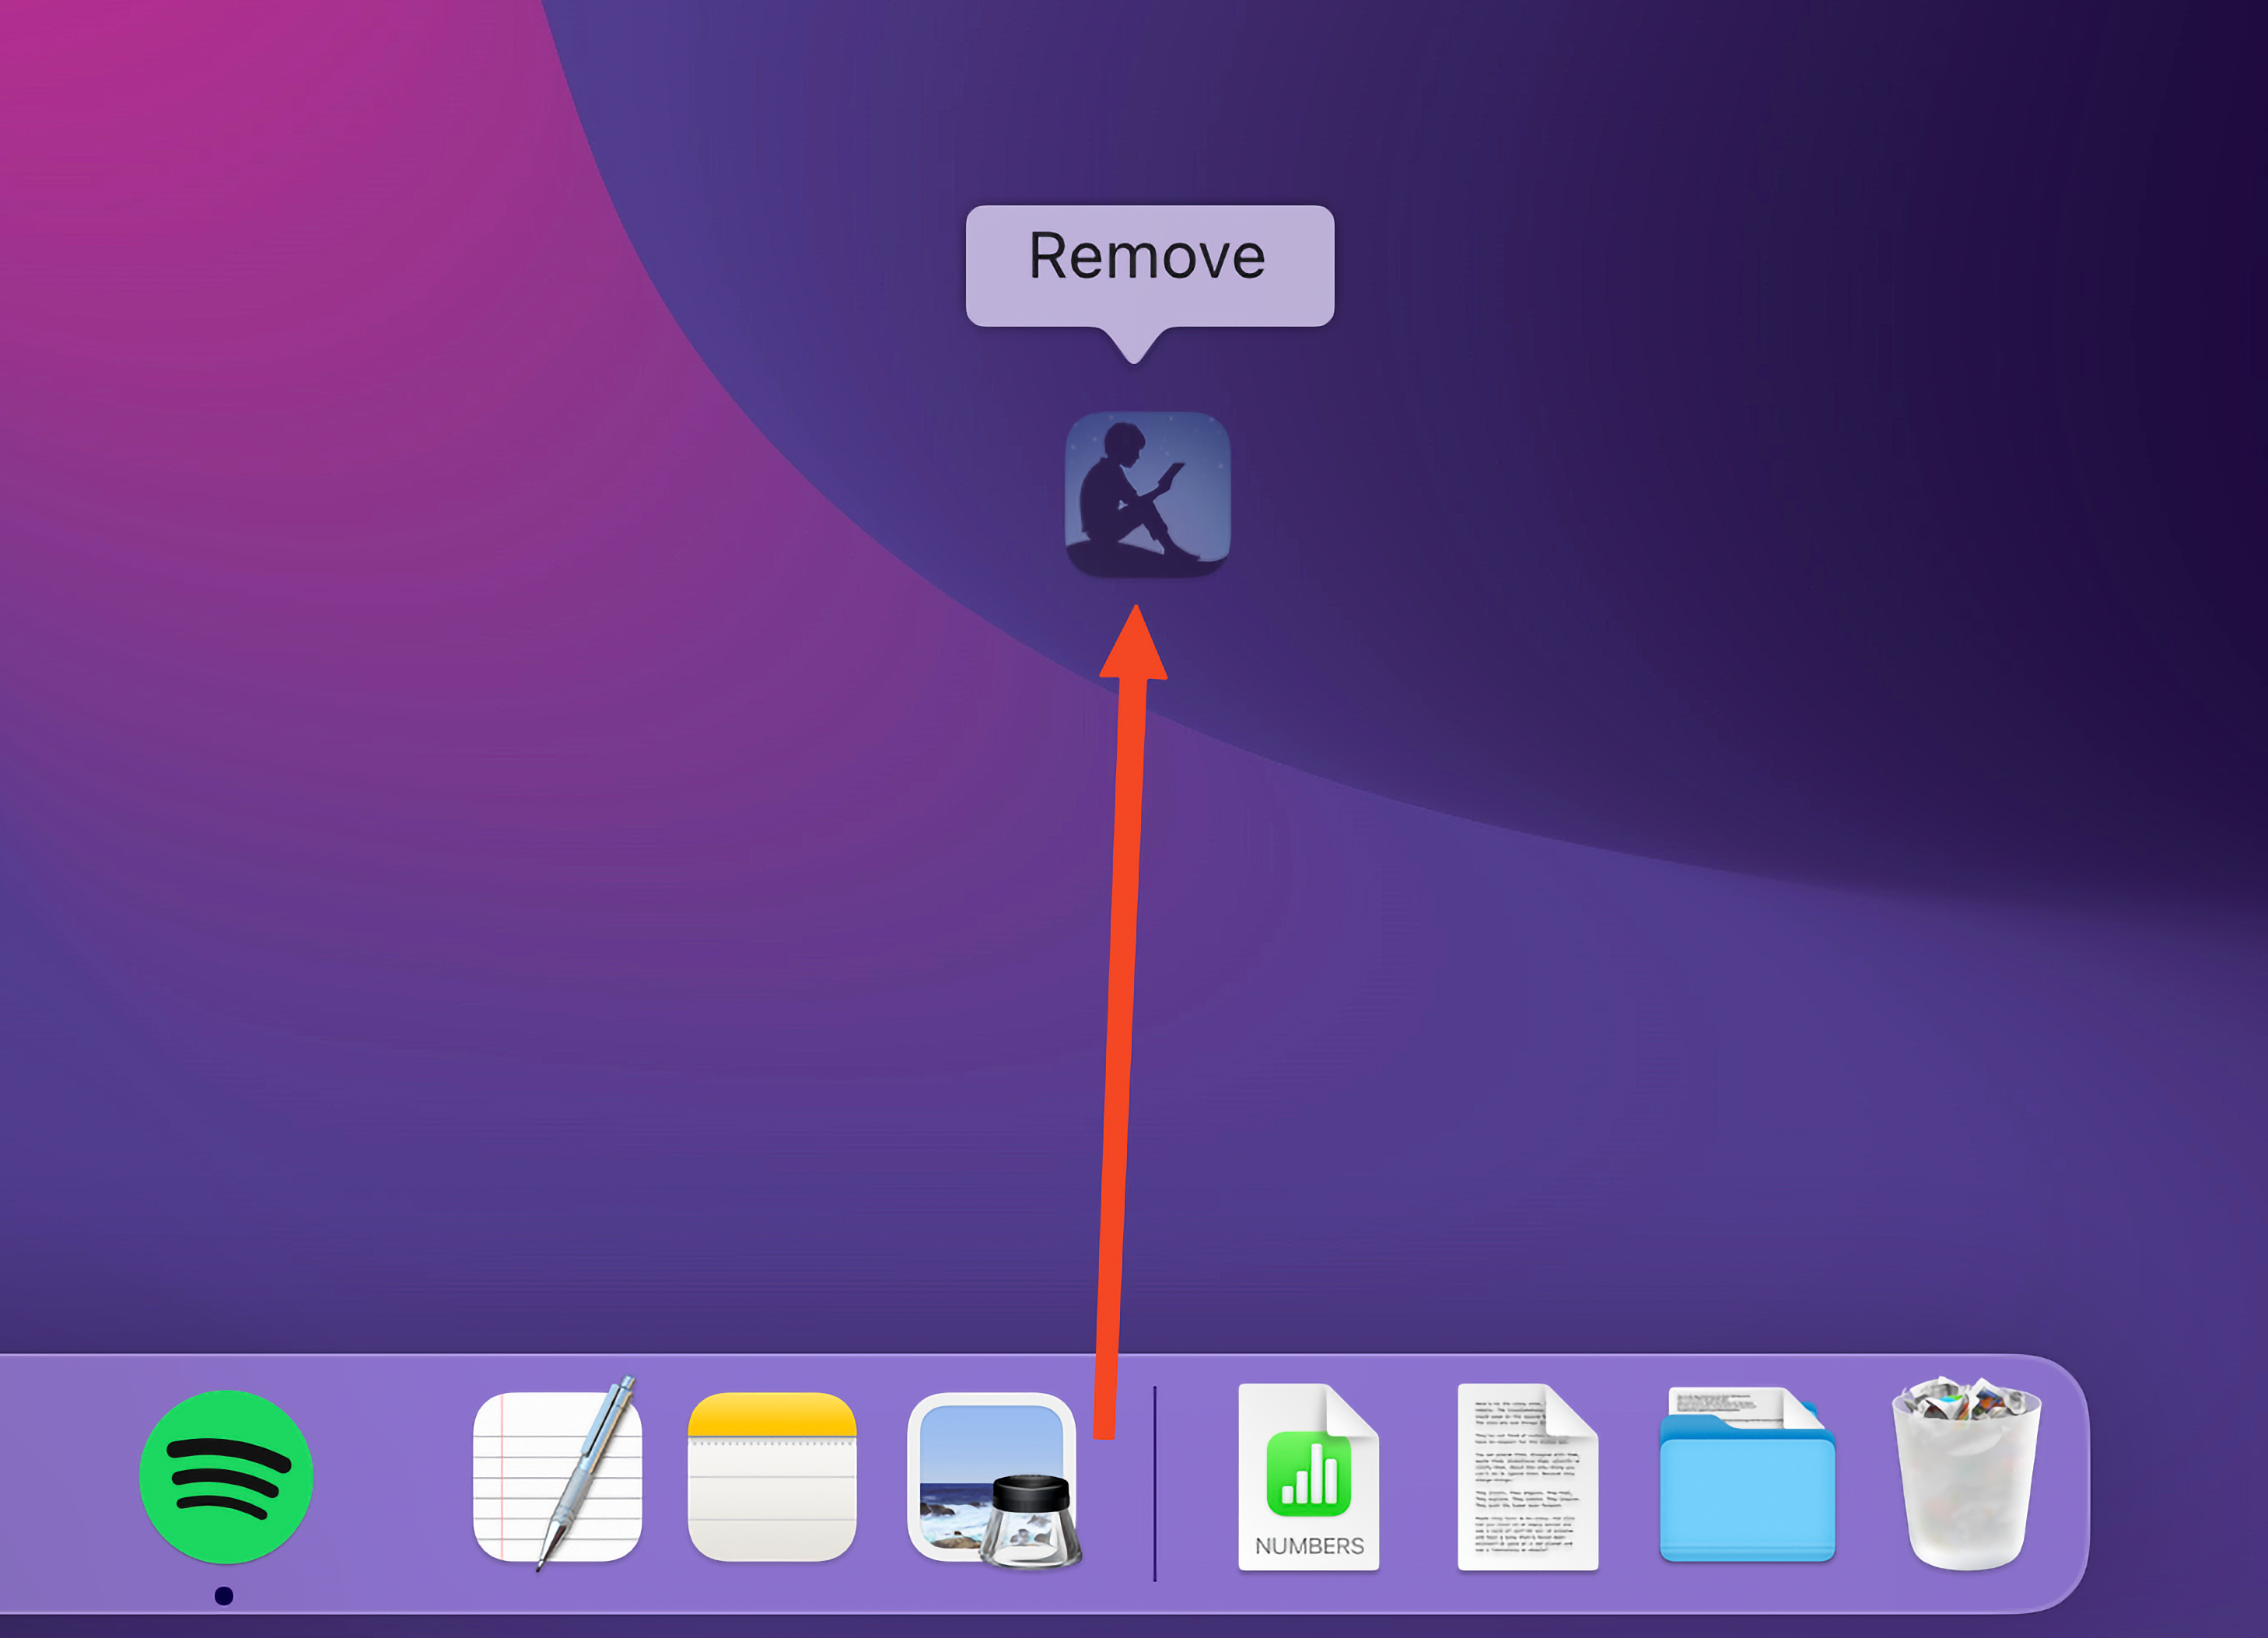
You can add files and folders by dragging them to the right side of the divider, near the trash icon. Remove anything from the Dock by clicking on it and dragging upwards until you see the word “Remove” appear.

2
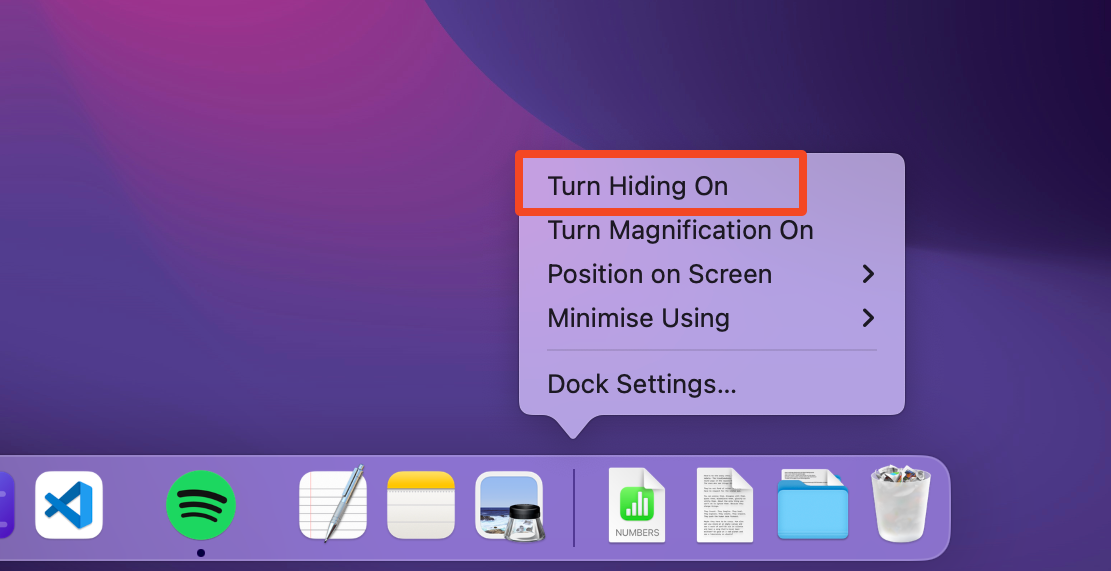
Hide the Dock
You can reclaim quite a bit of screen real estate by hiding the Dock. You then just move your mouse pointer to the bottom of the screen to make it appear as and when you need it.
To do this, right-click on the divider in the Dock and select “Turn Hiding On.” Alternatively, go to System Settings > Desktop & Dock and select “Automatically hide and show the Dock.”

3
Change the Position of the Dock
Although I keep my Dock positioned at the bottom of the screen, some people swear by having it on the left (or right) edge instead. This can be particularly useful if you don’t want to keep it hidden but still want the extra vertical space.
Right-click on the divider on the Dock, select “Position on Screen,” and choose whether you want it on the left or right.

4
Change the Size of the Dock
You can also change the size of the Dock. Hover your mouse pointer over the divider until you see a double-headed arrow, then drag it up to make it bigger or down to make it smaller.

Use the “Turn Magnification On” setting if you’ve got the Dock set to a very small size; turn magnification off if your Dock is particularly large.
5
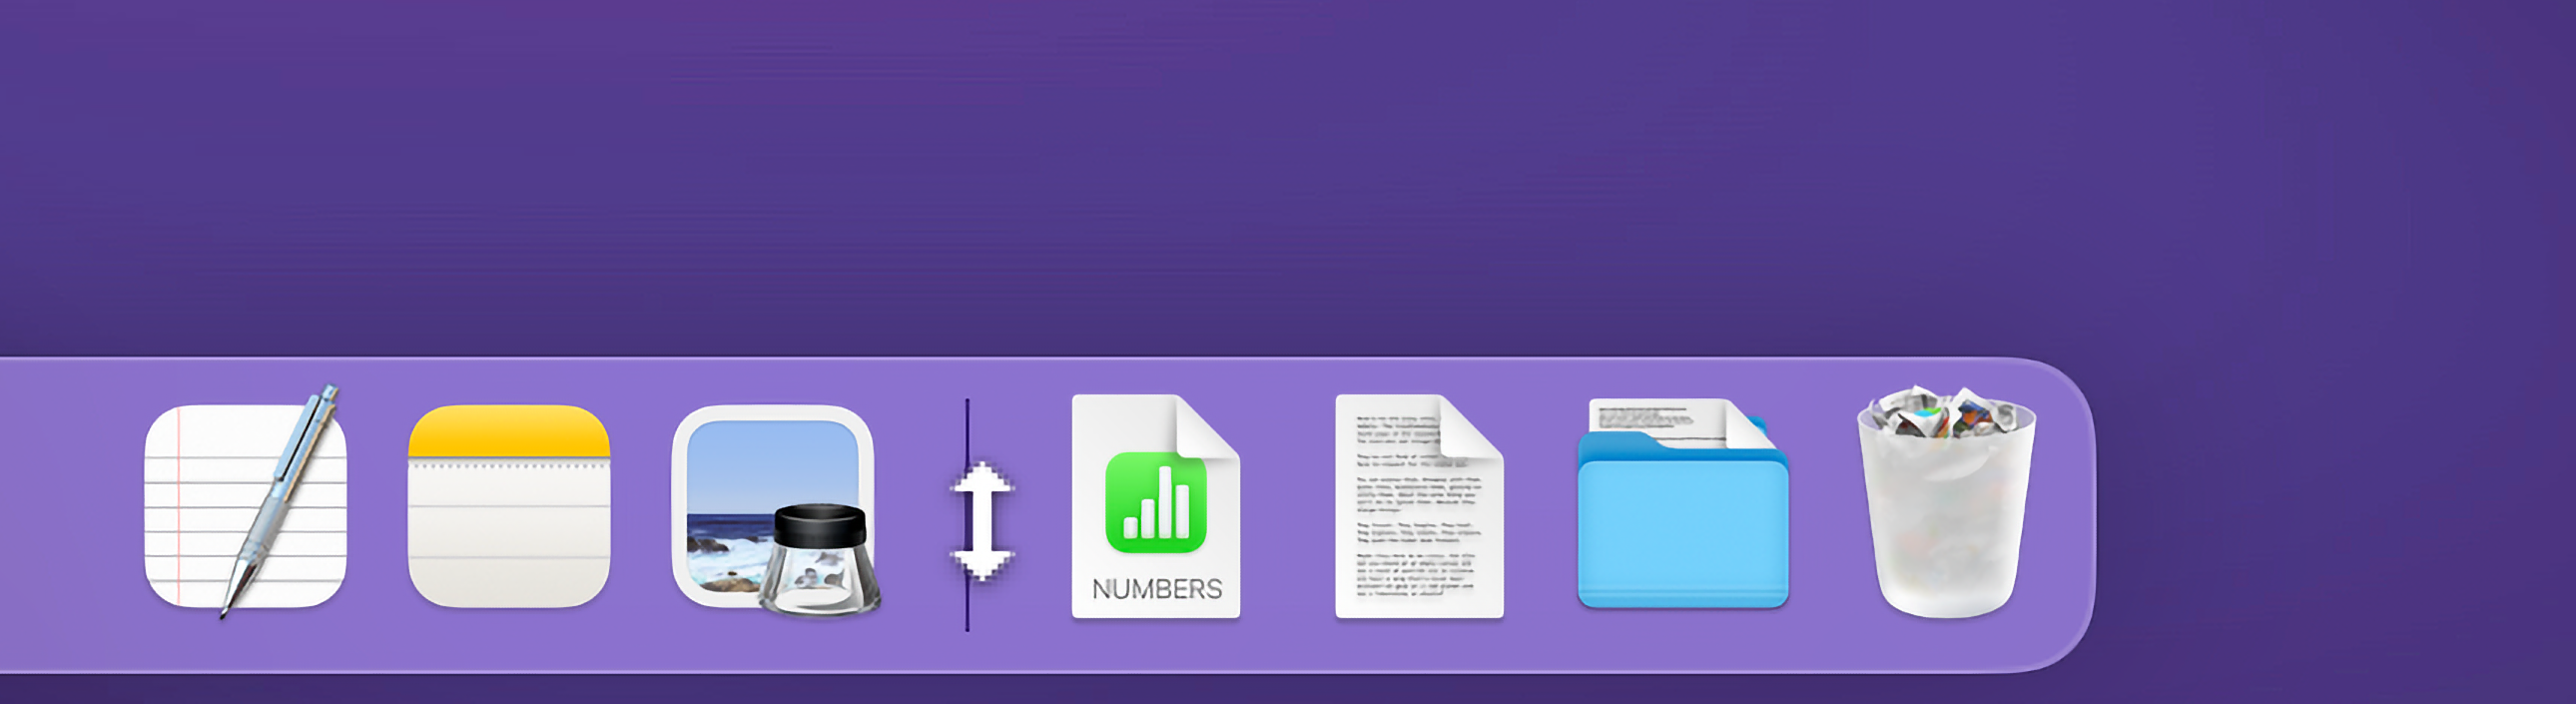
Add a Spacer or Half Spacer to Organize Apps
To help organize the apps in the Dock, you can add spacers—blank spaces that are either the size of a full app icon or half the size of a full app icon. You do this using the Terminal.

To add a full-sized spacer, open the Terminal app and paste in the following command:
defaults write com.apple.dock persistent-apps -array-add '{ "tile-type" = "spacer-tile"; }'; killall Dock
I prefer a half-sized spacer, which does the same job but takes up less room:
defaults write com.apple.dock persistent-apps -array-add '{ "tile-type" = "small-spacer-tile"; }'; killall Dock
Use these commands to add as many spacers as you need. Press the Up cursor key to repeat a command without having to paste it in again. When you’re done, drag the spacers into position just as you would drag app icons.
6
Make the Dock Appear Faster When Hidden
When you’ve got your Dock set to be hidden, you can speed up how quickly it appears by removing the animation effect it uses. When you place your mouse pointer on the bottom (or side, if applicable) of the screen, the Dock will pop open instantly.
Open the Terminal app, paste in this command, and hit Enter:
defaults write com.apple.dock autohide-time-modifier -float 0; killall Dock
To undo it and restore the animation, use this command:
defaults delete com.apple.dock autohide-time-modifier; killall Dock
7
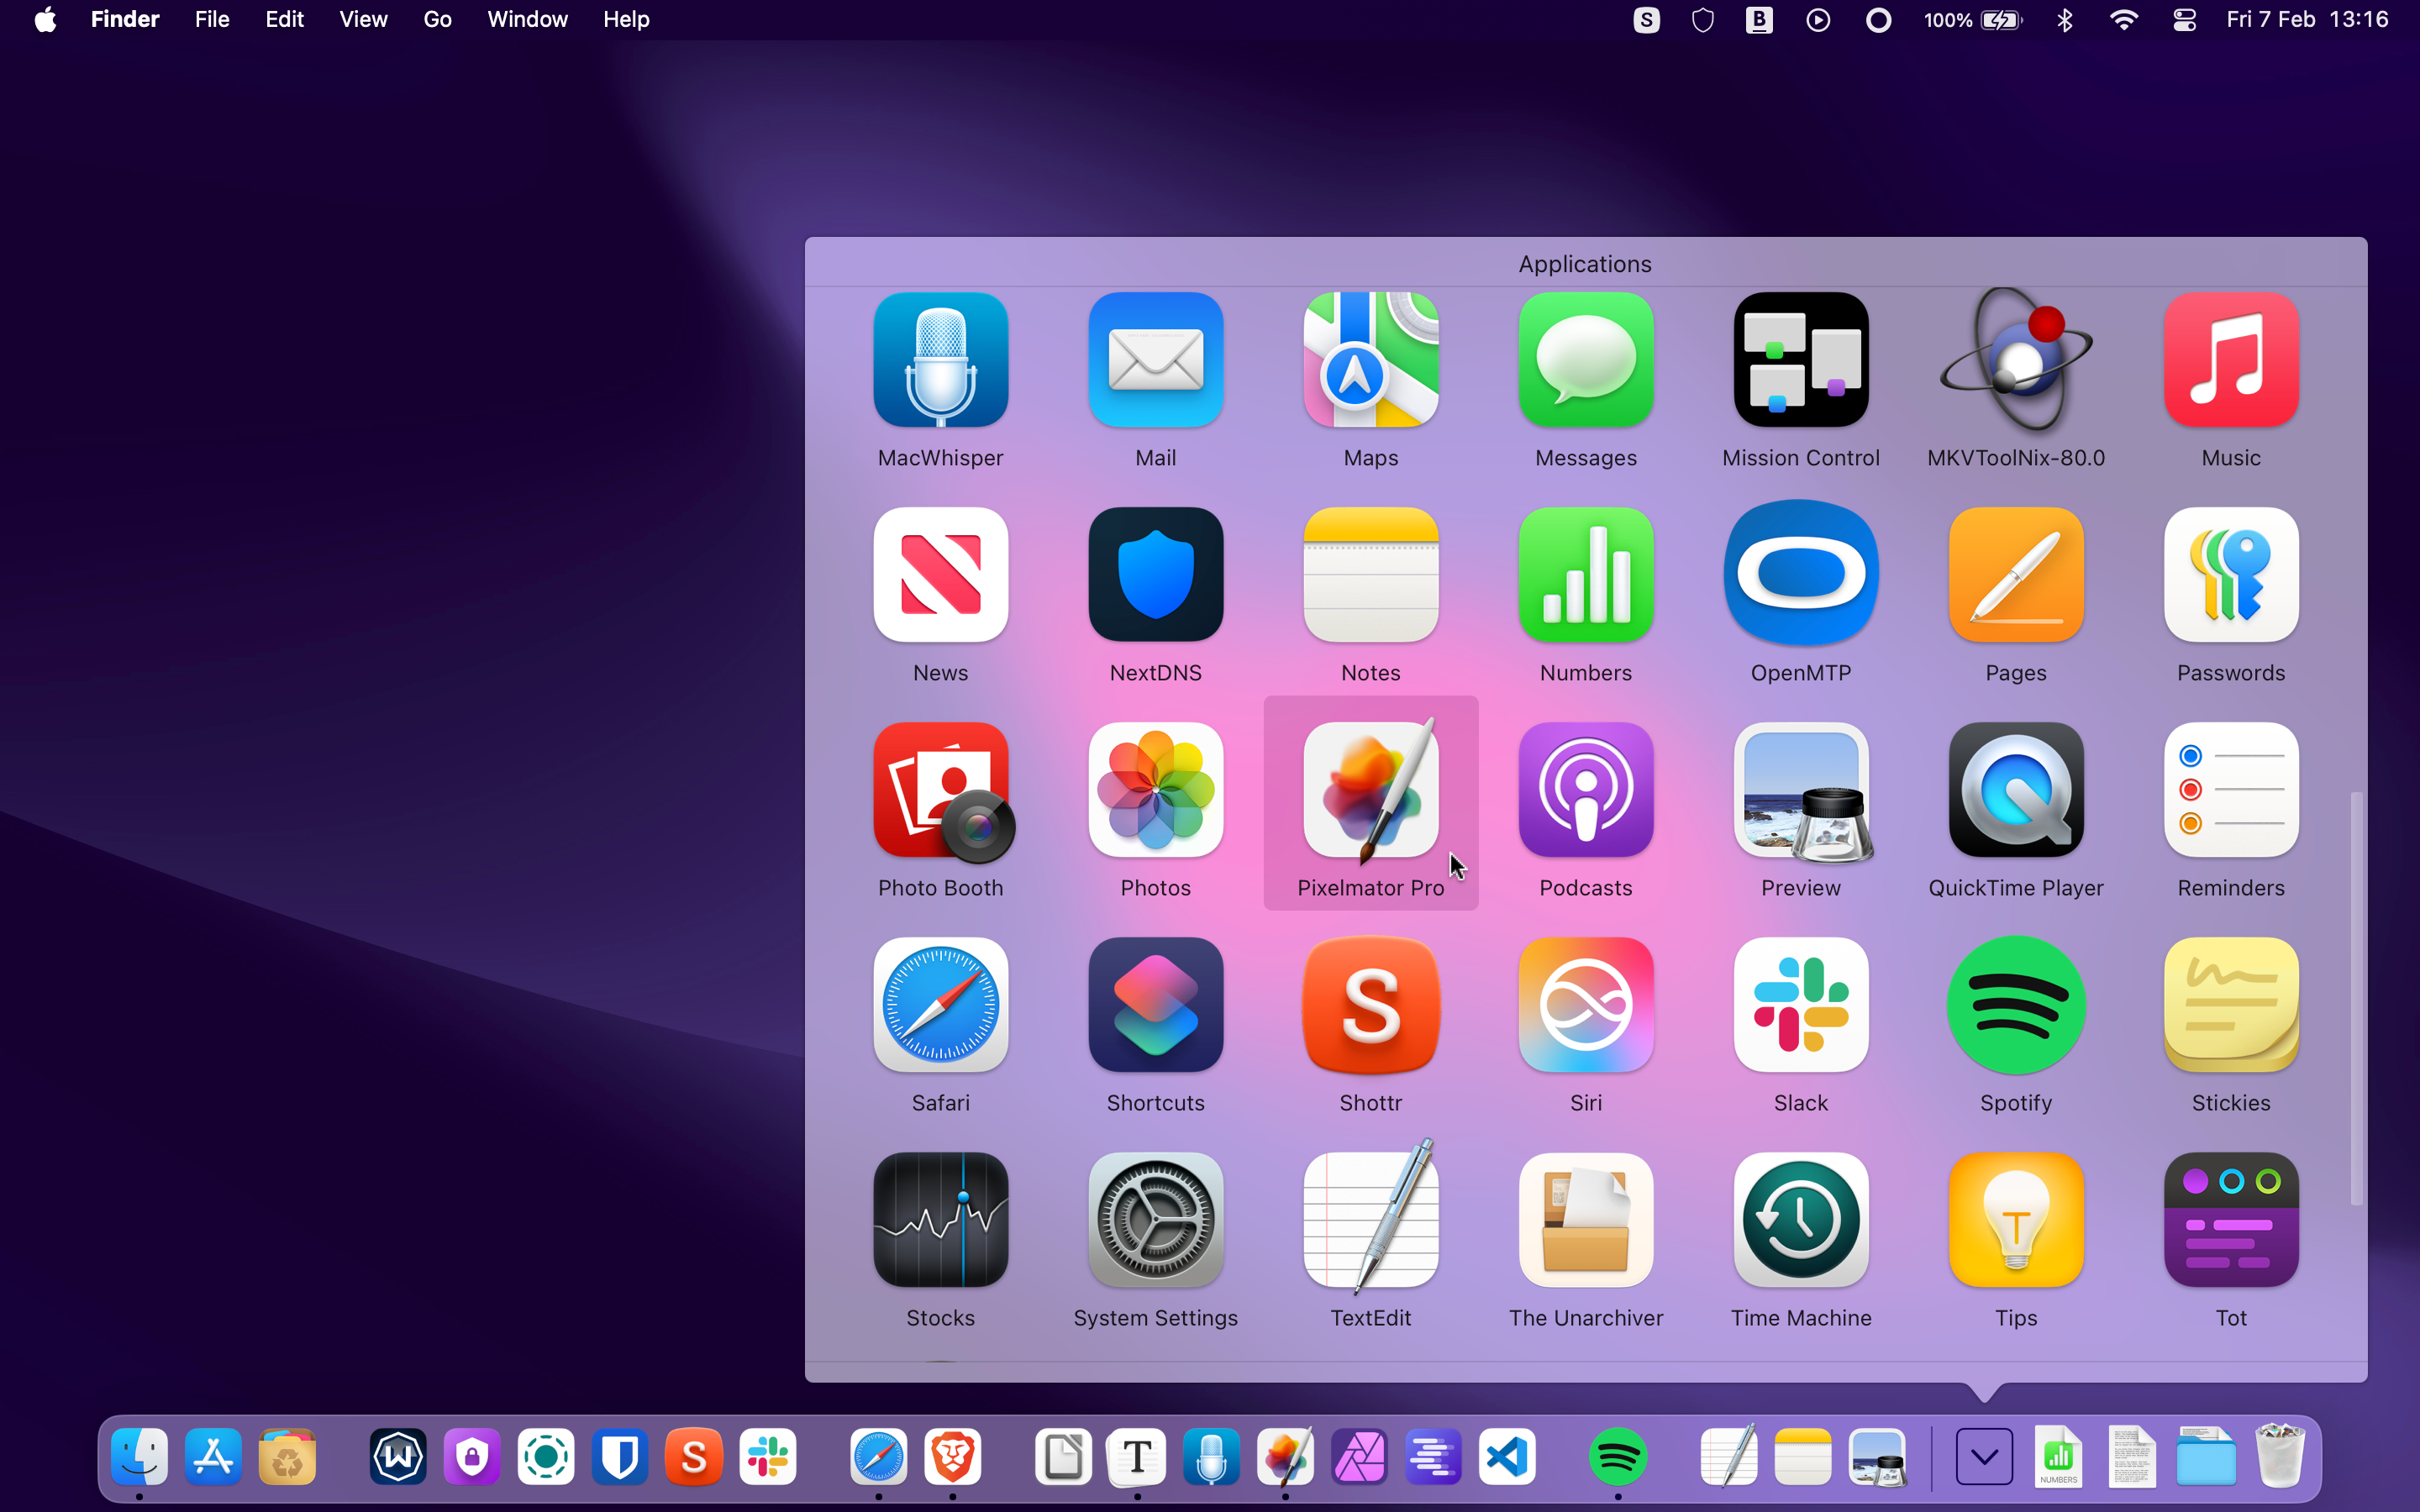
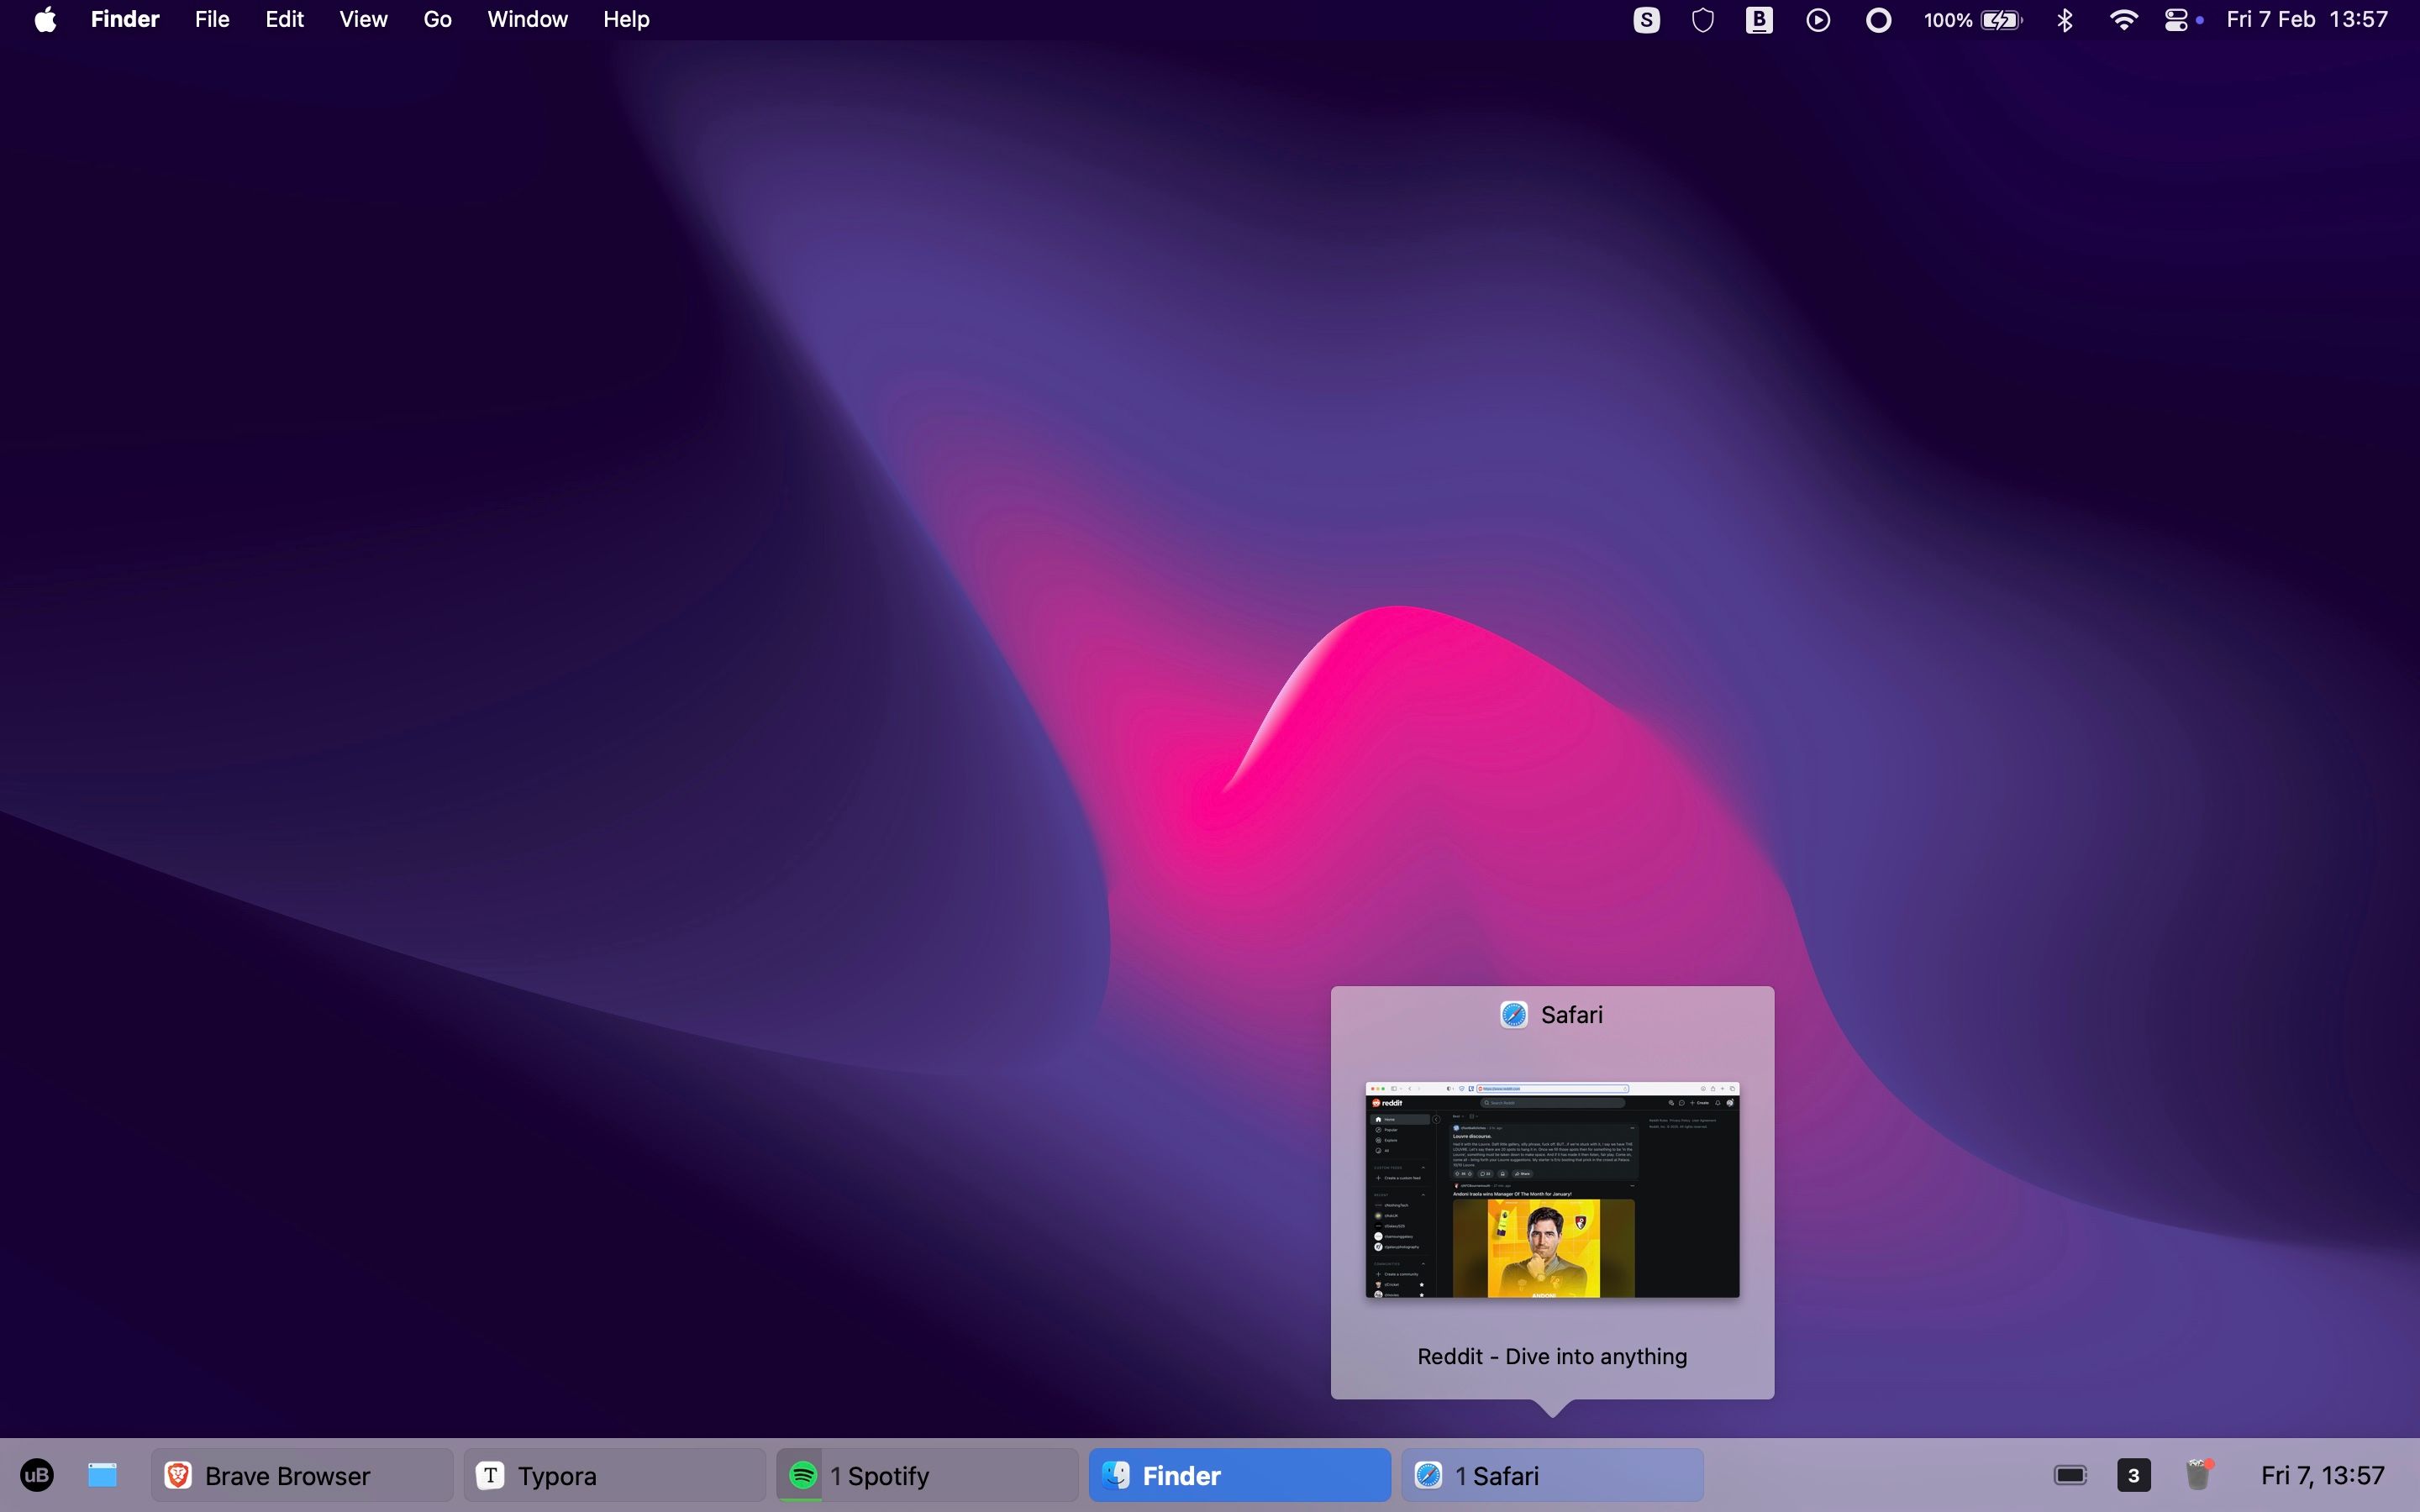
Add Your Applications Folder to the Dock
If you want to avoid cluttering your Dock with too many icons but still want easy access to your apps, you can place your entire Applications folder there. Open the Finder and in the sidebar, you should see an “Applications” shortcut. Simply drag it to the right of the divider in the Dock.

Now, right-click on the icon and select “View Content as Grid.”
8
Make App and Folder Grids Easier to Navigate
You get no visual feedback when you move your mouse pointer over an app or file in a grid on your Dock. To make the grid easier to navigate, you can add a hover effect using a Terminal command.
Open Terminal and paste in this:
defaults write com.apple.dock mouse-over-hilite-stack -bool true; killall Dock
Now open the grid and you’ll see that items become highlighted as you pass over them.
Use this command to undo the effect:
defaults write com.apple.dock mouse-over-hilite-stack -bool false; killall Dock
9
Change and Customize Your App Icons
If you want to get creative with your Dock, you can change the icons for your apps, using your own designs or downloadable icon packs. This can be a fun thing to do, but there’s also a practical side when you’ve got two apps that have very similar icons and you need a better way to differentiate them.
We’ve got full instructions on how to change app icons in macOS if you need them. In summary, locate the app in your Applications folder, right-click on it, and select Get Info. Now drag a square PNG or JPEG image, or an icon in the ICNS format, onto the icon in the top left corner of the Get Info window.
Finally, drag the app into your Dock (or remove it and re-add it if it’s already there) to see the new icon in place.
You can only change the icons of third-party apps, not the built-in Apple apps.
10
Add the Activity Monitor to the Dock
Need to keep an eye on the performance of your Mac or its network use? You can do this using the Activity Monitor app, and you can add it to your Dock to help you track performance in real-time.
Open Activity Monitor and go to View > Dock Icon. You can select one of four options to see a small chart showing the current or ongoing CPU activity, network use, or disk activity.

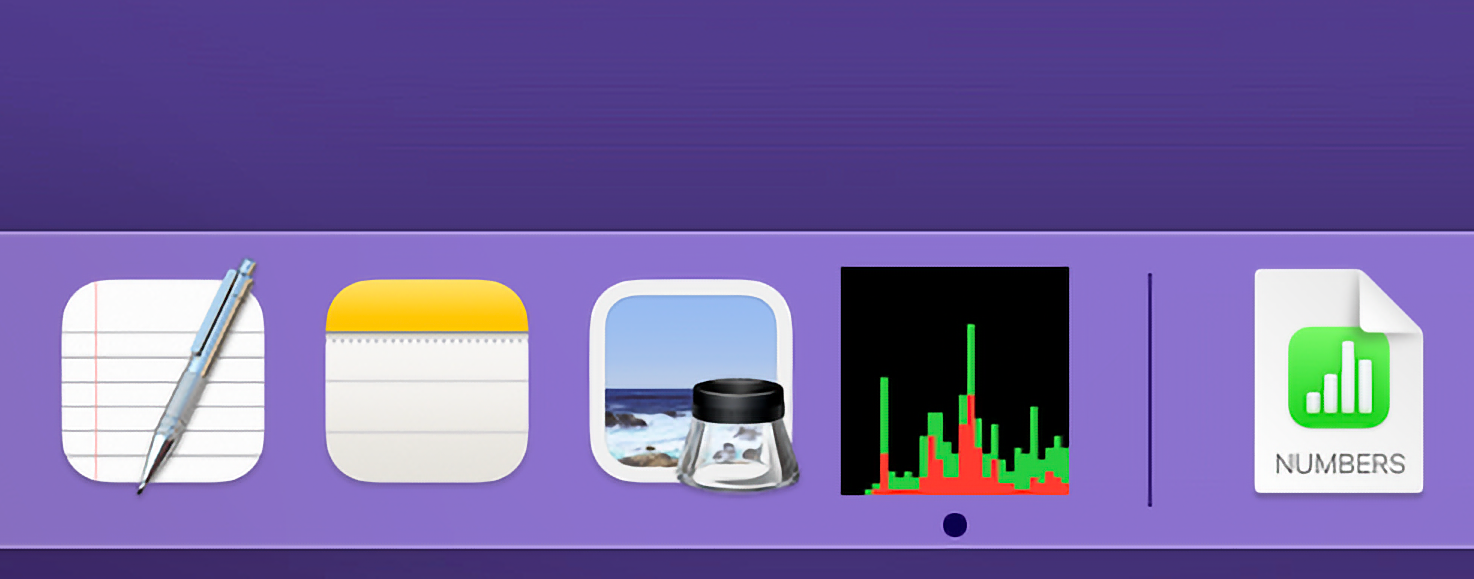
To get this in your Dock permanently, right-click on the icon, go to “Options,” and enable both “Keep in Dock” and “Open at Login.”
11
Replace the Dock Entirely
Finally, if the Dock still isn’t useful enough for you, you can replace it entirely with uBar. It’s a paid app with a 14-day trial and is hugely customizable.
It lets you replace the Dock with something more like the Windows taskbar, you can see previews of the windows in your open apps, get notifications, control media apps, and much more. It works well with multiple monitors, and you can even move your new dock to the top of the screen if you want to.
There are lots of ways to launch apps on a Mac and the Dock is one of the most useful. You don’t want to overload it with icons. Just keep your most important ones there so you can access them at any time.
I’d also recommend learning how to use Spotlight to launch apps. Customizing the Dock and mastering Spotlight will have you navigating your Mac like a pro.
Source link
-
-

-

-
-

-

-
-


