It’s probably fair to say that the Trash is one of the most overlooked features in macOS. You use it every day, but do you ever think about whether it can do anything more? It turns out there are quite a few handy little tweaks you can make to get it working even better.
1
Bypass the Trash When Deleting
The Trash serves as a safety net, so you can delete files and recover them again if you need them. If you’re certain that you don’t need the file that you’re deleting, you don’t need to move it to the Trash. You can delete it instantly.
Select the file or folder and press Option+Command+Backspace on your keyboard. You’ll see a pop-up warning you about what’s about to happen. Click “Delete” to finish the job.
Alternatively, you can use the Option key shortcut. Select the file, then press the Option key, and click “Delete Immediately.”
2
Delete Individual Items Without Emptying the Trash
I rarely empty my Trash. I like to keep files in it just in case I need them in the future. But when I’m working with massive files, I don’t want them clogging up my hard drive.

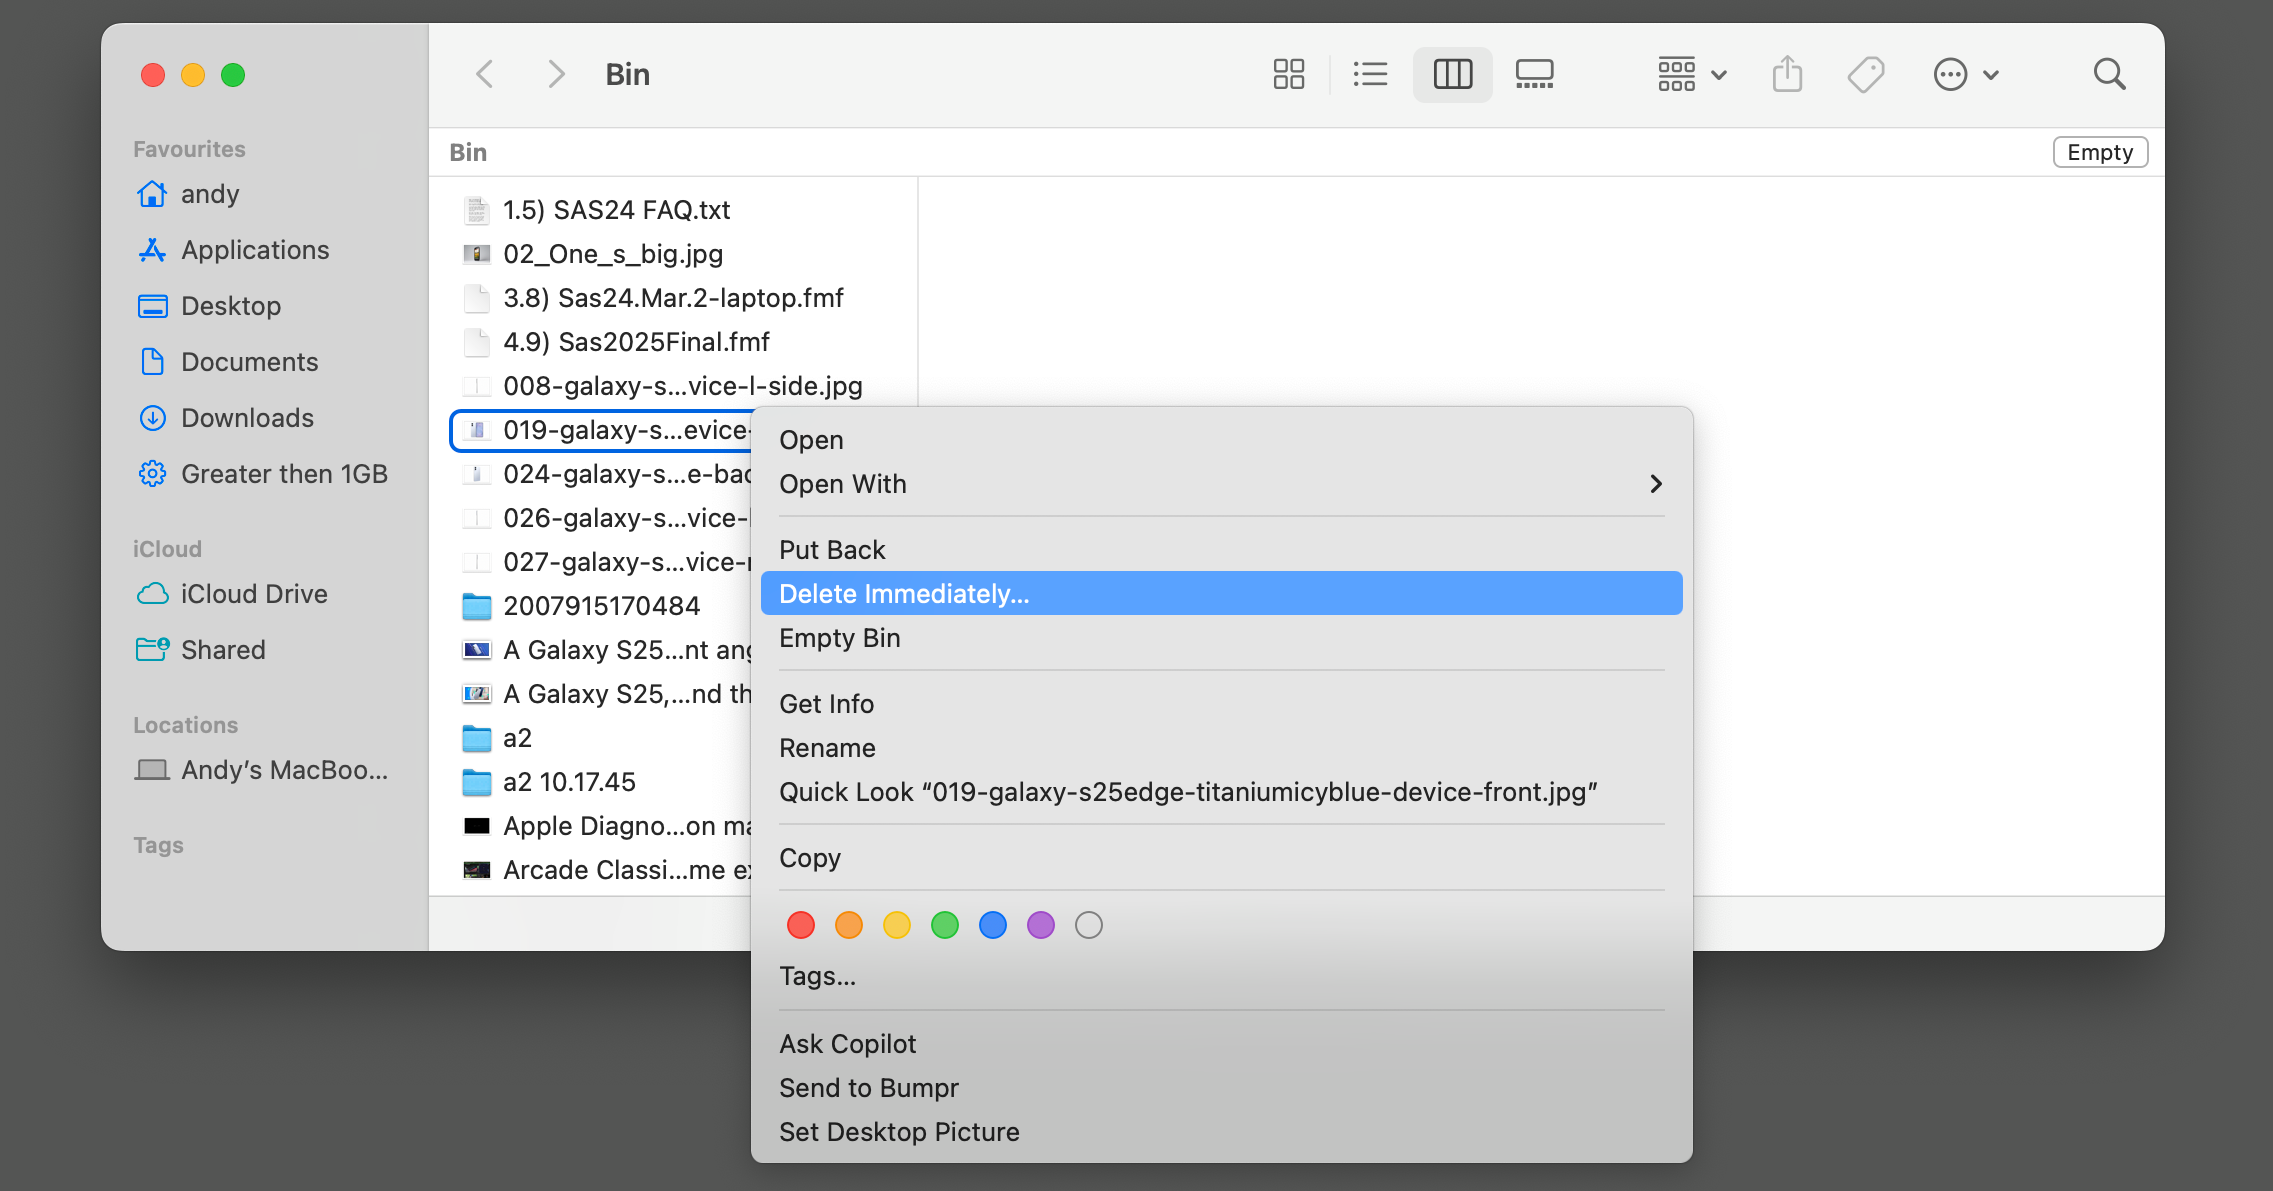
Fortunately, it’s possible to delete individual items from the Trash without needing to empty it entirely. Open the Trash and select all the files you want to delete. Now right-click (or Control+click) and select “Delete Immediately.”
3
Restore Deleted Items
If you delete something that you later need to recover, you can go into the Trash and drag it out. But there’s a better way.
Select the file you want to restore, then hit Command+Backspace. It won’t just be restored from the Trash, but moved back into the folder it originally came from. This works with multiple files and folders, even if their original locations are different.
The only potential issue is if you’ve got a new file or folder with the same name as the old one. In that case, you’ll see a warning to ask if you want to overwrite it. The better option is to click “Stop,” and then rename the file in the Trash before restoring it.
Because I keep files in my trash all the time, it’s handy to treat it as just another folder on my drive. While you can access it at any time using the icon in the dock, for a more integrated setup, you can add a Trash folder to the sidebar in Finder.

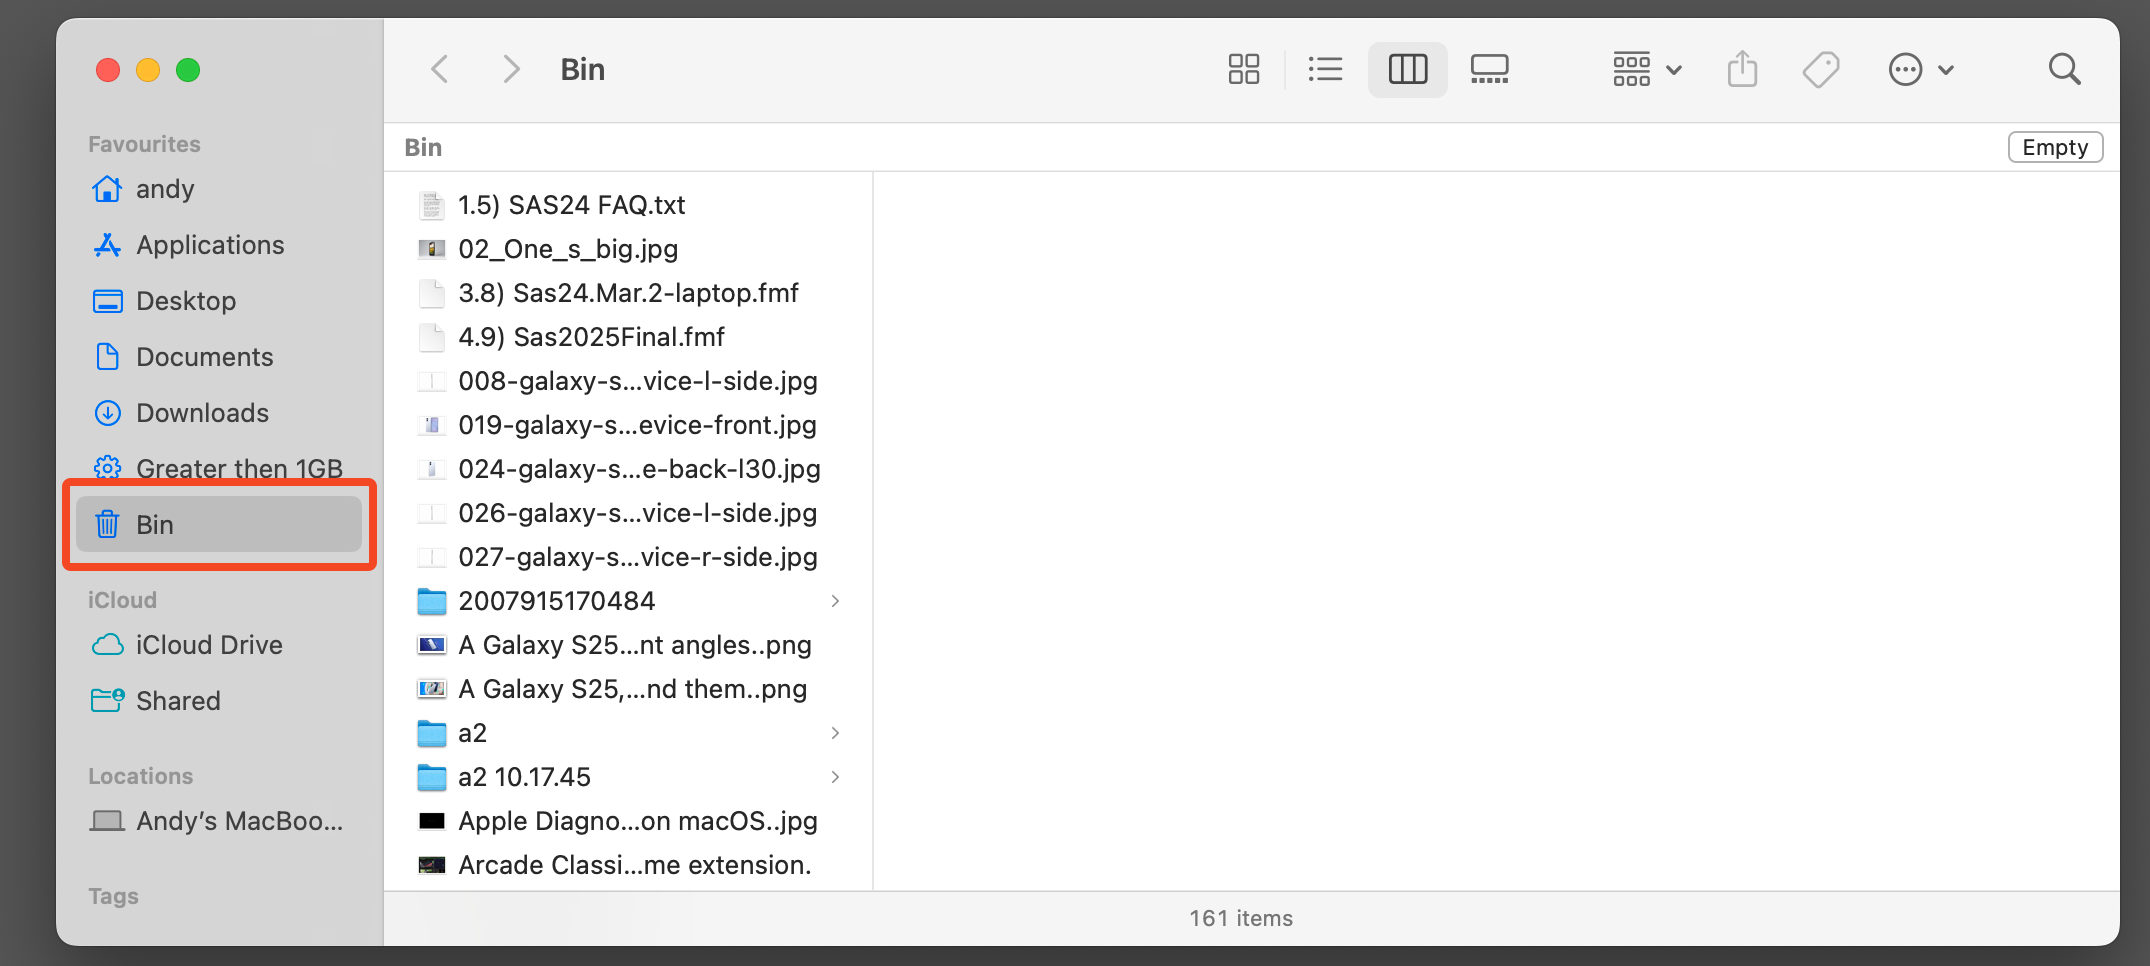
Click on your desktop and select Go > Go to Folder. In the box that opens, type “Trash” and hit Enter. The Trash folder will open in a Finder window. Now go to File > Add to Sidebar. You can now access the Trash through Finder like you would any other regular folder.
In my case, the language is set to UK English, so I typed “Bin” instead.
Related
Customize Finder on Your Mac for a More Productive Experience
Don’t settle for the default file manager setup on your Mac.
5
View Your Recently Deleted Items
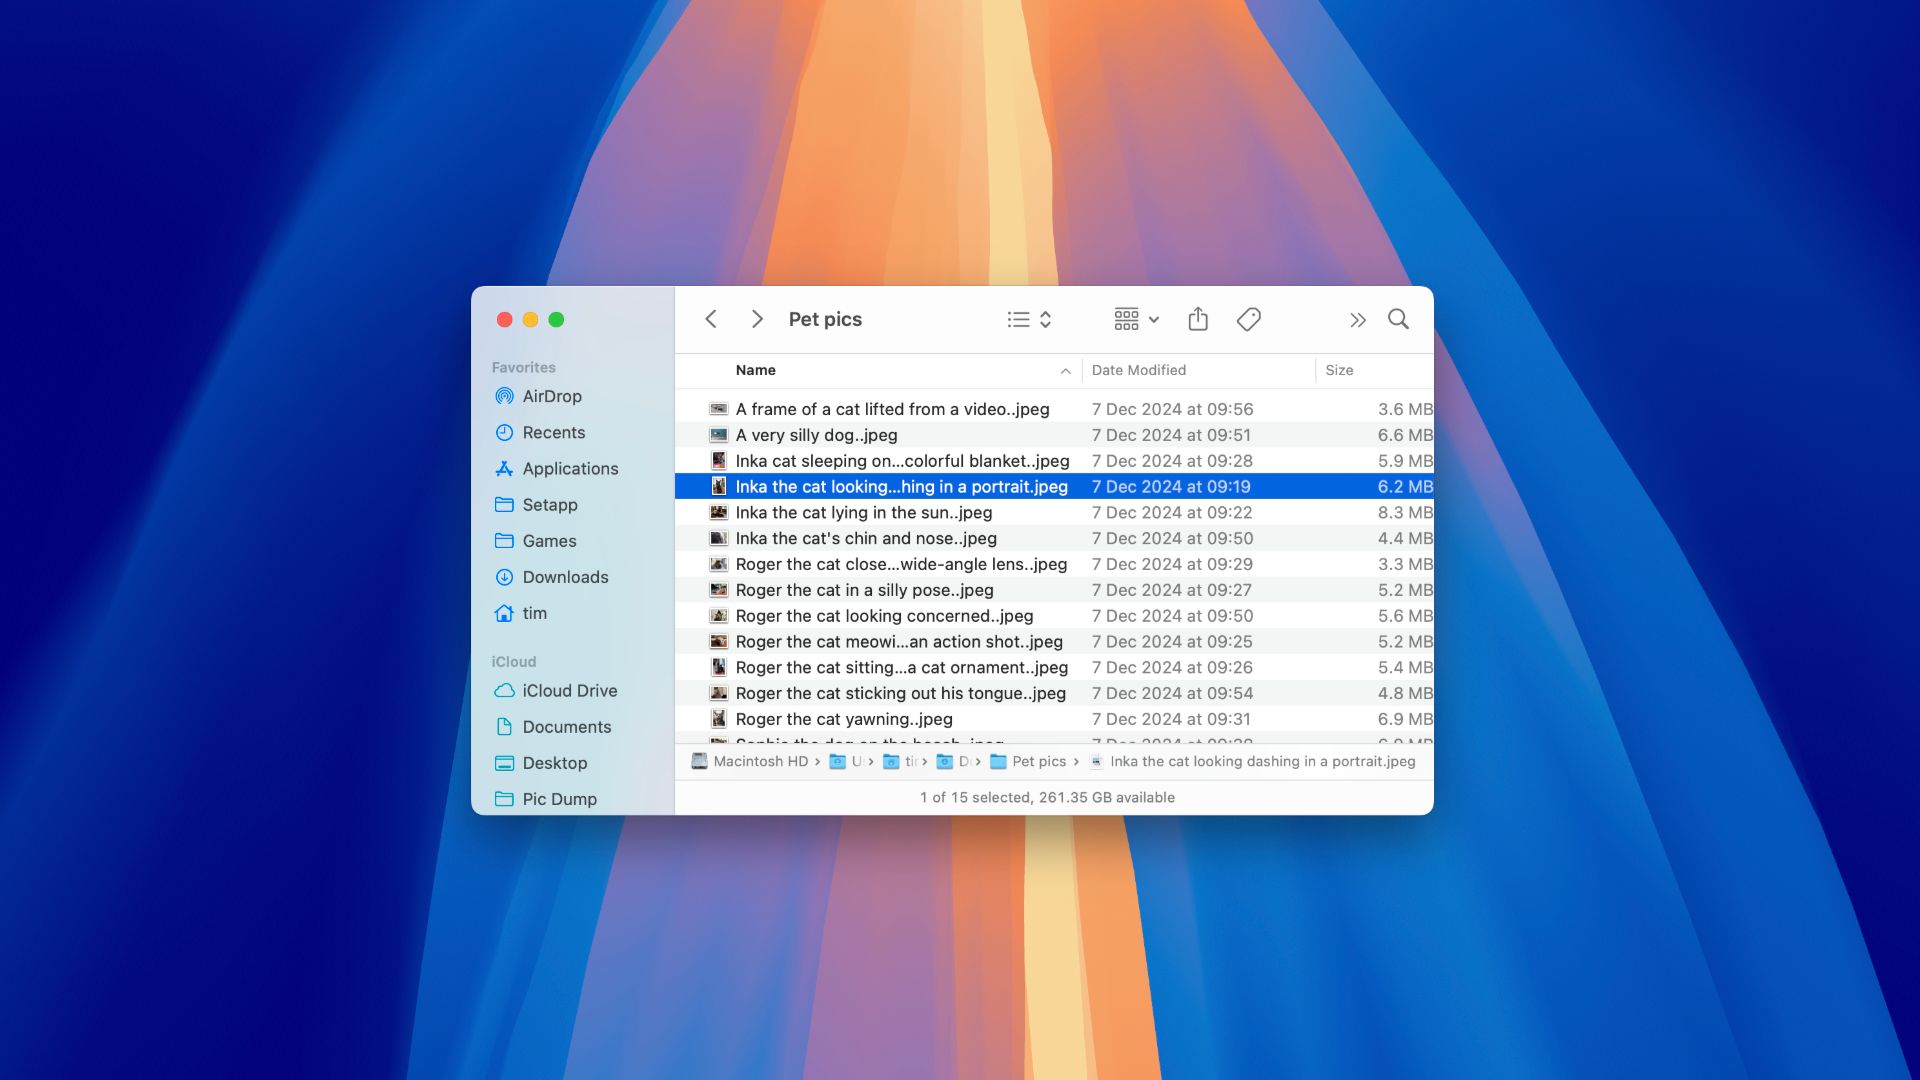
The Trash has a lot of options for how its contents are grouped, but you have to enable them, and it isn’t an obvious thing to change.

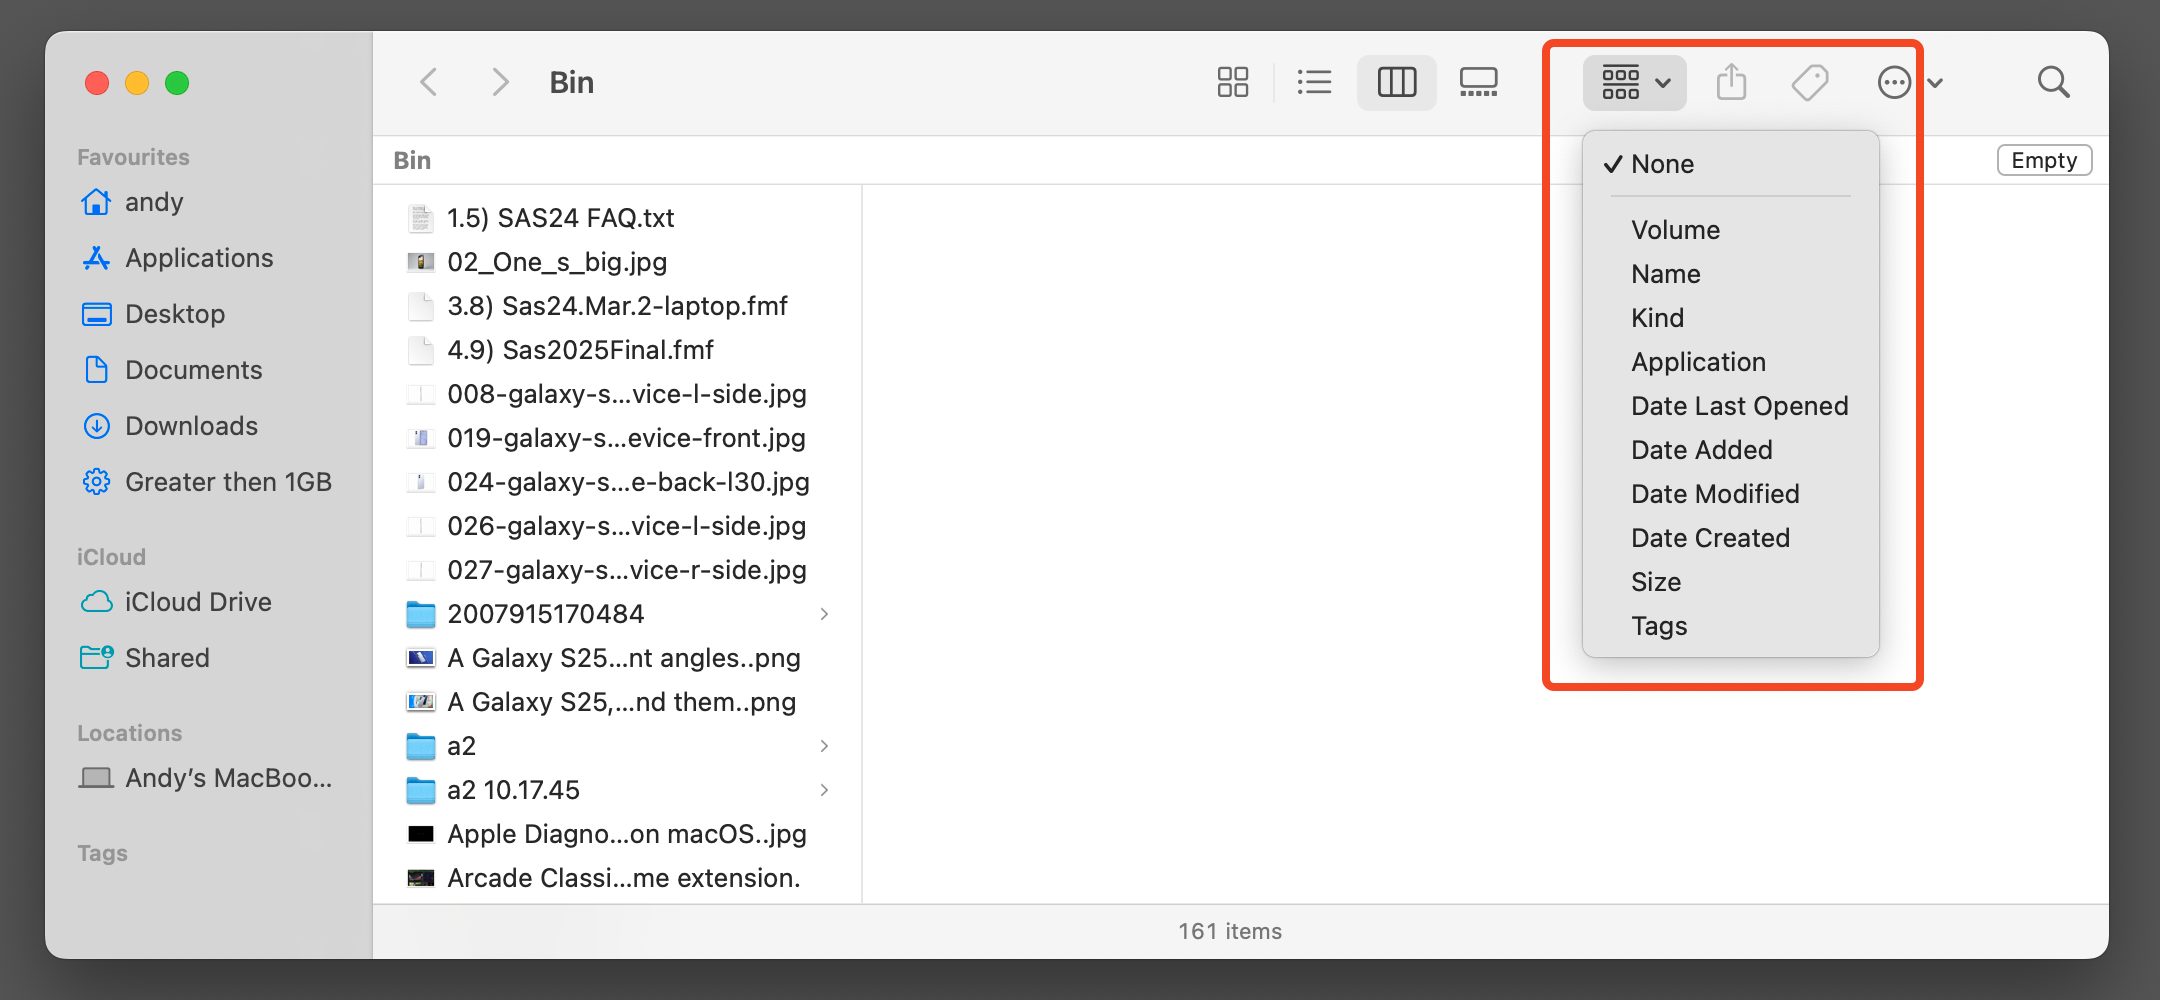
The “Change the Item Grouping” button on the Finder toolbar is how you do it. Click it and you’ll see a number of choices. For the Trash, the two most useful are “Volume,” which makes it simple to delete files from an external drive, and “Date Added.”

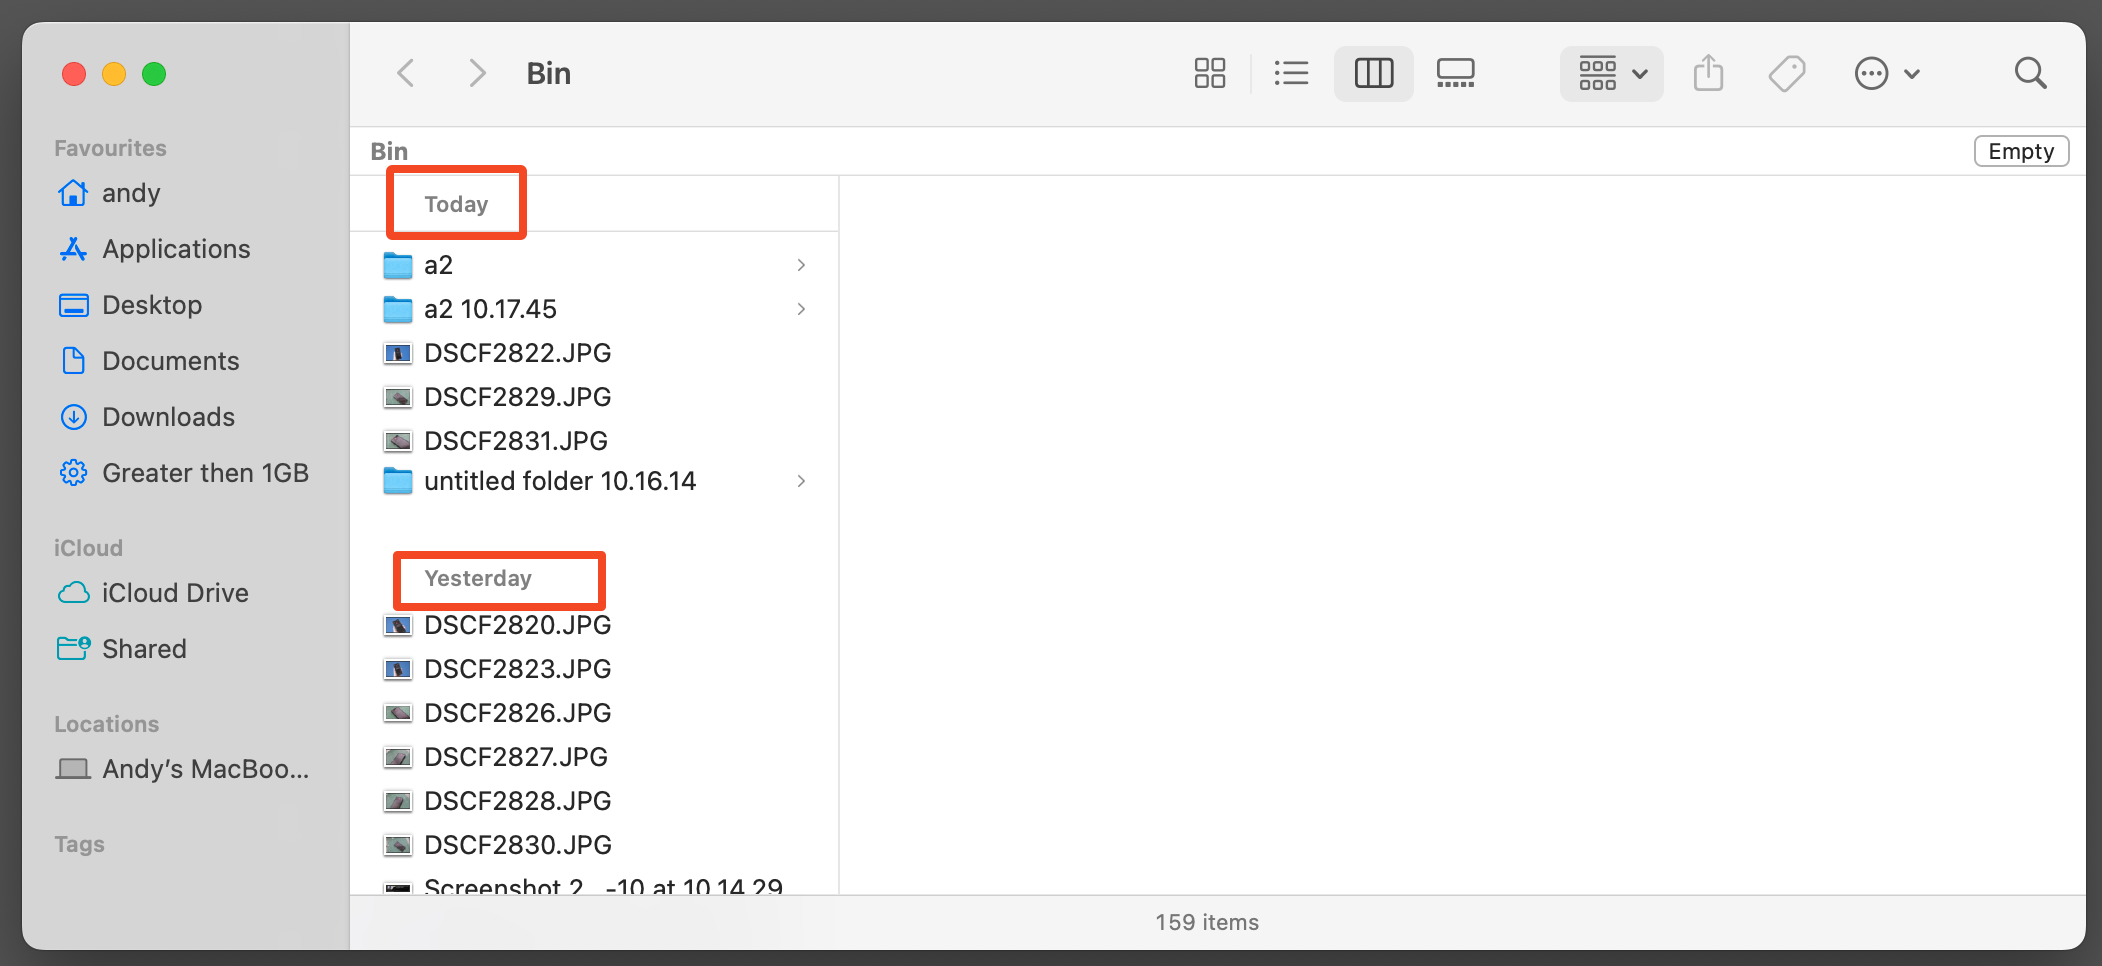
This option groups the items in the Trash by the day you deleted them: today, yesterday, the last seven days, and so on. It’s a game-changer. When you’re working on a project and need to recover a file, it’s so much easier when you know roughly when you deleted it.
Changing the Grouping in the Trash doesn’t affect any other Finder windows. You can set up different groupings for all of your Finder windows if you need to.
6
Delete Locked Files and Folders
Sometimes it isn’t possible to fully empty the Trash or delete specific files or folders because they are locked. If you encounter this problem, you need to unlock the files first in order to be able to properly delete them.

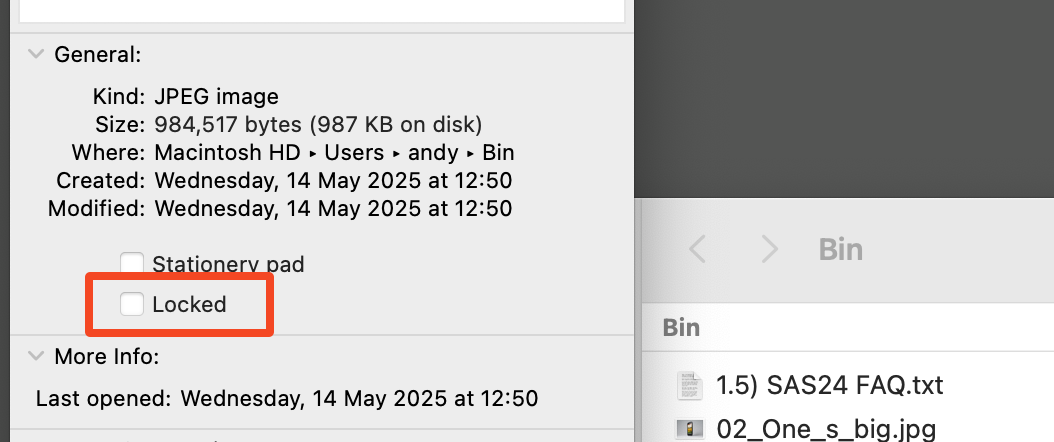
Find the file in the Trash and press Command+I to open its Info window. Now clear the “Locked” option if that is checked. If not, go to the Sharing & Permissions box at the bottom and set the “Privilege” for your user account to “Read & Write.” That should fix it.


The Trash is not an obvious tool for customization, but with these tips, you can make it work better for you. They’re especially handy when you’re creating lots of files, or working with particularly large files. And I find them useful because I rarely empty my Trash just in case there’s something in there that I need.
Source link
-

-

-

-

-
-

-

-