Searching for an email in an overflowing inbox can feel like looking for a needle in a haystack. However, smart use of Outlook’s search features let you quickly locate what you need without wasting time sifting through the clutter. Below are some search tips to help you find any email in seconds.
1 Use Targeted Keywords or Phrases
You should use targeted keywords and phrases to ensure your search yields relevant emails. Using generic terms like plan or report will return too many results, making it hard to sift through them all. Refining your search with more specific terms, like annual sales report or October plan, you can narrow the results to only the most relevant emails.
I also recommend enclosing your search terms in quotes, as this helps Outlook find exact matches rather than individual occurrences of the words. For example, searching for “annual sales report” in quotes will return emails containing that exact phrase rather than separate instances of annual, sales, and report.
This makes finding relevant emails easier, but be cautious—if the phrase doesn’t match the content exactly, you may miss the result you’re looking for.
2 Leverage Boolean Operators
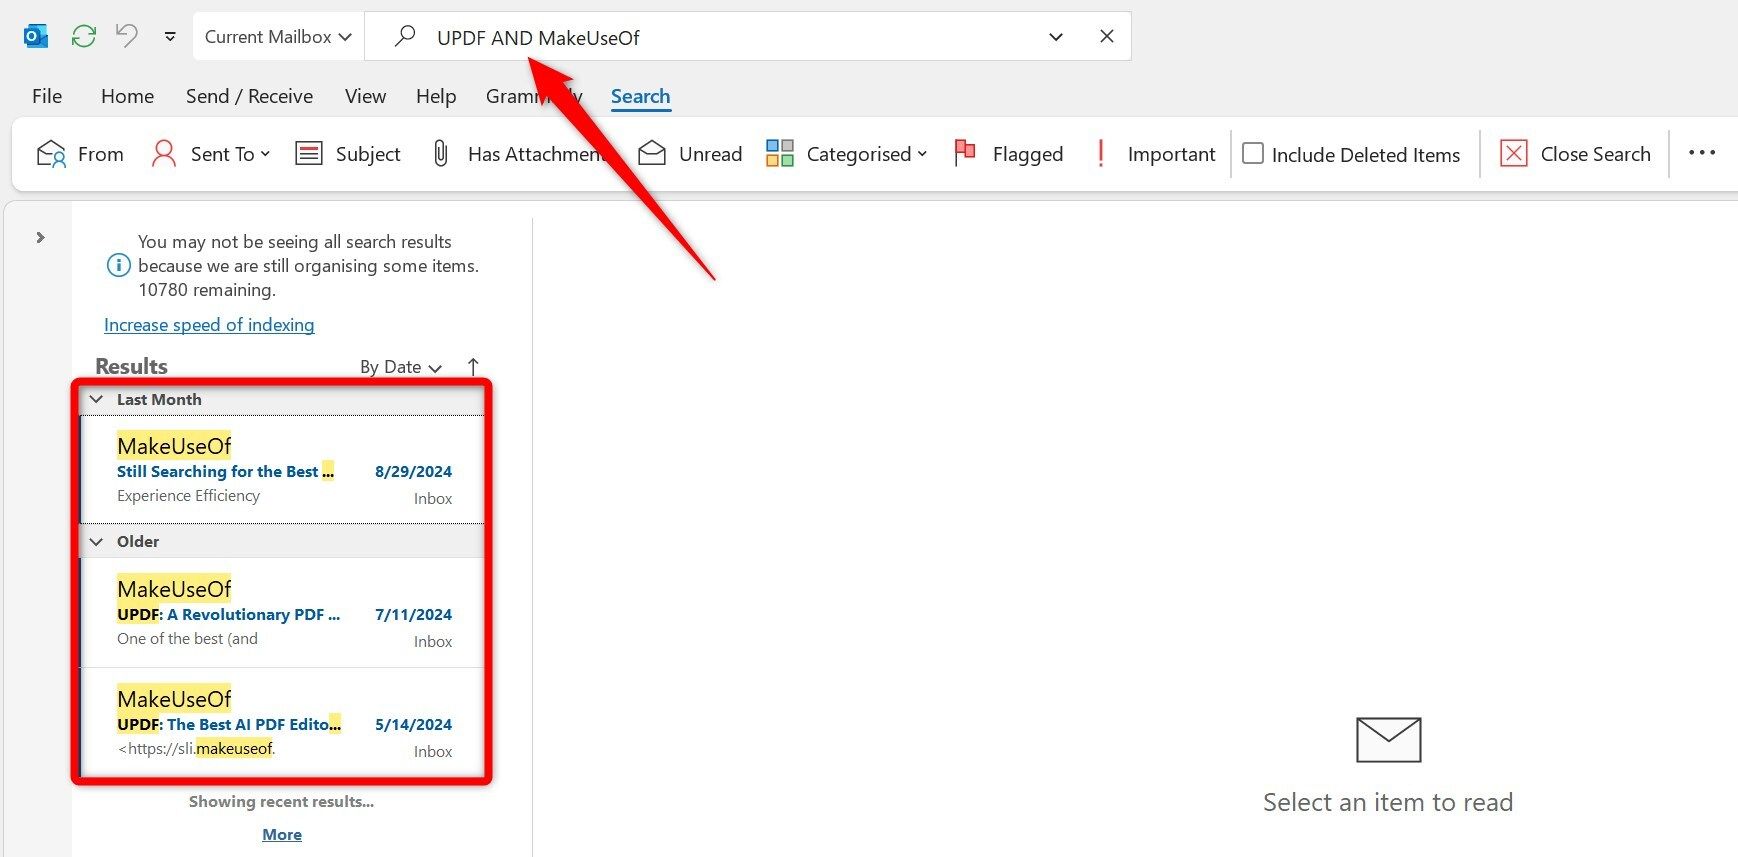
Like Excel, Microsoft Outlook search supports several Boolean operators that can help refine your search results. The ones I use most often are AND, OR, and NOT. With the AND operator, you can filter emails containing both search terms; with OR, you’ll get emails that contain either one of the terms; and with NOT, you can exclude a specific term.
If you want to find emails about a specific employee’s salary, like John’s, you can search John AND salary, and Outlook will only show emails that mention both. To find emails mentioning either notification or announcement, use announcement OR notification. If you want to find emails with reports but exclude budget-related ones, you can use report NOT budget.
3 Filter by Sender or Recipient
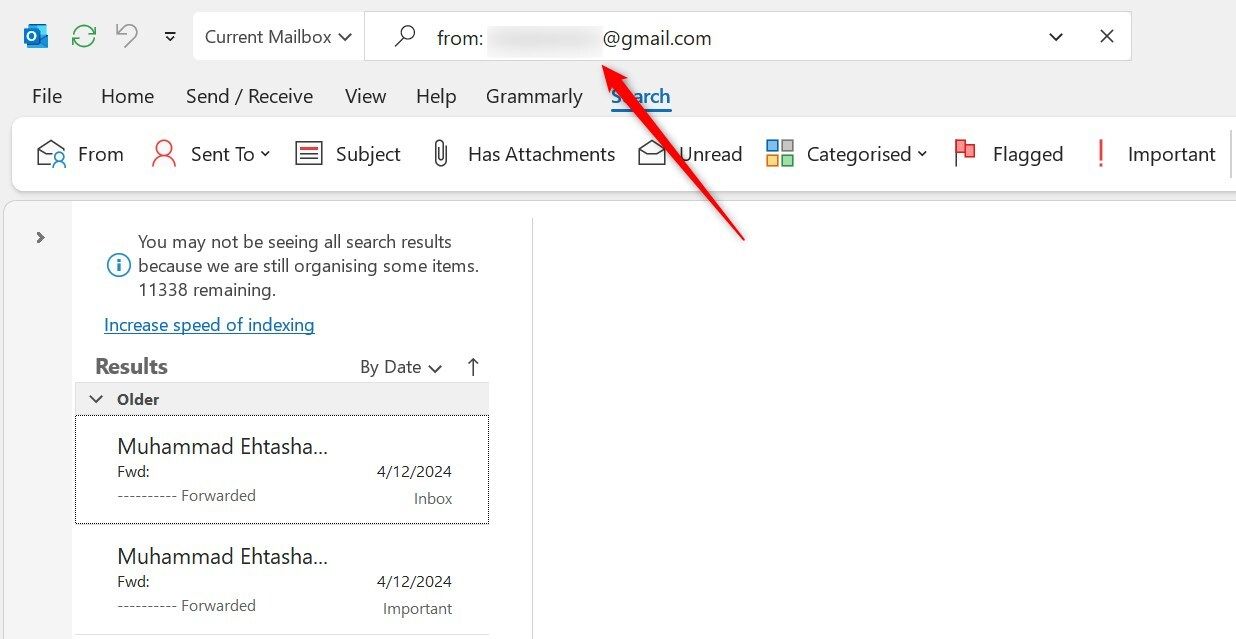
You can filter emails by sender or recipient if you remember their name or email address, which is the quickest way to locate specific emails. To find emails you received from someone, use from: name or email address. For example, if you’re looking for emails from Joe, you could search from: joe or from: joe@outlook.com. Outlook will then only display emails sent by Joe.
Also, you can easily find emails you sent to someone using their name or email address. To do that, use to: name or email address. For instance, searching to: joe or to: joe@outlook.com will show all emails you’ve sent to Joe. When you have multiple contacts with the same name, using the email address is usually more reliable.
4 Search Within a Date Range
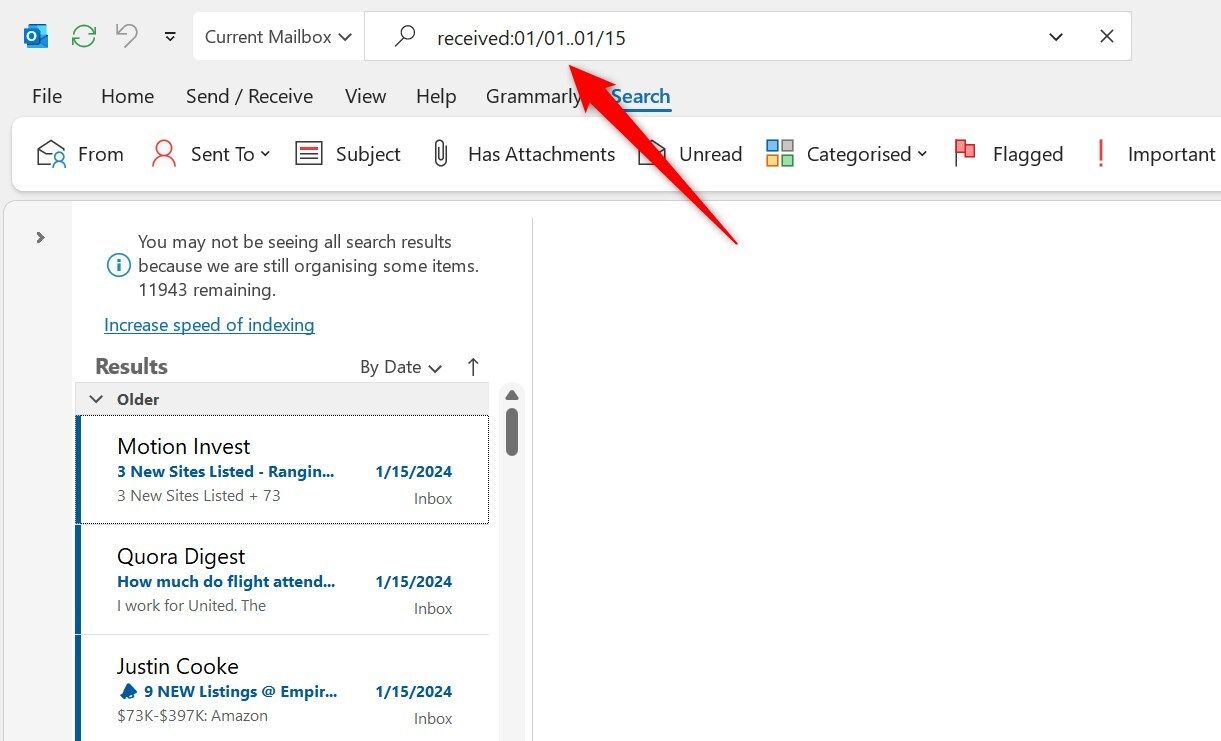
You can search for emails within a specific date range if you remember when you received them. For example, to filter emails received in the first half of January, you can type received: 01/01..01/15. You can also use natural language expressions like received: yesterday, or received: last month. To search sent emails, just replace received with sent.
You can filter emails from a particular day by typing received: 09/10. To exclude emails from a specific date, simply use a – sign with the sent or received operator. To combine date ranges with keywords, just type the keyword first, followed by the date range, and Outlook will find emails received within the specified dates mentioning that keyword.
5 Locate Emails With Attachments
Outlook allows you to filter emails with attachments. If the email you’re looking for has an attachment, you can search by keyword, attachment type, size, or even the attachment’s name. To find all emails with attachments, simply type hasattachments:yes in the search bar. To filter emails with attachments from a specific contact, use John hasattachments:yes.
For filtering emails with a specific type of attachment, such as a PDF, you can use hasattachments:yes attachment:pdf. You can also search by attachment size with size:>10MB. If you know the exact file name, type attachment:”file_name.pdf” to locate the email containing that specific attachment.
6 Use Advanced Search Options
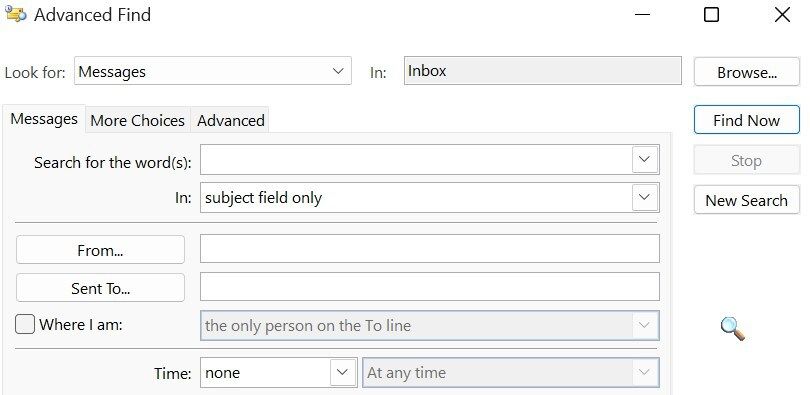
Outlook’s advanced search allows you to combine various search parameters for a more refined search experience. You can filter emails by subject line, keywords, sender or recipient, attachments, date, and more. Using multiple filters together helps you narrow down the results and find exactly what you’re looking for.
Each additional filter you apply reduces the number of emails to sort through. To combine multiple filters with this feature, click on the search bar, then click the three horizontal dots on the far right, and choose Search Tools > Advanced Find. In the dialogue that appears, you can enter as many details as possible to narrow your search results further.
7 Save Your Frequent Searches
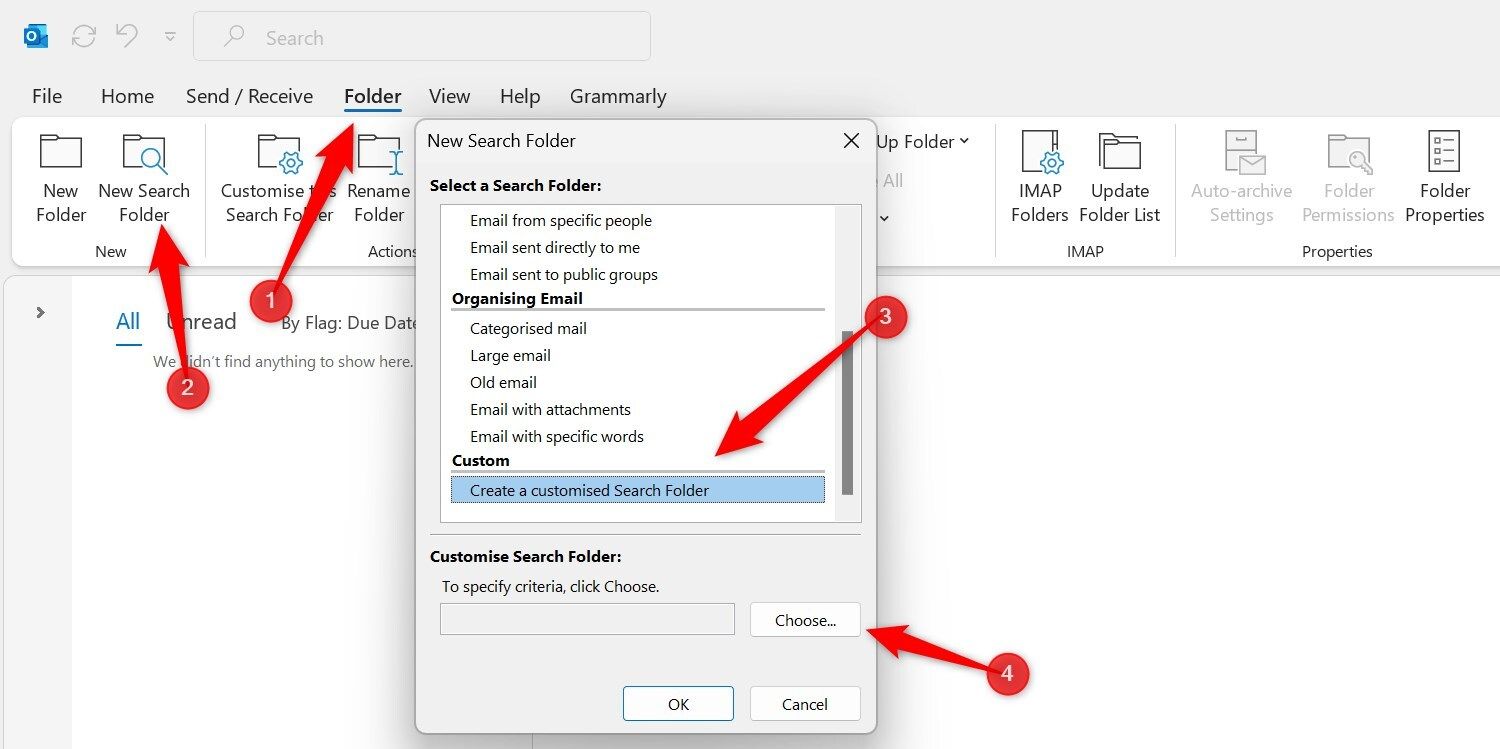
If you frequently search for emails using the same criteria, Custom Search Folders can save you from recreating it each time. First, define your search criteria using the search bar to ensure you get the correct results. Then, go to Folder > New Search Folder, select “Create a Customized Search Folder,” and click “Choose.”
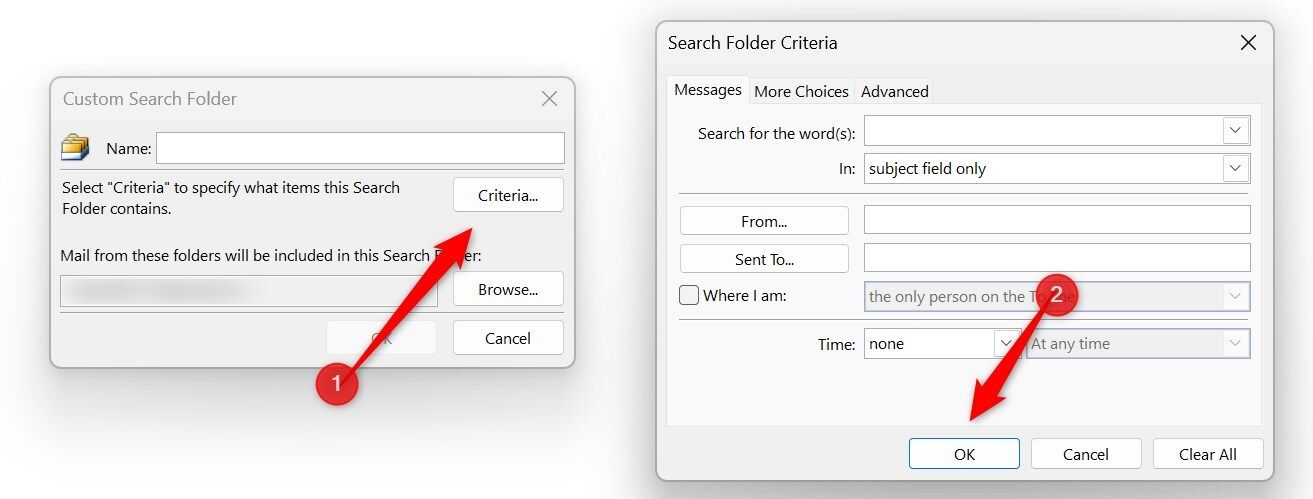
Next, name your search folder, click “Criteria,” set the specific conditions you previously defined, and click “OK.” This folder will now appear in the left-hand panel. To search for emails that match the same criteria, click the Search Folder, and Outlook will filter the emails, even the new ones you received recently.
8 Filter Read/Unread Emails
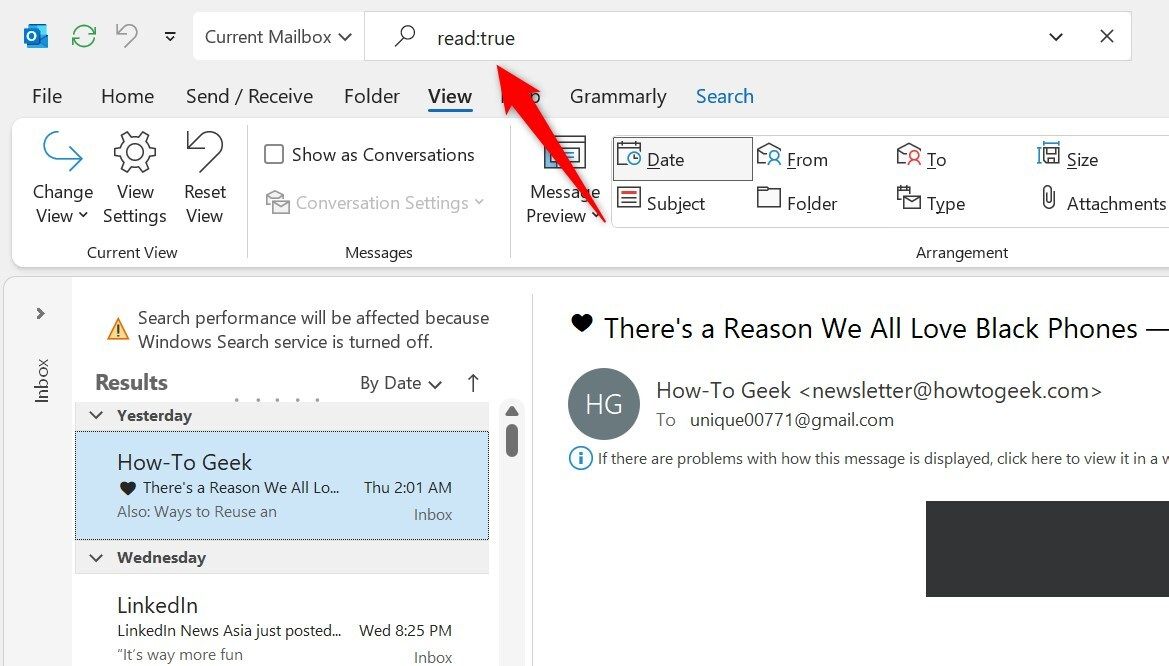
One search filter I find especially helpful is filtering emails by their read status. My inbox has over 500 unread emails, and I almost always need to search for important emails that I’ve read at least once. By using the read:true filter, Outlook will only show emails that meet other criteria and have already been read, excluding unread emails and narrowing down the results.
Similarly, if I leave an email to read later and forget about it, I use read:false to filter unread emails and apply date or other filters to find the specific message. When used smartly, both filters can significantly reduce the number of search results, especially when combined with other search criteria.
Searching for relevant emails in an inbox that’s become a dumping ground can be challenging. Learning these tips on using Outlook’s search tools, you should now find it much easier to locate the emails you need. By applying these techniques, you’ll save yourself considerable time and effort in the process.
Source link


