Key Takeaways
- Repurpose an old PC with Linux as a print server for a platform-agnostic, cost-effective setup.
- CUPS allows your old PC hardware to act as a Linux print server to various platforms.
- Configure CUPS and Samba for network printing, then easily connect devices to your shared printer.
Sharing a printer can be tricky due to complex setups or software compatibility issues. However, with an old computer, you can repurpose it as a Linux print server, simplifying network printer sharing into a cost-effective solution.
I custom-ordered an old PC back in 2015, which served me as a Windows desktop for productivity and light gaming. Since 2020, I’ve transitioned to Macs, and the PC became a headless Plex/print server. While administering it using remote desktop made this doable, it seemed like I was always running into weird network permissions quirks and frequent updates requiring reboots.
Tired of all this and just the sheer bloated nature of Windows, I set out to repurpose this old PC into a steady, reliable file server, that I could also use not just for Plex and sharing files, but also to print to it, from any computer or device, regardless of platform.
What is CUPS?
CUPS (Common UNIX Printing System) is the standard printing system for Unix-like operating systems, allowing a computer to act as a print server that processes print jobs for various printers. CUPS supports a wide range of printer models and is compatible with Internet Printing Protocol (IPP), enabling functionality across Windows, macOS, Android, and iOS.
Install and Configure CUPS
After you’ve installed a Linux distribution, install CUPS by following the steps for your distribution, then start and enable it, and add your user to the lpadmin group, for example: sudo usermod -aG lpadmin matt.
Ubuntu
sudo apt update
sudo apt install cups
sudo systemctl start cups
sudo systemctl enable cups
sudo usermod -aG lpadmin $USER
Members of the lpadmin group have permission to manage printers and print jobs, which includes adding and configuring printers through the CUPS web interface.
Fedora
sudo dnf install cups
sudo systemctl start cups
sudo systemctl enable cups
sudo usermod -aG lpadmin $USER
Arch Linux
sudo pacman -S cups
sudo systemctl start org.cups.cupsd.service
sudo systemctl enable org.cups.cupsd.service
sudo gpasswd -a $USER lpadmin
Configure CUPS
Once you install CUPS, you need to configure it to, among other things, enable printer sharing and the CUPS web interface. Back up the existing default configuration.
sudo mv /etc/cups/cupsd.conf /etc/cups/cupsd.conf.bak
Then, start a new configuration file.
sudo vim /etc/cups/cupsd.conf
Next, add or modify the following lines to the configuration file.
LogLevel warn
PageLogFormat
Listen *:631
interfaces
Listen /run/cups/cups.sock
MaxLogSize 0
ErrorPolicy retry-job
IdleExitTimeout 60
Browsing On
BrowseLocalProtocols dnssd
DefaultAuthType Basic
WebInterface Yes
<Location />
Order allow,deny
Allow all
Location>
<Location /admin>
Order allow,deny
Allow all
AuthType Basic
Require user @SYSTEM
Location>
<Location /admin/conf>
Order allow,deny
Allow all
AuthType Basic
Require user @SYSTEM
Location>
<Location /jobs>
AuthType Basic
Require user @SYSTEM
Order allow,deny
Allow all
Location>
<Location /printers>
Order allow,deny
Allow all
Location>
<Location /admin/log>
Order allow,deny
Allow all
AuthType Basicaccess
Require user @SYSTEM
Location>
Restart CUPS to apply the changes.
sudo systemctl restart cups
Finally, confirm CUPS is up and running properly.
sudo systemctl status cups
Configure Samba for Network Printer Sharing
Next, we need to configure Samba to act as a sort of intermediary between the CUPS server and client devices. Edit your smb.conf file:
sudo vim /etc/samba/smb.conf
Add the following lines to the [global] section.
 load printers = yes
 printing = cups
 printcap name = cups
Add the following [printers] section and the printer drivers [print$] section.
[printers]
 comment = All Printers
 path = /var/spool/samba
 printable = yes
 guest ok = yes
browseable = no [print$]
comment = Printer Drivers
path = /var/lib/samba/printers
browseable = yes
read only = no
guest ok = yes
Your smb.conf will somewhat resemble the following:
[global]
workgroup = DOGHOUSE
server string = Samba Server %v
netbios name = SERVER
security = user
map to guest = Bad User load printers = yes
printing = cups
printcap name = cups
[Home]
path = /home/username
browseable = yes
writable = yes
valid users = user
create mask = 0700
directory mask = 0700
[printers]
comment = All Printers
path = /var/spool/samba
printable = yes
guest ok = yes
browseable = no
[print$]
 comment = Printer Drivers
 path = /var/lib/samba/printers
 browseable = yes
 read only = no
guest ok = yes You can enter the testparm command to test your configuration.

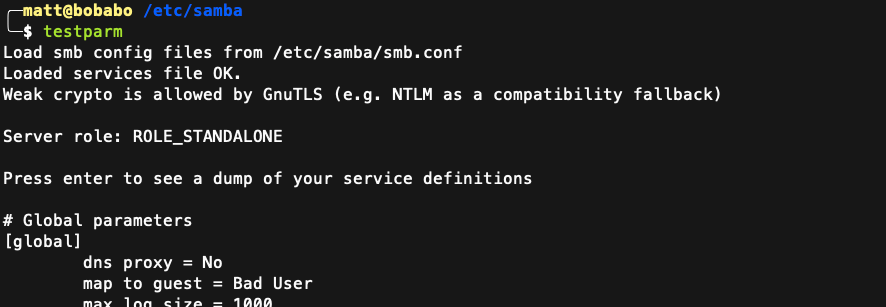
If everything passes, restart Samba:
sudo systemctl restart smbd nmbd
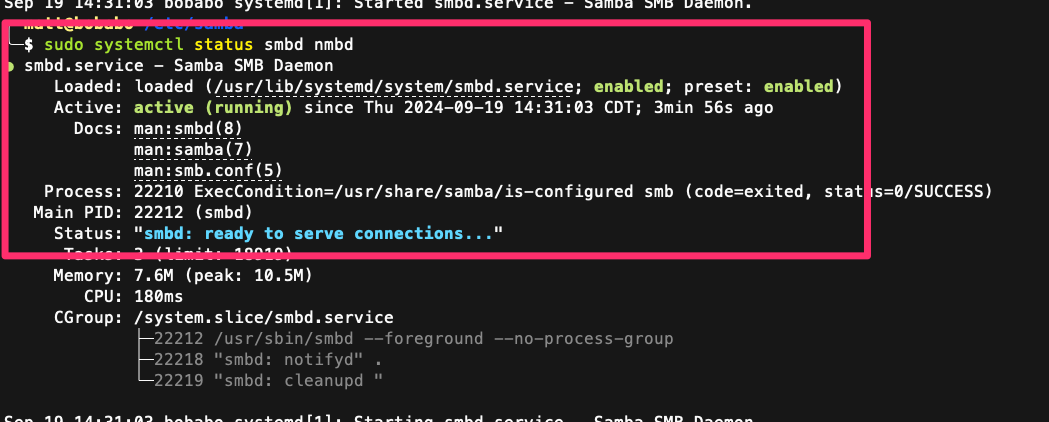
Finally, confirm Samba is up and running properly
sudo systemctl status smbd nmbd

Sharing Your Printer
We’re almost done! It’s time to log into your new CUPS server, then add and share your printer.
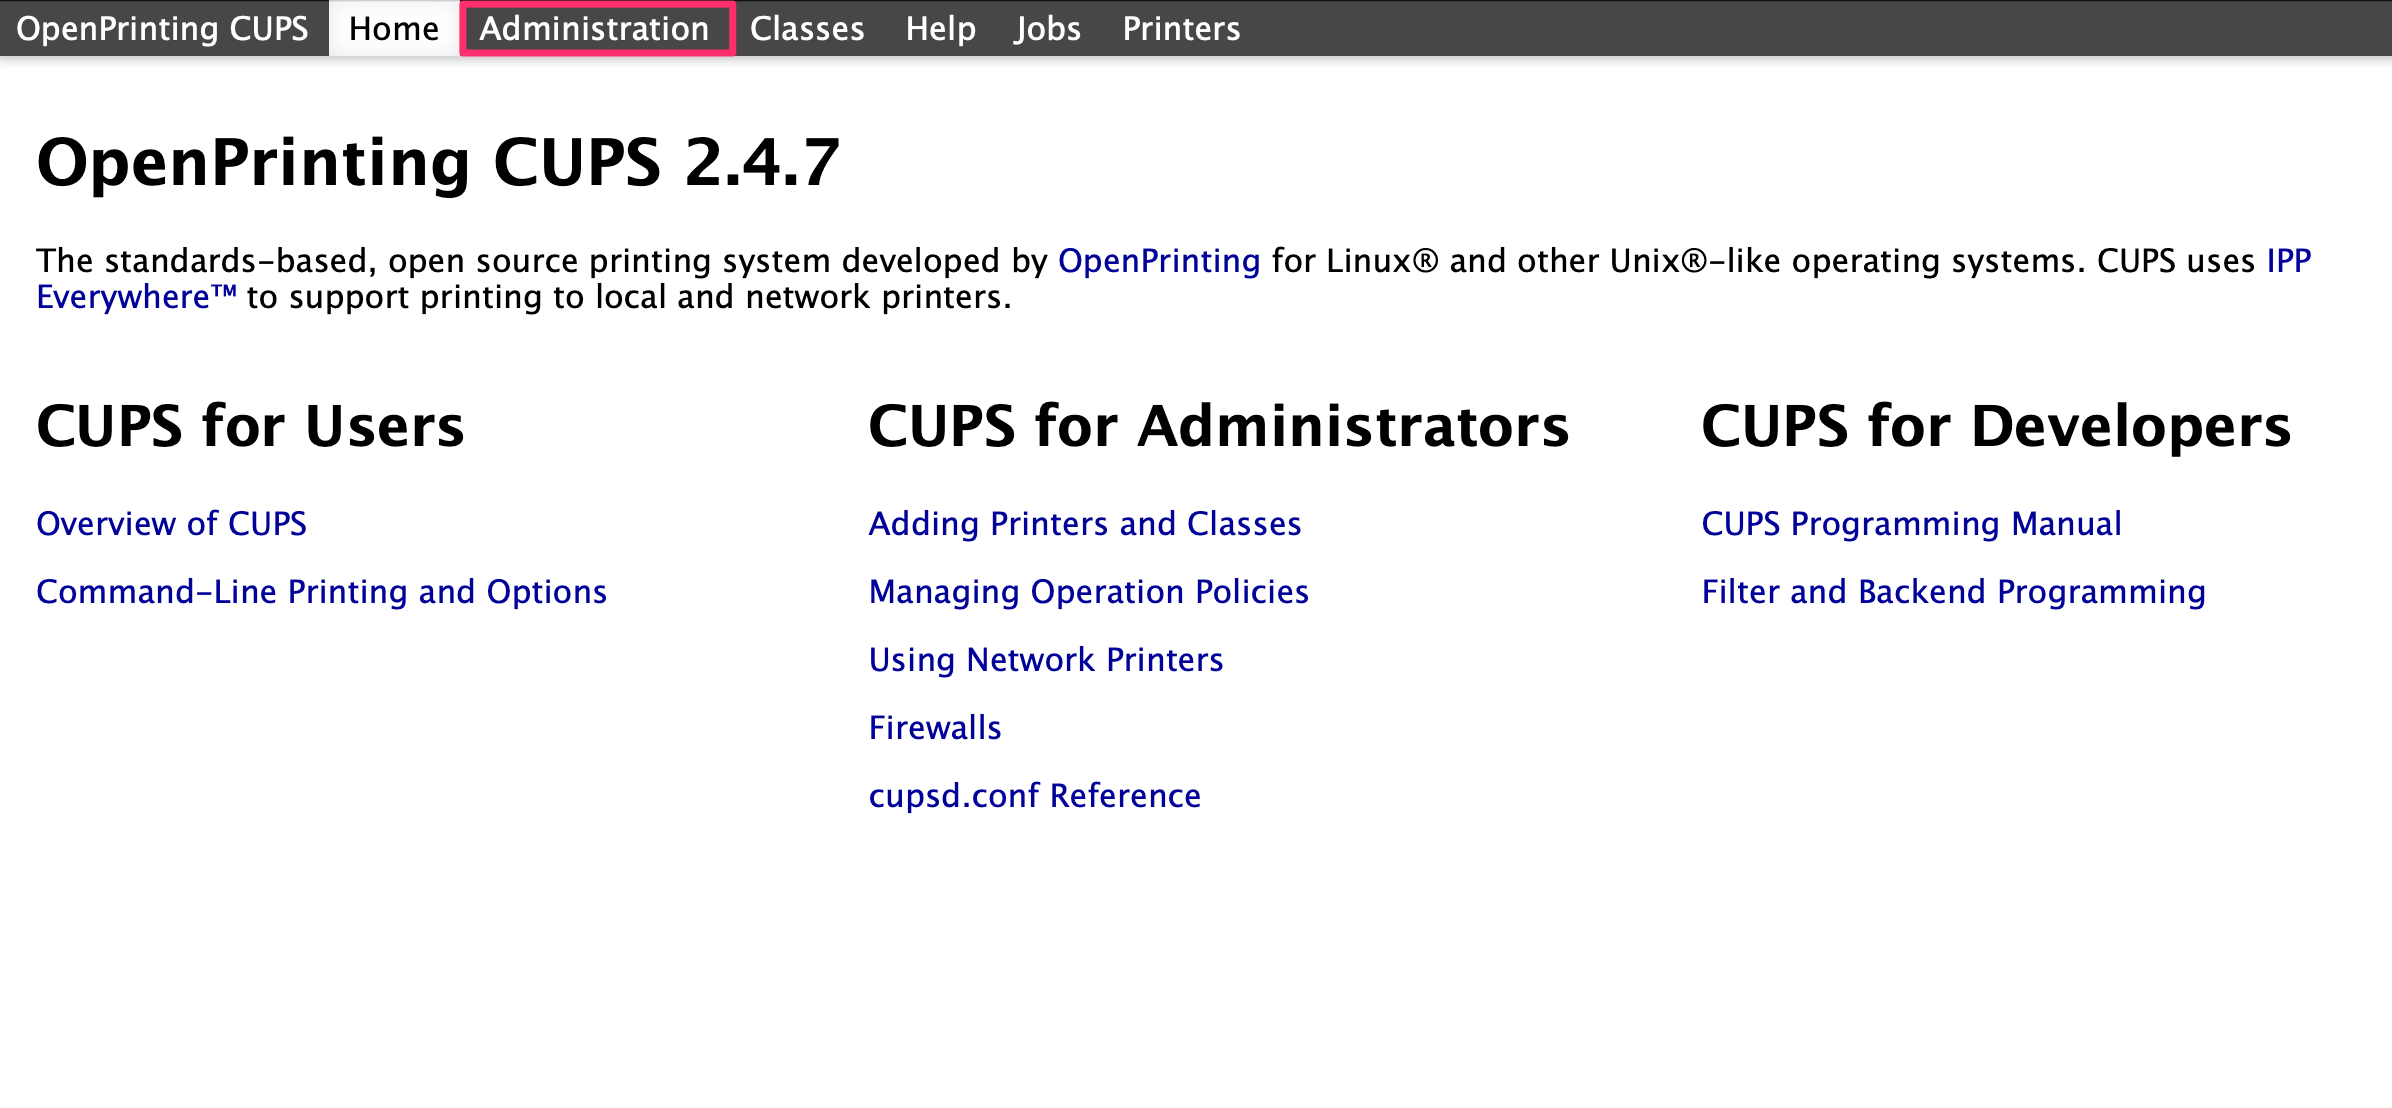
Point your web browser at your server IP or hostname, such as 192.168.1.100:631 or hostname:631. Using the CUPS configuration you added earlier, you should be prompted to enter your credentials to access the web interface.
Select the “Administration” tab in the top row,

Select “Add Printer,” then the server should already recognize your hardware and have it listed as a local printer. You can change your printer’s details, but don’t forget to select the “Share This Printer” option before proceeding to the driver selection screen. Select your printer manufacturer, the appropriate driver for your printer model, then select “Add Printer.”
Can We Talk About Drivers for a Minute?
CUPS uses PostScript Printer Description (PPD) files, which describe the capabilities and features of your specific printer model, but we’ll just call them drivers.
If you don’t find your printer represented, you can try the Generic (Generic PostScript) driver. If you look around, you will probably find a PPD file on your printer manufacturer’s website, then you can use the “Provide a PPD File” option to upload it to the CUPS server from your computer.


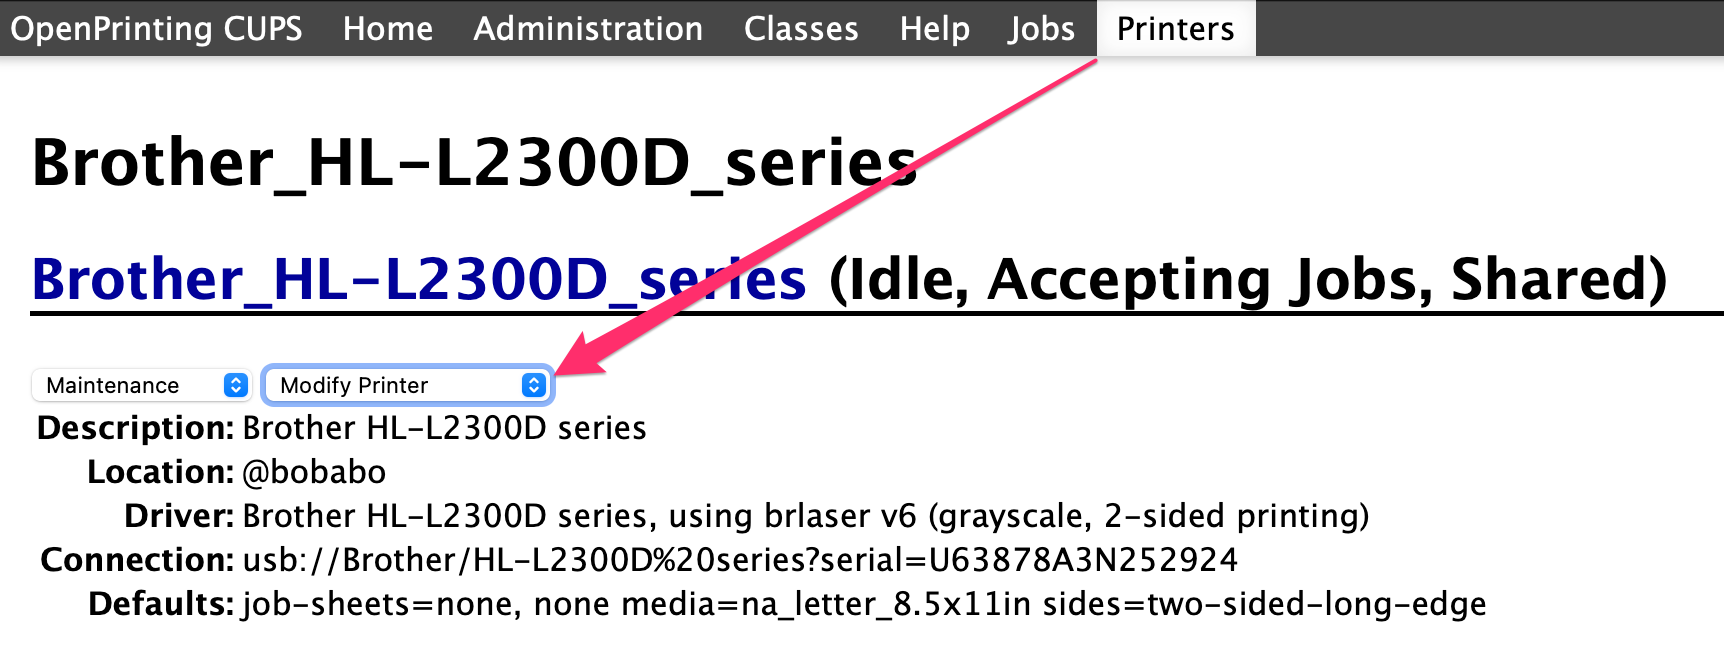
That said, in the case of Brother printers, you might not get optimal results with Brother’s own drivers. I’ve found the brlaser drivers yield far better results than Brother’s own drivers. The brlaser drivers can be easily added to your system with the printer-driver-brlaser package, for example: sudo apt install printer-driver-brlaser.
Getting this right the first time can be tricky, and you won’t know if it’s right until you submit your first print job. If your print output is mangled or gibberish, then you can modify your printer in the web interface and try a different driver.

Setting Up Your Devices
At this point, your CUPS printer should be accessible to network clients, it’s time to connect your network devices to your shared printer.
Windows
Open the Settings, and select Bluetooth & Devices > Printers & Scanners. To add the printer, select “Add Device,” and wait for Windows to scan to find it, then “Add Device.”
macOS
Open System Settings, then select “Add Printer, Scanner, or Fax.” On the Add Printer screen, select your printer, then select “Add.”
Android
Android does things a bit differently in that you probably need to install a print service that corresponds to your printer manufacturer. Open the Settings, then More Connectivity Options > Printing > Add Service. This will open the Play Store and allow you to choose a print service for your printer manufacturer (the Brother print service didn’t work for me, but the Mopria print service works flawlessly).
Once the print service found the shared printer, I just selected it and then “Print Test Page” to make sure it was working correctly.
iPhone
On iPhone and other iOS devices, it is very simple to print with little to no setup. Simply tap the share icon in whatever app you’re using, then select “Print” from the menu. You should see your printer, but if not, just select the “Printer” field, your printer, then Print.
Congratulations! You’ve successfully turned your old PC into a reliable Linux print server, making printer sharing across different platforms easy and seamless. This setup is streamlined, efficient, and saves time, allowing you to print from any device with ease. Enjoy the simplicity and control you’ve gained over your printing environment!
Source link
-

-

-

-

-
-
-

-