Enable and create GIFs with Snipping Tool on Windows 11
- You can create GIFs on Windows 11 using the Snipping Tool (version 11.2505.21.0 or higher) by recording your screen and exporting the clip as a GIF.
- The feature allows up to 30-second recordings and includes options to choose quality before saving.
- If the feature isn’t available, you can enable it with ViveTool using the command
vivetool /enable /id:47081492.
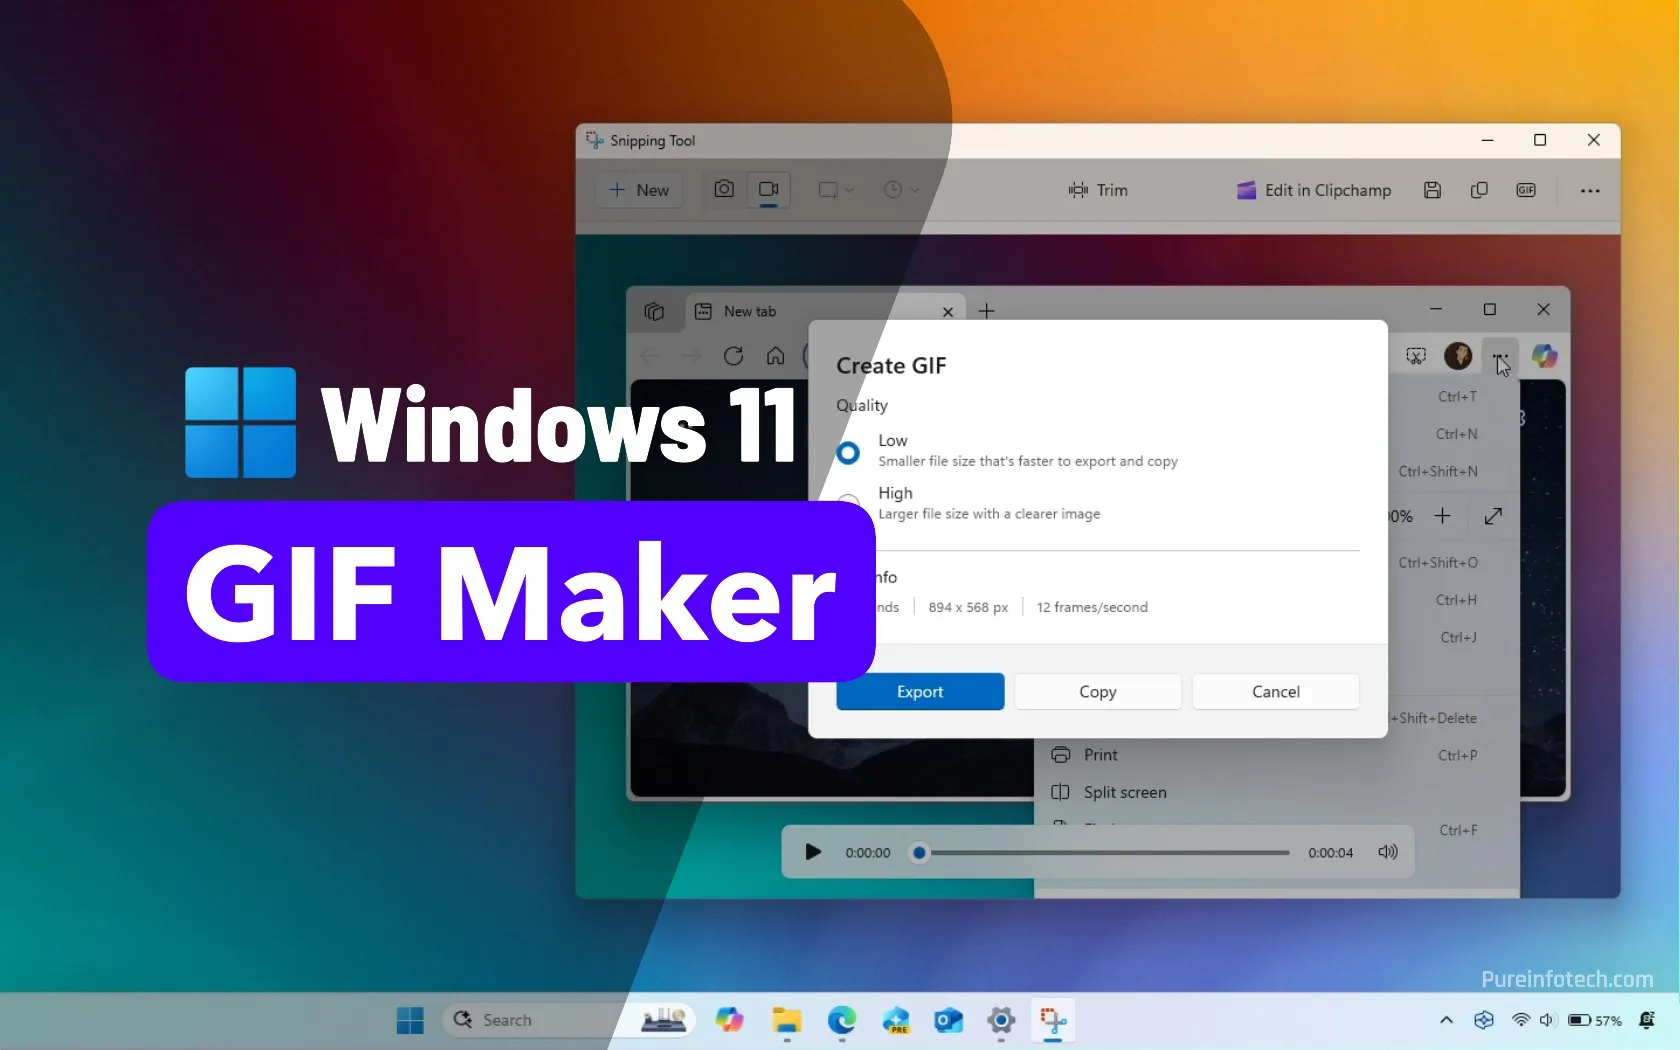
The Snipping Tool app for Windows 11 now has an option to create animated GIFs from screen recordings, so you no longer have to use third-party websites or tools.
The feature is basic and straightforward, with only an option to choose the quality. The length and size are based on the captured and edited video (up to 30 seconds), and the Snipping Tool sets a default of 12 frames per second.
Once you have recorded the screen, you can export a short animated GIF, which you can then share on social media or other media.
At the time of this writing, Microsoft is gradually starting to test the GIF maker with the Snipping Tool version 11.2505.21.0 and higher releases for devices enrolled in the Canary and Dev Channels of the Windows Insider Program. However, if the feature isn’t available, it’s possible to enable it using the ViveTool.
In this guide, I’ll explain the steps to enable and use the feature to start creating GIFs on Windows 11.
To enable the GIF maker on Windows 11, use these steps:
-
Download the ViveTool-vx.x.x.zip file on your computer.
-
Double-click the zip folder to open it with File Explorer.
-
Click the Extract all button.
-
Click the Extract button.
-
Copy the path to the folder.
-
Open Start.
-
Search for Command Prompt, right-click the top result, and select the Run as administrator option.
-
Type the following command to navigate to the ViveTool folder and press Enter:
cd c:\folder\path\ViveTool-v0.x.x
In the command, remember to change the path to the folder with your path.
-
Type the following command to enable the GIF export feature and press Enter:
vivetool /enable /id:47081492
-
Restart the computer.
Once you complete the steps, you can start capturing videos and share them as GIFs.
If you want to undo the changes, you can follow the same instructions outlined above, but in step 10, run the vivetool /disable /id:47081492 command.
To create and export a GIF image on Windows 11, follow these steps:
-
Open Start.
-
Search for Snipping Tool and click the top result to open the app.
Quick tip: You can also use the “Windows key + Shift + R” keyboard shortcut to launch the recording tool.
-
Select the Record option.
-
Click the New button.

-
Select the area to record with the mouse.
-
Click the Start button.

-
Create your video recording.
-
Click the Stop Recording button.
-
Click the Trim button.
-
Edit the capture as necessary.
-
Click the Apply button.

-
Click the GIF button at the top-right corner.

-
Choose the GIF quality, including “Low” or “High.”
-
Click the Export button.

-
Save the capture as a GIF file on your device.
Once you complete the steps, the GIF will be saved on your computer for sharing.
If the video is longer than 30 seconds, the Snipping Tool will only allow you to export the first 30 seconds.
If you’re using the Snipping Tool on a virtual machine, screen recordings may display incorrect colors, likely due to limitations with virtual video drivers. For accurate color capture, use the feature on a physical Windows 11 device.
Why You Can Trust Pureinfotech
The author combines expert insights with user-centric guidance, rigorously researching and testing to ensure you receive trustworthy, easy-to-follow tech guides. Review the publishing process.
Source link