I’ve always found Microsoft’s family features a bit confusing in the past, but things took a welcome turn with Windows 10. Setting up a child account became simpler, more intuitive, and much quicker than before. If you’ve ever wondered how to make a child account on Windows 10 or how to set up a Windows 10 computer for a child, this guide will walk you through the entire process, including how to do it even if your child doesn’t have an email address. Let’s get started:
Open the Family settings in Windows 10
To get started, open the Settings app. The quickest way is to click or tap its shortcut in the Start Menu or to press Windows + I on your keyboard. Once you’re there, go to the Accounts section.

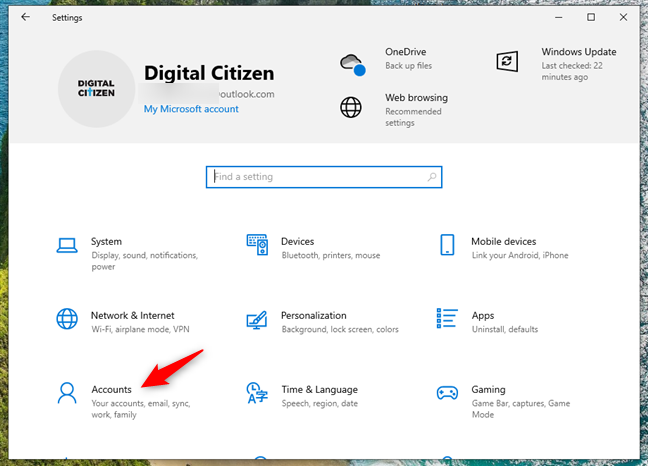
The Accounts category from the Windows 10 Settings
Next, select Family & other users in the left sidebar.

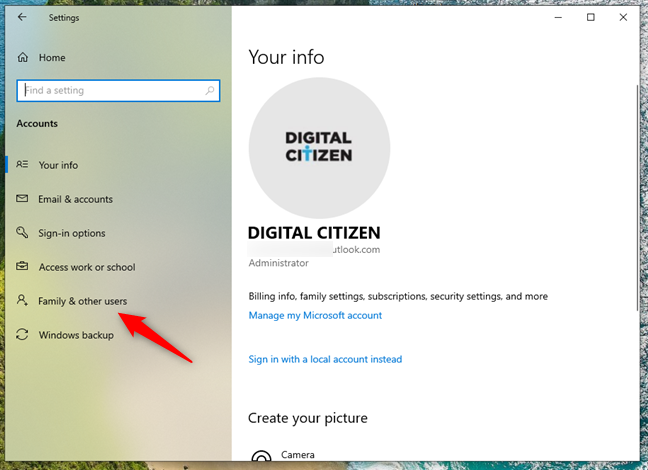
The Family & other users section from the Accounts category
Then, on the right side of the window, click or tap Add a family member.

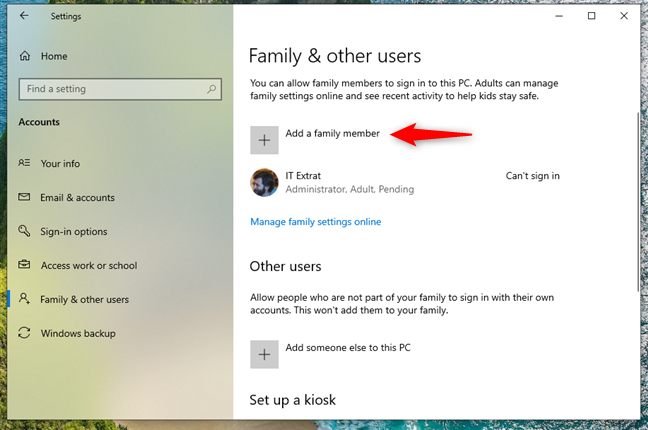
Choosing to Add a family member
How to add a child who has a Microsoft account
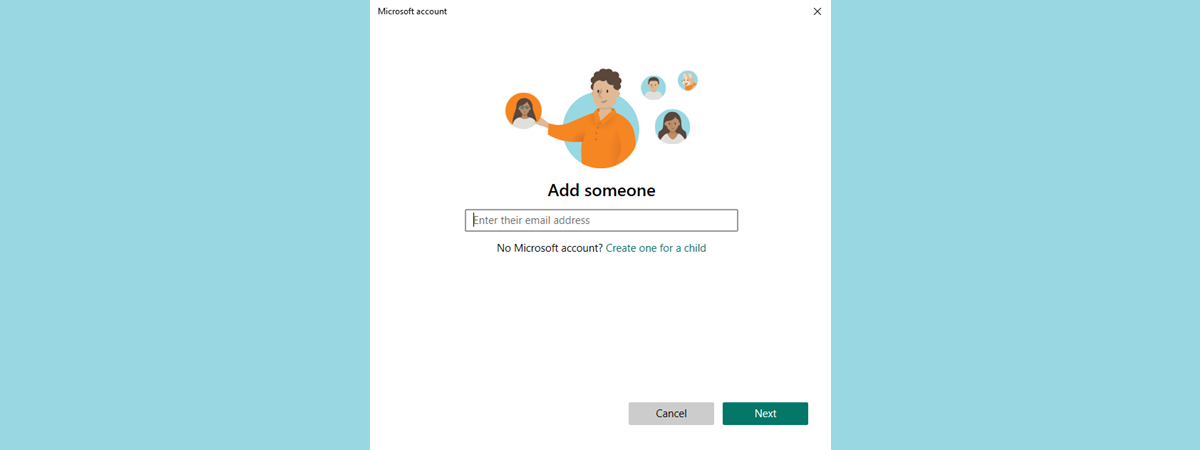
Windows 10 will now open a new window asking you to add someone. If your child already has a Microsoft account, that means they have an email address they use for things like Windows 10, Xbox, Office, Outlook.com, or OneDrive. If not, just skip to the next part of this guide.
If your child does have an account, you can use that same email address to add them to your Windows 10 PC. Just type it into the Enter their email address field, then click or tap Next.


Add someone to your family
Because you’re adding a child, select Member when asked what role they should have. Then, click or tap Invite to move forward.

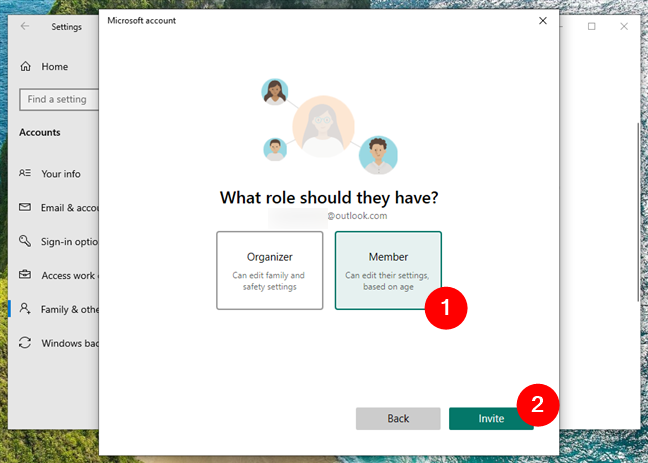
What role should they have?
If all goes well, your child will need to check their email and accept your invitation. Once they do, the family settings will apply to their account. Back in the Settings app, you’ll see the child account listed with a status of Child, Pending until they log in to the computer with their own details.

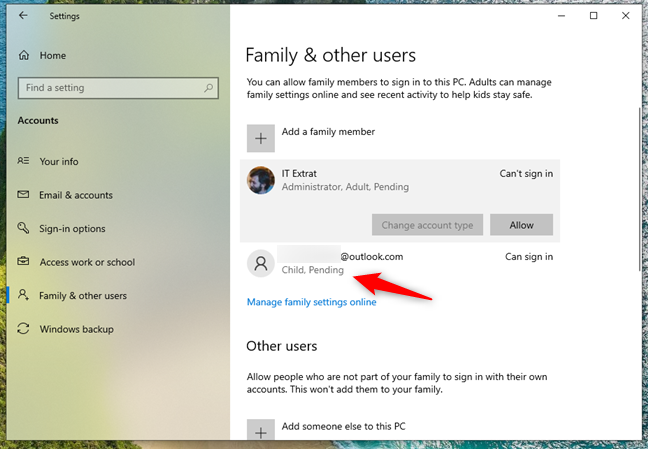
The child account has been set up, and its status is Pending until he or she logs in
The account is ready now, and all your child needs to do is sign in on the Windows 10 PC. But what if your child has no Microsoft account? Here’s what you must do:
How to add a child account without email, in Windows 10
If your child doesn’t have a Microsoft account yet, you’ll need to create one before setting up the child account. While you could make a basic local account, Windows 10 won’t treat it as a child account without a Microsoft account. To begin, click or tap the link that says “No Microsoft account? Create one for a child.”

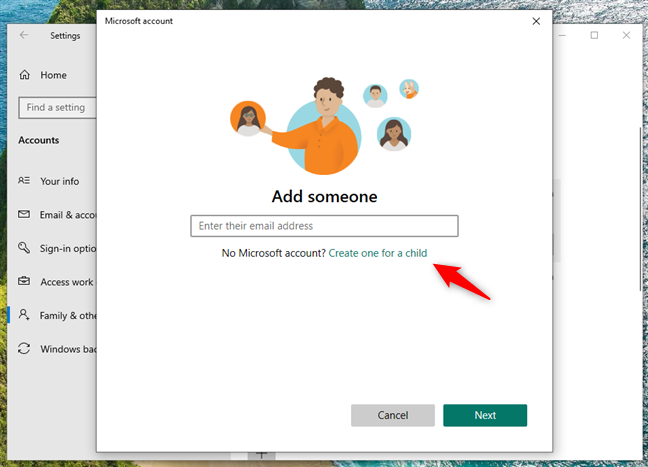
Choosing to create a child account when he or she doesn’t have an email address
Next, you’ll be asked to create an email address for your child. Pick a name both of you are happy with, then click or tap Next.

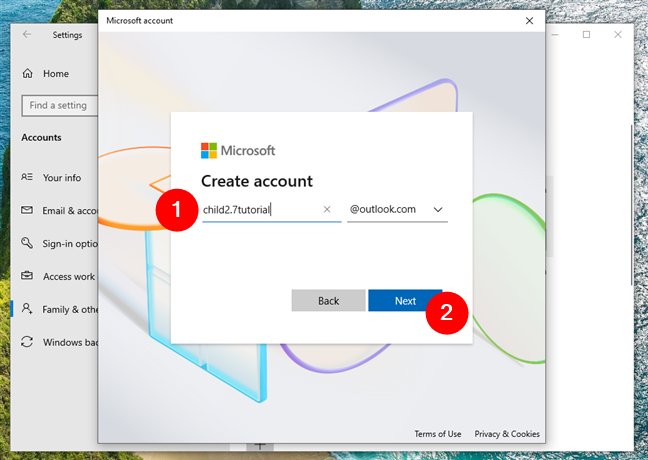
Creating a Microsoft account for your child
Set a strong password for the new account, and decide if your child should receive updates and offers from Microsoft. I bet that you don’t want that, so uncheck this option. 🙂 Press Next one more time.


Creating a password for the child’s account
Now, enter your child’s first and last name. Once you do, surprise: you need to hit Next. 🙂

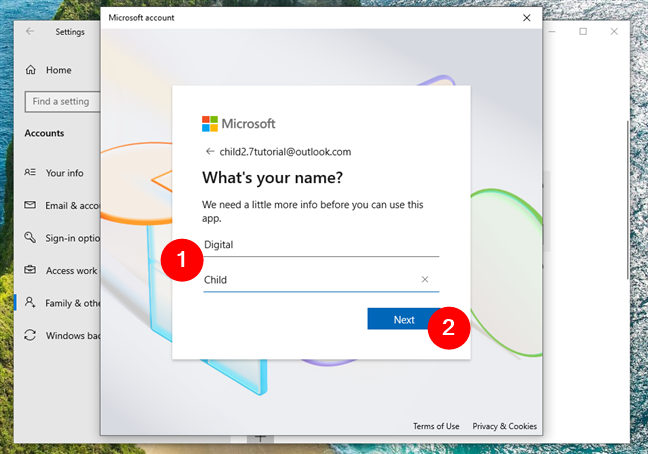
Entering the name of the child
Choose the country where your child lives and fill in their birth date: month, day, and year.
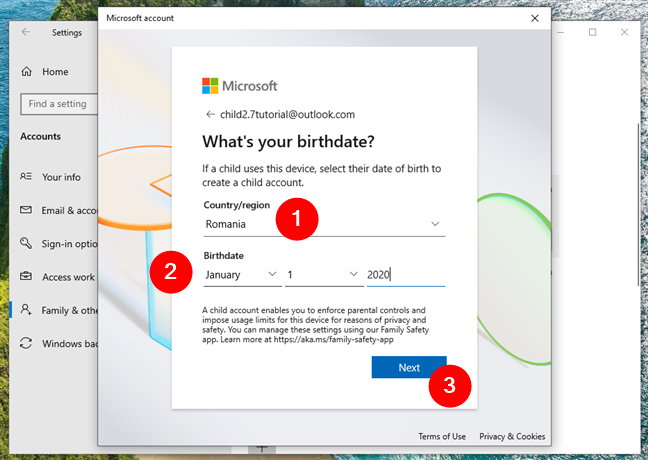
The child’s country and the date of birth
You’ll be asked to solve a small puzzle to confirm that you’re not a robot.

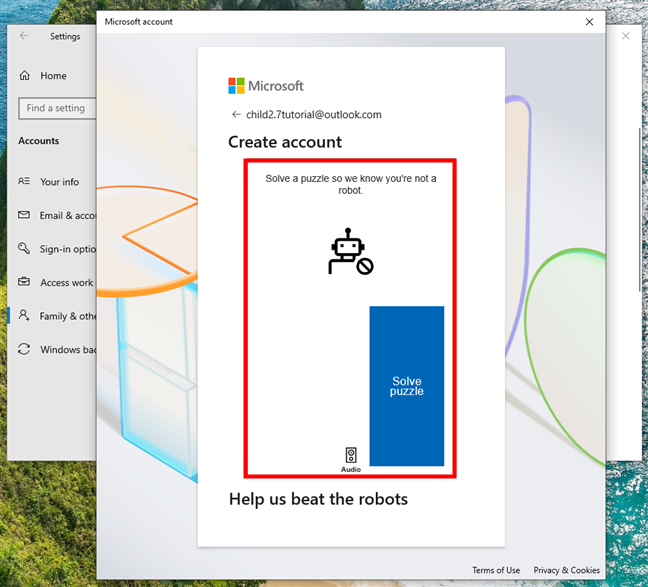
Solve a puzzle to prove you’re not a robot
At this point, you have two options: your child can send you a permission request via email, or you can sign in with your parent account right away.
If you’re already on your Windows 10 PC, it’s quicker to sign in now and handle the permissions immediately. So go ahead and select I’m a parent or guardian, then click or tap Continue.

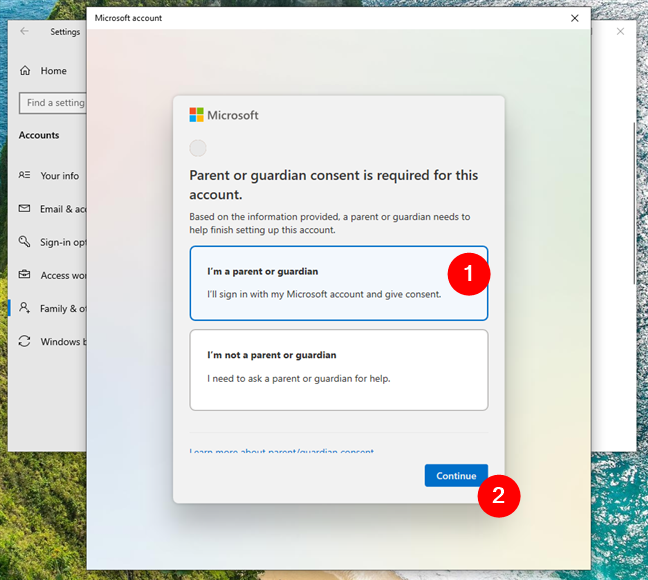
Choose I’m a parent or guardian
You’ll need to sign in with your own (parental) Microsoft account.
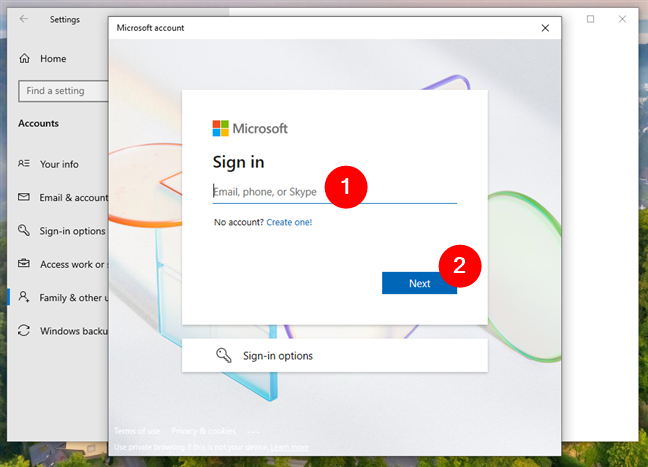
Sign in with your Microsoft account
After that, you’ll see a notice explaining how Microsoft handles your child’s data. Scroll down and click Yes, I agree to continue.
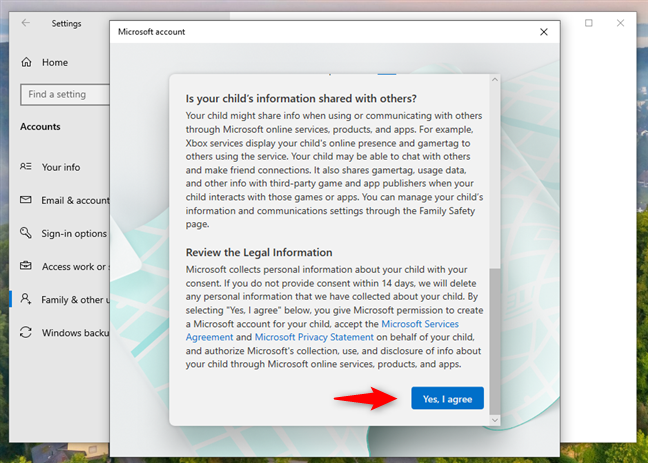
Choosing to agree with the legal stuff
Next, Microsoft will ask if your child should be allowed to “sign in to non-Microsoft apps.” It’s your call, but keep in mind that without this, your child won’t be able to use his or her Microsoft account with apps from companies like Google or Apple. Once you’ve decided, click or tap Continue.
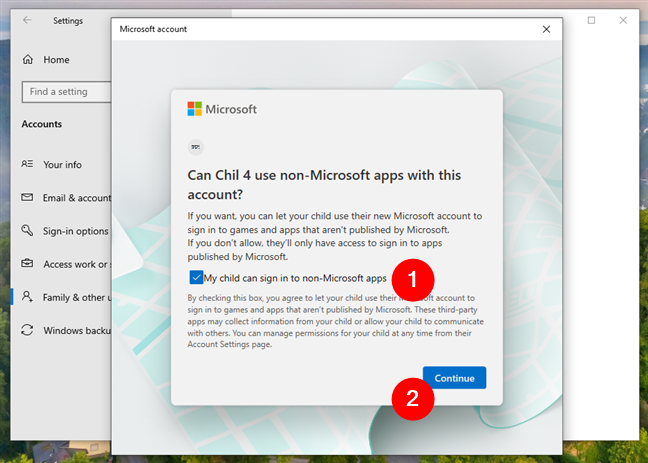
Choosing whether to give consent to the child to use third-party apps
You now have the option to set screen time limits for your child, enable activity reporting to receive weekly usage summaries, and access full parental controls through the Family Safety website. For the first two, simply choose your preferred settings. To open the full family dashboard, click or tap Family Safety: this will launch your default browser and take you to the family settings page.
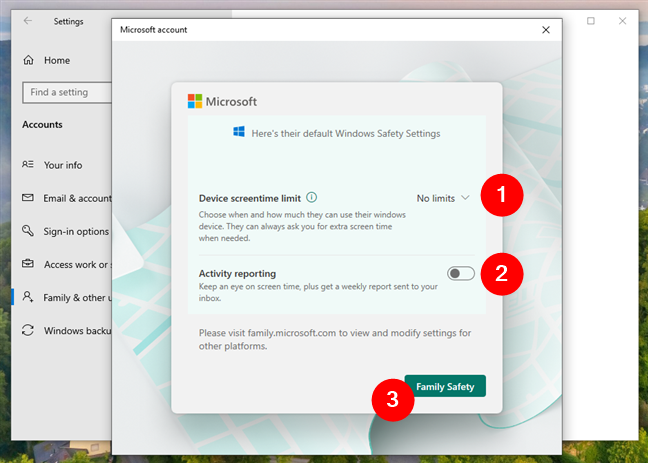
Quickly set device screentime limits and enable activity reporting
There, you can view your child’s activity and customize parental controls like screen time, app limits, and content filters. You can also locate their devices or add money to their Microsoft account.

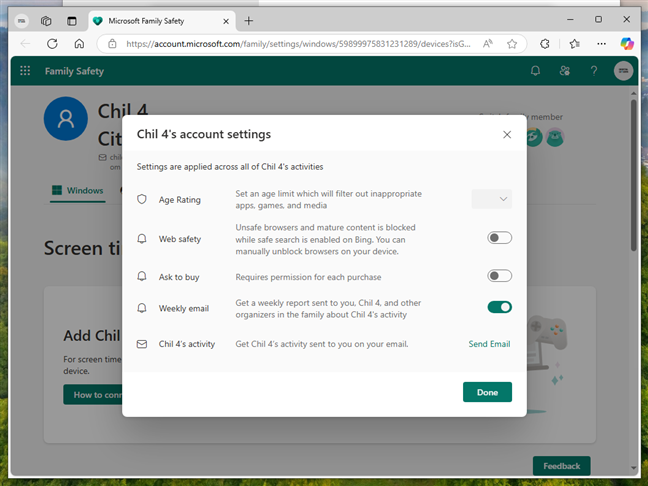
Microsoft offers a special webpage to manage your family
That’s it! Now, your child has his or her own user account on your Windows 10 PC or device and can start using it right away.
Did you create child accounts for your kids on your Windows 10 devices?
Creating a child account on Windows 10 is quick and fairly easy, and I appreciate how straightforward it is. What’s less convenient is that you still need a Microsoft account and email address to get started. I remember a time when you had to prove you were over 12 or 13 just to make an email. That doesn’t seem to be the case anymore. What’s your take? Do you like how easy Microsoft has made it to set up child accounts in Windows 10? Personally, I would have liked an option to create a Windows 10 child account without email, especially for younger kids who don’t really need one yet. Still, creating a Windows account for a child is pretty simple, even if it means setting up a new Microsoft email during the process.
Source link
-

-

-

-

-
-

-
-