
Windows 11 accumulates many temporary files over time. One way to get rid of these files is to manually delete them. If you don’t want that hassle, you can automate the process. I’ll show you how.
Step 1: Create a Script to Clear Temporary Files
To automatically remove temporary files on your Windows 11 PC, you’ll create a script. This script removes the temporary files from your user account’s temporary folder as well as the system-wide temporary folder.
To do that, access Windows Search (press Windows+S), type Notepad, and launch the app. Type the following code in a new Notepad document:
@echo off
echo Cleaning system and user temp files...
del /s /f /q %TEMP%\*.* >nul 2>&1
rd /s /q %TEMP% >nul 2>&1
md %TEMP%del /s /f /q C:\Windows\Temp\*.* >nul 2>&1
rd /s /q C:\Windows\Temp >nul 2>&1
md C:\Windows\Tempecho Temporary files cleared!
To save the script, from Notepad’s menu bar, choose File > Save As. Select the folder where you want to save the script. Click the “Save as Type” drop-down menu and choose “All Files.” Click the “File Name” field and type ClearTempFiles.bat (the bat extension indicates it’s a batch file).
Step 2: Schedule the Script With Task Scheduler
Your script is ready. You’ll now schedule it with Task Scheduler so it runs at the specified interval, automatically clearing your PC’s temporary files. To do that, open Windows Search (press Windows+S), type Task Scheduler, and launch the utility.
Related
You’re Not Making the Most of Task Scheduler in Windows
Save time by automating tasks!
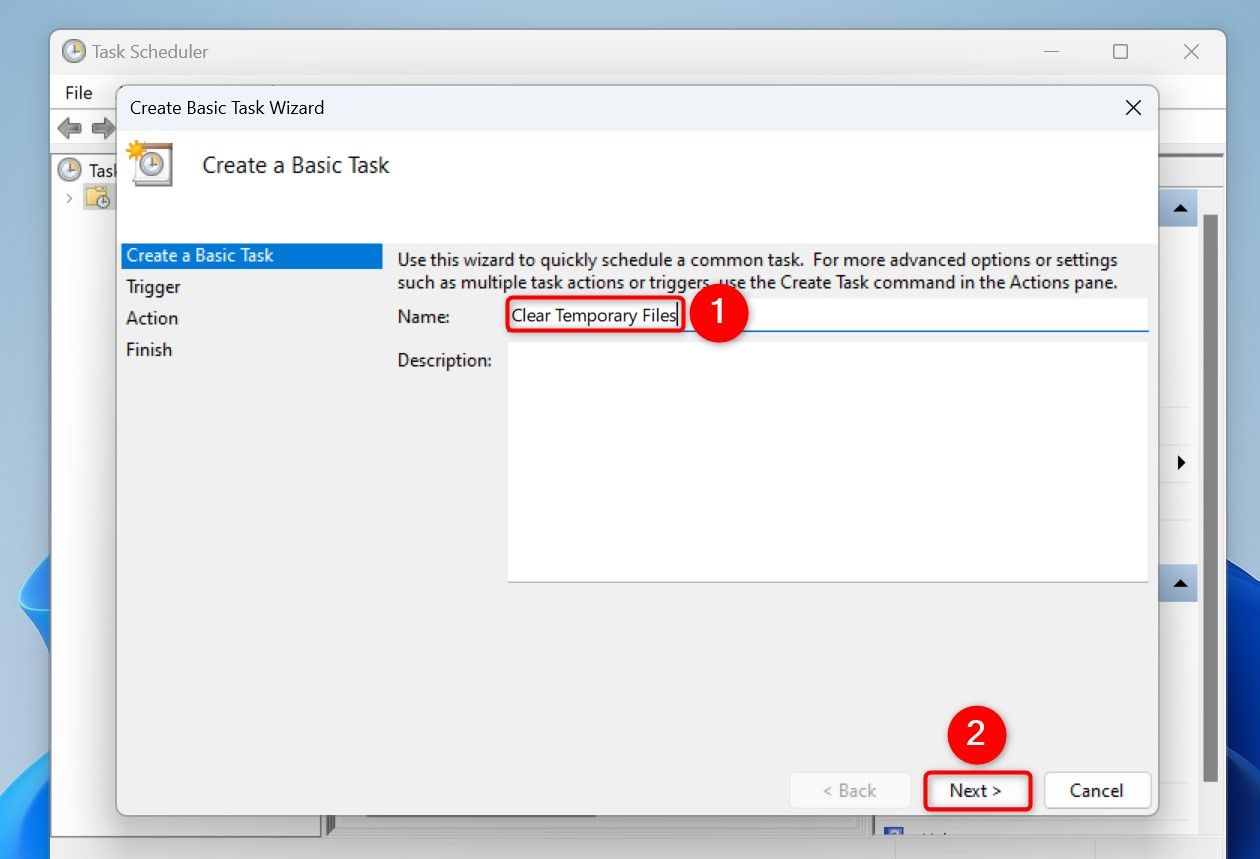
In Task Scheduler’s right sidebar, click “Create Basic Task.” Choose the “Name” field and type something like Clear Temporary Files. Then, select “Next.”

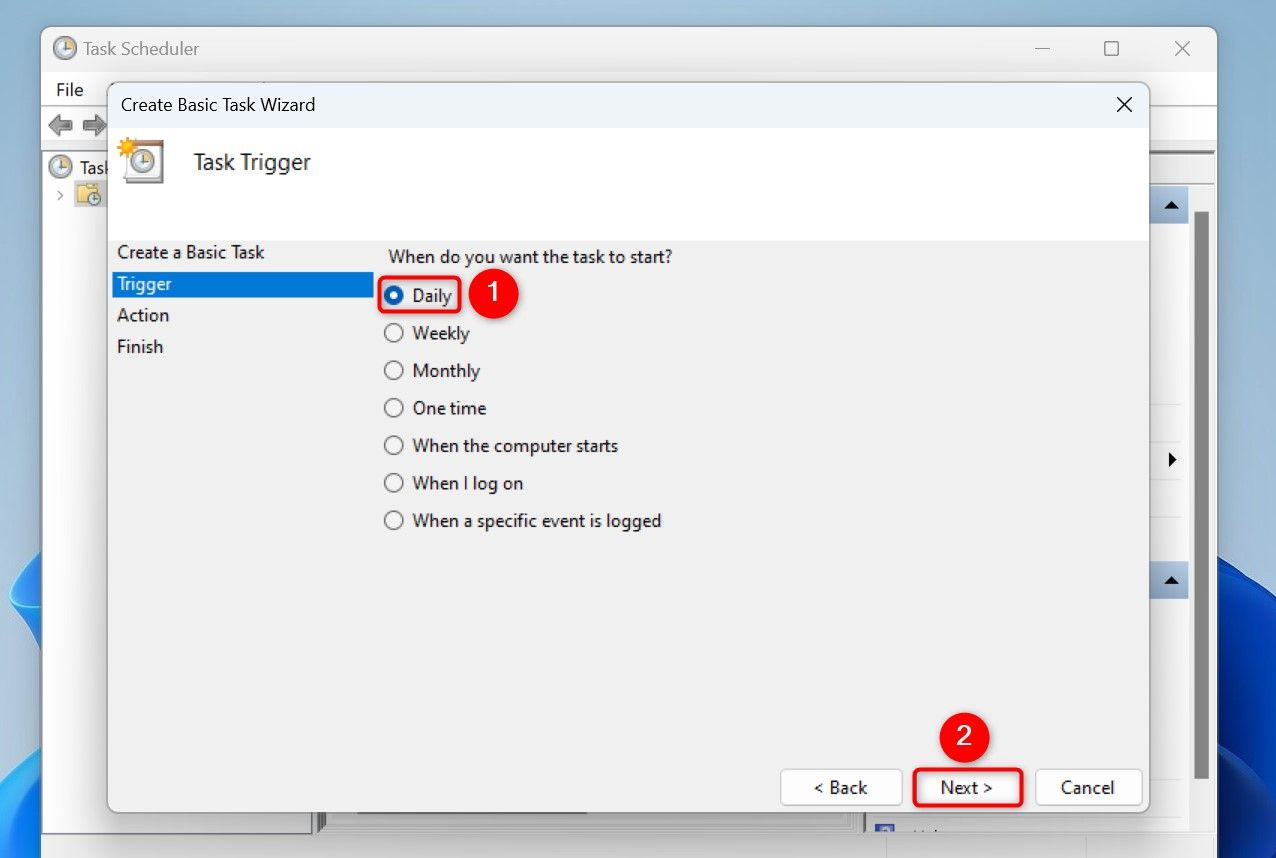
Select how often you want to run your script. To clear the temporary files every day, select “Daily.” Then, click “Next.”

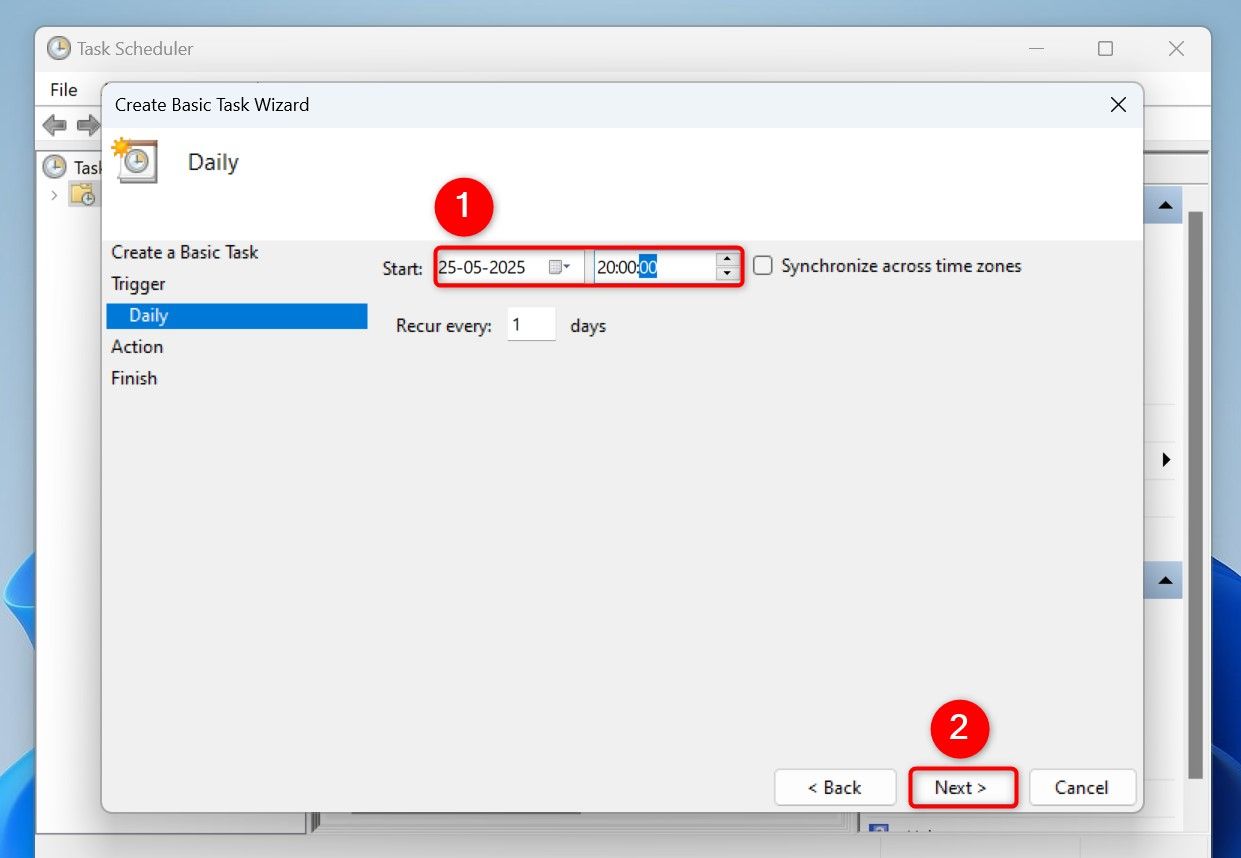
Choose the “Start” field and select the date when the task should start occurring. Specify the time the task should run. Then, click “Next.”

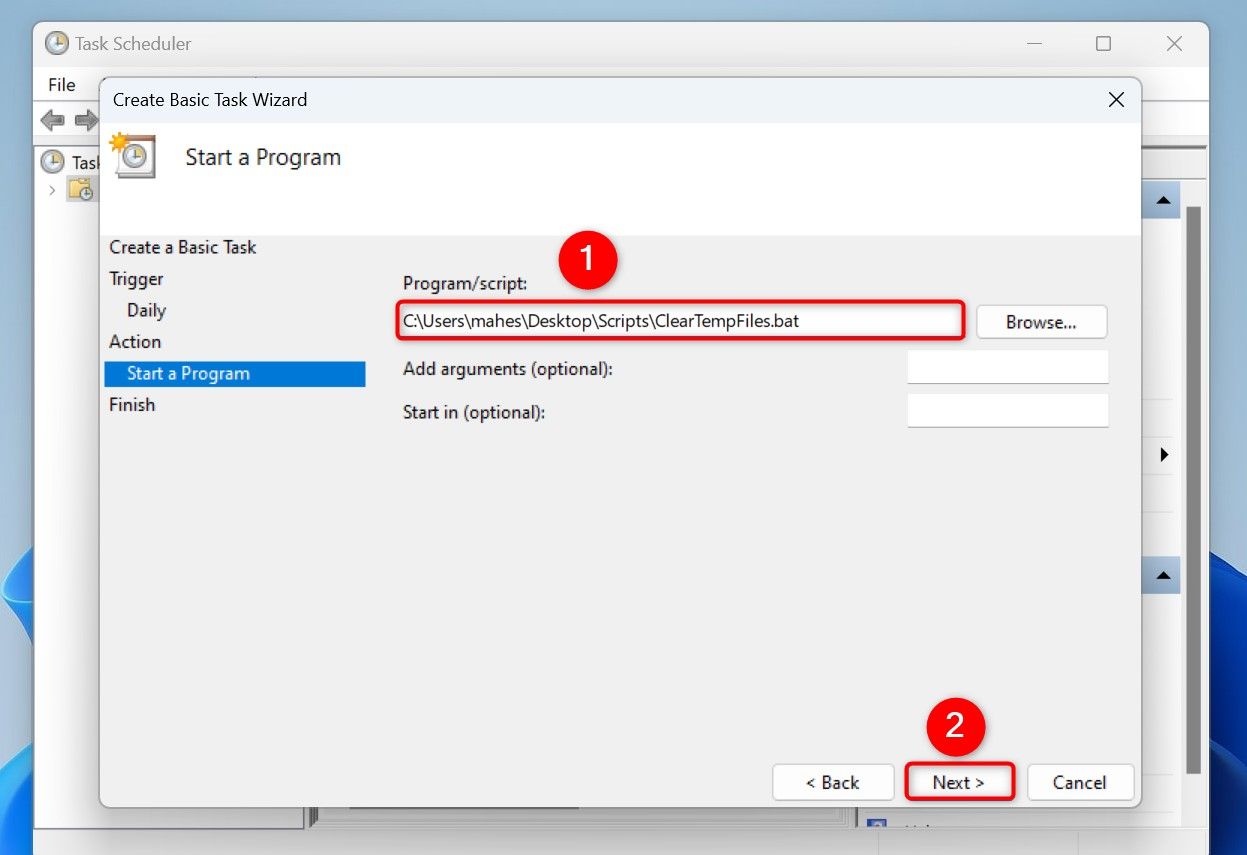
Choose “Start a Program” and select “Next.” Click the “Program/Script” field and type the full path to the script you created earlier. Then, click “Next.”

On the final screen, enable the “Open the Properties Dialog For This Task When I click Finish” option. Then, click “Finish.” On the open window, at the bottom, turn on the “Run With Highest Privileges” option. Then, click “OK.”


From now on, Task Scheduler will automatically run your script at the specified time, clearing temporary files.
If you want to turn off the functionality anytime, right-click your task in Task Scheduler and choose “Disable. To remove the task for good, right-click it and choose “Delete.”
Add More Cleanup Options to the Script
The script you created above only clears temporary files on your Windows 11 PC. If you want to clear other files, add the following extensions to your script.
Related
How to Clear Your Cache on Windows 11
Let go of unnecessary files and free up some storage space!
To make your script clear the contents of Recycle Bin as well, add the following code to the script:
PowerShell.exe -Command "Clear-RecycleBin -Force"
To make the script clear the Windows Update cache, add the following code to your script file:
net stop wuauserv
rd /s /q C:\Windows\SoftwareDistribution\Download
net start wuauserv
You can clear pretech files using the following code:
del /s /f /q C:\Windows\Prefetch\*.* >nul 2>&1
Tip: Run the Script at the Start or Shutdown of Your PC
You can get Windows 11 to run your script when you turn off or on your PC.
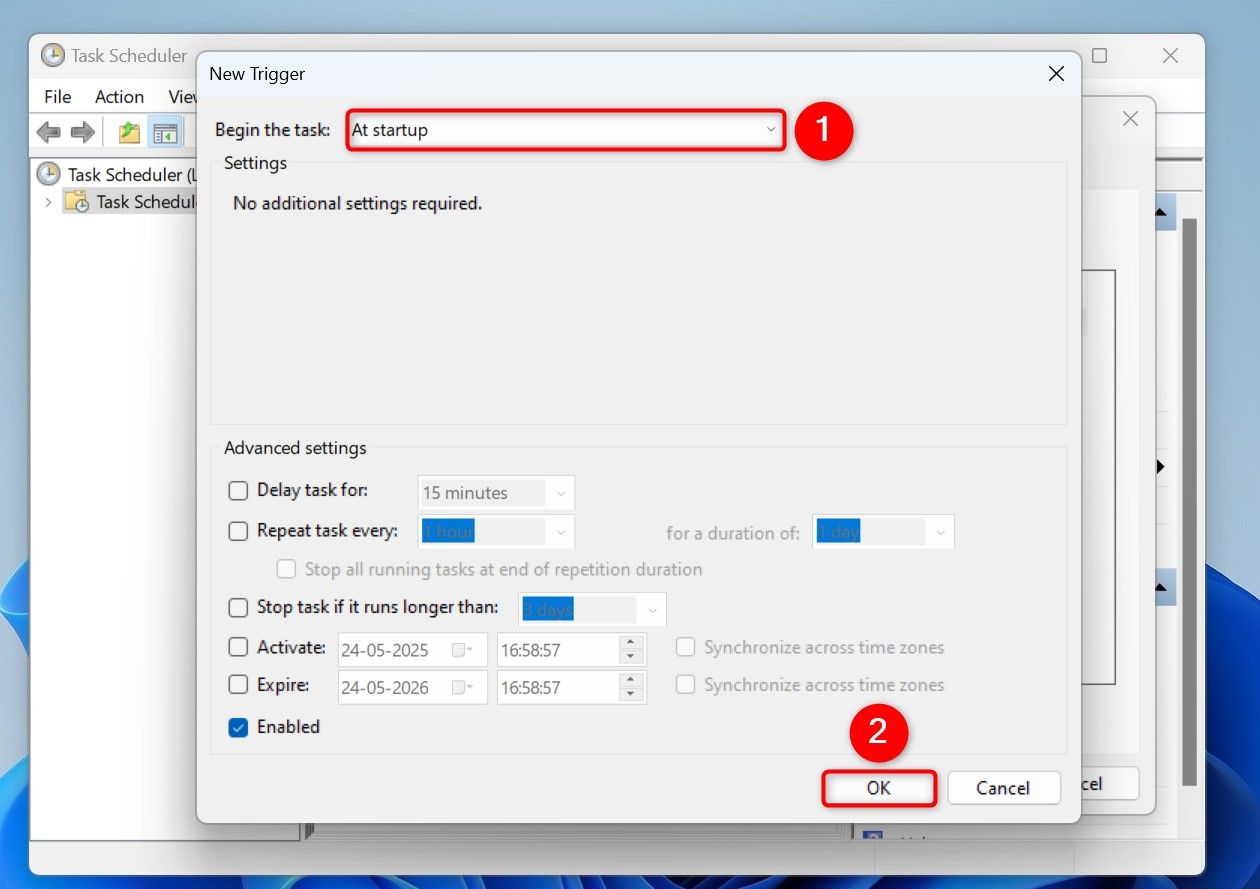
To make the script run at the start of your PC, open Task Scheduler. Right-click your task and choose “Properties.” Open the “Triggers” tab and click “New.” Select the “Begin the Task” drop-down menu and choose “At Startup.” At the bottom, select “OK.” Choose “OK” to save your changes.

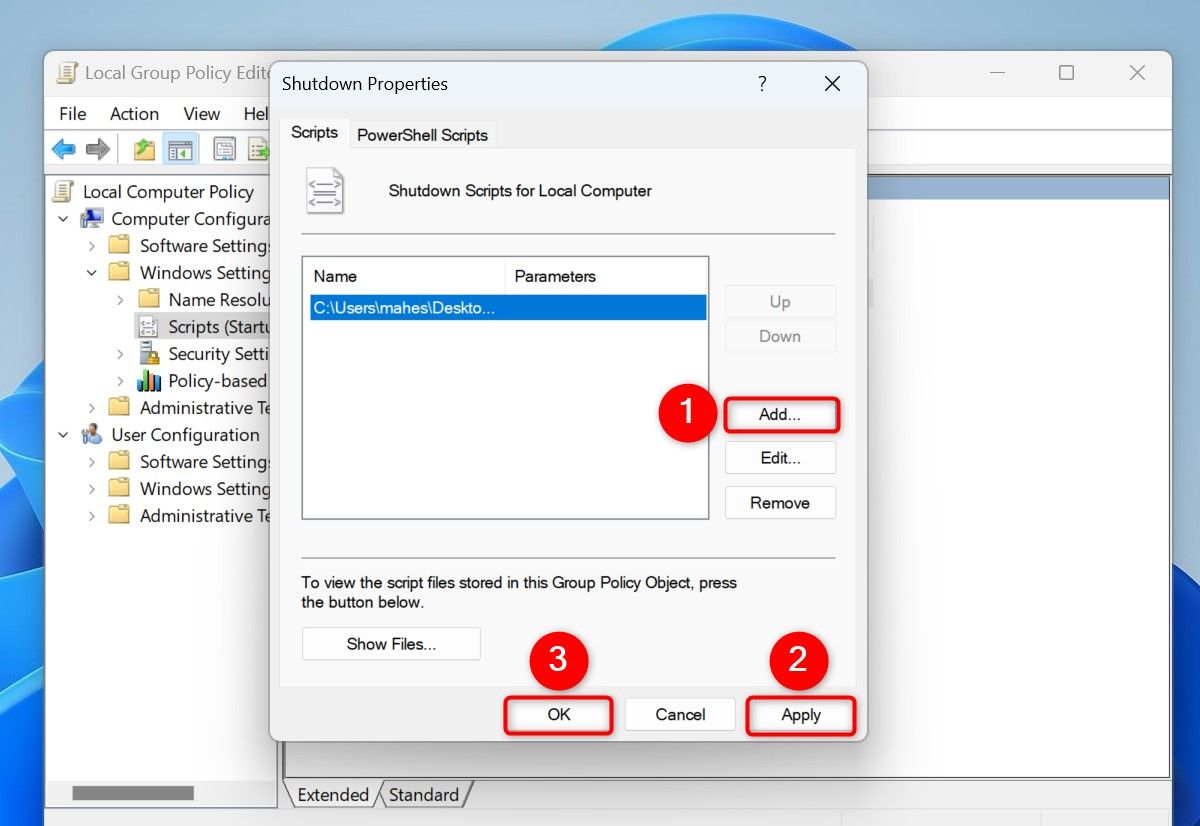
To make the run script run at the shutdown of your PC, you’ll use Local Group Policy Editor on your Windows 11 Pro edition. This utility isn’t available in the Home edition. To start, open Run by pressing Windows+R, type gpedit.msc, and press Enter. Navigate to Computer Configuration > Windows Settings > Scripts (Startup/Shutdown) and double-click “Shutdown” on the right. Select “Add,” add your script file, and save the changes.

Use Storage Sense to Clear Temporary Files
Windows 11 includes a feature called Storage Sense that can help you get rid of temporary files from your PC. This feature isn’t as flexible as the script above, though.

Related
How to Free Up Space in Windows 11
Windows 11 includes tools to free up space that make third party cleaners irrelevant. Find out how to use them here.
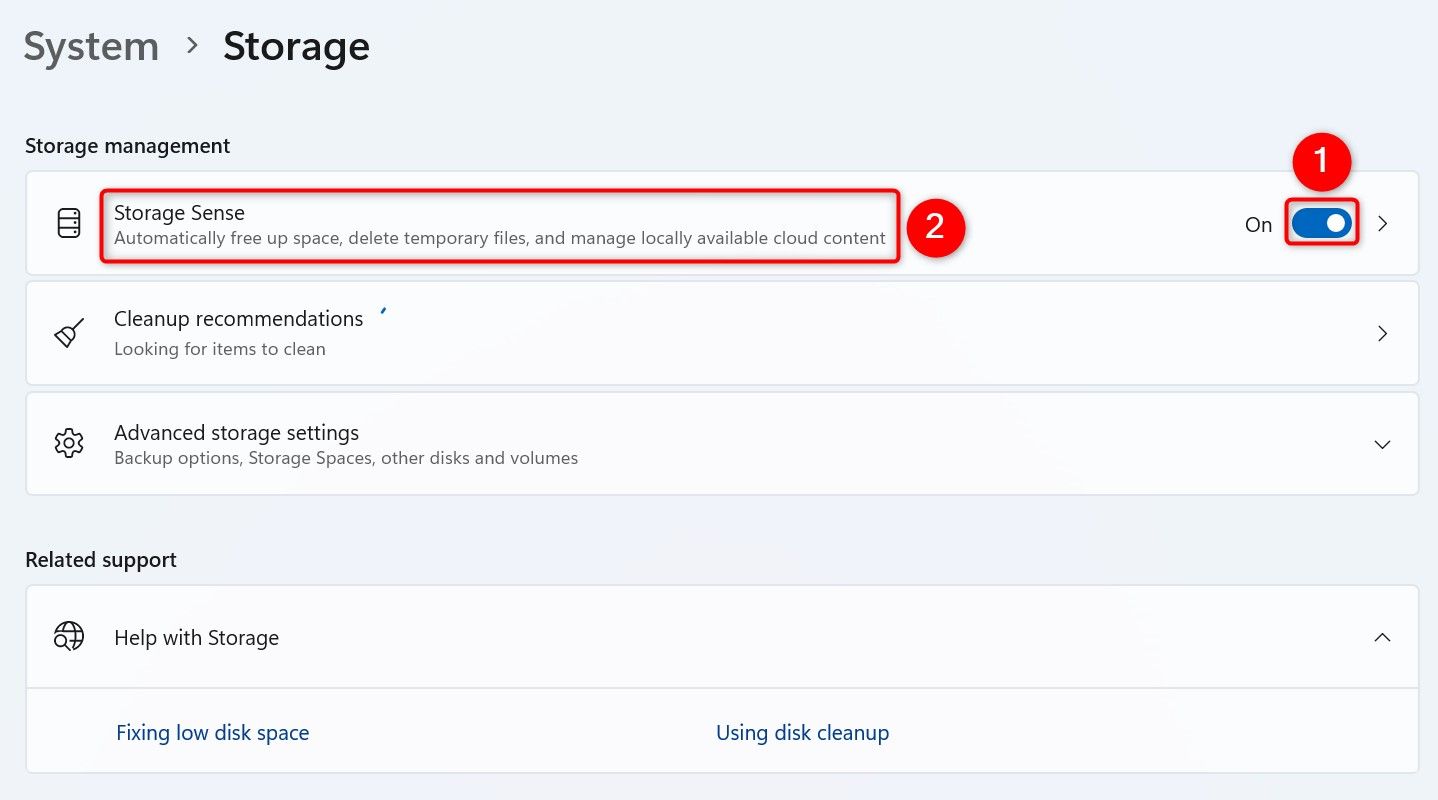
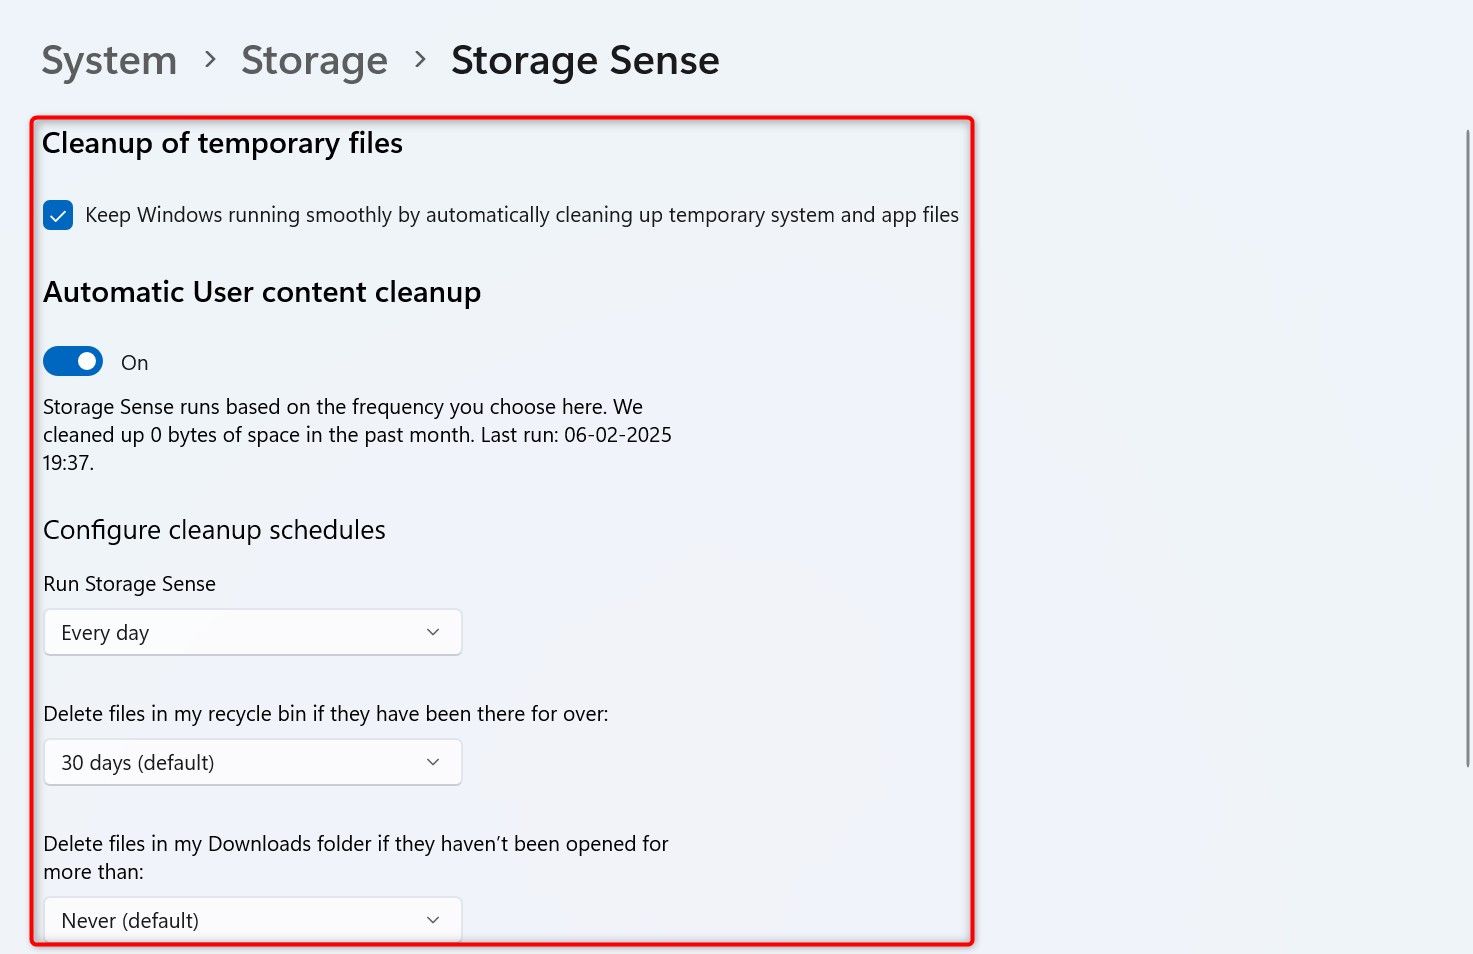
To use it, open Settings by pressing Windows+i. From the left sidebar, choose “System.” On the right pane, select “Storage.” Turn on the “Storage Sense” toggle and click “Storage Sense.”

On the open screen, specify what and when you want to delete. Use the “Run Storage Sense” drop-down menu to choose when you want the feature to kick in.

And that’s how you automate the process of removing junk files from your Windows 11 PC. Similarly, you can find and remove old files as well to declutter your machine.
Source link
-

-

-

-
-
-

-

-


