
If you’re on a Linux machine and want to capture your screen, there aren’t as many options as Windows or Mac users have. What we do have, though, is one of the most powerful and also free screen capture programs out there. In this article, I show you how to get started with OBS Studio on Linux.
Why Use OBS?
There are some good reasons to use OBS Studio over other screen capture software. The biggest reason is that it’s free, yet still provides a quality experience. While there may be better programs out there, they’re usually paid products which may not be suitable. Free in this case truly means free: there are no ads, no malware, no emails, nothing.
Secondly, OBS Studio works fine on Linux. Installing it is a breeze and it works without a hitch right after. I’ve been using it for over three years now to record interviews and put together screencasts and never had any issues. There’s plenty of paid software that could learn something from OBS Studio in this regard.
Finally, OBS Studio is easy to use. It handles a lot of the work for you, meaning that even with no knowledge of video recording or editing you can put out decent material. It’s of course better if you learn about advanced topics like filtering and balancing, but you don’t need to know exactly what you’re doing to record stuff on screen.
Configuring OBS Studio
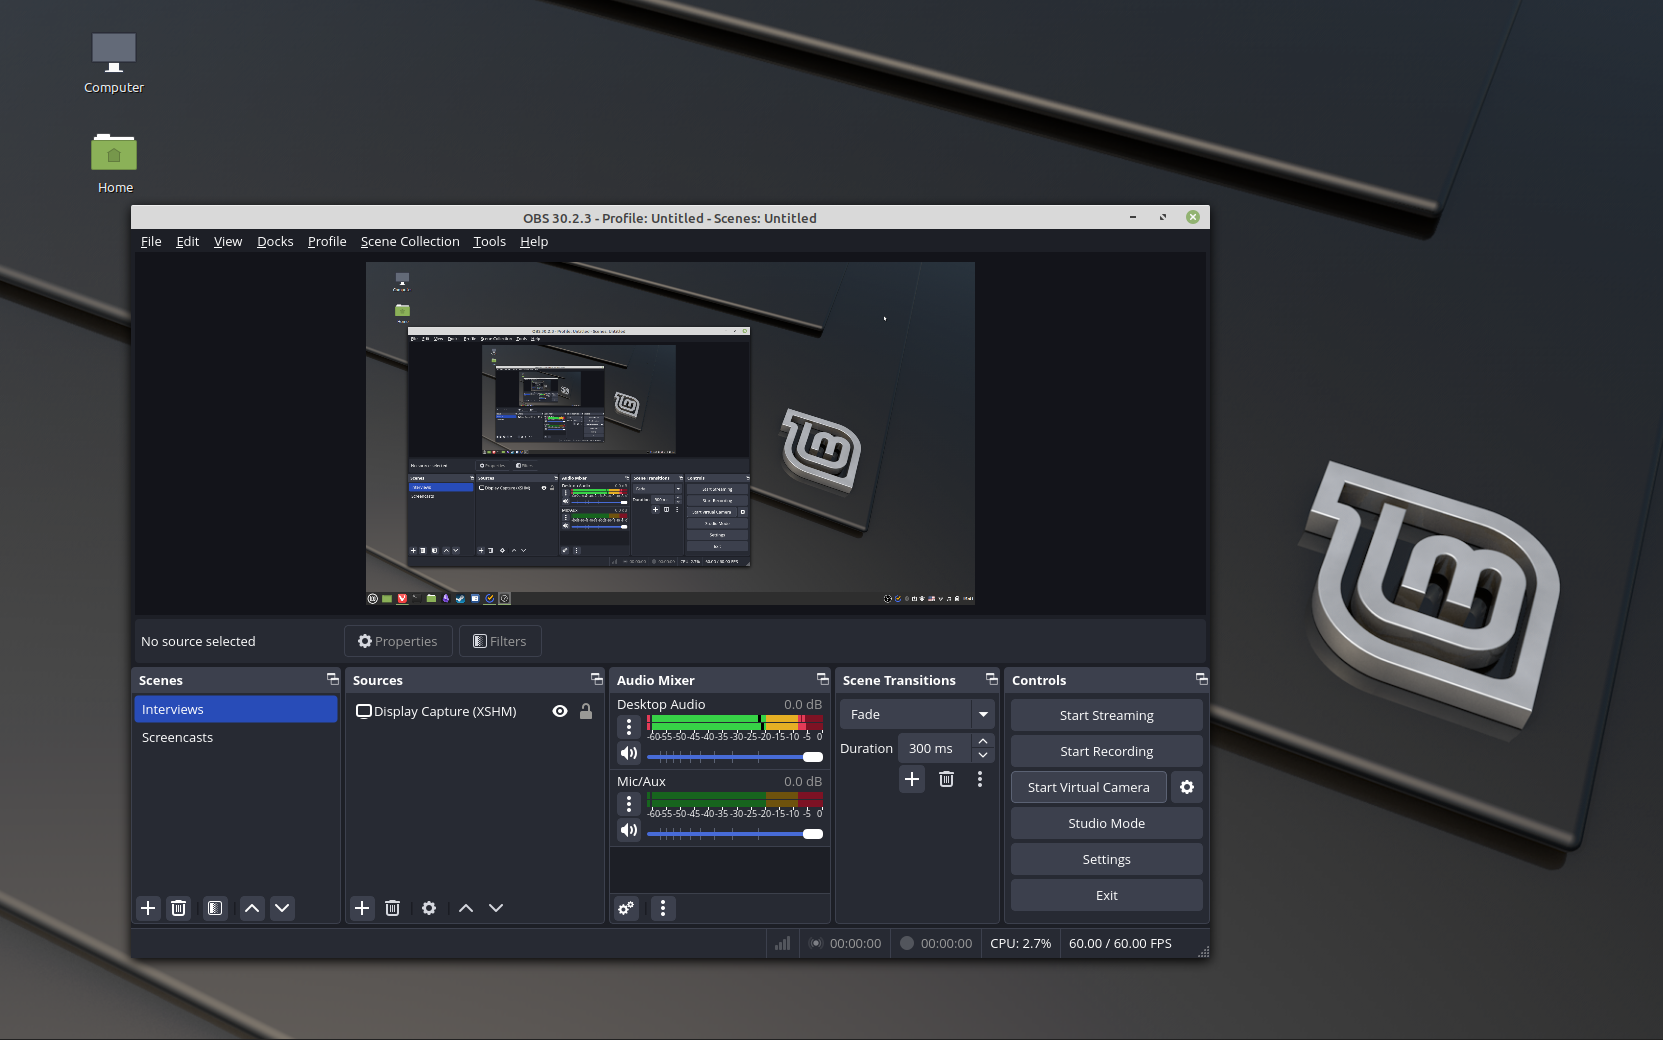
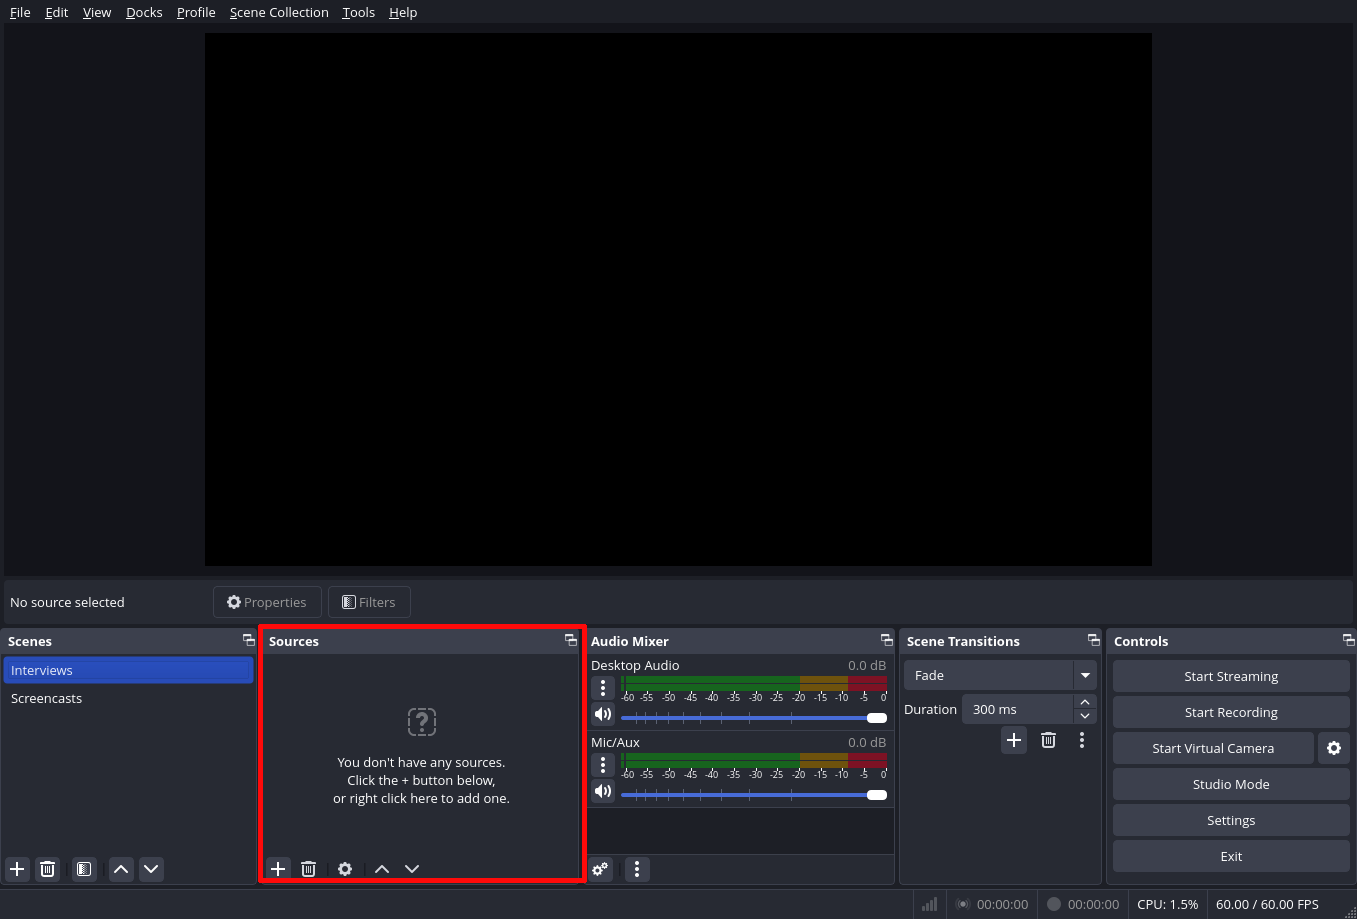
Once you have OBS Studio installed on your system and open it up, you’ll see the main screen.
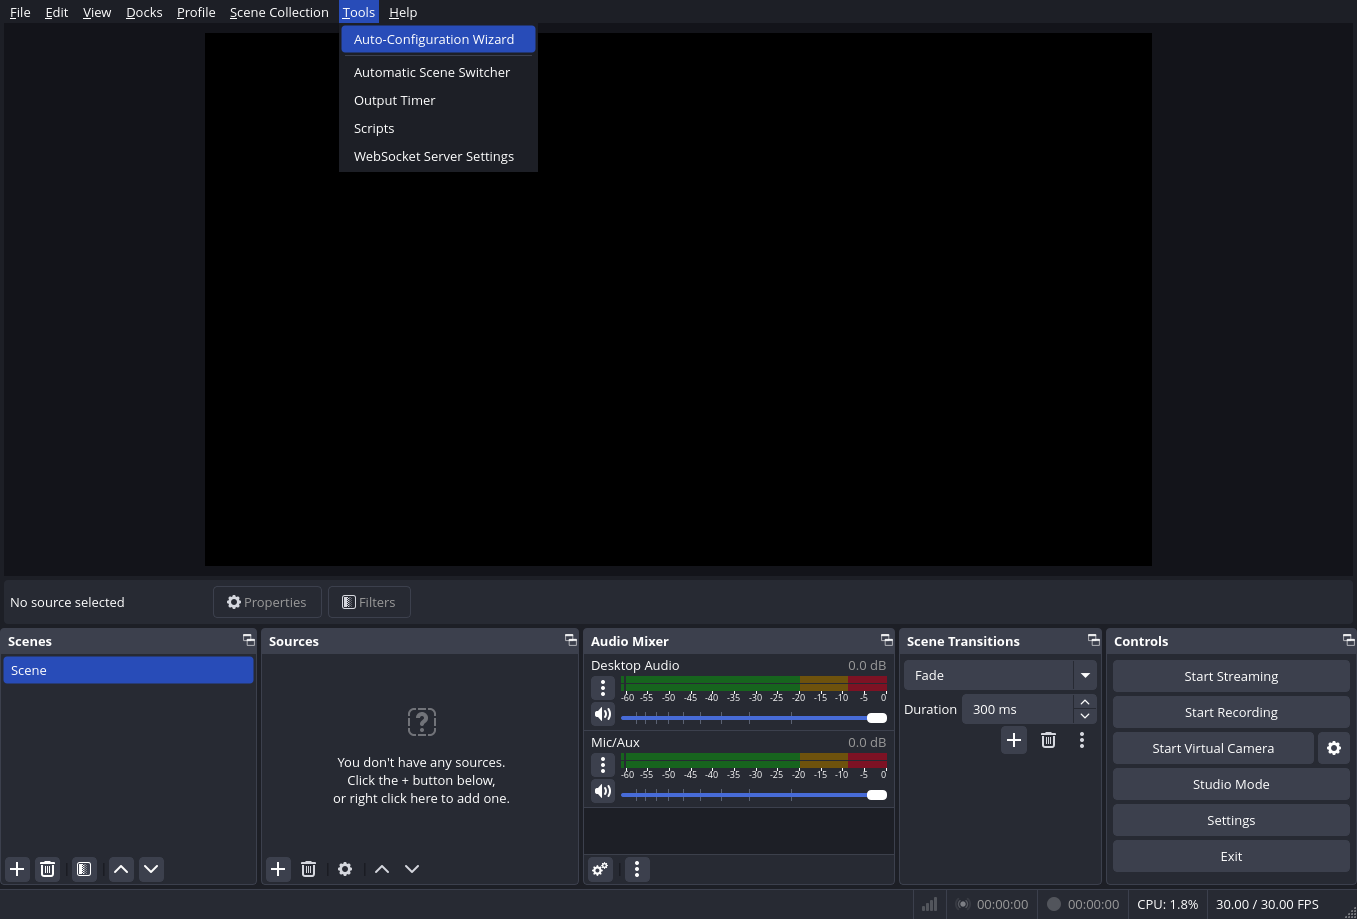
There’s a lot going on here, so I’ll go over all the basics. Before you can get started recording anything, you need to configure OBS Studio. Luckily, it can do that for you. Click on “Tools” in the top bar and there select the “Auto-configuration wizard.”

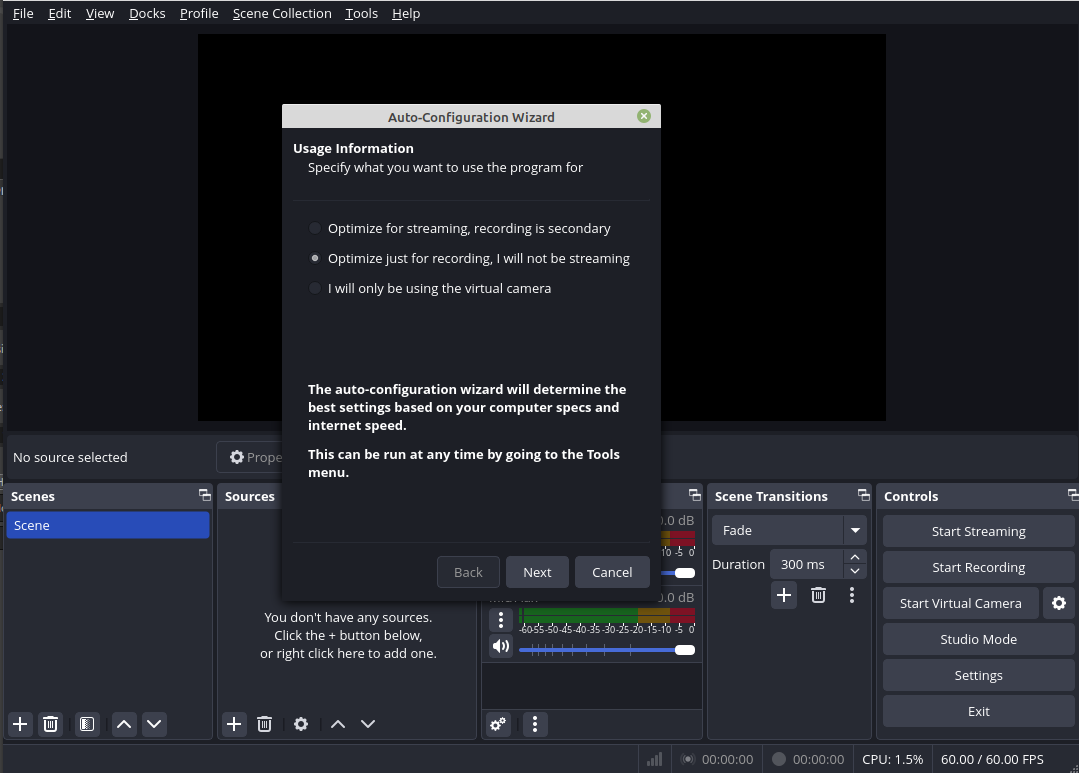
This will take you through some steps that should set you up so you can start recording, just make sure you choose the settings that apply to you best.

With that out of the way, let’s record some video.
Screen Capture with OBS Studio
To get a feel for OBS Studio, I recommend you start a video, whether on your desktop or via a streaming site, and record that. It allows you to both check video and audio and make sure everything is in working order before you begin recording or streaming for real.
If you’ve never used software like this before, you may feel a little overwhelmed, but it’s actually quite simple: You just take the elements on the lower half of the screen and work left to right.
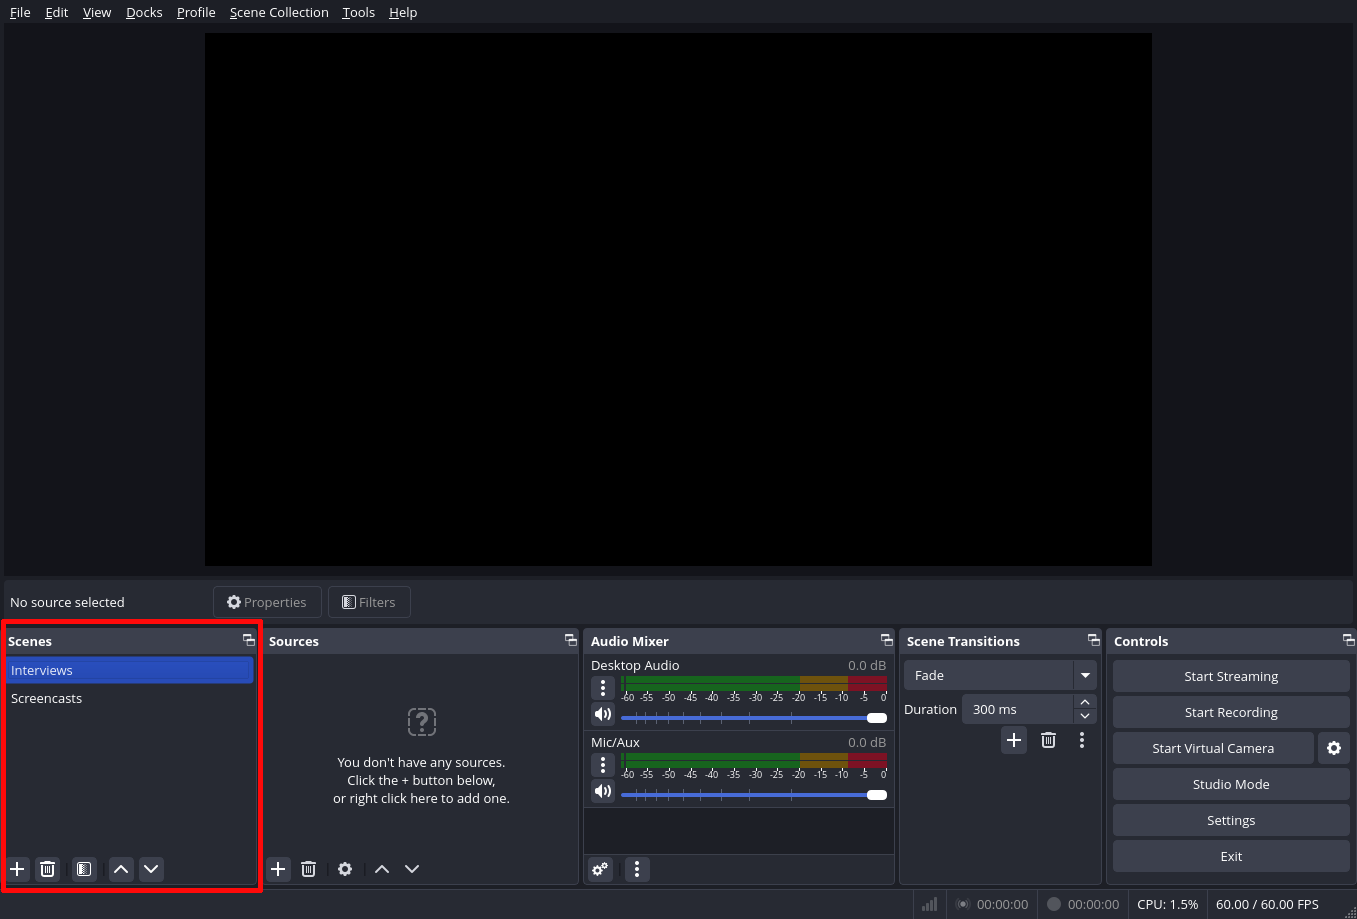
We start with the box titled “Scenes.” I like to think of these as folders, so I usually have one for interviews I record, and one for screencasts (usually recordings of me doing something on screen).
The box next to that is sources, these are the files you’ll be recording. These go into the scenes you select, so make sure you have the right one selected. To add a source, click on the “plus” symbol in the lower left.
You now get a massive list of options to choose from (OBS Studio has the full explanation). This can be daunting, so let’s go over some of the ones you’re most likely to use.
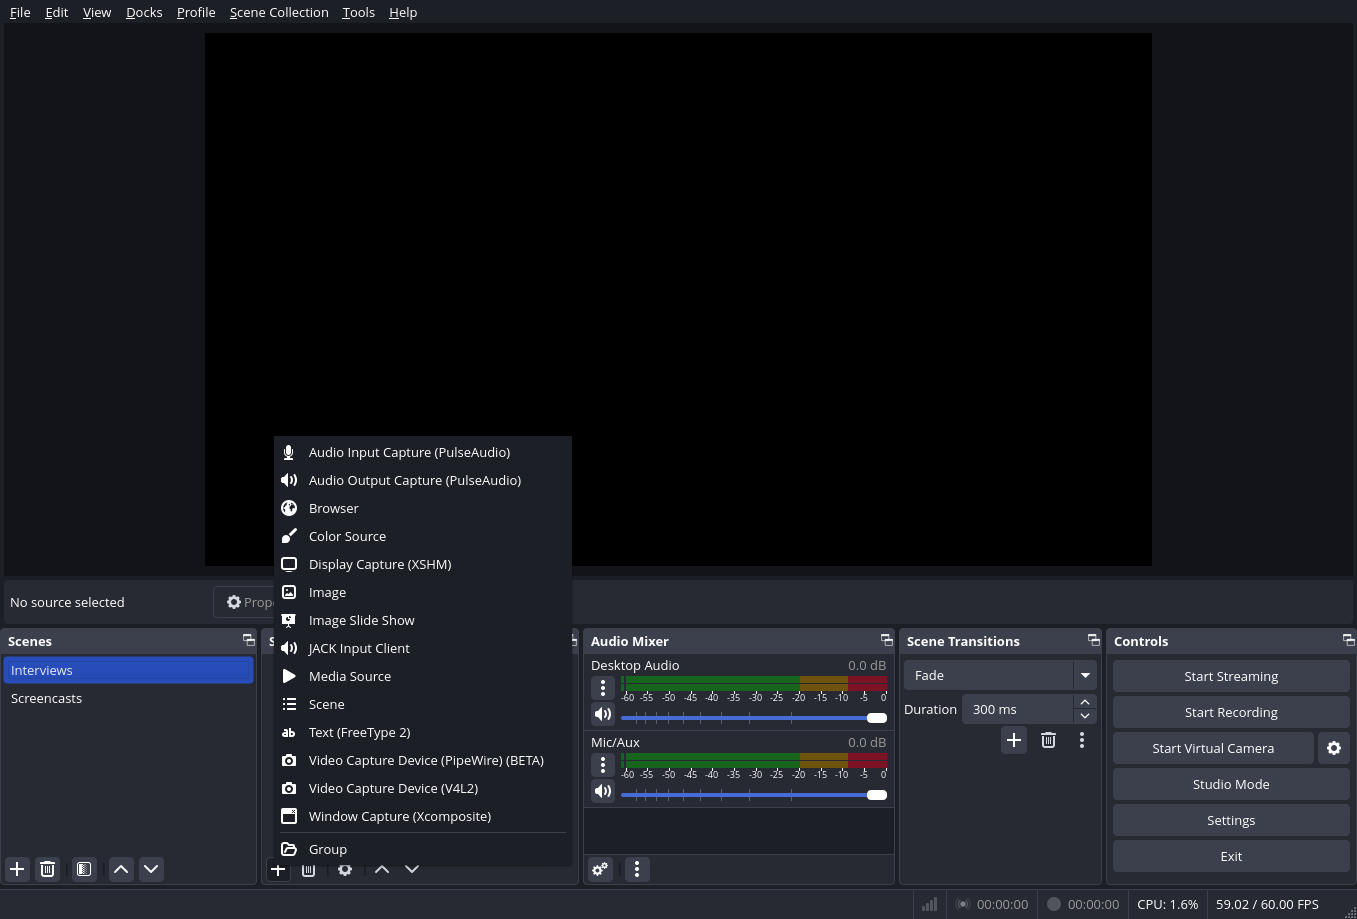
- Display capture: this is your basic screen capture tool; records audio, too.
- Window capture: captures only a specific window, great for screencasting.
- Browser: records what’s happening in your browser.
- Image: screenshots what’s going on in your display.
On installs using Xorg you’ll be using XSHM and Xcomposite for display and window capture respectively, while if you’re using Wayland it’s done through Pipewire. So depending on your distro, the options might look slightly different.
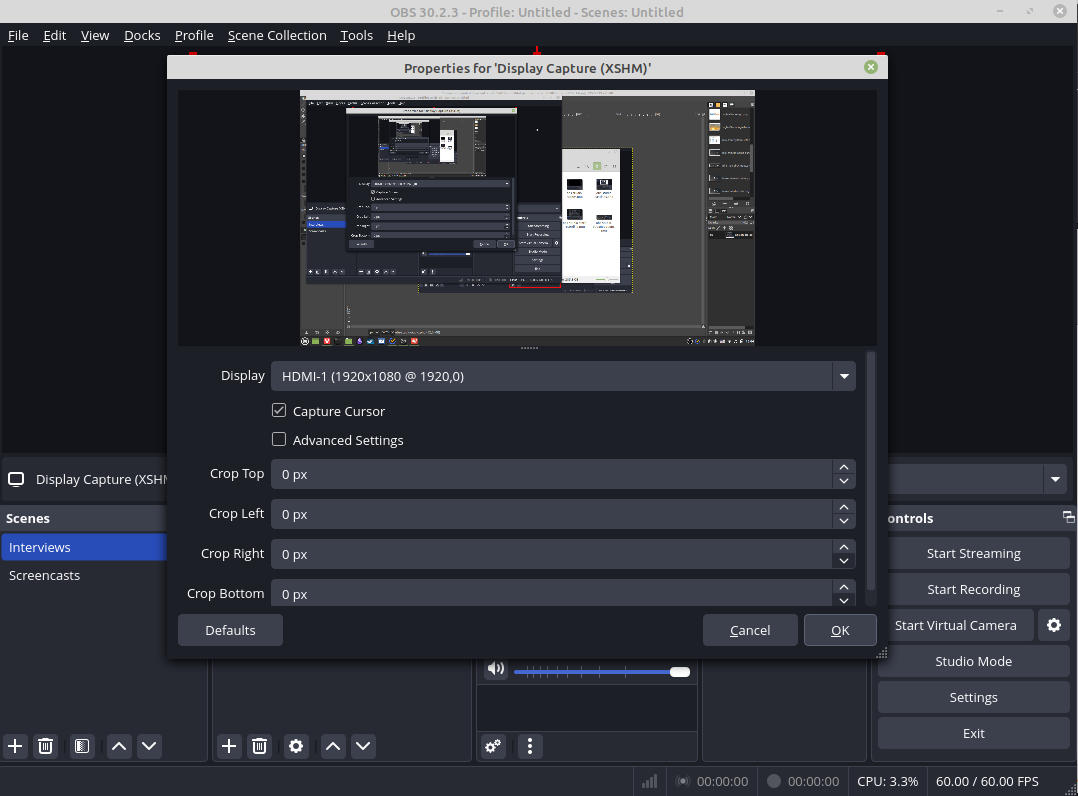
Let’s capture the entire display, so we can record my full desktop. This opens a new window where you can select which screen you want to capture (if, like me, you have more than one), as well as cropping settings. You can mess with these if you want, but for our purposes we’ll just click okay and move on.

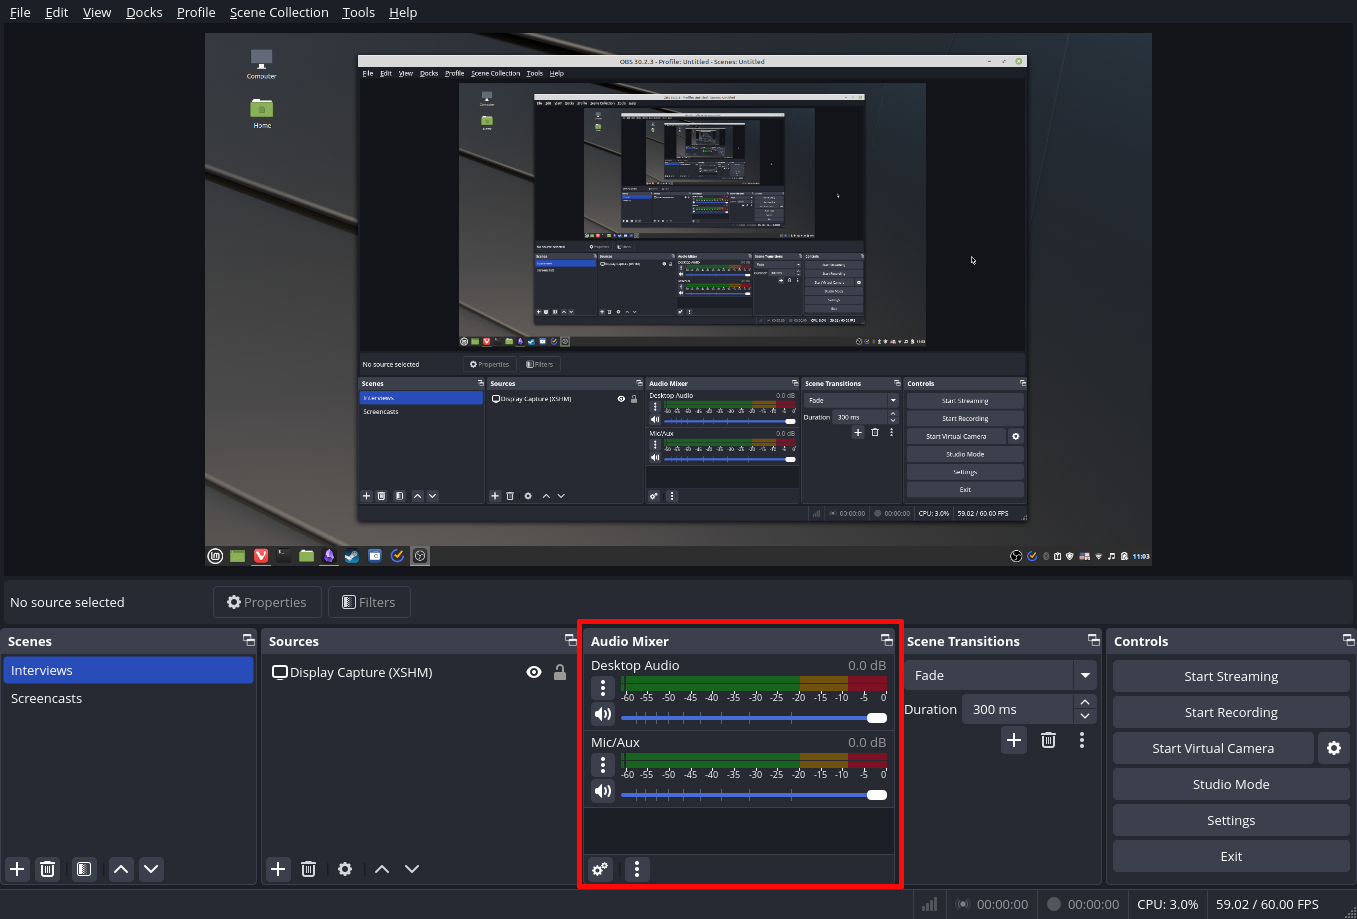
The viewfinder in the top of OBS Studio should now show your desktop, and it’s time to move on to the audio section. I would play a video and see how the slider reacts. If it goes too far left or right, it’s too soft or too loud and you should change your system’s volume. Then test your mic; again, somewhere in the middle is good.
After you make a few recordings you’ll get a feel for what works best. I’ve found that many of the recordings I make of interviews seem kind of harsh and tinny unless I adjust the volume downward a bit.
The penultimate section lets you choose scene transitions, which we’ll ignore as we’re focused on getting a single scene right. This means we’re ready to record, so click on “Start recording” in the final section.
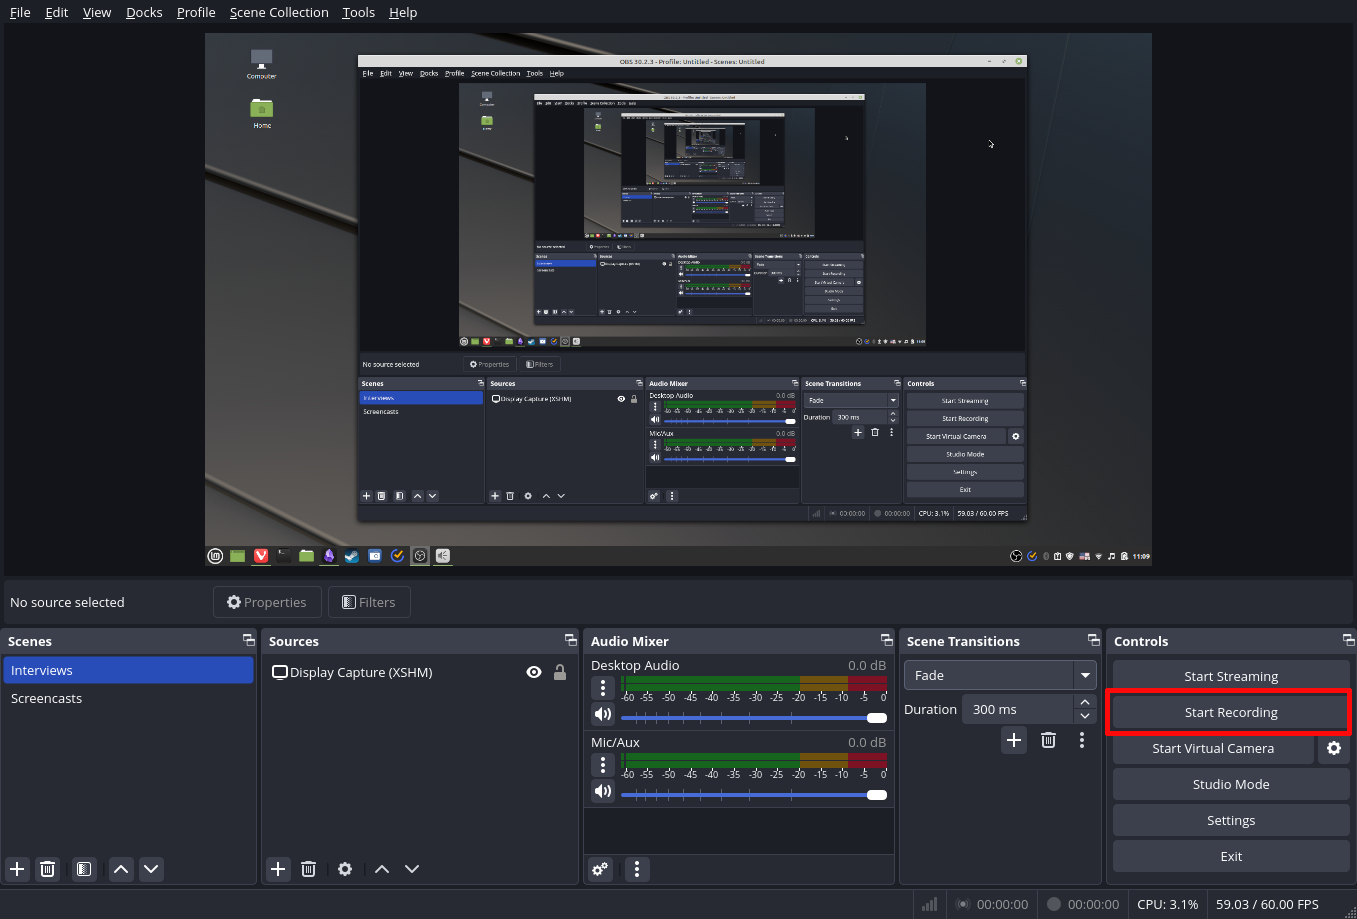
The button should now say “Stop recording,” which is how you know it’s working. Everything that’s happening on screen or that your mic picks up is now being recorded until you switch it off. I recommend taping a video, maybe talk over it a bit, and then stopping the recording and seeing what the results are.
Streaming With OBS Studio
You can do more than just record video with OBS Studio. You can also stream directly to any of your online accounts. The process is entirely the same, except for two things: You need to link your streaming account to OBS Studio, and you hit the “Start streaming” button rather than the one for record.
I’ll focus on linking your account, which you do by clicking on “File” in the top right and then selecting “Settings.”

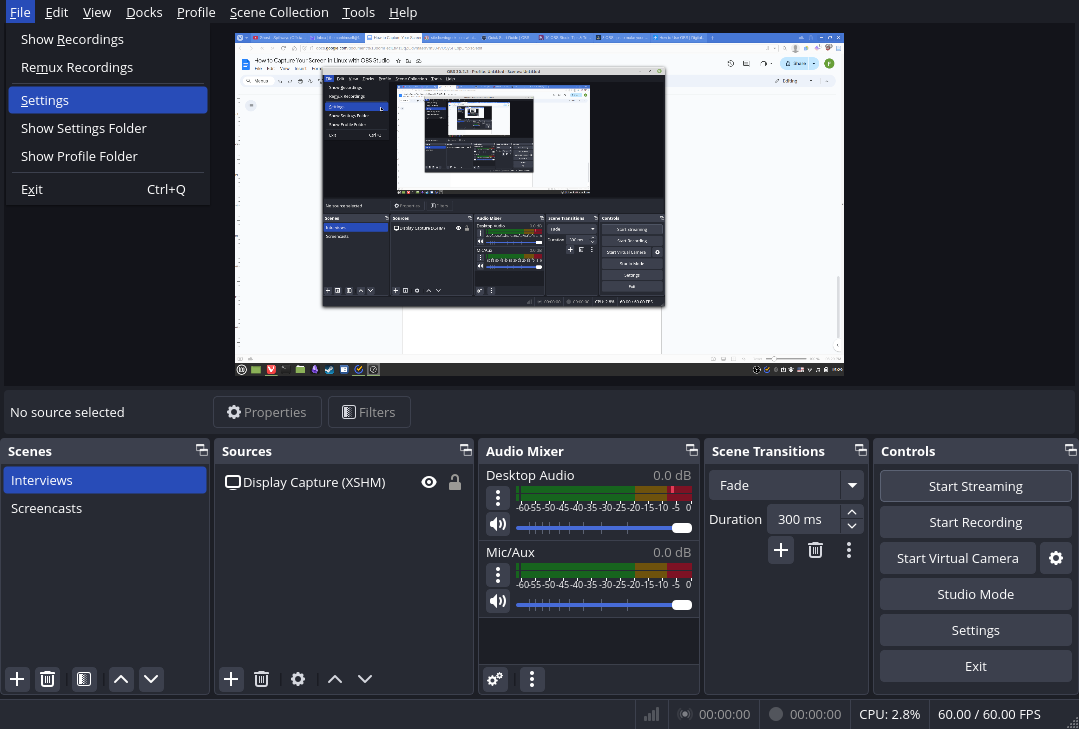
In the new window, navigate to “Stream,” which is the third option from the top. There, select the service you want to stream to.


Next, fill in the options below (these are different for each service), and you should be ready to go. Just start the stream and you’re now broadcasting.
Anybody Can Record Video
OBS Studio is a simple, straightforward program that anybody can learn to use within minutes. Though some things will take time to get right—audio is a good example—the program takes away the biggest barriers in the way of most users, namely skill and money. I’ve been using it for years, and I had no idea what I was doing when I got started.
Source link