
Performing a clean installation of Windows 11 typically involves creating a bootable USB drive. However, there are scenarios where using external media isn’t an option, perhaps due to hardware limitations, lack of access to a USB flash drive, or personal preference. In this situation, you can install Windows 11 by mounting the ISO file to File Explorer and launching the setup from within the experience without external bootable media.
This method is suitable for computers that are already running Windows 10 or 11. If you’re attempting to install the operating system on an empty hard drive, additional steps involving bootable media or alternative methods may be necessary.
While it’s possible to perform a fresh installation of Windows 11 directly from an ISO file without using external media, this approach may not always be the best. Running the setup from within the existing operating system requires the computer to process the entire installation internally, which can sometimes lead to complications. Although such issues are uncommon, using a bootable USB flash drive is a more reliable approach.
Will you lose your files?
Yes, this process will delete your personal files, apps, and settings. As a result, it’s critical to create a backup of your files before proceeding:
- Back up files — Save personal documents, photos, and other important data to an external drive or cloud storage, such as OneDrive or Google Drive. You can also perform a full backup of your computer to an external storage device.
- Note installed apps – Create a list of essential programs so you can reinstall them later.
- Save product keys and passwords – Ensure you have access to software licenses, email accounts, and other important credentials.
Will Windows 11 remain activated?
Yes. If the previous setup was running an activated version of Windows 11 or Windows 10, the new installation of the operating system will reactivate automatically after installation. You do not need to enter a product key.
If the device was never activated, you will have to activate Windows 11 Pro or Home during or after the setup.
What are the hardware requirements?
These are the system requirements to perform a fresh installation Windows 11:
- Processor: 1GHz or faster CPU or System on a Chip (SoC) with two or more cores.
- Memory: 4GB (8GB or even 16GB is recommended).
- Hard drive: 64GB or larger.
- System firmware: UEFI, Secure Boot capable.
- TPM: Trusted Platform Module (TPM) version 2.0.
- Graphics: Compatible with DirectX 12 or later with WDDM 2.0 driver.
- Display resolution: High definition (720p) display greater than 9″ diagonally, 8 bits per color channel.
- Networking: Internet connectivity and a Microsoft account are required for Windows 11 Home and Pro.
If the computer is already running Windows 11, the newer version is likely compatible with your current hardware configuration. However, you can always check your computer’s tech specs from the Settings app, System Information, or using Command Prompt and PowerShell.
Windows 11 also requires the Trusted Platform Module (TPM) 2.0 in the Unified Extensible Firmware Interface (UEFI). If your computer was previously running a different version of the operating system, you may need to enable the TPM 2.0 feature manually.
In this guide, I’ll outline the steps to use the official ISO file to install Windows 11 without the need for a bootable USB flash drive. You can also find a guide detailing all the available methods to install Windows 11.
Perform a clean install of Windows 11 from ISO file
To clean install Windows 11 with an ISO file without a USB flash drive, use these steps:
-
Select the Windows 11 option under the “Download Windows 11 Disk Image (ISO)” section.
-
Click the Download button.
-
Select the installation language.
-
Click the Confirm button.
-
Click the Download button to save the Windows 11 ISO file on the device.
-
Right-click the ISO file and select the Mount option.
Quick tip: If you don’t have the “Mount” option, select “Open with,” and choose the “Windows Explorer” option to mount it.
-
Select the virtual drive from the left navigation pane.
-
Double-click the Setup file to begin the Windows 11 installation.

-
(Optional) Click the “Change how Windows Setup downloads updates” option.

-
Select the “Not right now” option.

-
Click the Next button.
-
Click the Accept button to agree to the terms.
-
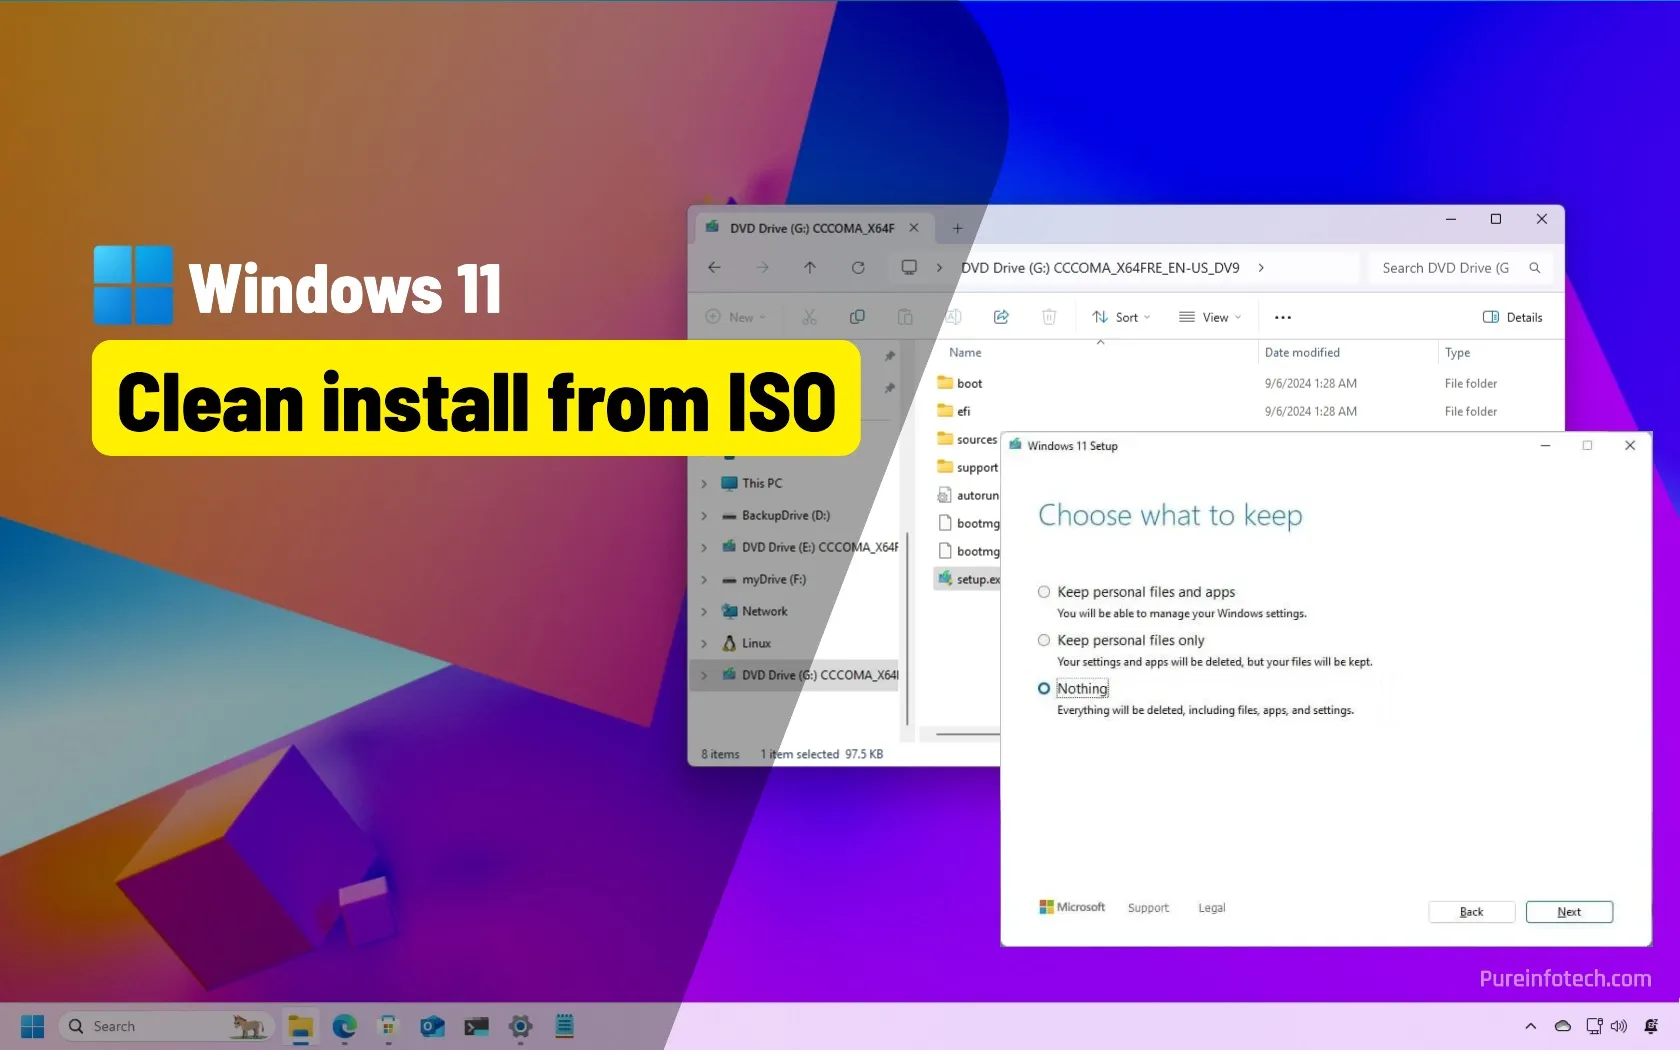
Click the “Change what to keep” option.

-
Select the Nothing option.

-
Click the Next button.
-
Click the Install button.

-
Click the Next button.
-
Choose your region setting on the first page of the out-of-the-box experience (OOBE) after the installation.
Quick note: The initial setup experience may be slightly different as Microsoft is constantly making changes and offering different options, depending on your region and the capabilities of the device.

-
Click the Yes button.
-
Select your keyboard layout setting.

-
Click the Yes button.
-
Click the Skip button if you do not need to configure a second layout.
-
The computer will automatically connect to the network using an Ethernet connection. You must set up the connection manually on a wireless connection (a security key may be required).
-
(Optional) Confirm a name for the computer.

Quick note: This is an optional step, but I recommend setting a name to make it easier to identify the device in the network, on your Microsoft account, and when restoring your computer from backup. Also, after completing this step, the setup will restart to apply the new name, but it’ll start where you left off to continue with the settings.
-
Click the Next button. (The device will restart automatically.)
-
Select the “Set up for personal use” option for Windows 11 Pro. This option is not available for the “Home” edition.

-
Click the Next button.
-
Click the Sign in button.
-
Confirm your Microsoft account email to create a Windows 11 account.

-
Click the Next button.
-
Confirm your Microsoft account password.
-
Click the Next button.
-
Click the Create PIN button.
-
Create a new four-digit Windows Hello PIN.

-
Click the OK button.
-
Turn on or off the toggle switch for each privacy setting to confirm the one that best suits your situation.
-
Click the Next button.
-
Click the Next button again.
-
Click the Accept button.

-
Click the More options setting.
 Quick tip: You can also click the “Restore from this PC” button to restore your files, apps, settings, and credentials from the system backup available in your OneDrive account. You can learn more about the Windows Backup app in this guide.
 -
Click the “Set up as a new PC” option.

-
Click the “Set up as a new PC” option again.
-
(Optional) On the “Let’s customize your experience” page, select one or more ways you plan to use the device to allow the operating system to suggest tools and service customization during this experience.

-
Click the Accept button to continue. Or click the Skip button to skip this part of the setup.
-
(Optional) Use the code to link your Android phone, or click the “Skip” option.
-
(Optional) Use the code to download OneDrive on your phone, or click the “Skip” option.
-
Click the “Not now” button if you will be using a browser other than Microsoft Edge.


Once you complete the steps, the setup will proceed with the installation process.
Check for system and driver updates
After the installation process, it’s recommended to check for updates to ensure the device has the latest version of its hardware drivers.
Check for system updates
To install Windows 11 updates manually, follow these steps:
-
Open Settings.
-
Click on Windows Update.
-
(Optional) Check the “Get the latest updates as soon as they’re available” toggle switch to download updates before they are automatically rolled out to everyone.
-
Click the “Check for updates” button.

-
(Optional) Click the “Download and install” option to apply a preview of an upcoming update of Windows 11.
Quick note: Optional updates usually include non-security changes that Microsoft plans to release in the next Patch Tuesday rollout.
-
Click the Restart now button.

Once you complete the steps, the system will download and install automatically on the computer.
Check for driver updates
To update the hardware drivers on Windows 11, follow these steps:
-
Open Settings.
-
Click on Windows Update.
-
Click the Advanced options page.
-
Click the Optional updates setting under the “Optional updates” section.

-
Click the Driver updates setting.
-
Select the device driver your computer is missing.

-
Click the “Download & install” button.


Once you complete the steps, the computer will download and install the available updates for the hardware drivers.
Usually, through the Windows Update settings page, you’ll only be able to download generic and basic drivers. If you want the most up-to-date driver version with all its functionalities, it’s best to download the package from the device manufacturer’s support website and then use the Device Manager to install the driver.
At this point, you can proceed with installing your applications, such as your preferred web browser, Microsoft 365 (Office) apps, and other specific programs.
Finally, remember to restore your files from backup. If your files are in OneDrive, signing into the app will make your documents, pictures, and other files available automatically through File Explorer.
If you exported the files to an external USB hard drive, you will need to connect the storage device and transfer the files manually.
How did the installation process without a USB flash drive turn out? Let me know in the comments.
Source link
- Сайт, Вход и Регистрация в онлайн-казино Pokerdom.1558
- Polskie kasyna online z turniejami dla graczy.596
- Najlepsze Kasyna Online w Polsce w 2025.10590 (2)
- Gioco Plinko nei casin online in Italia.2170
- – Официальный сайт Pinco Casino.8053 (2)
- Casino Mostbet Azrbaycan.1032
-

- B7 Casino NL — Bonus €450 en 250 gratis spins.2447
