

Windows 11 has various native tools that are designed to free up space, but I’ve never found any of them to be particularly helpful for doing much of anything. They don’t let you really dig in and see what is using up space. For that, you’ll need something different.
Windows has two main tools designed to help you free up space on your PC: Storage Sense and Disk Cleanup, and there is some overlap between what they do.
Related
How to Automatically Clear Temporary Files on Windows 11
Automate the junk removal task.
Storage Sense can automatically clear your Recycle Bin if you want, automatically delete your downloads, and delete files from your PC if they’ve already been saved to the cloud.

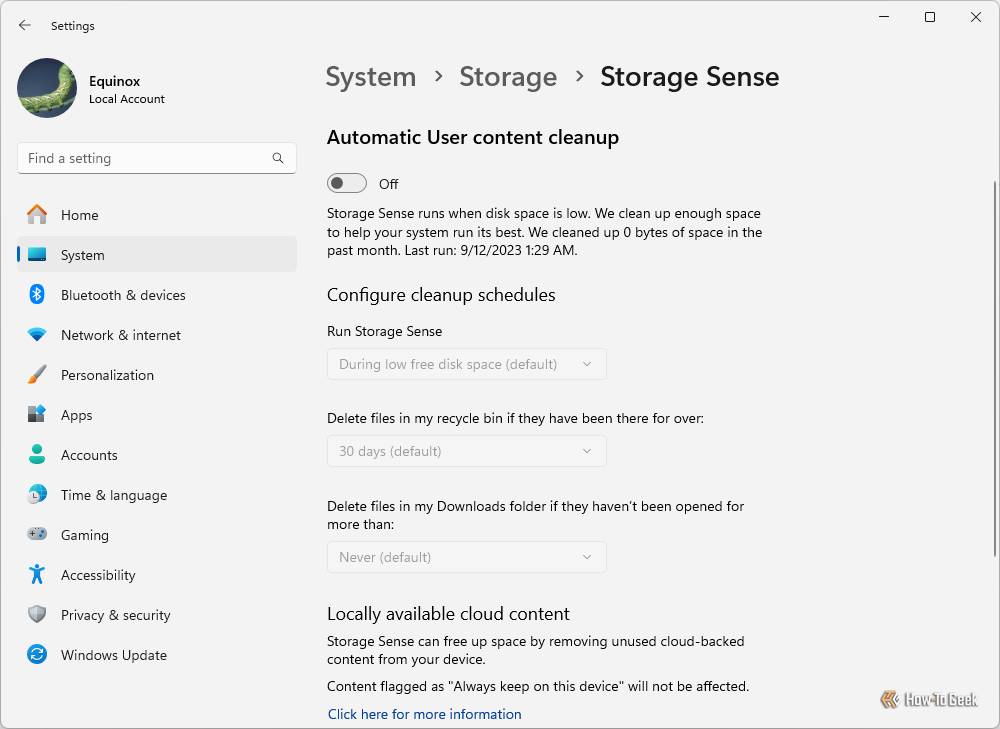
None of that is particularly helpful. I can clear the Recycle Bin myself every week or two, I don’t want to depend on the cloud, and that setting that threatens to delete downloads that I haven’t opened within a certain timeframe strikes fear into my data-hoarding heart.
Really, the only setting I keep enabled in the Storage Sense window is the option to clean up temporary files every once in a while.

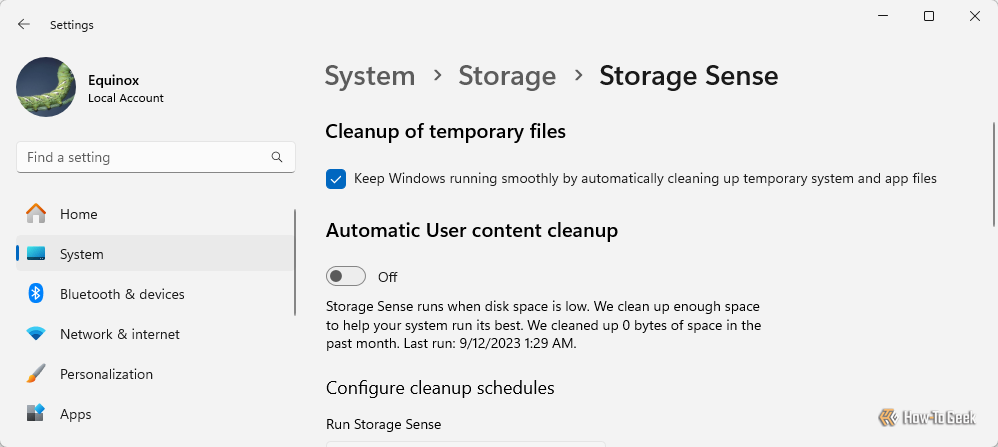
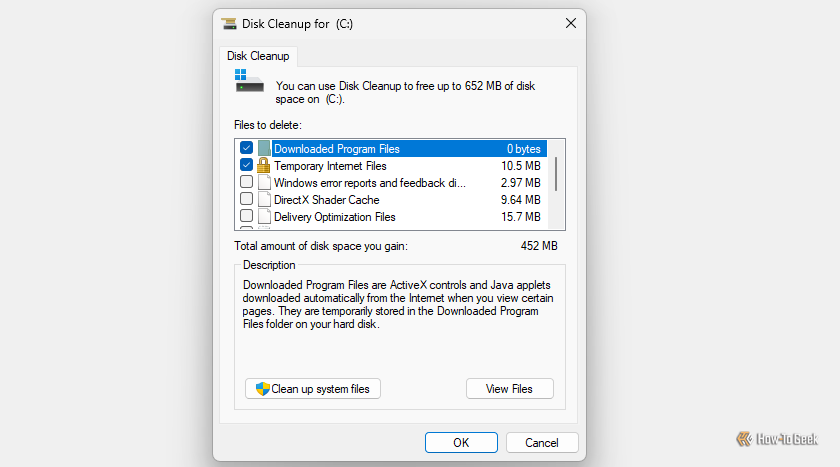
Disk Cleanup is older, and basically a slightly more granular version of the “Cleanup of temporary files” option that exists in the Storage Sense settings.
You have the option to clear out a few caches manually. Depending on what your system has been doing you might clear out a few gigabytes here, especially if you’ve recently received a big Windows update. However, compared to the size of modern PC hard drives, you’re talking about a relatively small amount of storage space overall.

You can also view your Storage use in the Settings app, but it isn’t very helpful either. For example, mine tells me that I have 190 gigabytes of “Other.” If I click around to figure out what is what, sometimes it just opens a folder. Other times it takes me to another app I can use to uninstall apps.
There is a better way.
WizTree Makes Finding Big Files Easy
WizTree is a third-party application that takes the same basic idea as Storage analysis that you can get in the Settings app, but provides way more detail and control.
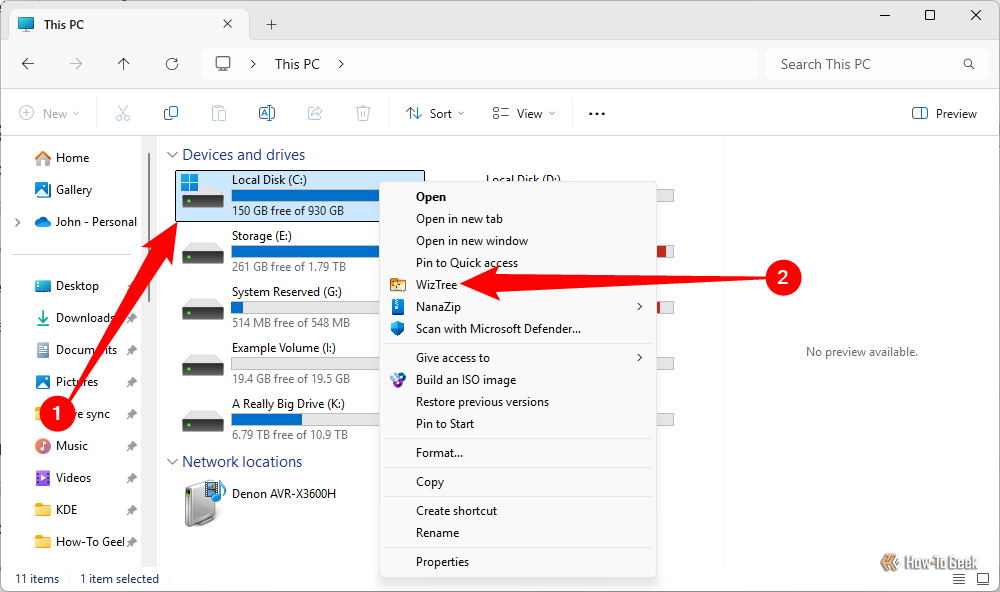
Let’s say I’ve run out of space on my boot drive and need to figure out what is using it all up. All I need to do is open up File Explorer, Shift+Right-Click the C:\ drive (on Windows 11 anyway, Windows 10 users can just right-click), and select “WizTree.” This works for any folder on your PC, not just drives.

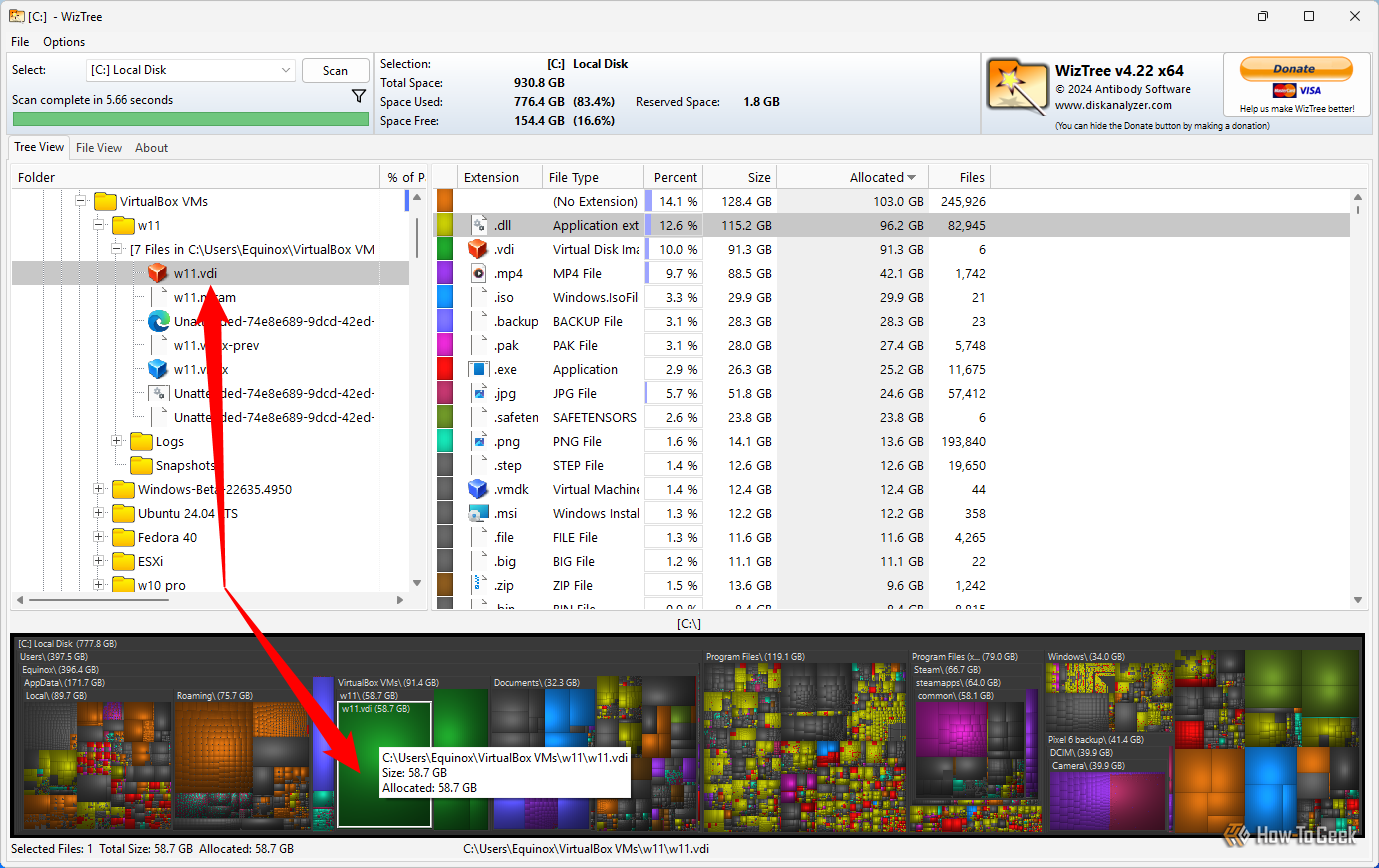
It’ll take up to a few minutes to take an inventory of the drive, then you’ll see a huge colorful mess, plus a basic file tree. The mess of colorful blocks can be daunting at first, but they’re actually extremely helpful, since each file type is assigned a color, and the size of the block corresponds to the size of the file(s) on your PC.

Related
How to Find Missing Right-Click Context Menu Options on Windows 11
Reveal Windows 10-style context options from a secret menu.
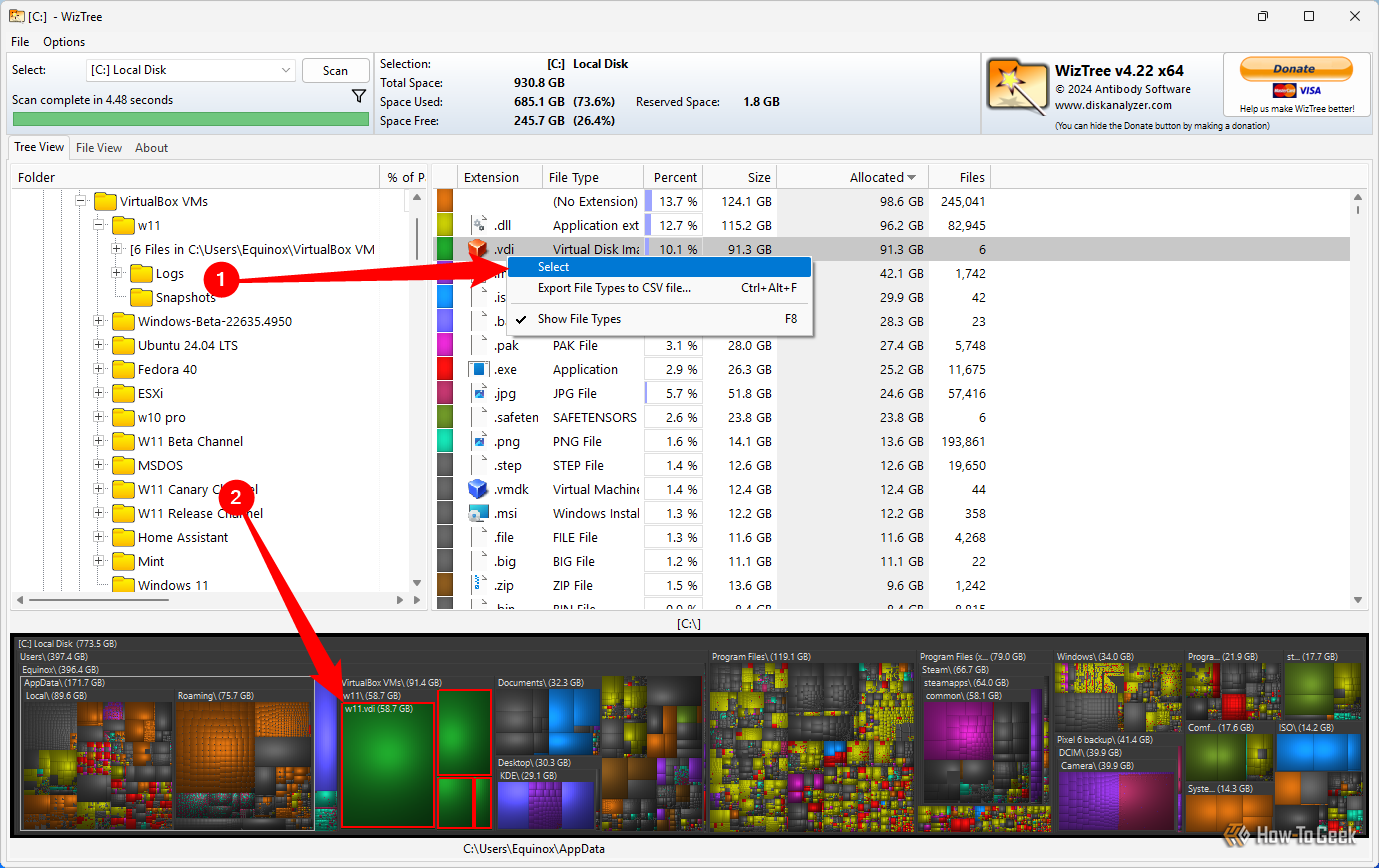
For example, I know that a forest green color has been assigned to VDI files, which are related to the virtual machines I use. A quick glance at the bottom shows me that all the dark green blocks are situated together, which means they share a parent folder. That’s good—they’re not scattered everywhere.
If you hover over each block, it’ll tell you its specific location, and if you click the block, it’ll open the file tree at the top to the specific file.

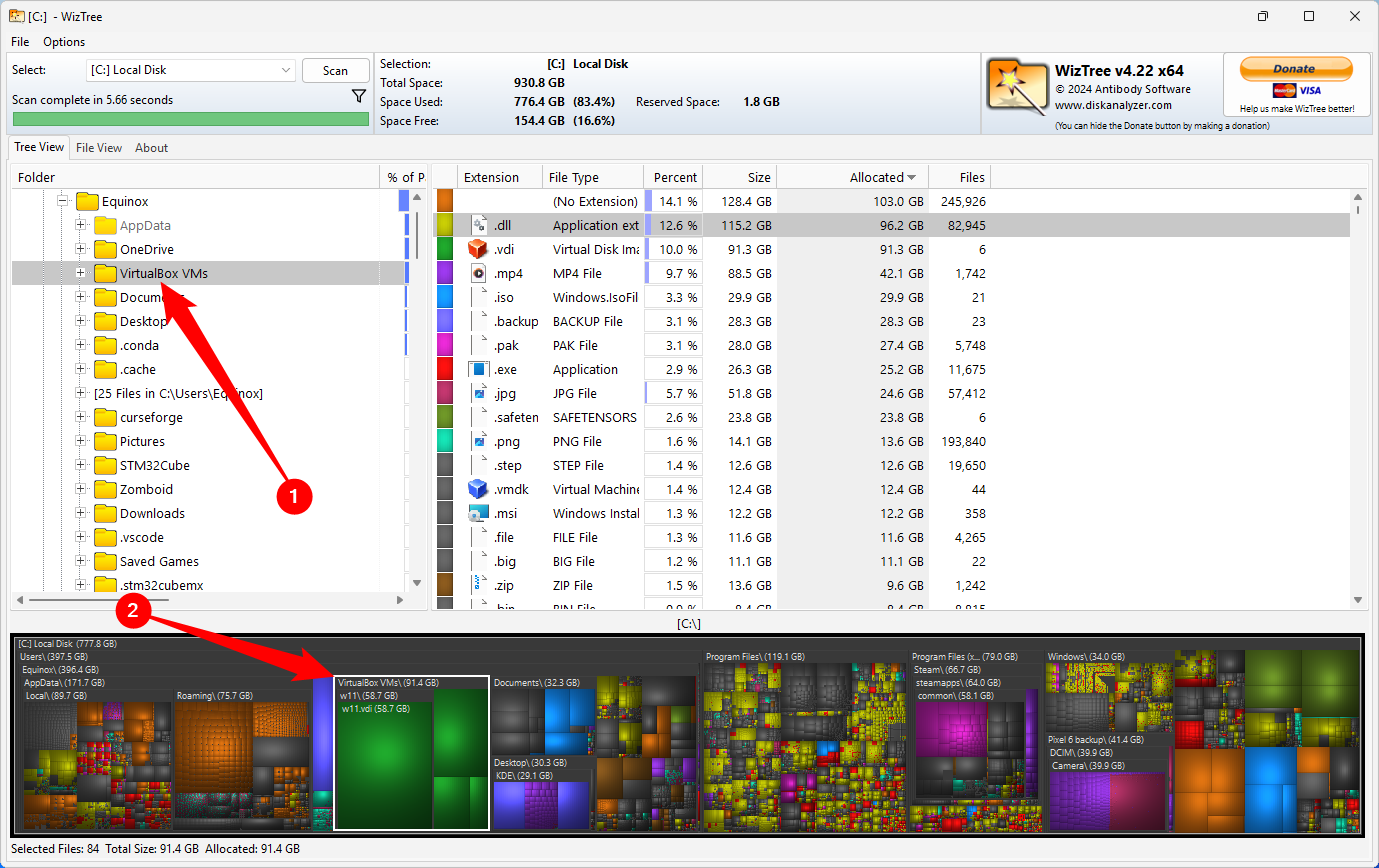
The reverse applies to interacting with folders—if you select a folder in the file tree, it’ll select all the files that are within it in the display below and tell you how much space they’re eating up.
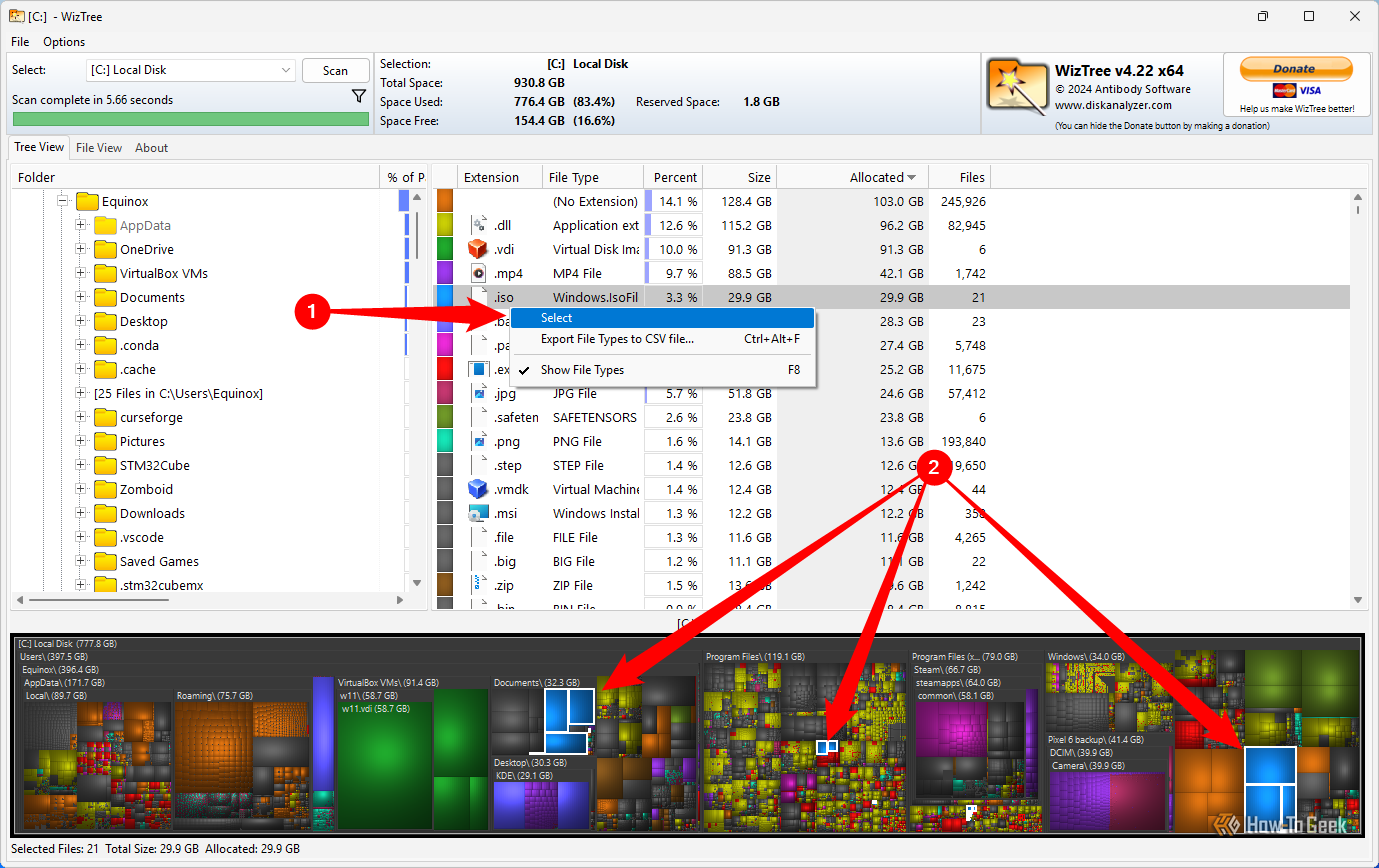
You can also right-click and select a file type in the upper right to highlight every instance of that file type on your PC. If you select something like a DLL file you could be waiting a while, since there will be tens or hundreds of thousands of those on your PC. However, if you only have a handful of files, it is a quick way to find them all.
Once you’ve found them, WizTree also makes it super easy to clean them up.
You Can Clean Up Files Easily
The same menus that let you interact with files and folders also let you move and delete them.
If you go crazy here, you could easily break something. For example, selecting all of your DLLs and deleting them would be nothing short of catastrophic. Don’t go wild deleting things—you will regret it.
For example, if I wanted to get rid of all the VDI files on my PC to free up 91.3GB, all I need to do is right-click the file type in the upper-right pane and hit “Select”, then press the Delete key. The selection indicator will change from white to red to indicate that you’ve deleted a file.
Of course, that approach is a bit broad. You can also just click the colored blocks at the bottom. After a rescan, the ISOs are now pink, so I clicked an ISO I didn’t need and hit the delete key. 5.2GBs free, just like that.
Of course, you can always right-click to open to a specific folder and then use that to move files around if you want to relocate them rather than delete them.
WizTree was a game-changer when I found it, and given that I tend to download everything even remotely interesting that I see on the internet, it has been a huge help in keeping my PC clutter-free. It is also a visual reminder that sometimes it is fine to delete six virtual machines that I’ve had sitting around for more than a year.
Source link
- 1WIN Azrbaycan – Bukmeker kontorunun rsmi sayt.107
- – Официальный сайт Pinco играть онлайн Зеркало и вход.3360
- Mostbet casino Pakistan.334
- 1win — казино и БК.5456 (2)
-

-

-

-


