
Using a table of contents in your document makes it easier for the reader to navigate. You can insert a table of contents in Word from the headings used in your document, and you can force it to update after you make any changes. Here’s how.
How to Add a Table of Contents
Regardless of the size of your document, using a table of contents can direct the reader to exactly where they need to be. In addition to making the document more reader-friendly, a table of contents also makes it easier for the author to go back and add or remove content if necessary.
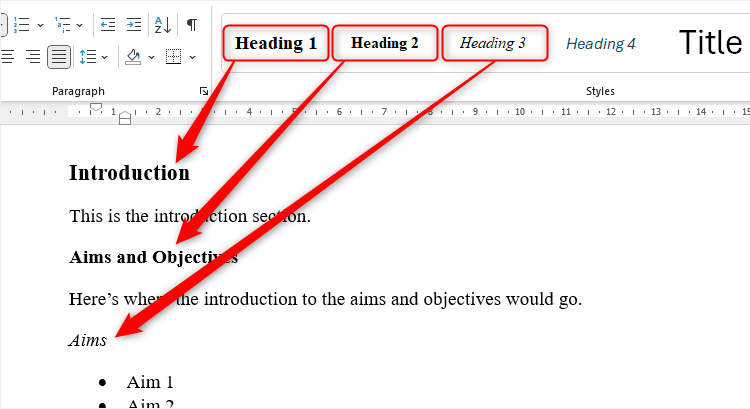
By default, Word generates a table of contents using the first three built-in Heading styles (Heading 1, Heading 2, and Heading 3). To apply Heading styles, select the particular style from the Style Gallery in the Home tab on the ribbon. If you’re not happy with the Heading styles available, you can change the default Heading style by right-clicking the relevant style in the Style Gallery (or pressing the Ctrl+Shift+S Microsoft Word keyboard shortcut to launch the Apply Styles dialog box), and clicking “Modify.”
In this example, I am using Headings 1 to 3 in a dissertation.

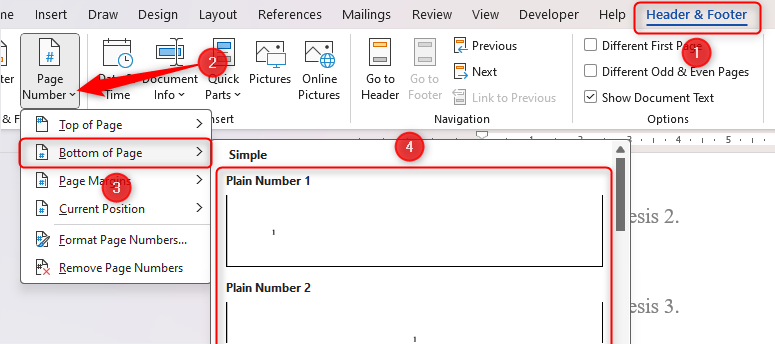
The final step to complete before creating your table of contents is to add page numbers, so that whoever reads your document can use the table of contents to quickly flick to the relevant page. To do this, double-click the footer of your first page, and click “Page Number” in the Header And Footer tab on the ribbon. From there, hover over “Bottom Of Page,” and choose the page number style you want to use.

Once you’ve finished creating your document (or placeholders for each section of your document), applied your Heading styles, and added page numbers, it’s time to insert your table of contents. The first thing you need to do is place the cursor where you want the table of contents to appear. Then, click “Table Of Contents” in the References tab on the ribbon.

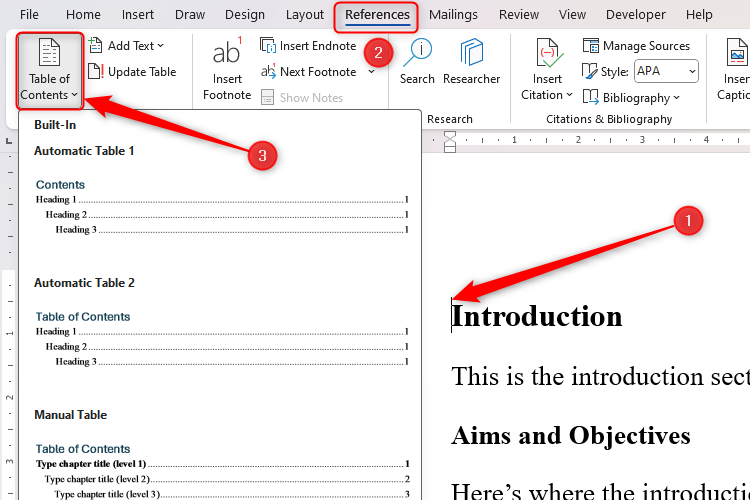
Next, you can choose between the three different built-in tables of contents from the drop-down menu. The only difference between Automatic Table 1 and Automatic Table 2 is their titles, which are “Contents” and “Table Of Contents,” respectively.
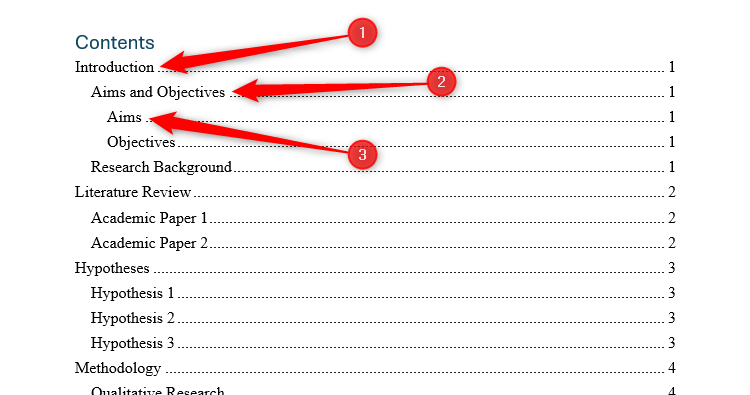
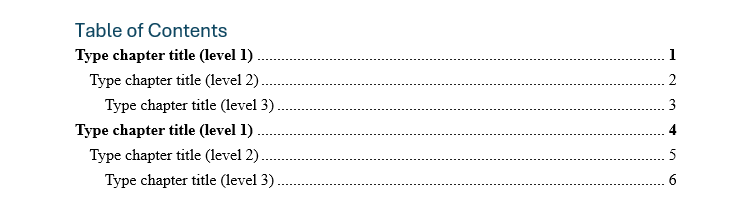
In this example, I’ve selected Automatic Table 1. This automatically includes the titles in the three Heading styles I selected earlier, with each level indented to show its hierarchy. Notice, also, how the formatting from the Heading styles has not been duplicated in the table of contents—instead, the table has its own formatting style to ensure it’s presented professionally and tidily.

If you choose the “Manual Table” option from the drop-down menu, Word will insert a template that you will need to edit yourself by clicking each line and adding the relevant details. This is the best option if you want the table of contents to contain details that differ from the headers throughout your document. For example, if you have lengthy chapter headings, and you want shorter representations of these headings in your table of contents, using the manual table means you can type the shortened versions directly into the table of contents. However, generally speaking, I wouldn’t recommend using the manual table of contents, as it doesn’t automatically change if you were to add more sections or subsections to your document later on.

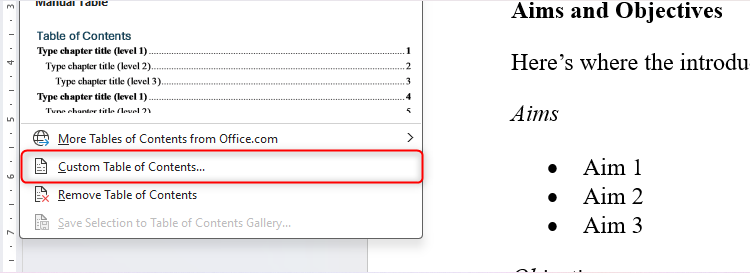
The third option in the Table Of Contents drop-down menu is to click “Custom Table Of Contents.” This is ideal if you want your table of contents to go deeper than the top three Heading styles, or if you want to customize how it will appear on the page.

You then have several options in the Table Of Contents dialog box that opens:

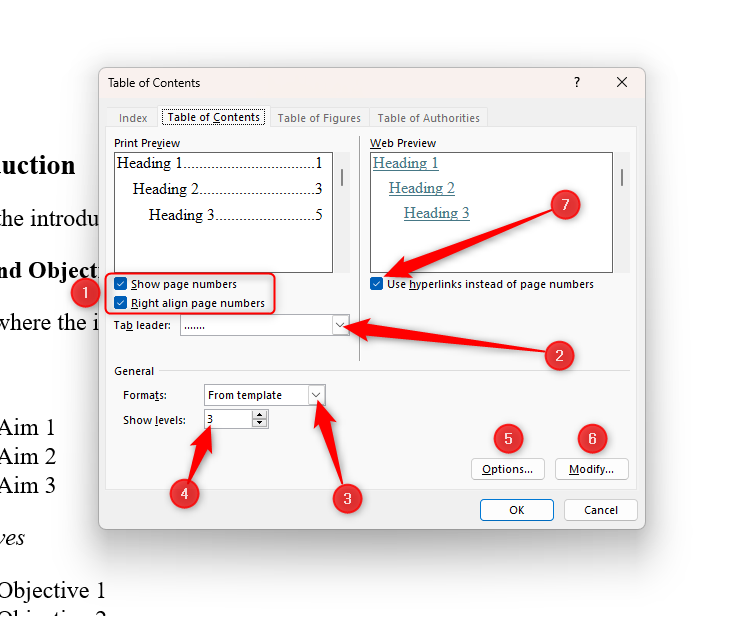
- Page numbering options: You can choose to show or hide the page numbers, and whether they are right-aligned. I would recommend checking both of these boxes—there’s no point in a table of contents if there aren’t any page numbers, and the right alignment is the tidiest way to present the table.
- Tab Leader: You can choose what to have between the chapter titles and the page number in your table of contents, whether that be dots, dashes, a solid line, or a gap. I would suggest you do not choose to have a blank gap, as this can make the table of contents harder to read. Using dots as the tab leader makes the document look the most professional.
- Formats: If you want a quirkier-looking table of contents, the Formats drop-down offers different styles for you to choose from.
- Show Levels: This option lets you tell Word how many levels you want to include in the table of contents. For example, you might have three Heading styles, but you only want to include two in the table of contents.
- Options: The Options button gives you even more control over the Heading styles and levels you want to include in your table.
- Modify: The Modify button is where you can change the typefaces and font sizes for each of the levels in your table of contents.
- Hyperlinks: Check “Use Hyperlinks…” if you plan to save and send the document as a PDF—this will allow people to jump straight to a section within the document by clicking the headers.
When you’re happy with your selections, click “OK” to see the table of contents added to your document.
How to Update the Table of Contents
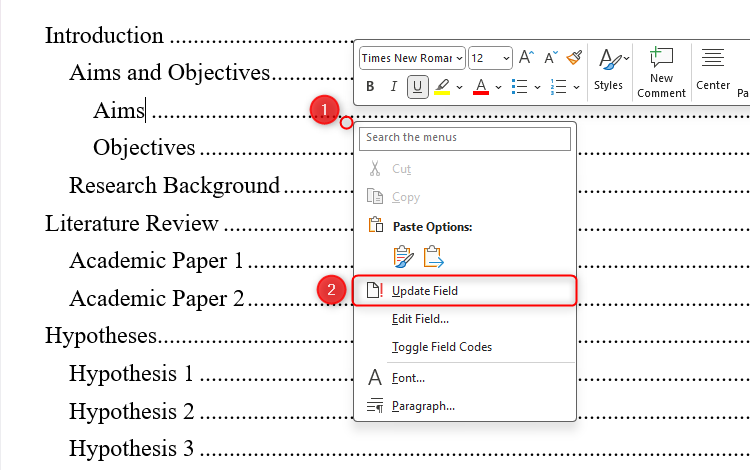
If you ever need to add or remove a section in your document, or if your page numbers change when you add more content, you can easily update the table of contents to reflect those differences. To do this, right-click anywhere on your table of contents, and click “Update Field.”

Depending on the changes you made to your document, you may have the option to update the whole table of contents or the page numbers only. If this is the case, choose the option that best aligns with the update you want to make, and click “OK.”
Your table of contents will then update accordingly.
How to Remove the Table of Contents
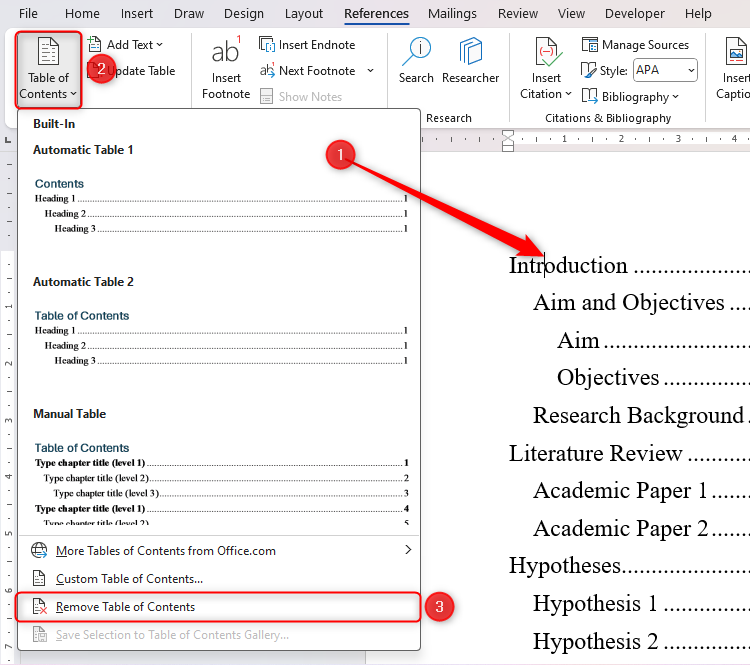
Removing the table of contents is equally straightforward. Simply place your cursor anywhere within your table of contents, click “Table Of Contents” in the Review tab on the ribbon, and click “Remove Table Of Contents.”

Your table of contents will now be removed from your document.
As well as using Word’s Heading styles, make sure you use styles to make the rest of your document well-presented and consistent.
Source link
- Pin Up Casino – Azrbaycanda onlayn kazino Pin-Up.3656
- Chicken Road slot w kasynie online mechanika gry.915
- – Официальный сайт Pinco играть онлайн Зеркало и вход.5131
-
- казино и ставки в БК – зеркало сайта Mostbet.547
- Tiranga Game Online Gambling in India Deposit and Withdrawal.1062
- Официальный Сайт Играть в Онлайн Казино Pinco.5911
- – Официальный сайт Pinco играть онлайн Зеркало и вход.11674 (2)

