- To create a Windows 10 bootable USB, download and open the “Media Creation Tool,” connect an 8GB flash drive to the computer, select the “Create installation media” option, and continue choosing the “USB flash drive” option.
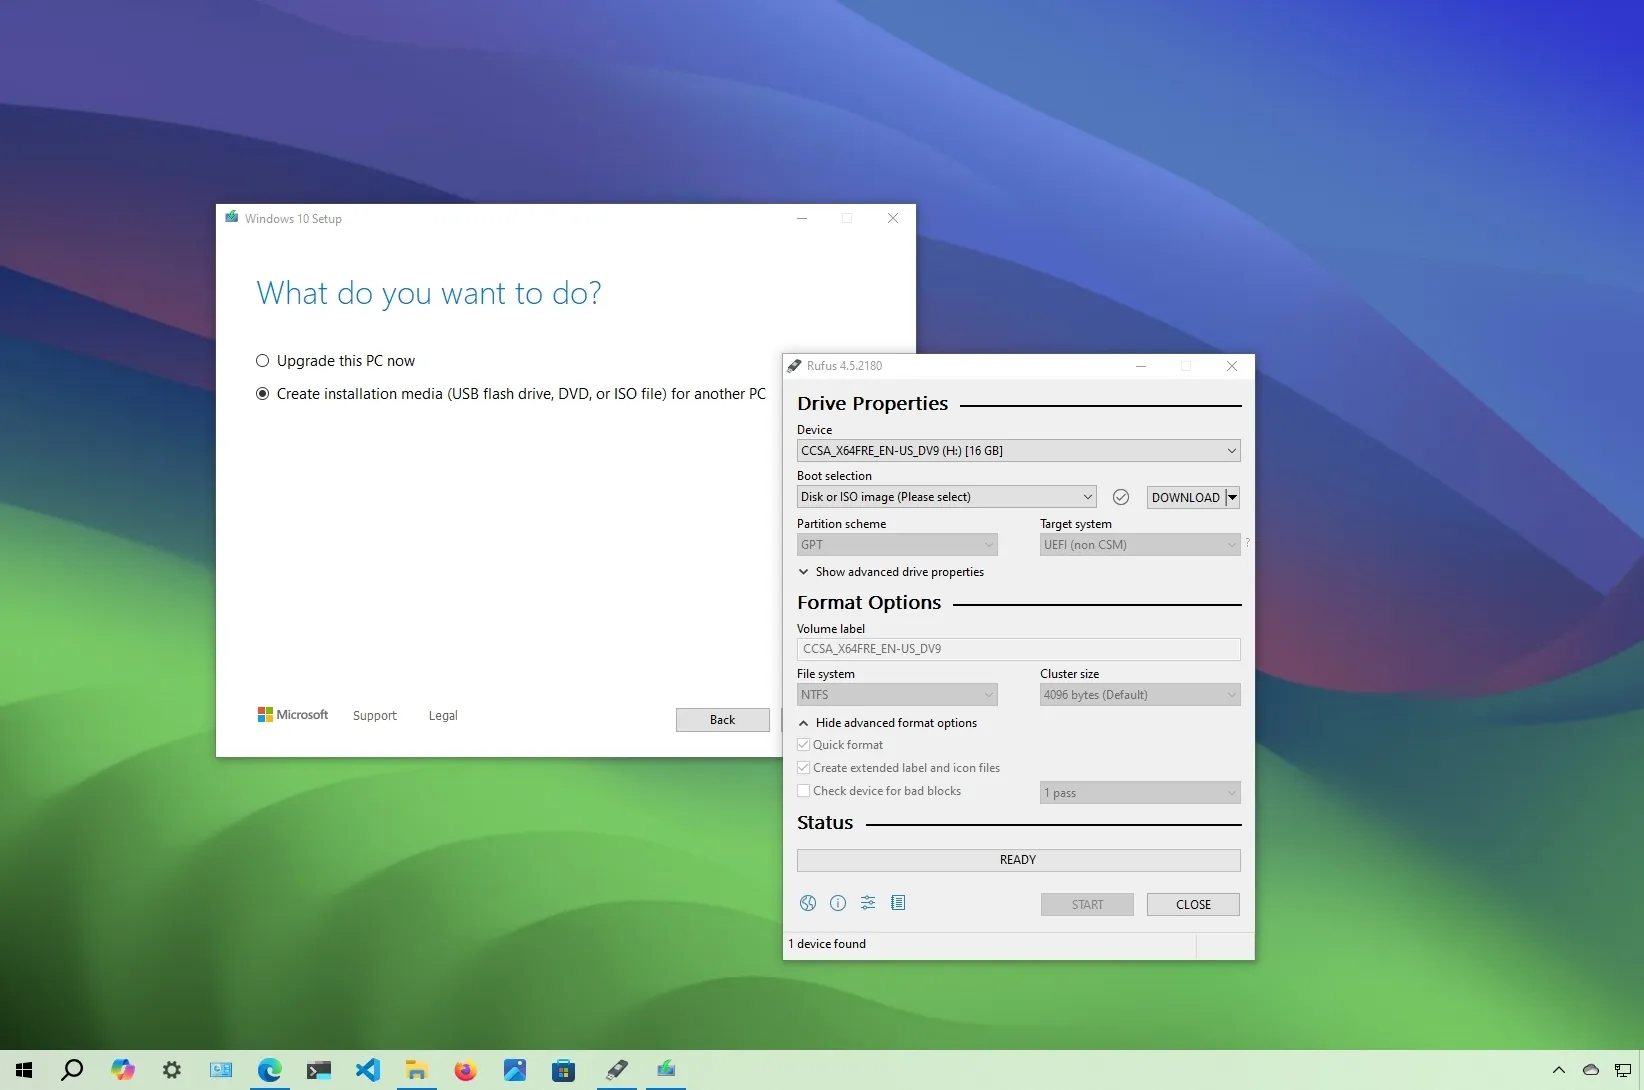
- Alternatively, open “Rufus,” use the “Download” option to grab the Windows 10 ISO, choose the USB media settings, and click the “Start” button to create the Windows 10 bootable USB flash drive.
- You can also use the Ventoy tool to create an installation media quickly.
On Windows 10, you can create a bootable USB drive with multiple tools, and in this guide, I will teach the different methods. When a new version of Windows 10 becomes available, not everyone gets the latest release on the same day. Instead, Microsoft upgrades computers gradually, taking some time until the new version reaches every device.
However, if you do not want to wait for the automatic upgrade, you can download the Windows 10 (version 22H2) installation files onto a USB flash drive using the Media Creation Tool. The tool helps perform an in-place upgrade or create a bootable installation media using a removable drive to perform a clean installation. Furthermore, you can even use third-party tools like Rufus and Ventoy to download and create a bootable media to install Windows 10 from USB.
In this guide, I will teach you how to use the Media Creation Tool, Rufus, and Ventoy to create a USB flash drive to upgrade or reinstall Windows 10 on different devices. (You can choose any of these tools to complete the process, but I personally have been using the Rufus app. It’s straightforward, and you have the option to download the files directly from Microsoft servers.)
To create a Windows 10 bootable USB, use these steps:
-
-
Under the “Create Windows 10 installation media” section, click the “Download Now” button.
-
Double-click the MediaCrationToolxxxx.exe file to launch the tool.
-
Click the Accept button.
-
Select the “Create installation media (USB flash drive, DVD, or ISO file) for another PC” option to make a bootable Windows 10 USB drive.
-
Click the Next button.
-
Click the Next button again.
Quick note: If you’re about to create a Windows 10 USB for another device, clear the “Use the recommended options for this PC” option to select the correct language, architecture, and edition as necessary.

-
Select the “USB flash drive” option to create the bootable USB installation media.

-
Click the Next button.
-
Select the flash drive from the list, making sure it doesn’t have any important files, as this process will erase everything on it.
-
Click the Next button.
-
Click the Finish button.

After completing the steps, you can start your computer using UEFI or BIOS with the USB drive to install Windows 10.
Create bootable USB drive of Windows 10 from Rufus
To make a Windows 10 installation media from Rufus with UEFI or BIOS support, use these steps:
-
Under the “Download” section, click the link to download the latest version of the tool.
-
Double-click the executable to launch Rufus.
-
Click the Settings button a the bottom of the page (the third button from the left).
-
Under the “Settings” section, use the “Check for updates” drop-down menu and select the Daily option.
-
Click the Close button.
-
Click the Close button again to close the app.
-
Reopen the Rufus tool.
-
Under the “Device” section, use the drop-down menu, and select the USB flash drive to create the Windows 10 bootable media.
Quick tip: You need to connect a USB flash drive with at least 8GB of storage. You may need to restart the tool if you do not see the device on the list.
-
Under the “Boot selection” section, use the drop-down menu and select the “Disk or ISO image” option.
-
Click the down arrow button on the right and select the Download option.

-
Click the Download button.
-
Select the Windows 10 option.
-
Click the Continue button.
-
Under the “Release” section, select the version of Windows 10 to download, such as version 22H2.

-
Click the Continue button.
-
Click the Continue button on the “Edition” setting (since there’s only one option).
-
Select the language for the installation — for example, English.
-
Click the Continue button.
-
Select the x64 (64-bit) operating system architecture. (You may need to download the x86 (32-bit) option if you have an older machine.)
-
Click the Download button.
-
Select the location to save the Windows 10 ISO file.
-
(Optional) Confirm a name for the bootable USB flash drive in the “Volume label” setting.
-
Continue with the default settings after the download.
-
Click the Start button.
-
(Optional) Skip the install customization settings since you want to make a regular bootable Windows 10 USB drive.
-
Click the OK button.
-
Click the OK button again.


Once you complete the steps, you can boot and install Windows 10 on computers running on UEFI or BIOS, depending on your firmware.
Create bootable USB drive of Windows 10 from ISO
To make a bootable Windows 10 USB drive with an existing ISO file, use these steps:
-
Under the “Download” section, click the link to download the latest version of the tool.
-
Double-click the executable to launch Rufus.
-
Under the “Device” section, use the drop-down menu, and select the USB flash drive to create the bootable media.
-
Under the “Boot selection” section, use the drop-down menu and select the “Disk or ISO image” option.
-
Click the Select option.

-
Choose the Windows 10 ISO file.
-
Continue with the default settings.
-
(Optional) Confirm the name of the USB flash drive in the “Volume label” setting.
-
Click the Start button.
-
(Optional) Skip the install customization settings since you want to make a regular bootable USB drive.
-
Click the OK button.
-
Click the OK button again.
After you complete the steps, the tool will create a USB installation media from the Windows 10 ISO you provided.
Create bootable USB drive of Windows 10 from Ventoy
Ventoy is a non-Microsoft tool that you can install on a USB drive to make any ISO file bootable without additional steps.
To create a Windows 10 bootable USB with Ventoy, connect a flash drive with at least 8GB of space and use these steps:
-
Under the “Assets” section, click the ventoy-x.x.xx-windows.zip file and download it to your computer.

Quick note: You may need to force and keep the file as the browser may detect it as malicious.
-
Open File Explorer.
-
Open the Zip folder location.
-
Double-click the open the ventoy-x.x.xx-windows.zip file to unzip it from File Explorer.
-
Click the Extract all button from the command bar.

-
Click the Browse button.
-
Select a location to extract the files.
-
Click the Select Folder button.
-
Click the Extract button.
-
Open the ventoy-x.x.xx folder.
-
Double-click the Ventoy2Disk.exe file to launch the installer.

-
Choose the USB flash drive from the “Device” setting.
Quick tip: If you have any important files in the flash drive, creating a backup is recommended, as this process will erase everything on the flash drive.
-
Click the Install button.

-
Click the OK button.
-
Click on This PC from the left pane of File Explorer.
-
Open the Ventoy drive.
-
Right-click on the page and select the Inspect option.
-
Click the Network tab.
-
Click the More Network conditions button.
-
Clear the “Use browser default” option.
-
Select the “Safari – Mac” option (or another non-Windows agent).

-
Refresh (F5) the page (if applicable).
-
Select the Windows 10 option.
-
Click the Confirm button.
-
Select the product language from the drop-down menu.
-
Click the Confirm button.
-
Click the Download button to save the ISO file to your computer.
-
Copy and paste the ISO file into the Ventoy USB flash drive to make it bootable.


After you complete the steps, you can use the bootable USB flash drive to start a device with the Ventoy application, from which you can choose to launch the Setup of Windows 10 and other operating systems like Windows 11 if you add additional ISO files.
The latest version of Windows 10 is 22H2, but you can use these instructions to download an older version of the ISO file.
Create bootable USB drive of Windows 10 copying files to USB
To create a bootable USB flash drive to install Windows 10 by copying the ISO file onto a USB, use these steps:
-
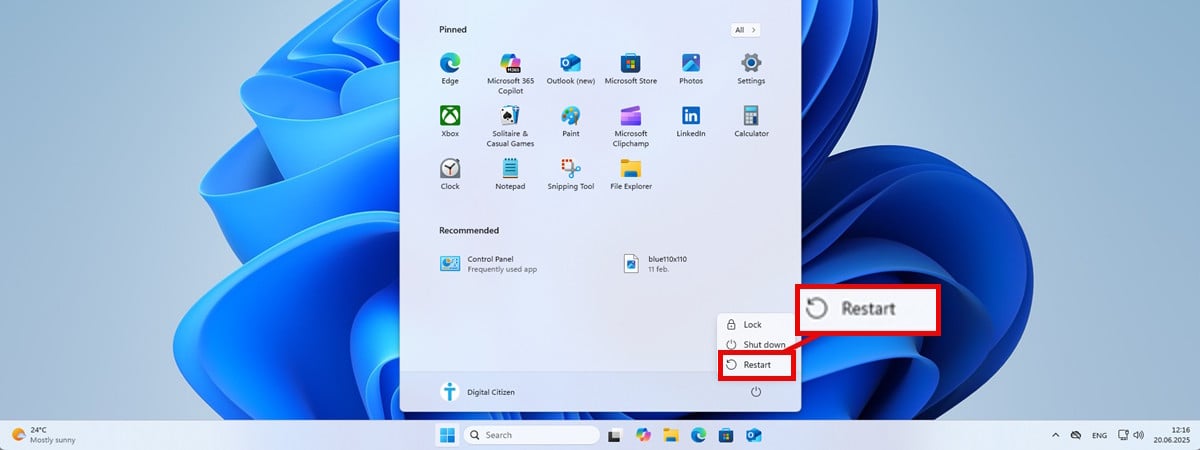
Open Start.
-
Search for Command Prompt, right-click the top result, and select the Run as Administrator option.
-
Type the following command to open DiskPart and press Enter:
diskpart
-
Type the following command to determine the USB flash drive and press Enter:
list disk
-
Type the following command to select the storage and press Enter:
select disk 1
Quick tip: The
select disk 1command as an example, but you have to replace 1 with the number of the flash drive you want to use. -
Type the following commands to delete everything from the USB drive and press Enter:
clean

-
Type the following command to create a primary partition and press Enter:
create partition primary
-
Type the following command to select the new partition and press Enter:
select partition 1
-
Type the following command to make the selected partition active and press Enter:
active
-
Type the following command to make the USB flash drive bootable and press Enter:
format FS=NTFS quick
-
Type the following command to assign a drive letter for the USB flash drive and press Enter:
assign letter=X
In the command, change X for any available letter to use.

-
Type the following command to quit the DiskPart and press Enter:
exit
-
Type the following command to mount the ISO file and press Enter:
PowerShell Mount-DiskImage -ImagePath "C:\path\to\Windows10.iso"

In the command, update the path with the location where you have stored the ISO file.
-
Type the following command to launch DiskPart again and press Enter:
diskpart
-
Type the following command to determine the drive letter for the mounted ISO file and press Enter:
list volume

-
Type the following command to exit DiskPart and press Enter:
exit
-
Type the following command to access the Windows 10 ISO file and press Enter:
E:
-
Type the following command to access the “boot” folder and press Enter:
cd boot
-
Type the following command to update the volume boot code for the USB flash drive and press Enter:
bootsect /nt60 X:
-
Type the following command to copy all the Windows 10 files to the bootable USB flash drive and press Enter:
xcopy E:\*.* X:\ /E /F /H

In the command, change the E and X drive letters with the correct drive letters for the Windows 10 ISO image and the USB flash drive, respectively.


After you complete the steps, the files from the ISO will transfer to the USB flash drive creating a bootable drive to install Windows 10 on computers using BIOS or UEFI.
If Windows 10 is not activated after the upgrade, click the “Troubleshoot” button on Settings > Update & security > Activation to start the “Activation troubleshooter” utility.
Update September 27, 2024: This guide has been updated to ensure accuracy and reflect changes to the process.
Source link
-
-

-

-

-
-

-
-