Quick Links
-
Print Your Christmas Cards
Are you fed up with sending the same uninspiring and generic Christmas cards every year? In Microsoft Word, you can create original and personalized designs to add that creative spark to your festive greetings. Here’s how.
Microsoft Word offers many Christmas card templates. However, most of these require you to cut the page once printed, and it’s difficult to reposition and resize the placeholders. Instead, by following this guide, you can create a fully personalized card that requires folding only.
Set Up the Word Document
The Christmas card you’re going to make will use A4 paper folded in half, meaning the finished product will be A5 in size. After opening a blank Word document, the first step is to turn on the non-printing character marker, also known as Show/Hide, by clicking the “¶” icon in the Home tab. This will make it easier to organize and understand your layout as you work.
Designate Your Pages
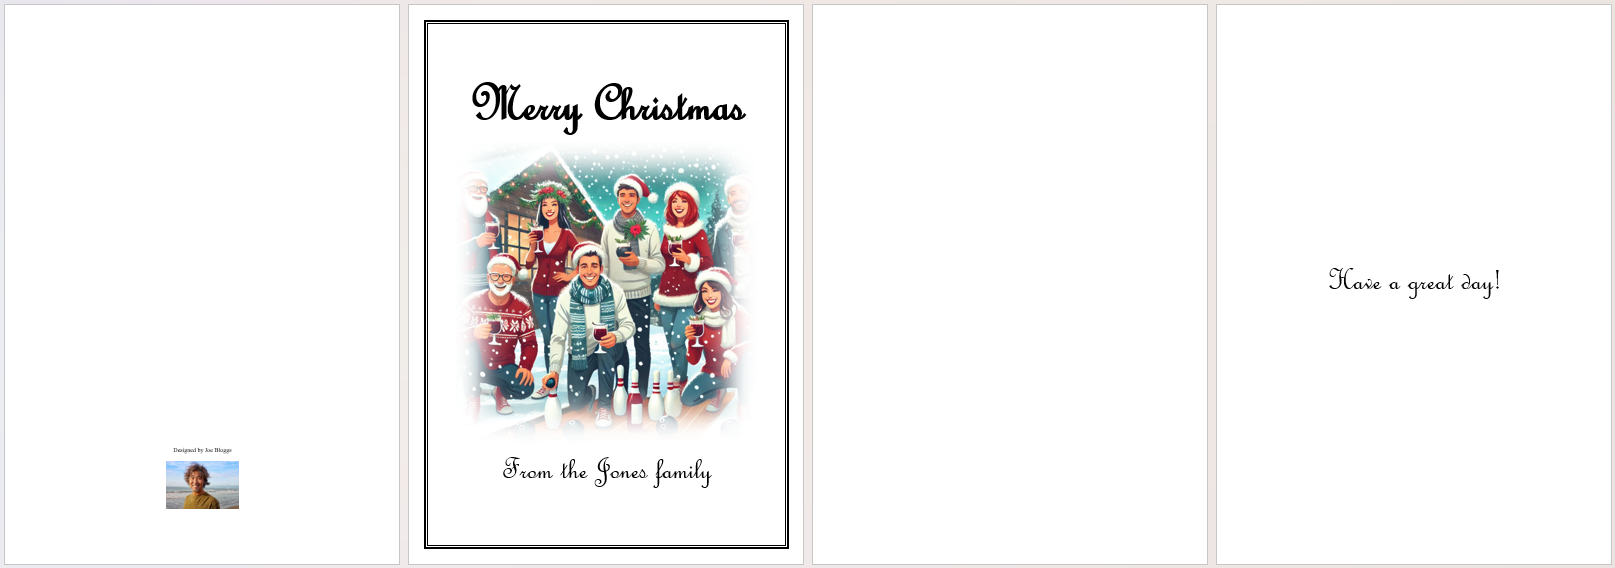
This method requires you to create four pages in your Word document. The first page will be the back of your card, the second page will be the front of your card, the third page will be the inside left of your card, and the final page will be the inside right of your card.
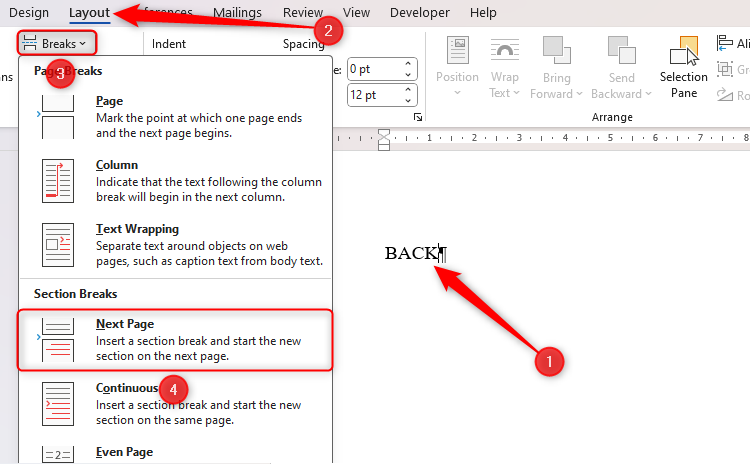
So that you can design and format each section separately, you need to add section breaks. Start by typing BACK on page 1, and then click Layout > Breaks > Next Page.
Now, type FRONT on page 2, and add another Next Page section break.
Type INSIDE LEFT on page 3, followed by another Next Page section break, and finally, type INSIDE RIGHT on page 4.
Zoom out
to see your four pages together. To do this, either use Microsoft Word’s zoom tool in the bottom-right corner of your Word window, or hold Ctrl while you scroll down on your mouse wheel.
Align Your Sections
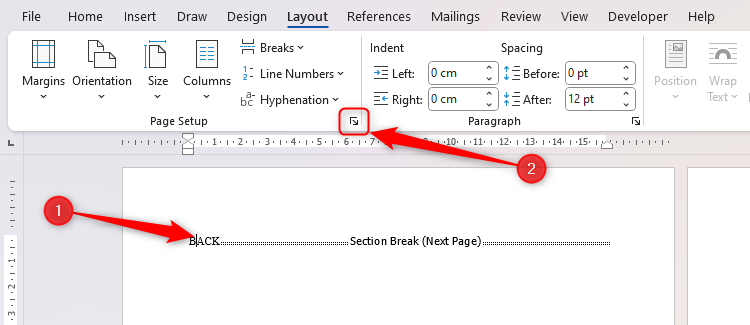
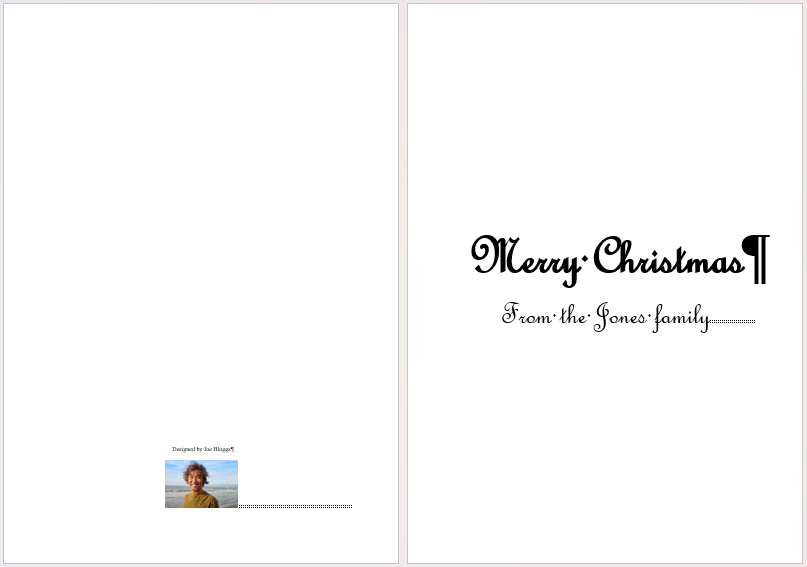
It’s now time to think about the alignment of each section. For example, if you want to add a small logo and some text to the back of your card to add a professional touch, this usually goes at the bottom. To force Word to accommodate this design, place your cursor on page 1 (before the section break), and click the Page Setup dialog launcher in the Layout tab.
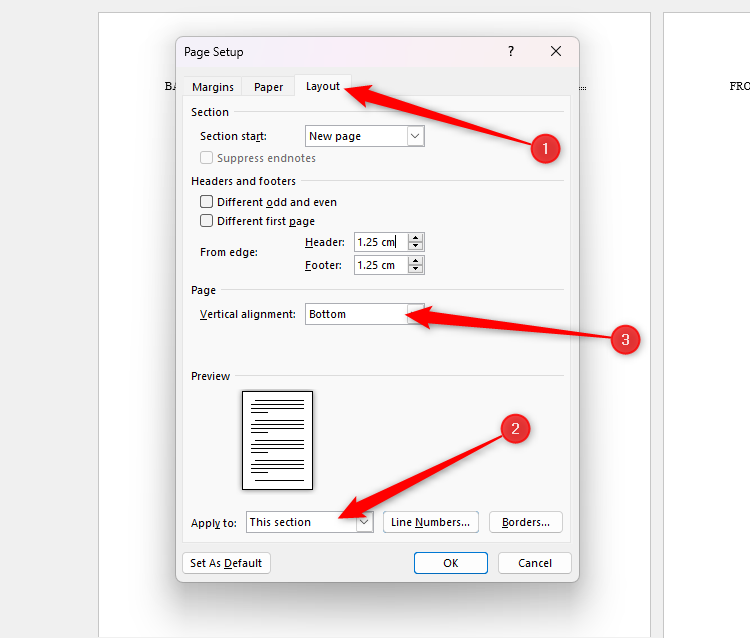
Now, open the “Layout” tab. There, choose “This Section” in the Apply To drop-down box and “Bottom” in the Vertical Alignment drop-down box.
When you click “OK,” you will see that the alignment on page 1 has been adjusted to the bottom, ready for you to replace the word “BACK” with your branding.
Follow the same steps for the other sections of your card, choosing the appropriate alignment each time. For example, the front of your card should be center-aligned, the inside left doesn’t need changing (as this part is usually left blank), and the inside right can be center or top-aligned.
Add Text
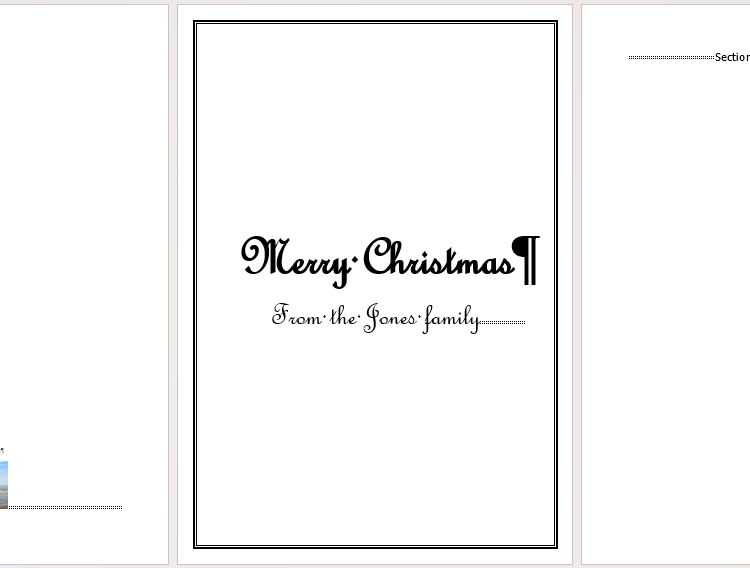
The next step is to decide what you’re going to type in each section. Starting on page 2 (the front of your card), replace the word “FRONT” with Merry Christmas (or another suitable main message). Choose a stylish but readable font (I’ve chosen French Script MT), centralize your text, increase its size, and make it bold if needed.
Then, press Enter, and add any more text you want on the front of your card. In my example, I’ve added some smaller text that will go at the bottom of my page under my main image (which we will add shortly).
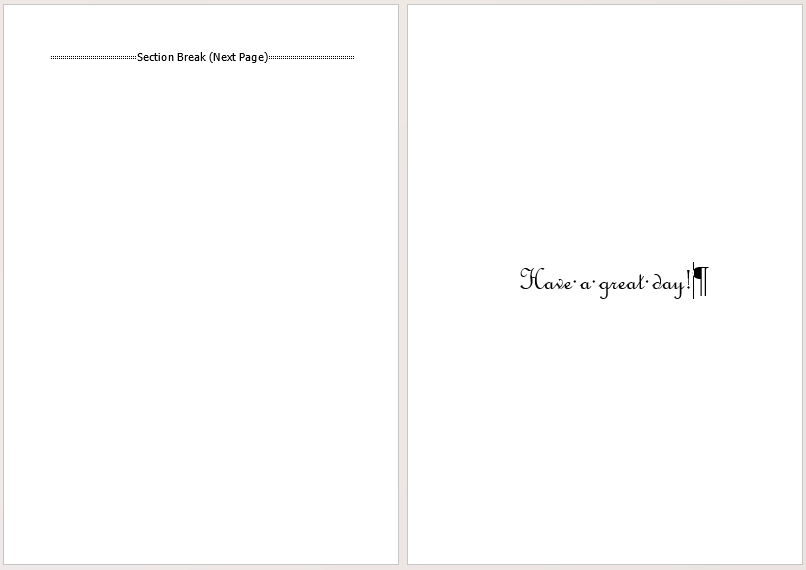
Delete “INSIDE LEFT” on page 3, and leave this page blank. On page 4, replace “INSIDE RIGHT” with your message. You can either write the whole message so that your card is ready to print and deliver, or you can type a short greeting in the center of the page so that you can print the design multiple times and add handwritten messages instead.
Add a Page Border
Adding a border to a page provides an extra stylish dimension to your card. For example, a border on the front of your card helps to box in your text and image.
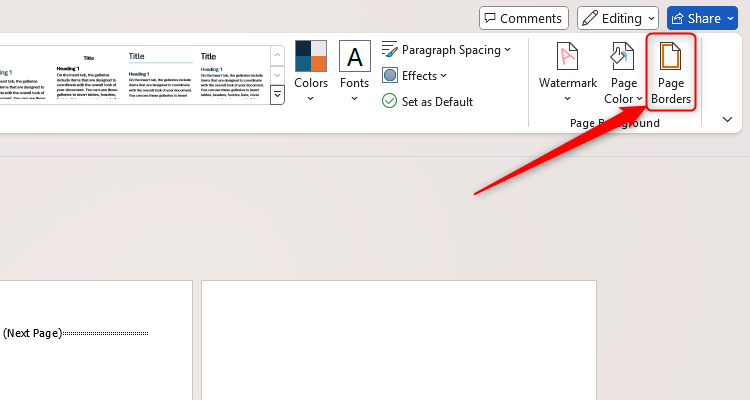
To do this, with your cursor on the relevant page, click “Page Borders” in the Design tab.
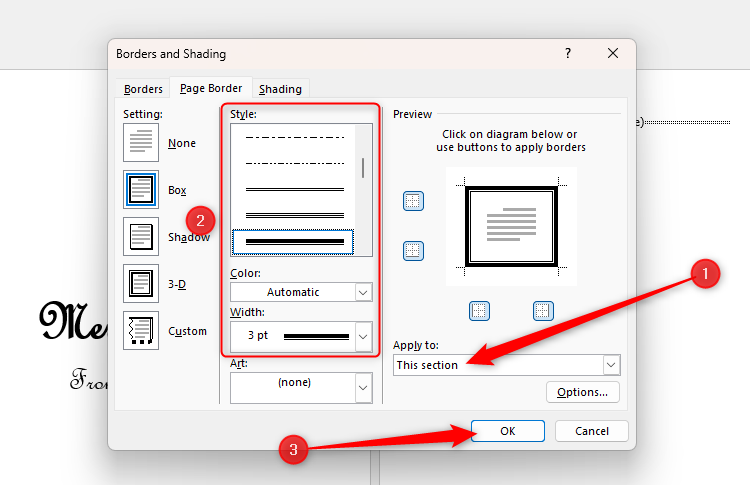
In the Apply To drop-down box, select “This Section.” This stops the border from being duplicated on every page. Then, choose a style, color, and width that works for you, and click “OK.”
You will now see the border appear on that section of your card.
Add a Front Image
Staying on the front of your card, it’s now time to add an image. There are several ways to do this—you can use Microsoft’s image gallery, upload an image already stored on your computer, source an online image, or design an original graphic on Microsoft Designer.
Design an Image on Microsoft Designer
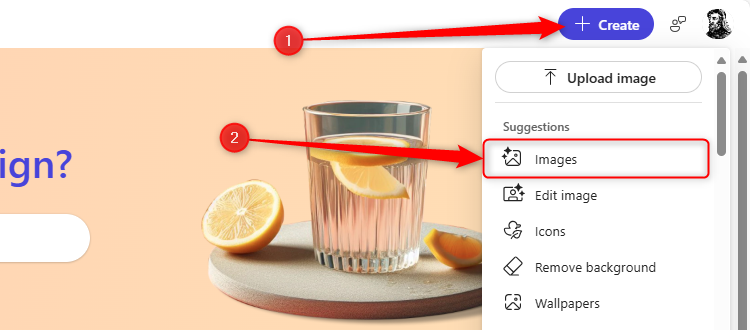
To create an image using Microsoft Designer, either open the Designer app or go to the Designer website, and click Create > Images.
Then, type the image you want to create in the Description field. In my case, I’m sending my cards to my friends at the local bowling club, so I’ve typed “A group of happy people playing bowls at Christmas. It is snowing heavily. Everyone is holding a glass of mulled wine.” When you’ve finished your description, click “Generate.”
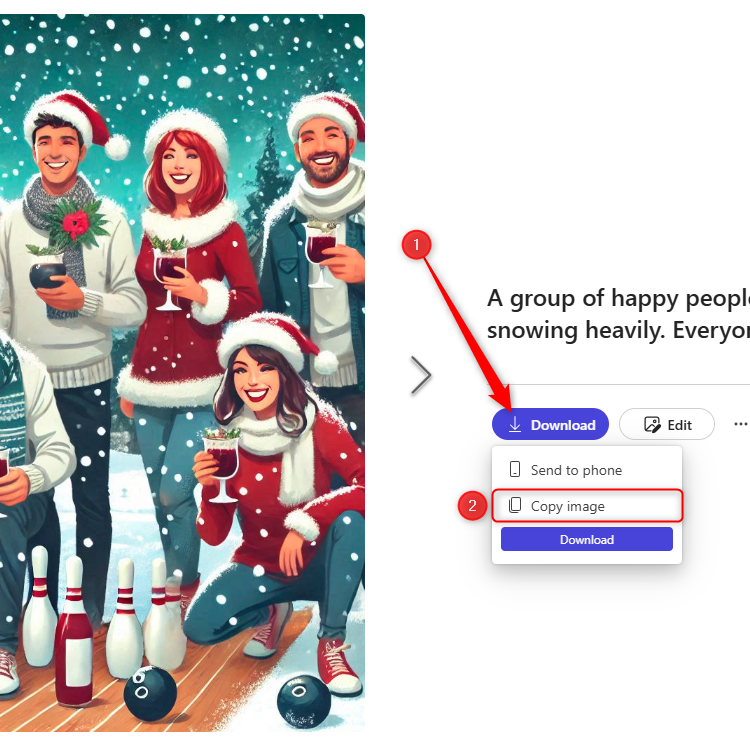
After a few seconds, Designer will display some pictures for you to choose from. Simply select the image that works best for you, and click Download > Copy Image.
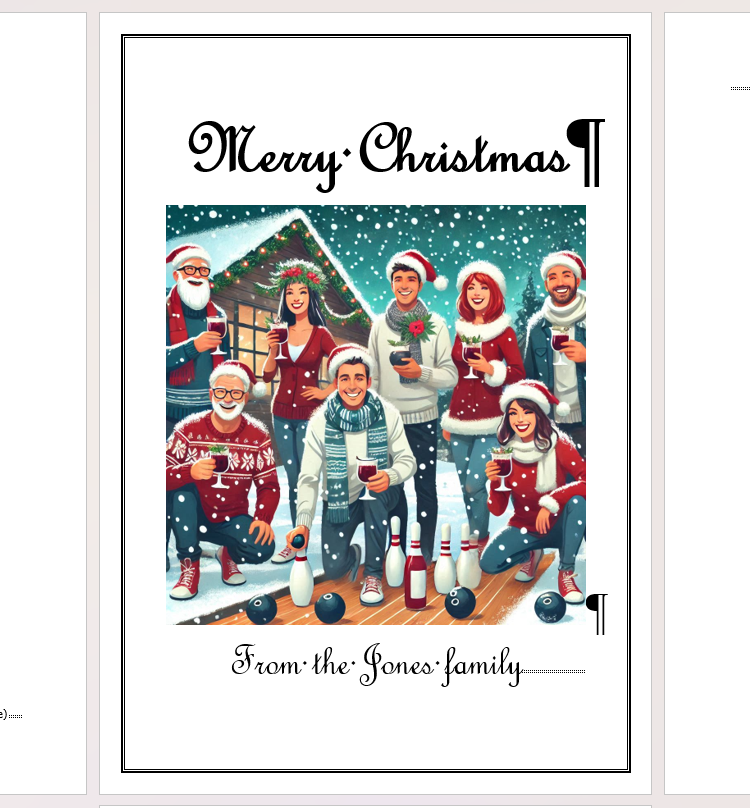
Back in Word, place your cursor where you want the image to sit, and press Ctrl+V.
Other Ways to Add an Image
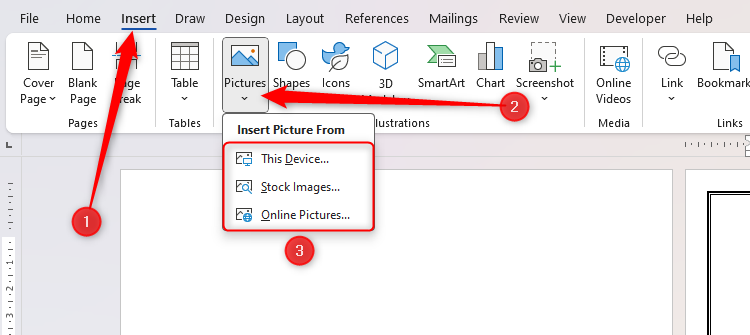
If you want to browse Microsoft’s image gallery, source an image from an online source, or upload your own, place your cursor where you want the image to go, and click “Pictures” in the Insert tab. Then, select the option that suits you, and follow the process to add your image.
Stylize Your Image
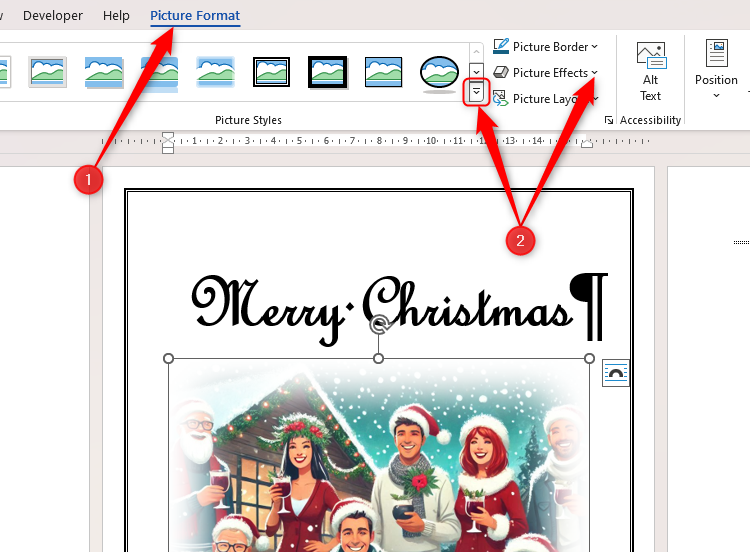
To add an extra Christmassy and professional feel to your image, select the picture, and scroll through the different Picture Styles and Picture Effects in the Picture Format tab. In my case, I’ve decided to soften its edges.
Your Christmas card is now ready to print!
Print Your Christmas Cards
Now that your card is designed, you’re ready to set up your printer so that it prints exactly as you’d hoped. Press Ctrl+P to launch the printing options.
What you see here will depend on your printer, though most printers should be able to accommodate the following settings.
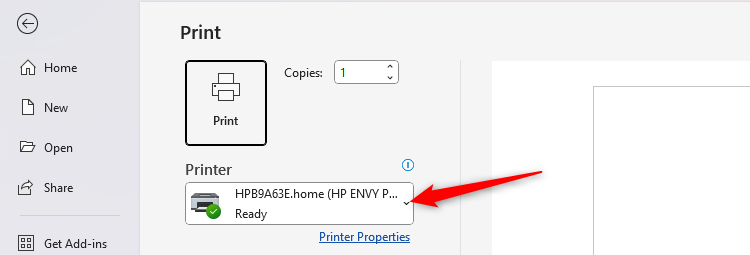
First, make sure the correct printer is selected under the “Printer” section of this menu.
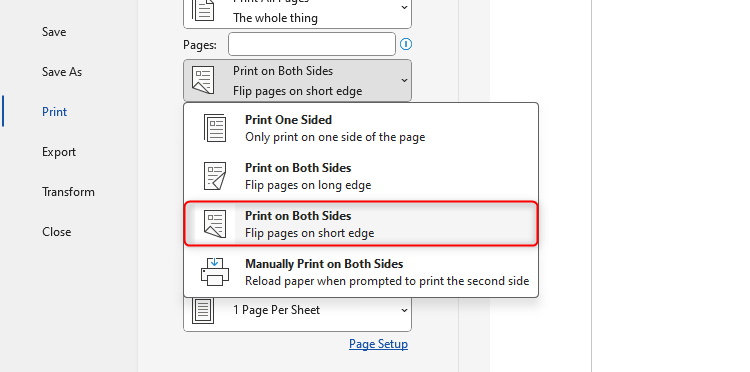
Next, find and select the setting that forces Word to print on both sides, making sure it flips on the short edge.
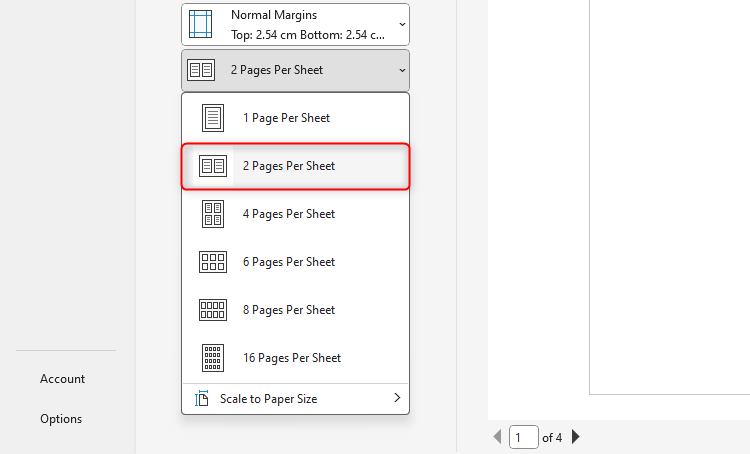
Now, tell Word to print two pages per sheet.
I suggest you do a test print in black and white first so that you can review your card and see whether you need to make any amendments to the text, images, border, or margins. Once you’re happy with how it looks when printed, add some photo paper to your printer, and you’re good to go!
Before you try to print on photo paper, check your printer’s instructions to ensure it can process thicker paper.
Use Microsoft Word’s mail merging tool if you want to automatically pull names from a list of contacts to add to page 4 (inside right) of your Christmas card. This saves you from having to type (or write!) all your recipients’ names individually when you print.
Source link


