
- To enable Hibernate on Windows 11, open PowerShell or Command Prompt (admin) and run the “powercfg /hibernate on” command, then open the Control Panel’s “Power Options” page, click the “Choose what the power button does” setting, and turn on “Hibernate.”
- You can also enable Hibernate when you press the Power button or close the laptop lid.
- To disable hibernation, open the Control Panel’s “Power Options” page, click the “Choose what the power button does” setting, and turn off “Hibernate,” and then from PowerShell or Command Prompt (admin) and run the “powercfg /hibernate off” command.
- Alternatively, you can configure the hibernation feature through the Registry by modifying the “HibernateEnabled” key.
UPDATED 9/25/2024: On Windows 11, you can enable “Hibernate” in multiple steps, and in this guide, I’ll outline steps to complete this configuration. Hibernate is a feature that saves the contents loaded into memory onto the hard drive (in the “hiberfil.sys” file) to shut down the computer completely, preserving your current session with all the running applications. This process allows you to pick up where you left off the next time you turn on the computer.
The Hibernate power state is an alternative feature to sleep or shut down sleep to save energy or preserve battery life when on the go and you don’t have a power source nearby.
Although it’s a convenient feature, you won’t find the “Hibernate” option in the Power options menu because it’s disabled by default. However, if you have a computer that meets the hardware requirements, you must use Command Prompt (or PowerShell) to enable Hibernate on Windows 11. Otherwise, you won’t find the option in Control Panel. Once it’s enabled, you can add the “Hibernate” option to the Power options menu or change the behavior of the power button or laptop’s lid from the Control Panel.
In this guide, I will teach the steps to turn on (and off) and configure hibernation on Windows 11.
Enable Hibernate on Windows 11
On Windows 11, you can turn on the hibernation power mode through the Command Prompt, PowerShell, and the Registry.
From Command Prompt or PowerShell
To enable Hibernate on Windows 11, use these steps:
-
Open Start on Windows 11.
-
Search for Command Prompt (or PowerShell), right-click the top result, and select the Run as administrator option.
-
Type the following command to check the hibernation status and press Enter:
powercfg /availablesleepstates
-
Type the following command to enable Hibernate on Windows 11 and press Enter:
powercfg /hibernate on
-
Close the Command Prompt (or PowerShell) console.
-
Open Control Panel.
-
Click on Hardware and Sound.
-
Click on Power Options.
-
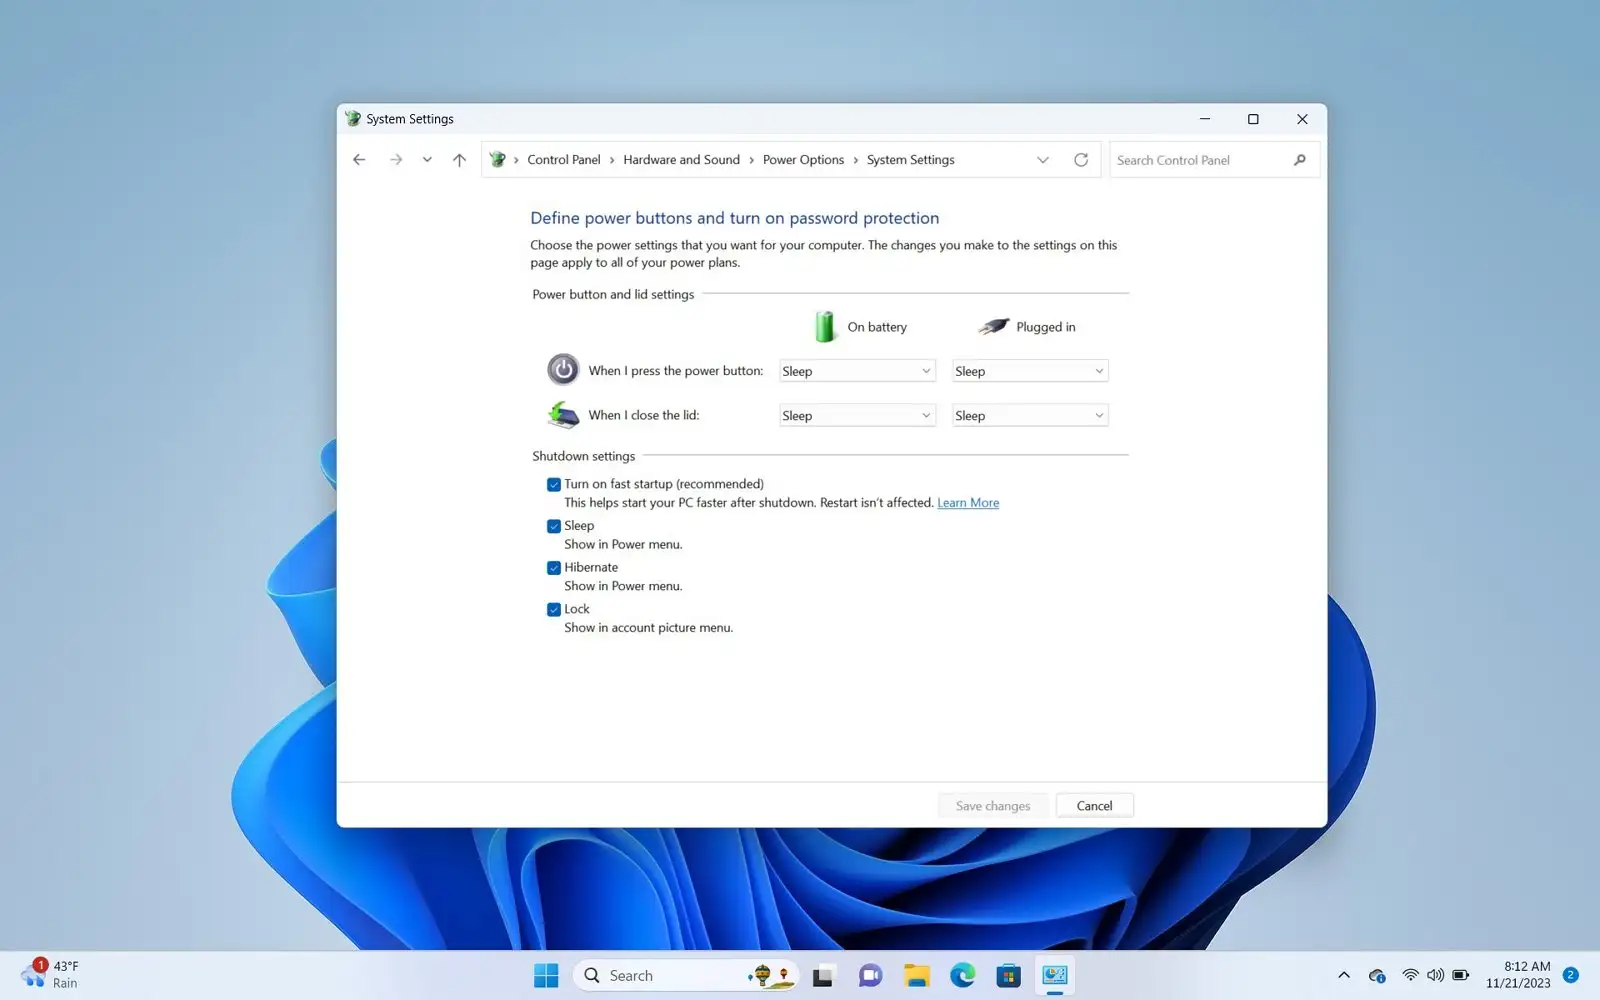
Click the “Choose what the power button does” option.

-
Click the “Change settings that are currently unavailable” option.
-
Under the “Shutdown settings” section, check the Hibernate option.

-
(Optional) Under the “Power button and lid settings” section, choose the Hibernate option in the “When I press the power button” setting to hibernate the device when pressing the power button.

-
Choose the Hibernate option in the “When I close the lid” setting to allow hibernation when closing the laptop’s lid.
- Click the Save Changes button.


Once you complete the steps, the hibernation feature will be enabled on Windows 11, and the option will be available in the Power menu in Start.
While you can configure the power button and lid close action to hibernate from the Control Panel, starting on Windows 11 24H2 and higher releases, you can also configure these features from Settings > System > Power (Power & battery) with the “Lid & power button controls” (or “Power button controls”) setting.
You can also follow these instructions in my video tutorial on my YouTube channel. (Remember to like and subscribe.)

From Registry
To enable Hibernate from Registry, use these steps:
-
Open Start.
-
Search for regedit and click the top result to open the Registry.
-
Navigate to the following path:
HKEY_LOCAL_MACHINE\SYSTEM\CurrentControlSet\Control\Power
-
Right-click the HibernateEnabled DWORD and choose the Modify option.
-
Change the value from 0 to 1.

-
Click the OK button.
-
Restart the computer.

After you complete the steps, the power mode will now be enabled on your computer.
Disable Hibernate on Windows 11
You can also use the Registry, Command Prompt, or PowerShell to disable Hibernate on your computer.
From Command Prompt or PowerShell
To disable Hibernate on Windows 11, use these steps:
-
Open Control Panel.
-
Click on Hardware and Sound.
-
Click on Power Options.
-
Click the “Choose what the power button does” option.
-
Click the “Change settings that are currently unavailable” option.
-
Under the “Shutdown settings” section, clear the Hibernate option.
-
Click the Save Changes button.
-
Open Start.
-
(Optional) Search for Command Prompt (or PowerShell), right-click the top result, and select the Run as administrator option.
Quick tip: Once you clear the option from the Control Panel, it’ll no longer appear in the Power options menu. However, if you want to turn off the feature, you will have to use the “powercfg” tool.
-
Type the following command to disable Hibernate on Windows 11 and press Enter:
powercfg /hibernate off

-
Type the following command to confirm the hibernation has been disabled and press Enter:
powercfg /availablesleepstates

After you complete the steps, the Hibernate feature will be disabled on Windows 11.
From Registry
To disable Hibernate from Registry, use these steps:
-
Open Start.
-
Search for regedit and click the top result to open the Registry.
-
Navigate to the following path:
HKEY_LOCAL_MACHINE\SYSTEM\CurrentControlSet\Control\Power
-
Right-click the HibernateEnabled DWORD and choose the Modify option.
-
Change the value from 1 to 0.

-
Click the OK button.
-
Restart the computer.
After you complete the steps, the power mode will now be enabled on your computer.
Update September 25, 2024: This guide has been updated to ensure accuracy and reflect changes to the process.
Source link
- Polskie kasyna online z turniejami dla graczy.596
- Najlepsze Kasyna Online w Polsce w 2025.10590 (2)
- Gioco Plinko nei casin online in Italia.2170
- – Официальный сайт Pinco Casino.8053 (2)
- Casino Mostbet Azrbaycan.1032
-

- B7 Casino NL — Bonus €450 en 250 gratis spins.2447
- 7Slots Casino – 7Slots Casino giri.30
