
On Windows 11, you can run the operating system without a Recovery Partition. However, if it’s missing, you can create a new Recovery Partition to regain access to the Windows Recovery Environment (WinRE), and in this guide, I’ll show you how to complete this configuration.
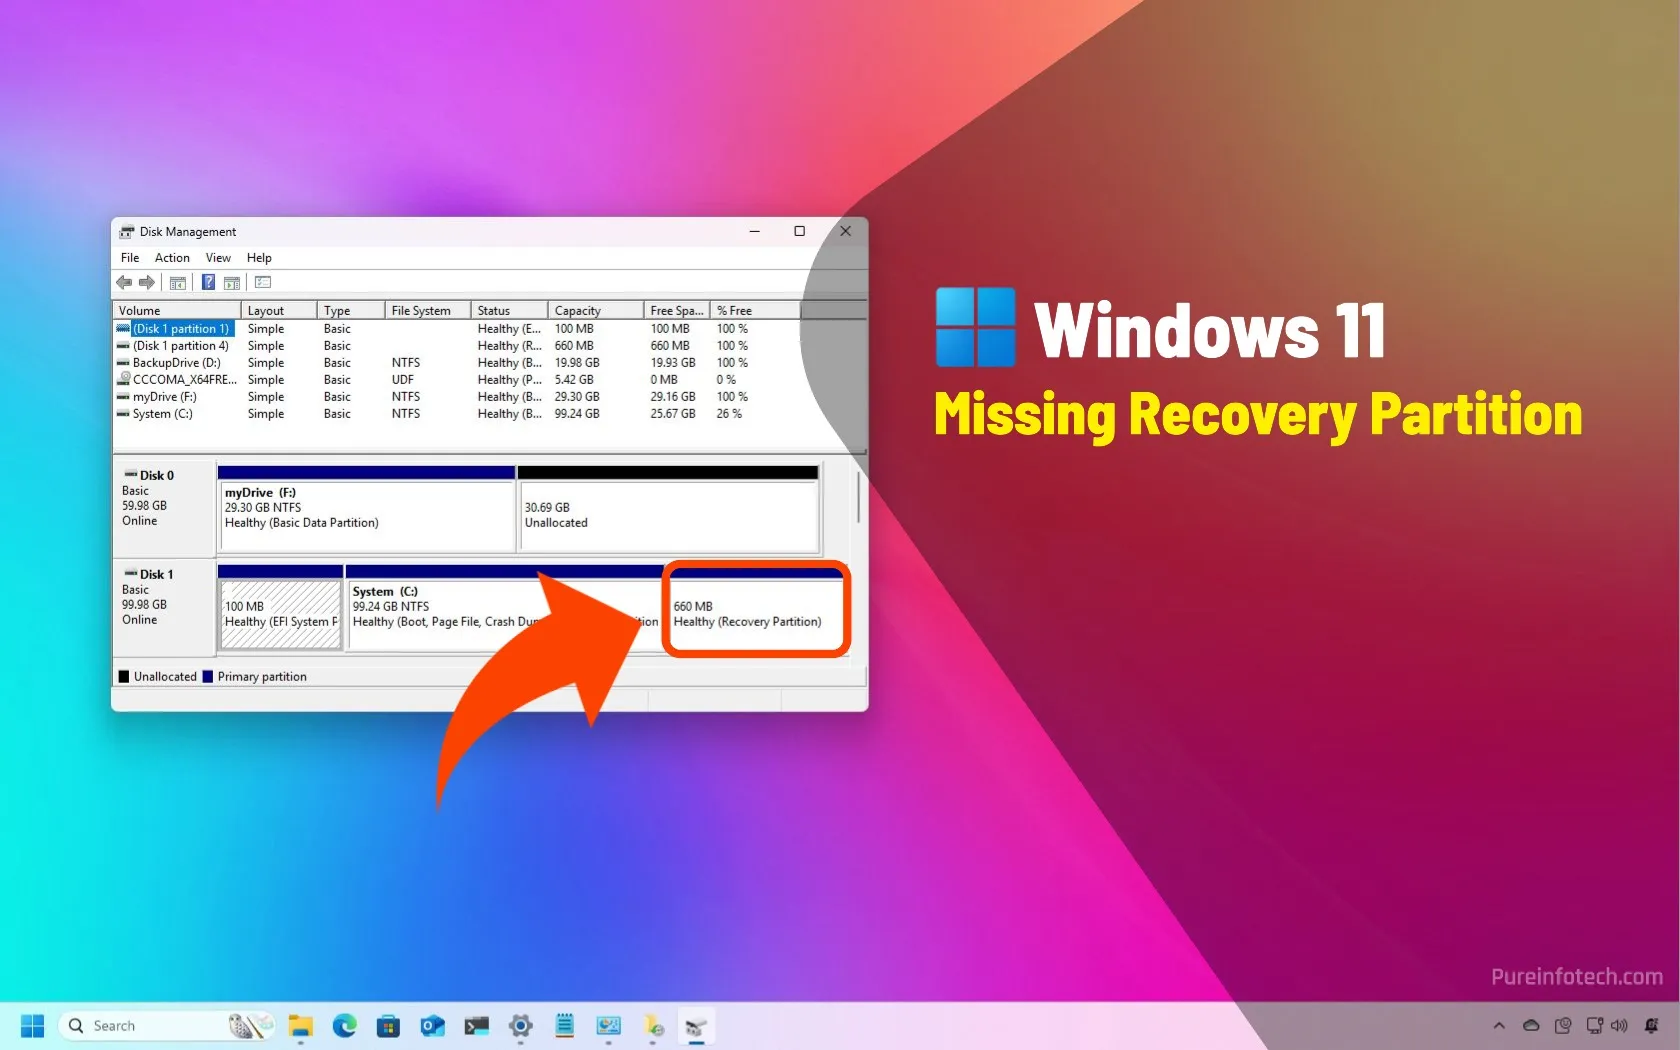
A new clean installation of Windows 11 contains multiple partitions. The EFI (Extensible Firmware Interface) partition is a crucial component of the system’s boot process. The “C:” drive contains the operating system, apps, settings, and files, and the Recovery Partition includes the tools to troubleshoot and resolve system issues.
If the Recovery Partition is missing or you accidentally deleted it, you can recreate it to regain access to the Windows Recovery Environment when going to Settings > System > Recovery, and clicking the “Restart now” button for the “Advanced startup” feature.
You can complete this configuration using the existing “WinRE.wim” file from the “Recovery” folder. However, if the image file is missing from the system folder, you’ll have to extract the “WinRE.wim” file from the “Install.wim” file available through the Windows 11 ISO file.
In this guide, I will explain how to fix the missing Recovery Partition on Windows 11.
Fix missing Recovery Partition on Windows 11 using existing WinRE.wim
This set of instructions assumes that a copy of the “winre.wim” file is available on C:\Windows\System32\Recovery while the hidden and protected system files are set to be visible. If the recovery image is missing, you will have to continue with the alternative set of instructions below.
To create the missing Recovery Partition with an existing WinRE.wim file, follow these steps:
-
Open Settings.
-
Click on Storage.
-
Click on Advanced storage settings under the “Storage management” section.
-
Click on Disks & volumes.
-
Select the Windows 11 volume and click the Properties option.

-
Click the Change size button.
Quick note: If the drive has some available unallocated space, you don’t have to shrink the Windows 11 installation, and you can skip to step 9.

-
Confirm the “Max” value in the New (MB) setting to indicate the total size of the partition (C:) where Windows 11 is installed, but leave at least 1024MB (1GB) to create a new Recovery Partition. For example, if the maximum size of the partition that can be used is 307082, then subtract 1024, and use that as the new number (306058).

-
Click the OK button.
-
Open Start.
-
Search for Command Prompt, right-click the top result, and choose the Run as administrator option.
-
Type the following command to launch DiskPart and press Enter:
diskpart
-
Type the following command to recreate the missing Recovery Partition and press Enter:
create partition primary

-
Type the following command to format the partition and press Enter:
format fs=ntfs quick
-
Type the following command to register the new partition as the Recovery Partition in the system and press Enter:
set id=de94bba4-06d1-4d40-a16a-bfd50179d6ac override
-
Type the following command to lock and prevent users from modifying this partition and press Enter:
gpt attributes=0x8000000000000001
-
Type the following command to close the DiskPart tool and press Enter:
exit
-
Type the following command to enable WinRE and press Enter:
reagentc /enable
Quick note: This action will also copy the “Winre.wim” from the “Recovery” folder to the “Recovery Partition.”
-
Type the following command to confirm the Windows Recovery Environment is working correctly, and press Enter:
reagentc /info


After you complete the steps, the missing Recovery Partition will be created next to the Windows 11 setup.
Fix missing Recovery Partition on Windows 11 using new WinRE.wim
If the “winre.wim” file is missing from the system’s “Recovery” folder, you can recreate the Recovery Partition using the “winre.wim” file available inside the “install.wim” file from the Windows 11 ISO file.
To create a new Recovery Partition by extracting the winre.wim from the install.wim file, follow these steps:
-
Open Settings.
-
Click on Storage.
-
Click on Advanced storage settings under the “Storage management” section.
-
Click on Disks & volumes.

-
Select the Windows 11 volume and click the Properties option.
-
Click the Change size button.
Quick note: If the drive has some available unallocated space, you don’t have to shrink the Windows 11 installation, and you can skip to step 9.
-
Confirm the “Max” value in the New (MB) setting to indicate the total size of the partition (C:) where Windows 11 is installed, but leave at least 1024MB (1GB) to create a new Recovery Partition. For example, if the maximum size of the partition that can be used is 307082, then subtract 1024, and use that as the new number (306058).
-
Click the OK button.
-
Open Start.
-
Search for Command Prompt, right-click the top result, and select the Run as administrator option.
-
Type the following command to run the DiskPart tool and press Enter:
diskpart
-
(Option 1) Type the following command to create a new partition with the renaming unallocated space and press Enter:
create partition primary

-
(Option 2) Type the following command to recreate the missing Recovery Partition of exactly 1GB and press Enter:
create partition primary size=1024
-
Type the following command to format the new partition as NTFS and press Enter:
format fs=ntfs quick
-
Type the following command to register the new partition as the Recovery Partition in the system and press Enter:
set id=de94bba4-06d1-4d40-a16a-bfd50179d6ac override
-
Type the following command to lock and prevent users from modifying this partition and press Enter:
gpt attributes=0x8000000000000001
-
Type the following command to exit the DiskPart tool and press Enter:
exit
-
Connect the USB bootable flash drive (or mount the Windows 11 ISO to File Explorer).
Quick tip: You can always mount the Windows 11 ISO file by right-clicking the file and choosing the “Mount” option. Also, make sure to note the drive letter of the mount point or the USB bootable media, as you’ll need this information in step 20.
-
Type the following command to create two custom folders and press Enter:
mkdir "%USERPROFILE%\Downloads\Images" "%USERPROFILE%\Downloads\Mount"
-
Type the following command to copy the “Install.wim” image to the “Images” folder (this command may take a while to complete) and press Enter:
xcopy "D:\Sources\install.wim" "%USERPROFILE%\Downloads\Images\" /H /E /C /I /Y

-
Type the following command to mount the Install.wim image and press Enter:
dism /Mount-Image /ImageFile:"%USERPROFILE%\Downloads\Images\install.wim" /Index:6 /MountDir:"%USERPROFILE%\Downloads\Mount"
Important: In this step, I’m using the number “6” for index, which means that I’ll interact with the Pro edition of Windows 11. If you have another version, you will have to specify the index number within the image. You can use the
dism /Get-WimInfo /WimFile:D:\sources\install.wimcommand to determine the index number for your edition of the operating system. (Remember to change “D” for the drive letter for the drive with the installation files.) -
Type the following command to rename the existing ReAgent file in the “Recovery” folder and press Enter:
ren C:\Windows\System32\Recovery\reagent.xml Reagent.xml.bak
-
Type the following commands to copy the “Winre.wim” and “ReAgent.xml” files to the “Recovery” folder and press Enter:
xcopy "%USERPROFILE%\Downloads\Mount\Windows\System32\Recovery\winre.wim" "C:\Windows\System32\Recovery\" /H /E /C /I /Y
xcopy "%USERPROFILE%\Downloads\Mount\Windows\System32\Recovery\reagent.xml" "C:\Windows\System32\Recovery\" /H /E /C /I /Y

-
Type the following command to re-enable the recovery environment in the new partition and press Enter:
reagentc /enable

-
Type the following command to confirm the Windows Recovery Environment state and press Enter:
reagentc /info
Quick note: If the output shows as “Enabled” and you can see the location path, then everything has been configured successfully.
-
Type the following commands (one at a time) to dismount the “Install.wim” image and press Enter:
dism /Unmount-Image /MountDir:"%USERPROFILE%\Downloads\Mount" /discard
dism /Cleanup-Wim
Quick tip: At this point, you can also delete the “Images” and “Mount” folders from the “Downloads” folder.


Once you complete the steps, the missing Recovery Partition will be recreated on the computer.
You can test the recovery feature from Settings > System > Recovery and click the “Restart now” button for “Advanced startup.” If the recovery environment loads correctly, then the new Recovery Partition is working.
Why You Can Trust Pureinfotech
The author combines expert insights with user-centric guidance, rigorously researching and testing to ensure you receive trustworthy, easy-to-follow tech guides. Review the publishing process.
Source link
-

- Meilleur Casino en Ligne 2025 – Top 10 des Casinos Fiables.12486
- The Best Online Casino Sites in the UK 2025 Updated Guide.2173
-

-

-

-

-


