
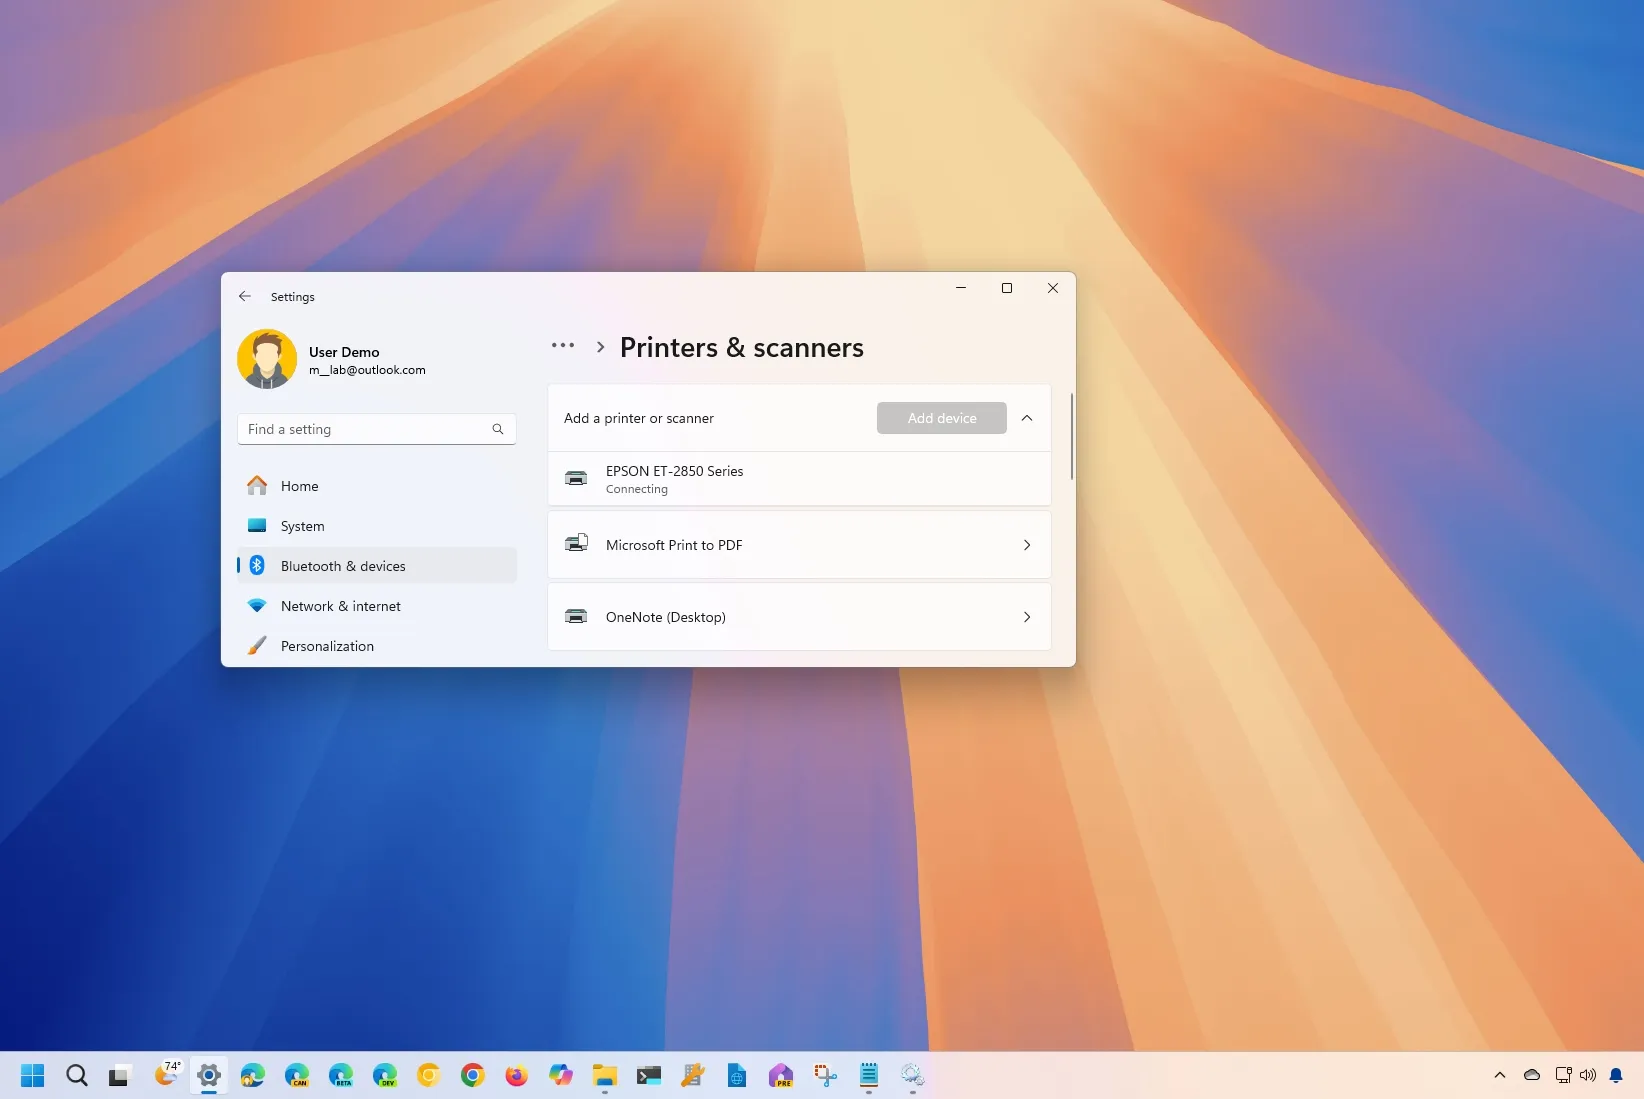
- To install a Wi-Fi printer on Windows 11, open Settings > Bluetooth & Devices > Printers & scanners, click “Add device,” and click “Add device” again for the printer you want to install.
- If the system can’t find the printer, you can still add it manually using the IP address of the device.
On Windows 11, you can connect a wireless printer to your computer in at least two ways, including automatically using the “Devices” wizard or manually installing a printer using an IP address.
However, before you can connect to the printer, you have to connect it to the wireless network. The steps will differ depending on the printer, but typically, you must perform this configuration from the printer’s screen. Also, many printers allow you to set up a printer through an Android or iPhone app.
For example, you can connect a wireless HP printer to the network from Setup > Network Setup > Wireless Settings, turn on the “Wireless settings” option, and continue with the on-screen directions. On an Epson printer, you can install the “Epson Smart Panel” app on your phone and use the guided wizard to set up a new product.
If you have a printer connected using a wired (Ethernet) connection, you don’t even need to go through the setup. You only need to know the printer’s IP address, which you can get by going to Setup > Network Setup > Ethernet Settings and using the “View Ethernet Details” option.
You can always check with your printer manufacturer’s support website to get more specific instructions for your printer.
In this guide, I will teach you the steps to add a printer to Windows 11 wirelessly.
Connect wireless printer on Windows 11
On Windows 11, you can use the “Printers & scanners” settings to add a printer automatically or manually with its IP address. You would typically use the automatic method and the IP address steps if the system isn’t finding the device in the network. You can also fix the most common printer issues with these instructions.
Method 1: Install a Wi-Fi printer automatically
To add a network printer wirelessly on Windows 11, use these steps:
-
Open Settings.
-
Click on Bluetooth & Devices.
-
Click the Printers & scanners page.
-
Click the “Add device” button in the “Add a printer or scanner” setting.
-
Click Add device to install the wireless printer to Windows 11.


Once you complete the steps, Windows 11 will automatically set up the wireless printer.
Method 2: Install Wi-Fi printer from IP address
If Windows 11 can’t find the wireless printer, you can add the device using an IP address using these steps:
-
Open Settings.
-
Click on Bluetooth & Devices.
-
Click the Printers & scanners page.
-
Click the “Add device” button in the “Add a printer or scanner” setting.

-
Click the “Add a new device manually” option for the “The printer that I want isn’t listed” option.

-
Select the “Add a printer using a TCP/IP address or hostname” option.

-
Click the Next button.
-
Select the Autodetect option in the “Device type” setting.

-
Check the “Query the printer and automatically select the driver to use” option.
-
Confirm the IP address of the printer.
Quick tip: This information can be found in the printer’s settings.
-
Click the Next button to install the wireless printer on Windows 11.
Quick note: If the setup doesn’t recognize the printer, you may have to select the brand and model from the wizard to install the correct drivers. If you can’t find the printer, click the “Windows Update” button to download the driver library. (This action can take a long time.)
-
Confirm the printer’s name.

-
Click the Next button.
-
Select the “Do not share this printer” option.

-
Click the Next button.
-
(Optional) Click the “Print a test page” button to test the printer connection.
-
Click the Finish button.


After you complete the steps, you can start printing from your laptop or desktop computer.
If you no longer need the device, you can remove the wireless printer from Settings > Devices > Printers & scanners by selecting the printer and clicking the “Remove” option.
Installing a printer using the Settings app will only install the basic driver for printing. You must install the manufacturer’s software if you want to use the additional printing functionalities.
Update August 19, 2024: This guide has been updated to ensure accuracy and reflect changes to the process.
Source link
-

-

-

-

-
-
-

-


