Did you move the default user folders (Documents, Downloads, Pictures, etc) somewhere else? Did you change your mind and want them back to their initial location? Have you set up OneDrive, and you noticed that it changed the location of your Documents folder? Do you want to restore the default folder locations for Documents, Downloads, Pictures, Videos, or other user folders? Then you’ve come to the right place, as I’ll show you how to restore all the user folders in Windows 10 and Windows 11:
How to restore your user folders to their default location (Documents, Downloads, Pictures, etc.)
Each user account on a Windows computer has at least a dozen user folders. Some of these are hidden, and the user does not interact with them directly. However, they can be used automatically by Windows or the apps you’ve installed. If you have moved some of these folders to a new location, or you installed and configured OneDrive, which then moved their location automatically to the OneDrive folder, you can change your mind and reset their location to the default user folder.
If you’re using Windows 10, open File Explorer, go to Quick access or This PC, and then right-click (or press and hold) the user folder you want to restore to its original location. For this tutorial, I chose Documents, but you can follow the same steps to restore Downloads, Pictures, Desktop, or Music. In the right-click menu, select Properties.

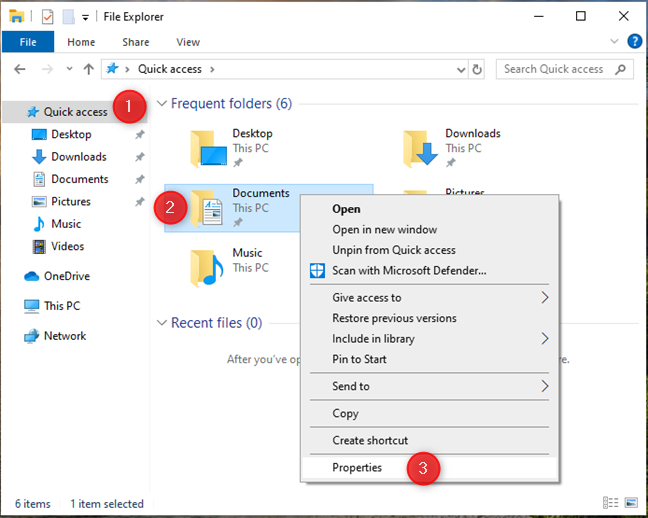
In Windows 10, access user folders from the Quick access section of File Explorer
In Windows 11, go to Home or This PC in File Explorer’s left sidebar and right-click (or press and hold) the user folder you want to restore to its original location. In the menu displayed, choose Properties.

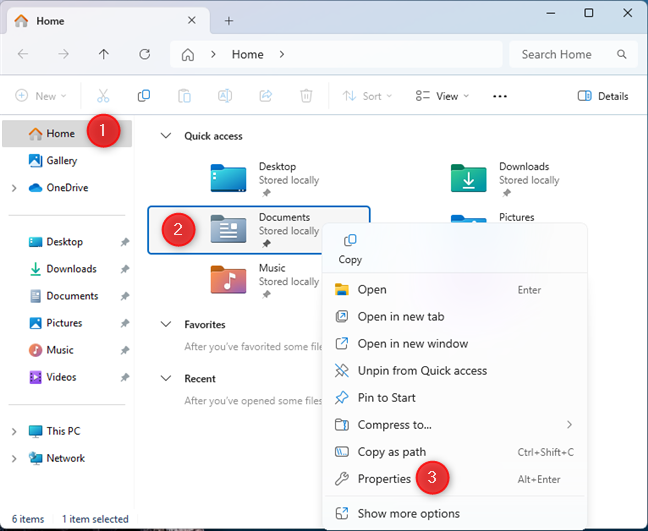
In Windows 11, access user folders from File Explorer’s Home section
NOTE: From now on, the steps are identical in Windows 10 and Windows 11, so I’ll only use screenshots from Windows 11.
When you see the Properties window for the selected user folder, go to the Location tab and click or tap Restore Default. Before you do that, notice the current location of the selected folder. It can be a partition like D instead of C, a subfolder in your OneDrive, or another location other than the default user folder from Windows.

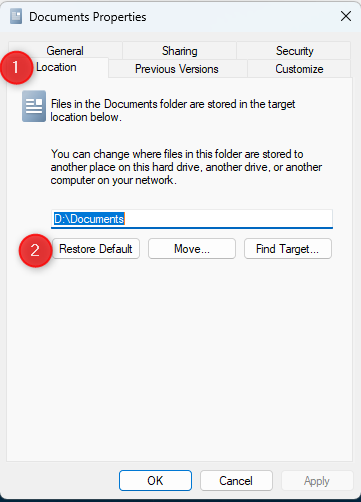
Go to the Location tab and click or tap Restore Default
You then see the data in the location field changing to something like:
C:\Users\Username\Documents
…where Username is replaced by the name of your user account. Click or tap OK to continue.


After the default user folder location is shown, click or tap OK
On some computers, you may be informed that your chosen folder does not exist. This happens because it was moved to a different location. When asked whether you want to create it, select Yes.

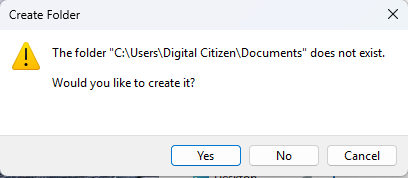
Click or tap Yes
You’re asked whether you want to move all the files from the old location to the new one. Again, choose Yes.


Click or tap Yes one more time
Then, wait for all your files to be moved. When the process is over, you can access the user folder you’ve moved. Notice that it’s found in its default location as a subfolder of your user folder. Again, this procedure applies to all user folders: Documents, Desktop, Downloads, Pictures, or Videos.
How to deal with OneDrive changing the location of your user folder?
Some users don’t have a paid Microsoft 365 subscription, which gives them access to 1 TB of OneDrive storage. When they try OneDrive, it recommends them to back up their Documents, Pictures, Desktop, Music, and Videos. After creating a backup, they notice that their documents and files require much more storage space than the 5 GB that is free on OneDrive. Also, the OneDrive app has changed the location of their synced user folders. What should you do in this situation?
First, you should stop OneDrive from backing up your user folders. To do that, click or tap the OneDrive icon in the system tray, click or tap the Help & Settings cogwheel icon, and choose Settings.


Click or tap OneDrive > Help & Settings > Settings
In the OneDrive Settings window, go to Sync and backup and click or tap Manage backup.


Click or tap Manage backup
You see a list of all the user folders backed up by OneDrive. Click or tap the switch next to each user folder you don’t want on your OneDrive to turn it off.
When asked to confirm your choice, click or tap Stop backup. Repeat this step for all the user folders you don’t want in your OneDrive. Then, click or tap Close.

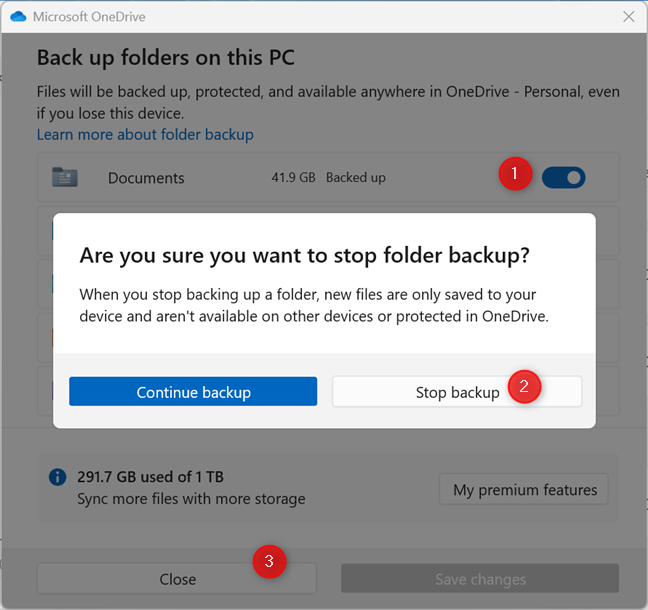
Turn off the switch for the user folder you don’t want to sync to OneDrive
You have stopped OneDrive from backing up your user folder(s). Now, you can use the instructions from the first section of this tutorial to change the location of your user folders to their default. It may also be a good idea to change OneDrive’s location in Windows to keep things separate. And remember, when OneDrive asks whether you want it to back up your user folders, don’t accept this invitation, unless you want to go through this process again.
Which user folder(s) did you restore to their original location: Downloads, Documents, Pictures?
I hope you found this guide helpful, that you successfully restored your user folders to their original location, and that you didn’t lose any files in the process. Before closing, leave a comment sharing which user folders you moved back to their original location and why. Was it because OneDrive moved them for you in the first place? Or is it because you have changed and reorganized the partitions on your Windows computer? Comment using the options available below and let me know.🙂
Source link
-

-

-

-

-
-
-

-