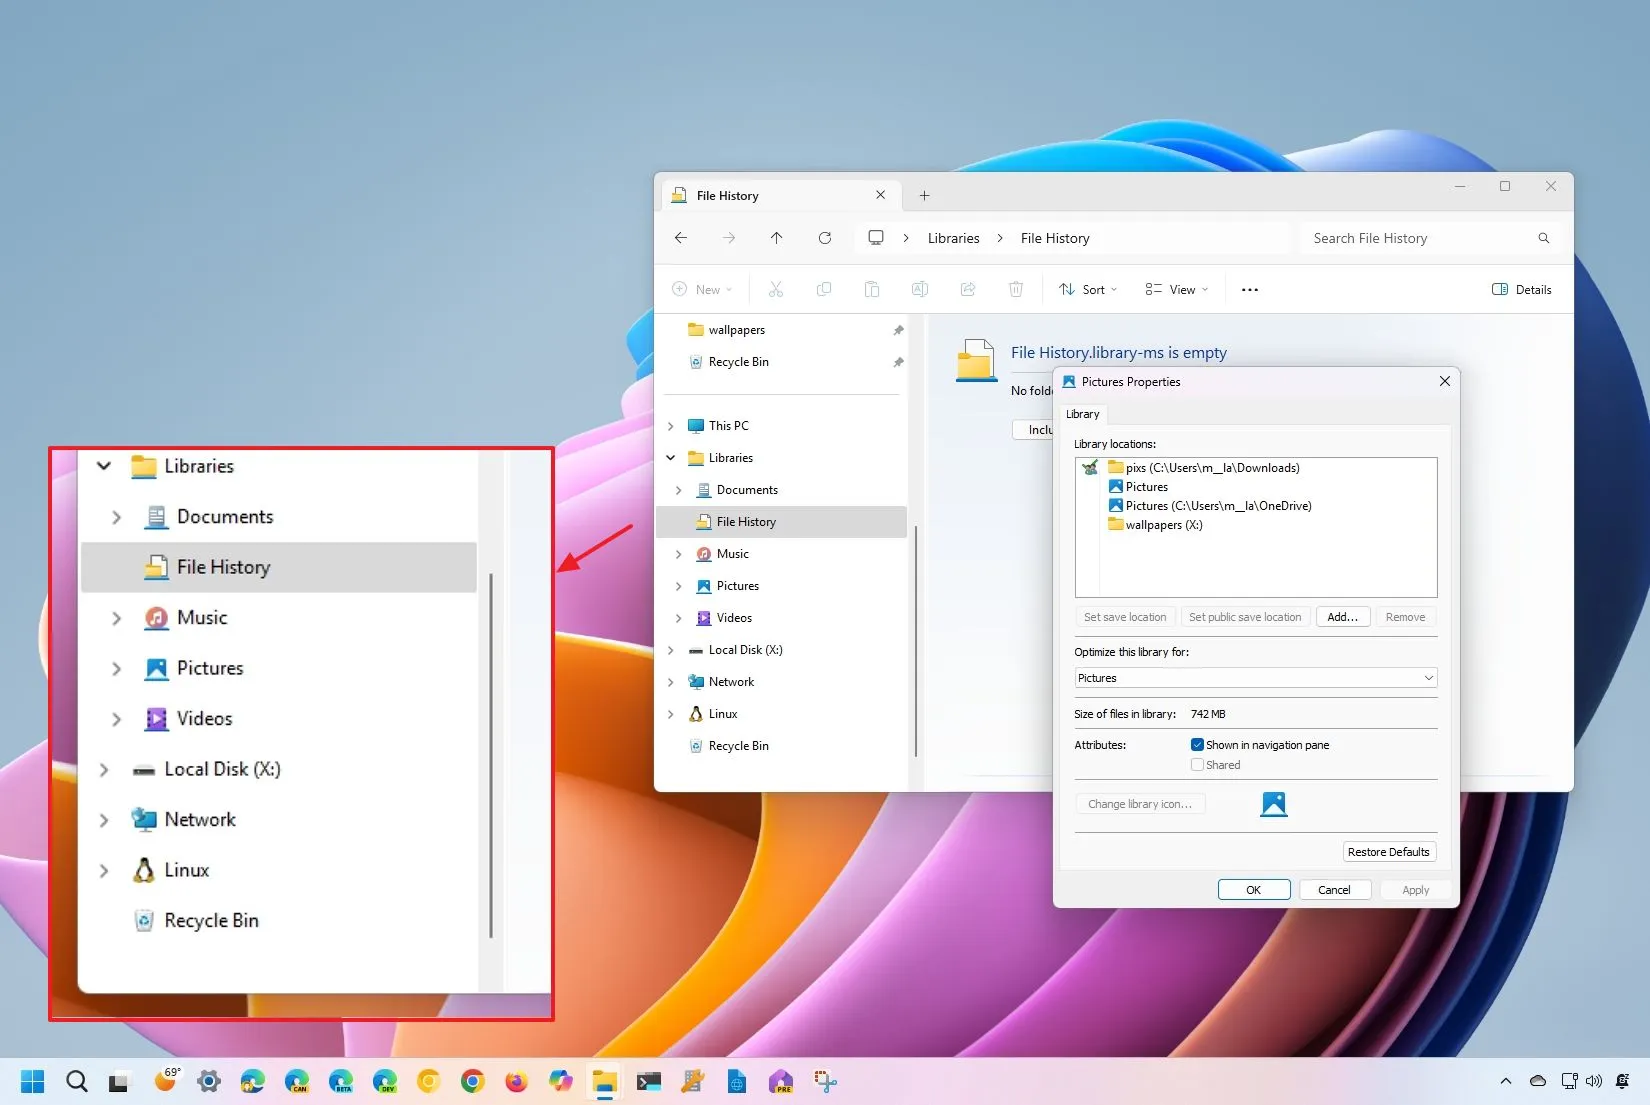
- To show Libraries on Windows 11 (or 10), open File Explorer, right-click on the left pane, and choose the “Show libraries” option.
- You can add or remove folder and network locations to each library and create new libraries to group other types of files.
On Windows 11, 10, 8.1, and older versions, you can show Libraries in File Explorer to have access to different folders from a single location, and in this guide, I will explain the steps to manage this feature.
In simpler terms, “Libraries” on any version of Windows are virtual folders that gather files from different physical locations and present them as a single collection, meaning you can have files from your hard drive, external drives, or network locations appear in one place.
The key benefits of this feature include a unified view of specific file types (documents, pictures, music, etc.) in one place, regardless of their actual location, and the ability to add or remove folders from libraries to tailor them to your needs. Also, it’s the only way to add custom locations to back up files using the File History feature.
Windows 11 (and 10) come with four default libraries, including Documents, Music, Pictures, and Videos, but you can always create new libraries as needed.
In this guide, I will explain the steps to show, add, remove, and create libraries on Windows.
Enable Libraries on File Explorer
To show “Libraries” on Windows 11 (or 10), right-click on the left pane of File Explorer and choose the “Show libraries” option, or use these steps:
-
Open File Explorer.
-
Open the See more (three-dots) menu.
Quick tip: On Windows 10, click the View tab and then click on “Options.” -
Click on Options.
-
Click the View tab.
Quick note: In older versions of the operating system, you may find the option in the “General” tab.
-
Scroll down and check the Show libraries option under the “Navigation pane” section.
-
Click the Apply button.
-
Click the OK button.
Once you complete the steps, the “Libraries” feature will appear in the left pane with the default groups for Documents, Music, Pictures, and Videos.
Add a folder to library on File Explorer
To add a new folder or network location to a library, use these steps:
-
Open File Explorer.
-
Right-click the library and choose the Properties option.
-
Click the Add button.
-
Choose the folder or network location.
-
Click the Include folder button.
-
(Optional) Select the folder you recently added.
-
Click the “Set save location” button to make the location the default folder when saving files in the library.
-
Click the Apply button.
-
Click the OK button.
Once you complete the steps, the new location will added to the library on File Explorer.
If you plan to use the “Pictures” library on Windows 11, you should consider the “Gallery” page since it provides a better organization for images, shows your pictures from OneDrive automatically, and adds and removes locations from the “Collection” menu.
Remove a folder from library on File Explorer
To remove a folder location from a library on File Explorer, use these steps:
-
Open File Explorer.
-
Right-click the library and choose the Properties option.
-
Select the folder you no longer want in the library.
-
Click the Remove button.
-
(Optional) Clear the “Shown in navigation pane” option to hide the item from Libraries.
-
Click the Apply button.
-
Click the OK button.
-
(Optional) Right-click the library and choose the Delete option to remove it.
After you complete the steps, the folder will be removed from the library.
Create a new library on File Explorer
To create a new library on File Explorer, use these steps
-
Open File Explorer.
-
Press and hold the “Shift” key, right-click the library, choose the New option, and click on Library.
-
Confirm a name for the library and press Enter.
-
Right-click the library and choose the Properties option.
-
Click the Add button.
-
Choose the folder or network location.
-
Click the Include folder button.
-
Click the Apply button.
-
Click the OK button.
Once you complete the steps, the new library will appear in the left pane of File Explorer.
Libraries vs. system folders
Although on Windows 11 (and 10), File Explorer includes system folders (Documents, Pictures, Music, Videos, Downloads, and Desktop), they are different from libraries, even though you will find the same Documents, Pictures, Music, Videos locations.
System folders can contain virtual or physical folders. In other words, they act as containers for different files and folders for a specific location. For example, the “Videos” system folder points by default to the “Videos” folder from your profile’s folders.
Windows Libraries are logical groupings of symbolic links to different locations that you can access from a single entry point or library. For example, the “Videos” library can include the path to the “Videos” folder on your account. You can add other folder locations with video files, and then when you open the library, you will have access to all the locations from a single entry point.
Source link
