How to show hidden files on Windows 11
- To show hidden files on Windows 11, open File Explorer, click “View,” choose “Show,” and check “Hidden items.”
- Alternatively, open File Explorer’s Folder Options page and check the “Show hidden files, folders, and drives” option from the “View” tab.
- You can also use the
dir a:hordir a:dcommands on Command Prompt ordir -forceorls -forcecommands on PowerShell.
On Windows 11, a new version of File Explorer replaces the ribbon menu with a minimalistic menu with basic commands. As a result, some settings are now more difficult to find, such as the option to show hidden files (and folders).
Although the “View” tab is no longer available in File Explorer, you can still show hidden files and folders within the new menu using the legacy “Folder Options” or the “View” menu. However, since changing these settings will only affect the items you’re browsing on File Explorer, you have to use specific commands to list files with the hidden attribute turned on Command Prompt and PowerShell.
In this guide, I’ll show you the steps to show hidden files, folders, and drives in the File Explorer app for Windows 11.
Show hidden files on File Explorer
To show hidden files in File Explorer on Windows 11, use these steps:
-
Open File Explorer on Windows 11.
Quick tip: You can open Explorer from the Start menu, use the Taskbar button, or use the “Windows key + E” keyboard shortcut.
-
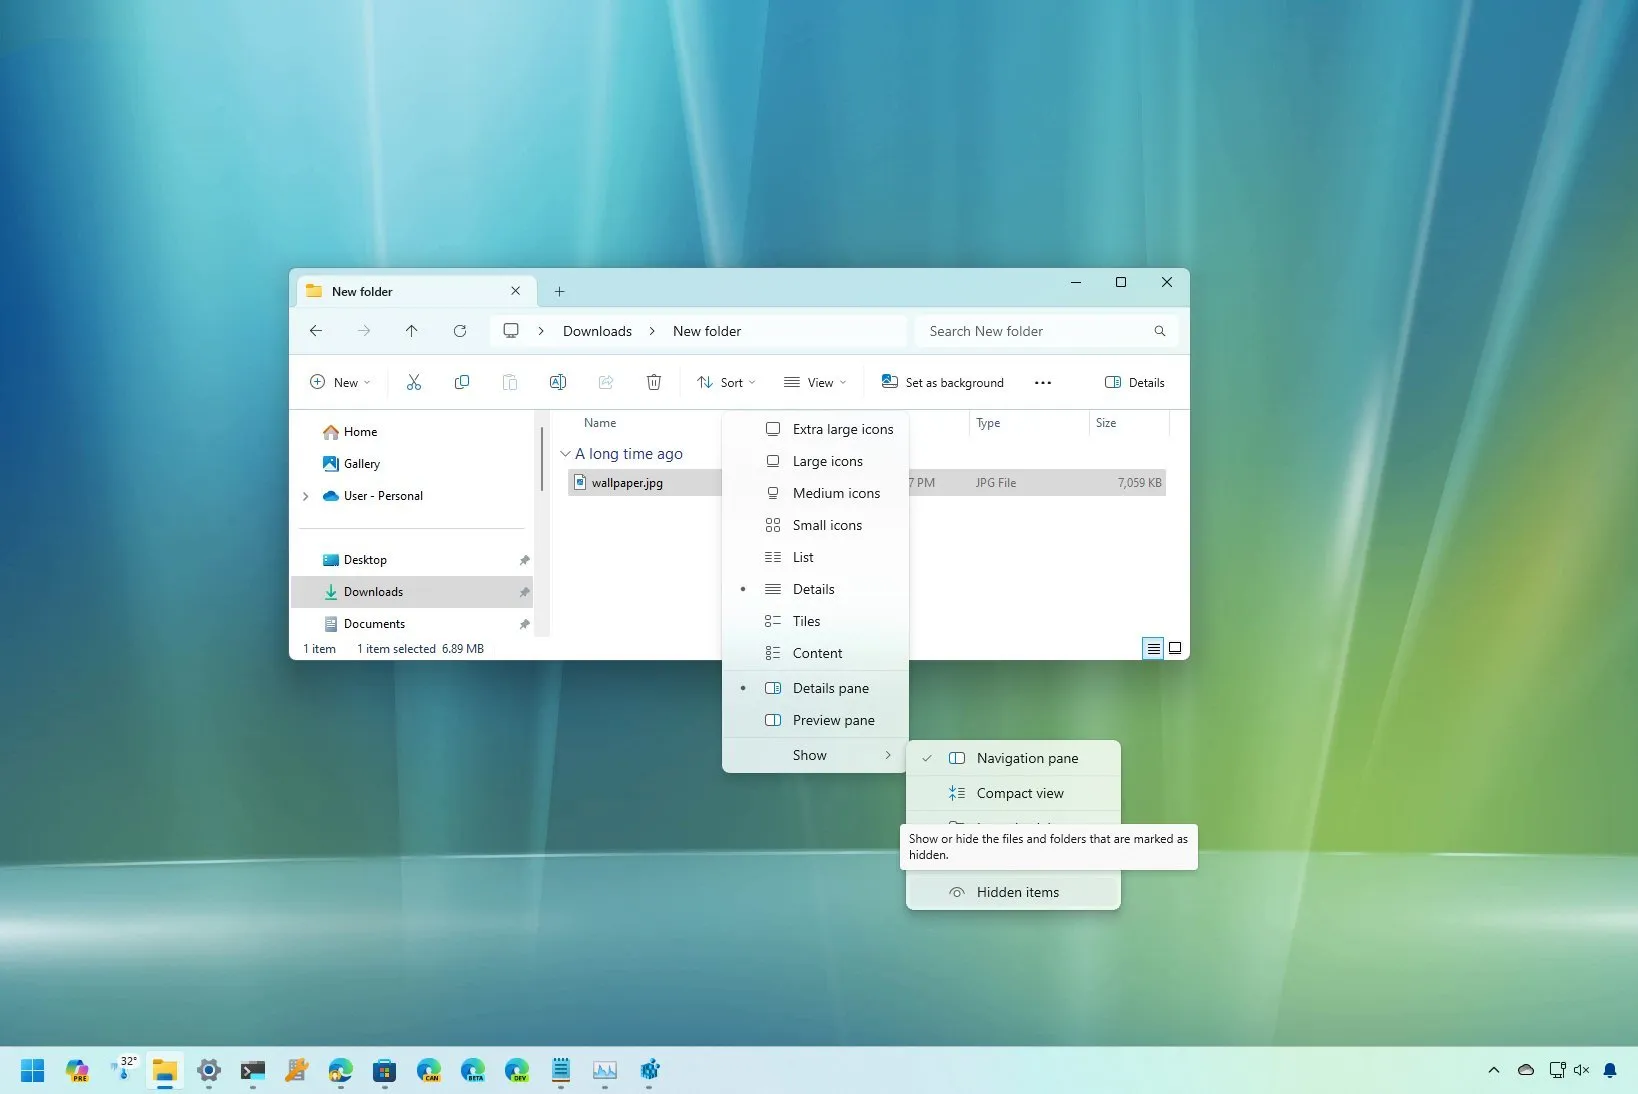
Click the “View” menu from the toolbar.
-
Select the Show submenu and click on the Hidden items option.
Once you complete the steps, hidden files and folders will be visible in File Explorer.
You can also follow these instructions in my video tutorial on my YouTube channel. (Remember to like and subscribe.)
From File Explorer Folder Options
To view hidden files using the Folder Options settings, use these steps:
-
Open File Explorer.
-
Click the See more (three-dotted) menu and select the Options item.

-
Click the View tab.
-
Check the “Show hidden files, folders, and drives” option in the “Hidden files and folders” group under the “Advanced settings” section.

-
Click the Apply button.
-
Click the OK button.
After you complete the steps, files and folders with the hidden attribute will be visible to anyone using File Explorer on Windows 11.
Show hidden files on Command Prompt
To show hidden files and folders through Command Prompt, use these steps:
-
Open Start.
-
Search for Command Prompt and click the top result to open the console.
-
Type the following command to open the directory with the hidden files and press Enter:
cd path\to\files
-
(Option 1) Type the following command to view hidden directories and press Enter:
dir a:d

-
(Option 2) Type the following command to view hidden files and press Enter:
dir a:h

Once you complete the steps, the command will show the hidden items for that particular location.
Show hidden files on PowerShell
To show hidden files and folders through PowerShell, use these steps:
-
Open Start.
-
Search for Command Prompt and click the top result to open the console.
-
Type the following command to open the directory with the hidden files and press Enter:
cd path\to\files
-
(Option 1) Type the following command to view hidden files and directories and press Enter:
dir -Force

Quick tip: You can also use the “Force” option for other commands. For example,
ls -ForceandGet-ChildItem . -Forcewill also list hidden items on a specific path.
After you complete the steps, the PowerShell command will list the files and directories with the hidden attribute turned on.
It’s important to note that neither commands for PowerShell nor Command Prompt will make changes to the system to make the files and folders unhidden.
If you’re wondering why you cannot see specific files, it’s because the operating system sometimes hides certain files and folders for security and organization reasons. You can always make a file or folder visible by right-clicking the item, choosing “Properties,” and clearing the “Hidden” attribute from the “General” tab. However, it’s not recommended to perform this action on system files.
Update September 13, 2024: This guide has been updated to ensure accuracy and reflect changes to the process.
Source link