
Did you ever want to look at a GIF frame by frame or save just one moment from it as a still image? Then, you’re in the right place because this guide has all the info you need to split a GIF into frames. I’ll show you how to use GIMP together with a plug-in as a GIF frame extractor, breaking down an animated GIF into separate frames that you can save. You’ll also learn more about using an online GIF frame splitter to easily extract GIF frames online without downloading software. By the end, you should be able to turn any GIF into a series of separate images you can save, print, or edit as you like. Let’s get started:
How to use GIMP to convert a GIF to frames
If you’re looking for a free and reliable way to split a GIF into frames, GIMP is a great tool to get the job done. GIMP (GNU Image Manipulation Program) is a powerful, free, open-source image editor that works on Windows, macOS, and Linux. With the help of a free plug-in called Batcher, it turns into a GIF frame extractor. You can then easily break a GIF into frames and export them as separate image files. I’ll explain in detail how this works in Windows.
Step 1. Download and install GIMP
You can get the app from the GIMP official webpage. After you download it, run the setup file. Choose Yes if you get a UAC prompt and follow the instructions to install GIMP on your computer.

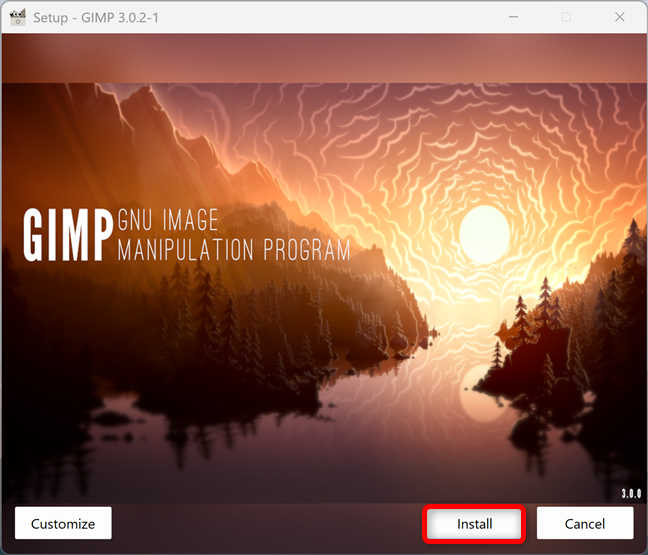
Install GIMP to help you extract GIF frames
Step 2. Get the Batcher plug-in and extract it
You also need to download a free GIMP plug-in called Batcher if you want to separate a GIF into frames. Access the official Batcher page and use the Download button at the top to get the latest release.

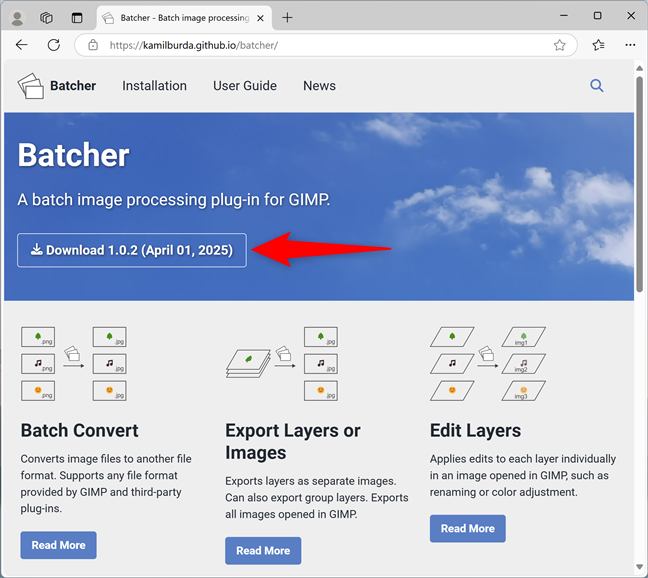
Download Batcher on your PC
Extract the ZIP file, and you get a folder called batcher.

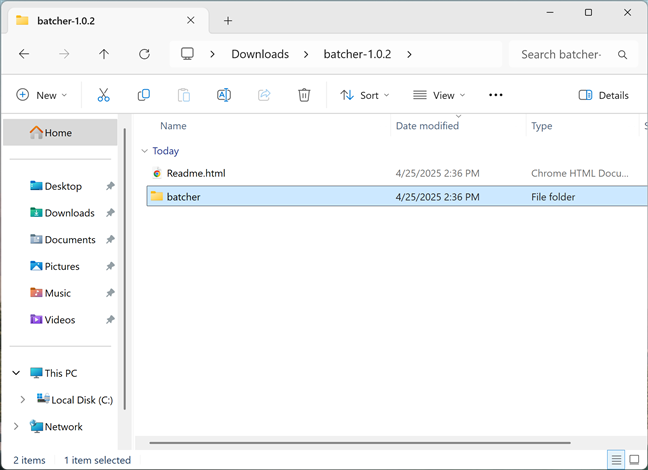
Extract the batcher plug-in folder
Remember its location, cause you will need it later on.
Step 3. Add the Batcher plug-in to GIMP
Open GIMP and click or tap Edit at the top. In the menu that opens, access Preferences.

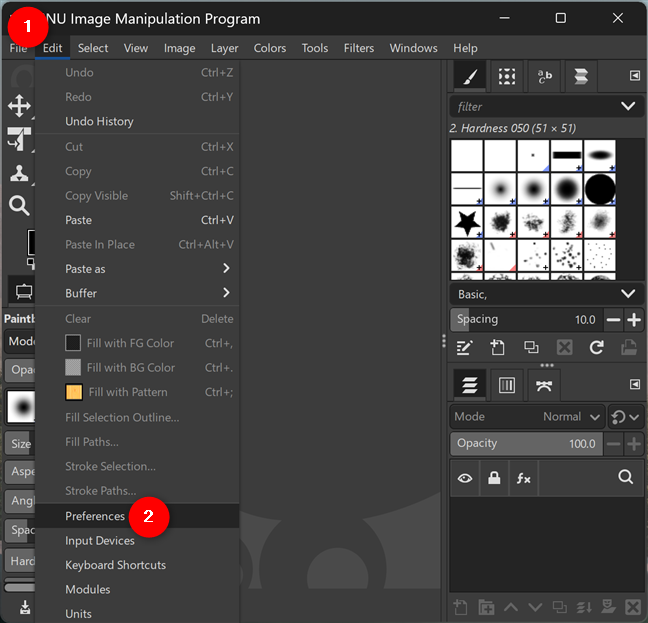
Open Preferences
GIMP’s Preferences window pops up. Scroll the list in the left pane all the way down to find the Folders entry. Click or tap the small arrow next to it to expand it.

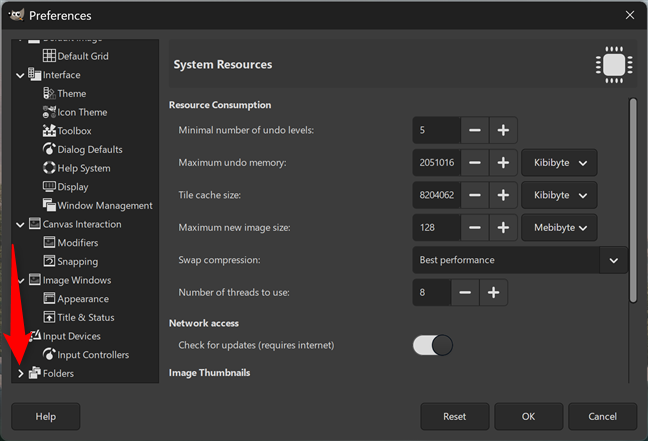
Expand the Folders entry
The list in the left pane just became longer. Scroll down again until you see the Plug-ins entry. Click or tap it, and then look at the folder paths in the right pane. They should be similar to the ones in the screenshot below but point to your user folder instead. You should next access the first path shown here.

Find the path to the plug-ins folder
Open File Explorer and navigate to the path you found earlier, which is highlighted in the screenshot above. Make sure the GIMP app is closed, and then copy and paste the batcher folder you got during Step 2 of this tutorial to the plug-ins folder used by GIMP.


Move batcher to the plug-ins
Well, the hard part is over. Everything is set up for GIMP to work as a GIF frame splitter, so let’s get to work.
Step 4. Open the GIF with GIMP
For this step, you need to know where the GIF file is saved on your computer. Open GIMP again and access the File menu. Then, click or tap Open.

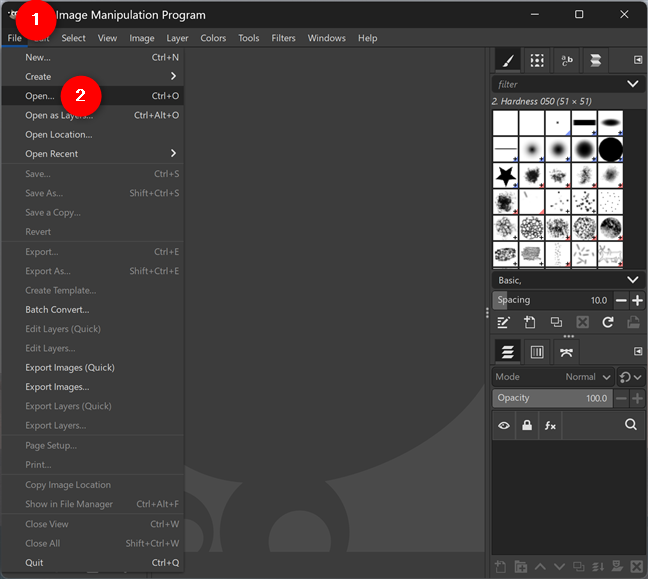
Select Open in the File menu
In the Open Image window, browse to the location where your animated GIF file is located, select it, and then click or tap Open.

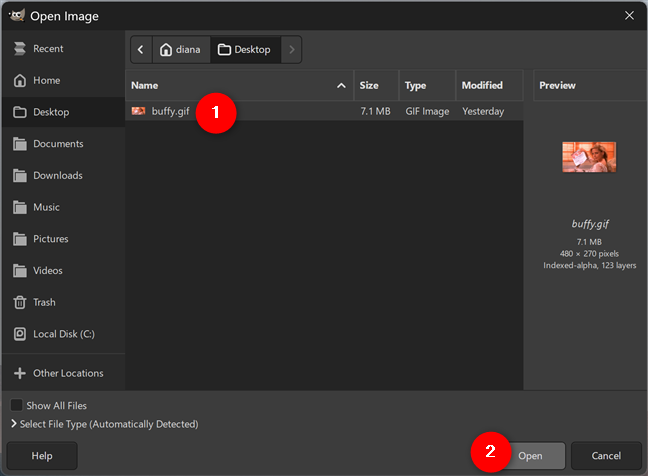
Open a GIF file in GIMP
I chose a GIF from one of my favorite TV shows, Buffy the Vampire Slayer. I downloaded the GIF file from GIPHY and saved it on my desktop to make it easier to find.
Step 5. Extract the GIF frame by frame
After opening the GIF file in GIMP, access its File menu again, and then click or tap Export Layers.

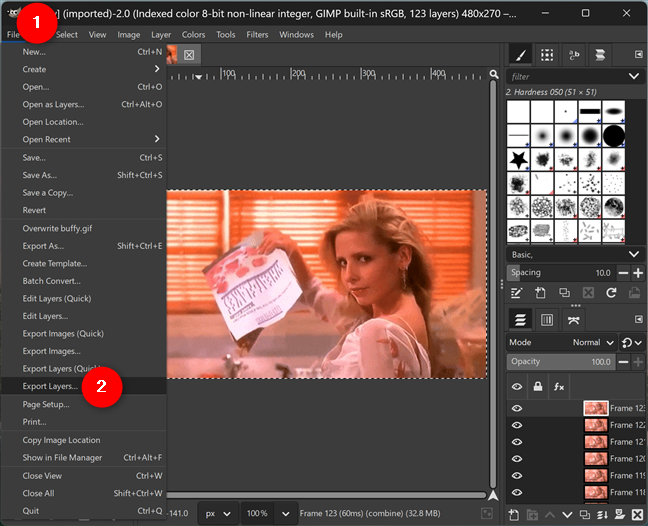
Go to File > Export Layers
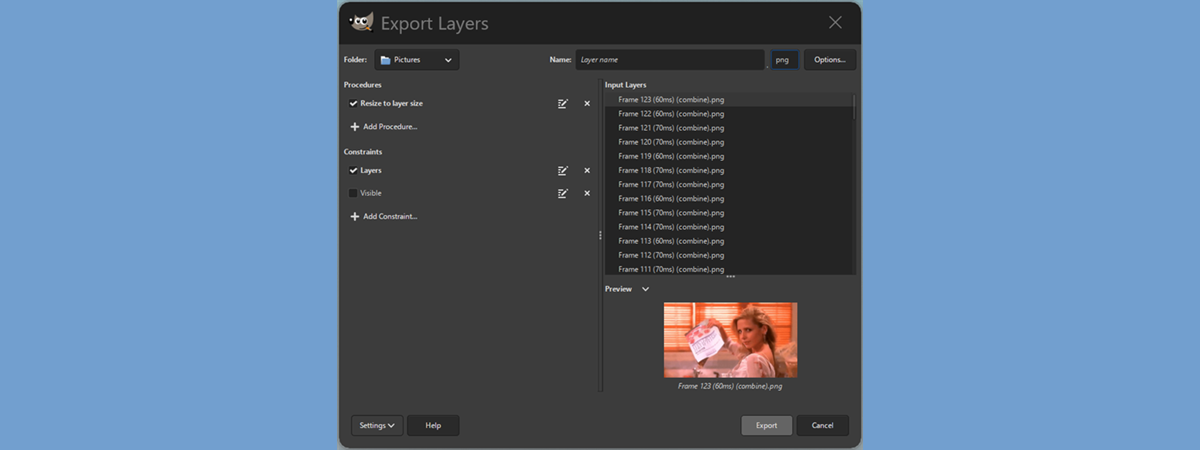
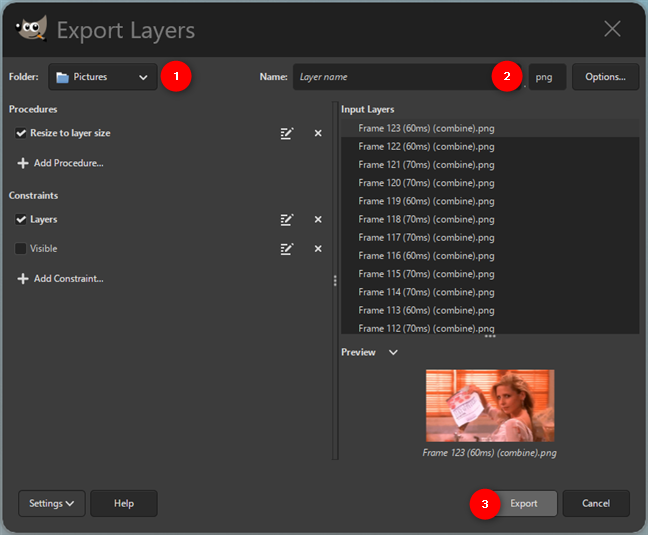
GIMP opens a new window called Export Layers. Choose the Folder where you want to extract all the images from your GIF (1), select the Name and the file extension you want for the frames (2), and finally, click or tap Export (3).

Convert the GIF to PNG frames
This may take a while, depending on the GIF’s size. When it’s over, you’ve successfully converted your GIF to frames.
Step 6. Find the extracted GIF frames
Your work with GIMP is done, and you can close it now. Then, open the folder where you chose to save the extracted GIF frames – in my case, Pictures. Inside, all the frames of the original animated GIF file are saved as separate image files.

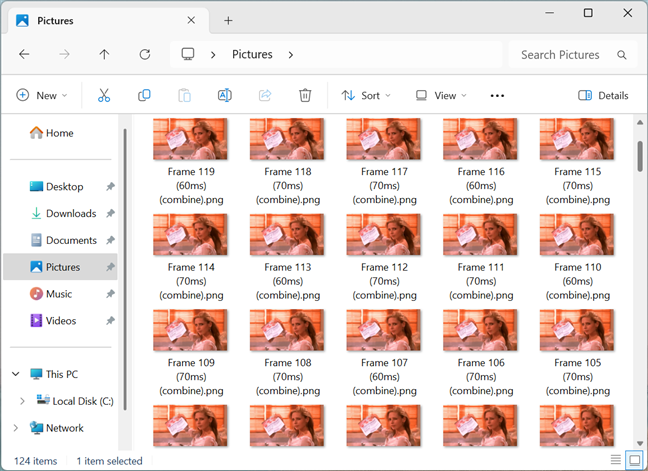
You can see your GIF frame by frame
You can now use the images as you see fit, including printing them or setting them as wallpapers.
How to extract GIF frames online
If you don’t want to install any software, it’s easy to extract GIF frames online using free, browser-based tools. These websites let you upload an animated GIF and quickly break it into separate frames that you can view or download. It’s a fast and convenient option, especially if you only need to extract a few frames or don’t want to deal with installing extra programs. I tried a few of these tools and selected the best one. Let’s take things step by step again.
Step 1. Access Ezgif’s GIF frame extractor
The best option seems to be Ezgif’s GIF frame extractor. Use the link I provided to access this tool. Its interface is pretty basic and easy to use.
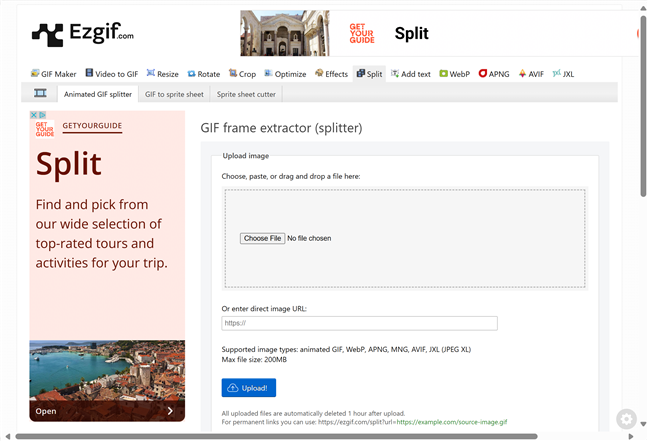
The GIF frame splitter
Step 2. Upload the GIF file
Under Upload image, you can drag and drop or click/tap Choose File to upload a GIF from your PC. Alternatively, if you have the link to the GIF file, enter its URL in the appropriate field. Whatever you choose, click or tap the blue Upload! button.
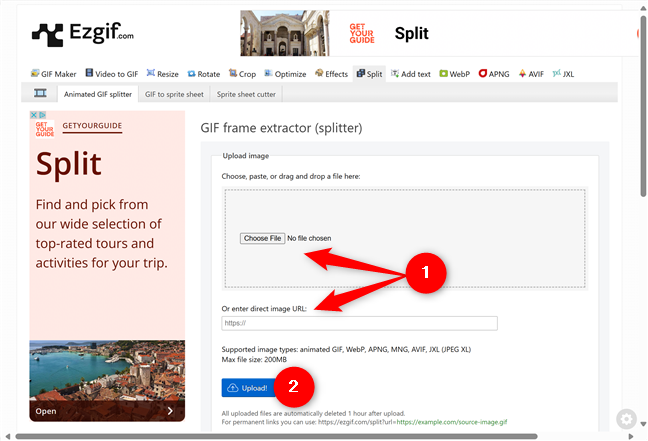
Upload the GIF file
This method is much better if you find a GIF online, as it saves you the hassle of saving it on your PC.
Step 3. Use the GIF frame splitter to extract all the images from a GIF
After uploading the GIF file, you get to a page with many options. You can edit, resize, rotate, reverse it, add different effects to it, etc. Once you finish tinkering with the available tools, click or tap the Split options dropdown menu.

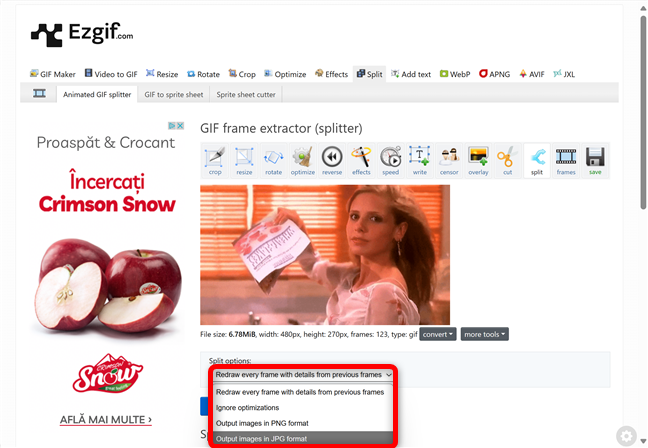
Choose the preferred Split options
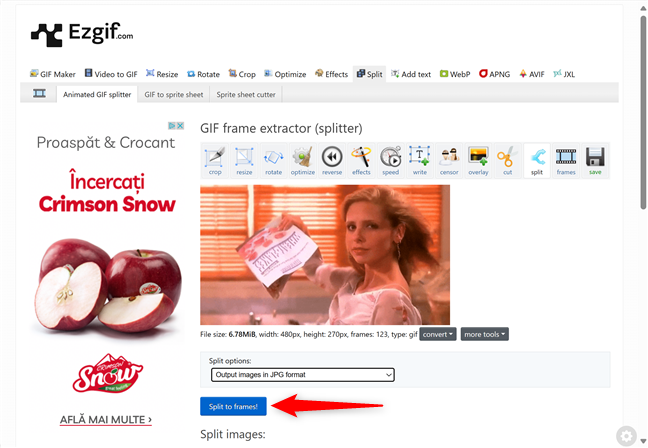
Select how you want to split the GIF, then click or tap the blue Split to frames! button. For example, I chose to Output images in JPG format.
Split a GIF into frames online
Scroll down to see your GIF frame by frame in the Split images section. You can save and use any of the images, and you also get the option to Download frames as ZIP.

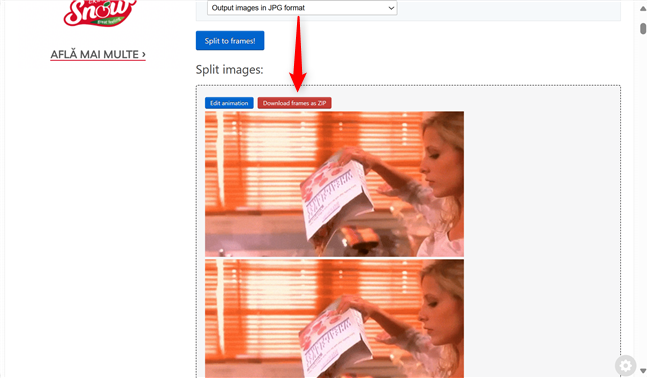
Your GIF is shown frame by frame under Split images
That was simpler than installing an app and its plug-in, wasn’t it?
How do you prefer to convert a GIF to frames?
It’s easy to extract GIF frames as long as you have the right tools. Now that you’ve seen how to convert a GIF to frames using both GIMP and Ezgif’s GIF frame extractor, it really comes down to what works best for you. If you prefer a powerful, offline method with more control, GIMP and the Batcher plug-in are a solid choice. On the other hand, online tools are fast and easy if you want speed and simplicity. Before you close this guide, let me know your go-to method to break a GIF into frames. Leave your answer in the comments section below.
Source link
-

- Meilleur Casino en Ligne 2025 – Top 10 des Casinos Fiables.12486
- The Best Online Casino Sites in the UK 2025 Updated Guide.2173
-

-

-

-

-


