Key Takeaways
- iMovie is free and easy to use on Mac, iPhone, and iPad and is perfect for most simple video editing tasks.
- Apple’s software is highly optimized, deeply integrated with iCloud Photos Library, and packed with extras like transitions, backgrounds, and title cards.
- iMovie even includes more advanced tools like chroma key (green screen), picture-in-picture, color correction, video stabilization, and more.
Apple bundles a lot of software with the Mac, iPhone, and iPad, including its entry-level video editor iMovie. Though it can be tempting to write iMovie off for its hand-holding approach, there are plenty of reasons to keep it installed.
iMovie Is Free and Easy to Use
iMovie is free and bundled with Mac, iPhone, and iPad devices. You can download it from the App Store for iPhone or iPad, or from the Mac App Store for use on a computer. It’s worth keeping iMovie around since it’s great for quick tasks like combining two or more videos into a single file.
Though there are some notable differences between using iMovie on mobile or on a computer, both versions of Apple’s video editor emphasize simplicity. On an iPhone, iMovie lacks the more advanced features you’d find on a Mac, but it’s perfect for quickly compiling clips and exporting them for sharing on the go.
The Mac version of iMovie has more features and is better geared towards a more traditional video editing experience. Drag, drop, trim, arrange your clips, and share. You can use multiple layers on both platforms, add separate audio tracks, and use additional assets like photos and title cards.
Making changes to a clip is as simple as clicking or tapping on it and then using the controls that appear to change the speed, add filters, and more. It’s an app you can learn to use as you go, simply by exploring the interface and seeing what does what.
Best of all you can use the “Export Project” feature on the iPhone or iPad to import your project to the Mac version of iMovie. The easiest way to do this is to AirDrop your projects from mobile to a computer, where you can open them with all of your edits intact.
Designed and Optimized for Apple Hardware
The other reason iMovie really stands out is the fact that it’s designed with Apple hardware in mind. Since Apple only produces iMovie for its own platforms, the editor feels fast and fluid even on older devices. Editing 4K videos on a four-year-old iPhone or a MacBook Air with only 8GB of RAM is a breeze (even older Intel Mac models hold up).
Apple has been designing mobile and desktop chips that can chew through high-resolution video for years, it’s one of the big benefits of designing software and hardware in unison. iMovie is performant because smooth video playback is central to Apple’s iPhone and Mac vision.

This results in silky smooth video editing performance. Hover your cursor over the timeline in iMovie on a Mac to see the current frame with next to no perceptible lag. Preview a full clip before you add it to your project simply by moving your finger.
Many of Apple’s chips (including the M1) have dedicated video encoding engines, which means that hardware inside the device is dedicated specifically to rendering video. That greatly speeds up the export process when it’s time to share.
iMovie Integrates With Apple Photos
When you create a new project with iMovie, there’s no need to ingest footage or create a media pool like you do with other video editors. iMovie is designed to work with Apple Photos over iCloud Photo Library, which means that your footage should already be waiting for you when you start editing.

On the iPhone and iPad, you’ll be invited to pick your media when you create a new “Movie” (with a “Magic Movie” option where iMovie adds extra transitions and music for you). On a Mac, “Photos” appears as a library in the Media picker on the left of the screen and you can filter videos and photos.
Despite its user-friendly nature, Apple packed a few extra tools into iMovie. This includes a chroma key tool for creating green or blue screen videos, picture-in-picture mode, and a split screen toggle. You could be forgiven for missing this.
On an iPhone, you need to set this up when adding a clip to your footage. On a Mac, you need to layer one video on top of another in the timeline (in separate tracks), select the “top” video, and then use the “Video overlay settings” control panel to switch between them.

In addition to this, a quick flick through a clip’s other controls includes stabilization and rolling shutter correction (which can fix the “jelly” effect seen on certain cameras during fast panning), color correction tools including sample-based matching for clip tone, white balance, and skin tones.
You can also apply video and audio filters to your clips, change the speed (with full support for slow-motion videos), and apply a Ken Burns filter that allows for easy zoom and pan (great for static shots to add a bit of movement).
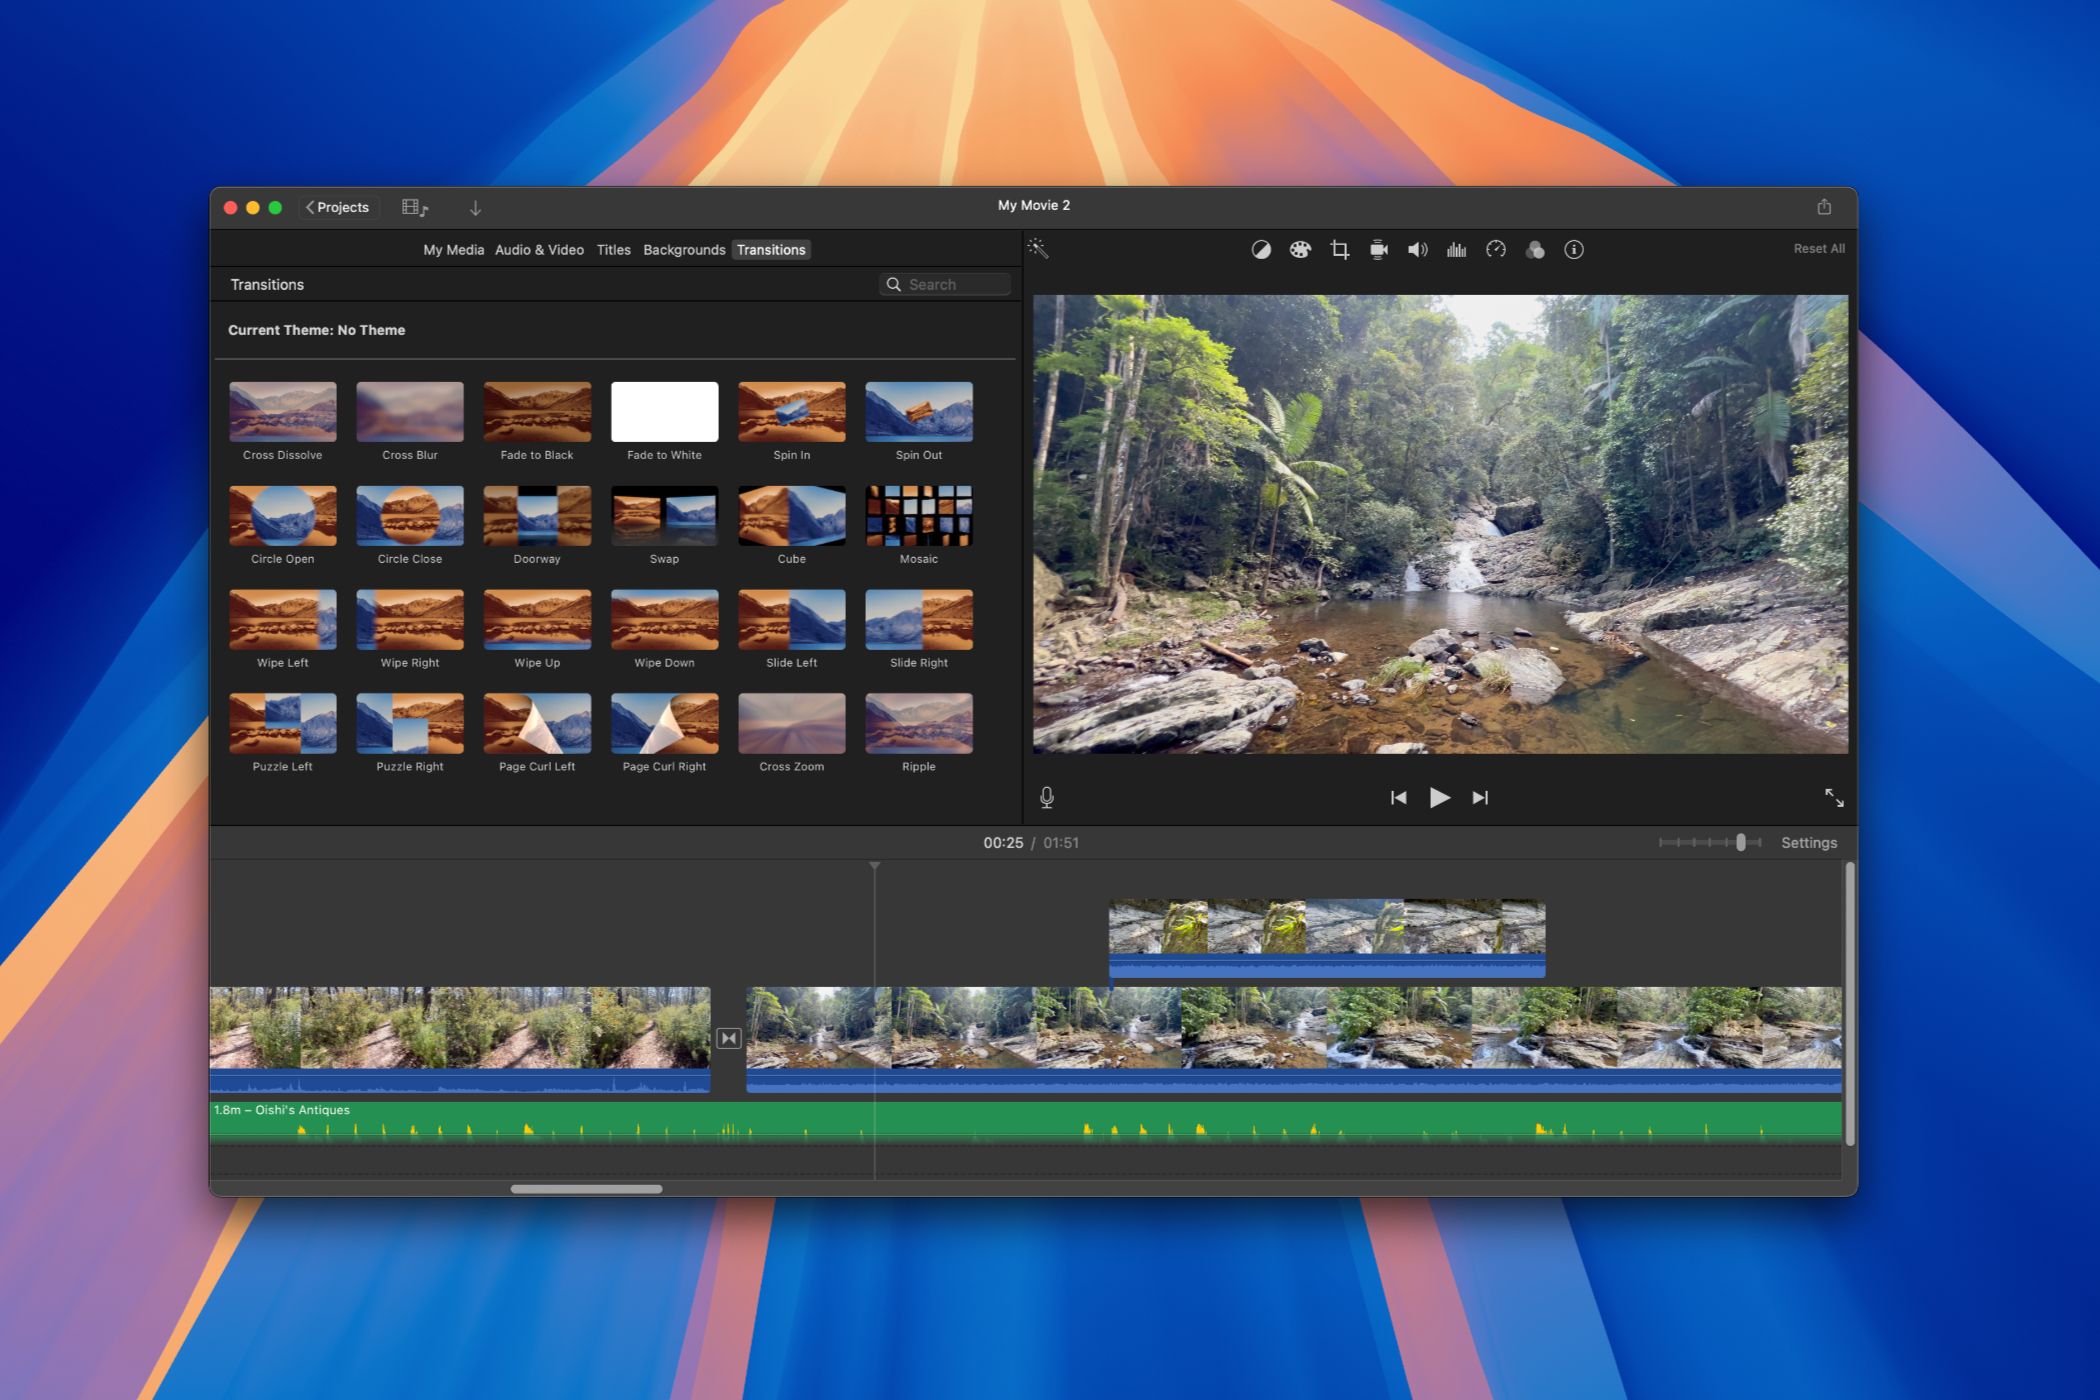
High-Quality Built-in Assets Included
If you use the Mac version of iMovie, you can use Apple’s title cards by dragging and dropping them into the timeline. Put these over your existing footage, or leave them on a colored background to break up your clips. They’re genuinely impressive, and the animations add a level of polish to your finished video.
You also have all the basic transitions available on both versions of iMovie (like cross dissolves, and fades to black and white), with the Mac version having a greater selection.

The Mac version of iMovie also has a larger selection of backgrounds, including some customizable animated map animations that are perfect for travel videos.
Some Limitations to Be Aware Of
In its pursuit of making iMovie a user-friendly video editor, Apple has made some sacrifices. The most notable one that I’ve run into is being locked to a 16:9 widescreen aspect ratio. While most of your videos are probably shot like this, it feels like an outdated choice in an age of vertical video.
This means you can’t edit vertical videos in iMovie and post them to social channels. There’s simply no option to switch project aspect ratio, and importing vertical video will result in unsightly bars on either side of the screen. An update from Apple to include vertical (or square) video support could see a big uptick in user activity.

On top of this, there are some inconsistencies when exporting videos. On an iPhone, you can export at 4K with HDR enabled, which spits out an HEVC file in Apple’s MOV format. This matches the type of video that modern iPhones capture (unless you disable it).
On a Mac, exports take place at up to 4K without HDR and rely on the older H.264 codec in MP4 format. This is a shame since it means you take a hit when it comes to disk space and HDR output. I’d love to see this fixed in a macOS update.
There are more limitations, but for everyday projects you’re not likely to miss multi-camera support, ripple editing, or the ability to sync video and audio tracks recorded separately. If you do, you need a far more powerful tool than iMovie.
Just like you can export iPhone and iPad projects to iMovie for Mac, you can export iMovie projects to Apple’s $299 professional video editing suite Final Cut Pro.
While Final Cut Pro is one of the more user-friendly professional packages of its kind, if you’re graduating from iMovie and need some serious video editing power, we recommend our favorite free video editor DaVinci Resolve instead.
Source link