
Sick of paying for an Adobe subscription just to use Lightroom? Looking for a RAW editor that can handle every part of your workflow? You need to give darktable a shot.
This open-source photo editing powerhouse takes a bit of getting used to but is completely free and runs on Windows, Mac, and Linux.
Who Is darktable For?
darktable is a tool specifically for working with RAW photos. RAW photos are commonly used by photographers and those looking to get the most out of their cameras by capturing photographs as undeveloped bursts of data. A RAW photo captures as much information as possible about a scene and stores it in a file type like DNG (Digital Negative), ARW (Sony), CR2 (Canon), and NRW (Nikon) among many others. Even your smartphone can shoot RAW, if you want it to.
Related
Should You Buy an Older Full-Frame Camera in 2025? I Did
The A7 III is still a fantastic camera, even in its old age.
Unlike a JPEG, which discards much of the additional information in a scene when compressing the image to reduce its file size, RAW images are much larger and allow for far greater adjustments in post. While a JPEG might discard the data in an under-exposed shadow or over-exposed highlight, a RAW file will hold on to it so that you can claw it back during the editing phase.
By processing a RAW photo, you can recover these details by tweaking a few settings. You can change the exposure or have better control over white balance, and no compression means the highest possible image quality too. Doing this requires purpose-built software that’s built to “develop” RAW images. Lightroom and Photoshop (Adobe Camera RAW) are commonly used, but many other apps like Apple’s Photos and Google’s Snapseed can also do it.
One thing that makes apps like Lightroom so appealing is the way that they handle the entire RAW workflow. There’s more to editing your photos than simply opening an image, tweaking a few sliders, and exporting. Apps like Adobe Bridge and Lightroom are built with this in mind. The first step is to browse your images, then you move on to marking or rate the ones you want to edit and keep, and only then do you commit to actually editing and developing them.

This is where darktable shines. This free tool can handlethe whole workflow: importing images, browsing your library, selecting your photos, and eventually editing and exporting them. Just like Lightroom, this takes place in a single app.
Browse, Edit, and Export
People pay top-dollar for Adobe solutions and apps like DxO Photolab and Capture One for a dependable workflow. While I used to use Photoshop back in the day, recently I’ve been relying on Affinity Photo for RAW editing in small batches. This app is woefully ill-equipped for anything more than editing five to 10 images at a time.
That’s not the case with darktable. The app is effectively split down the middle between two modes: lighttable and darkroom. Lighttable is an image browser in which you can view your entire library, apply ratings and color tags, and then filter out the images you want to see.
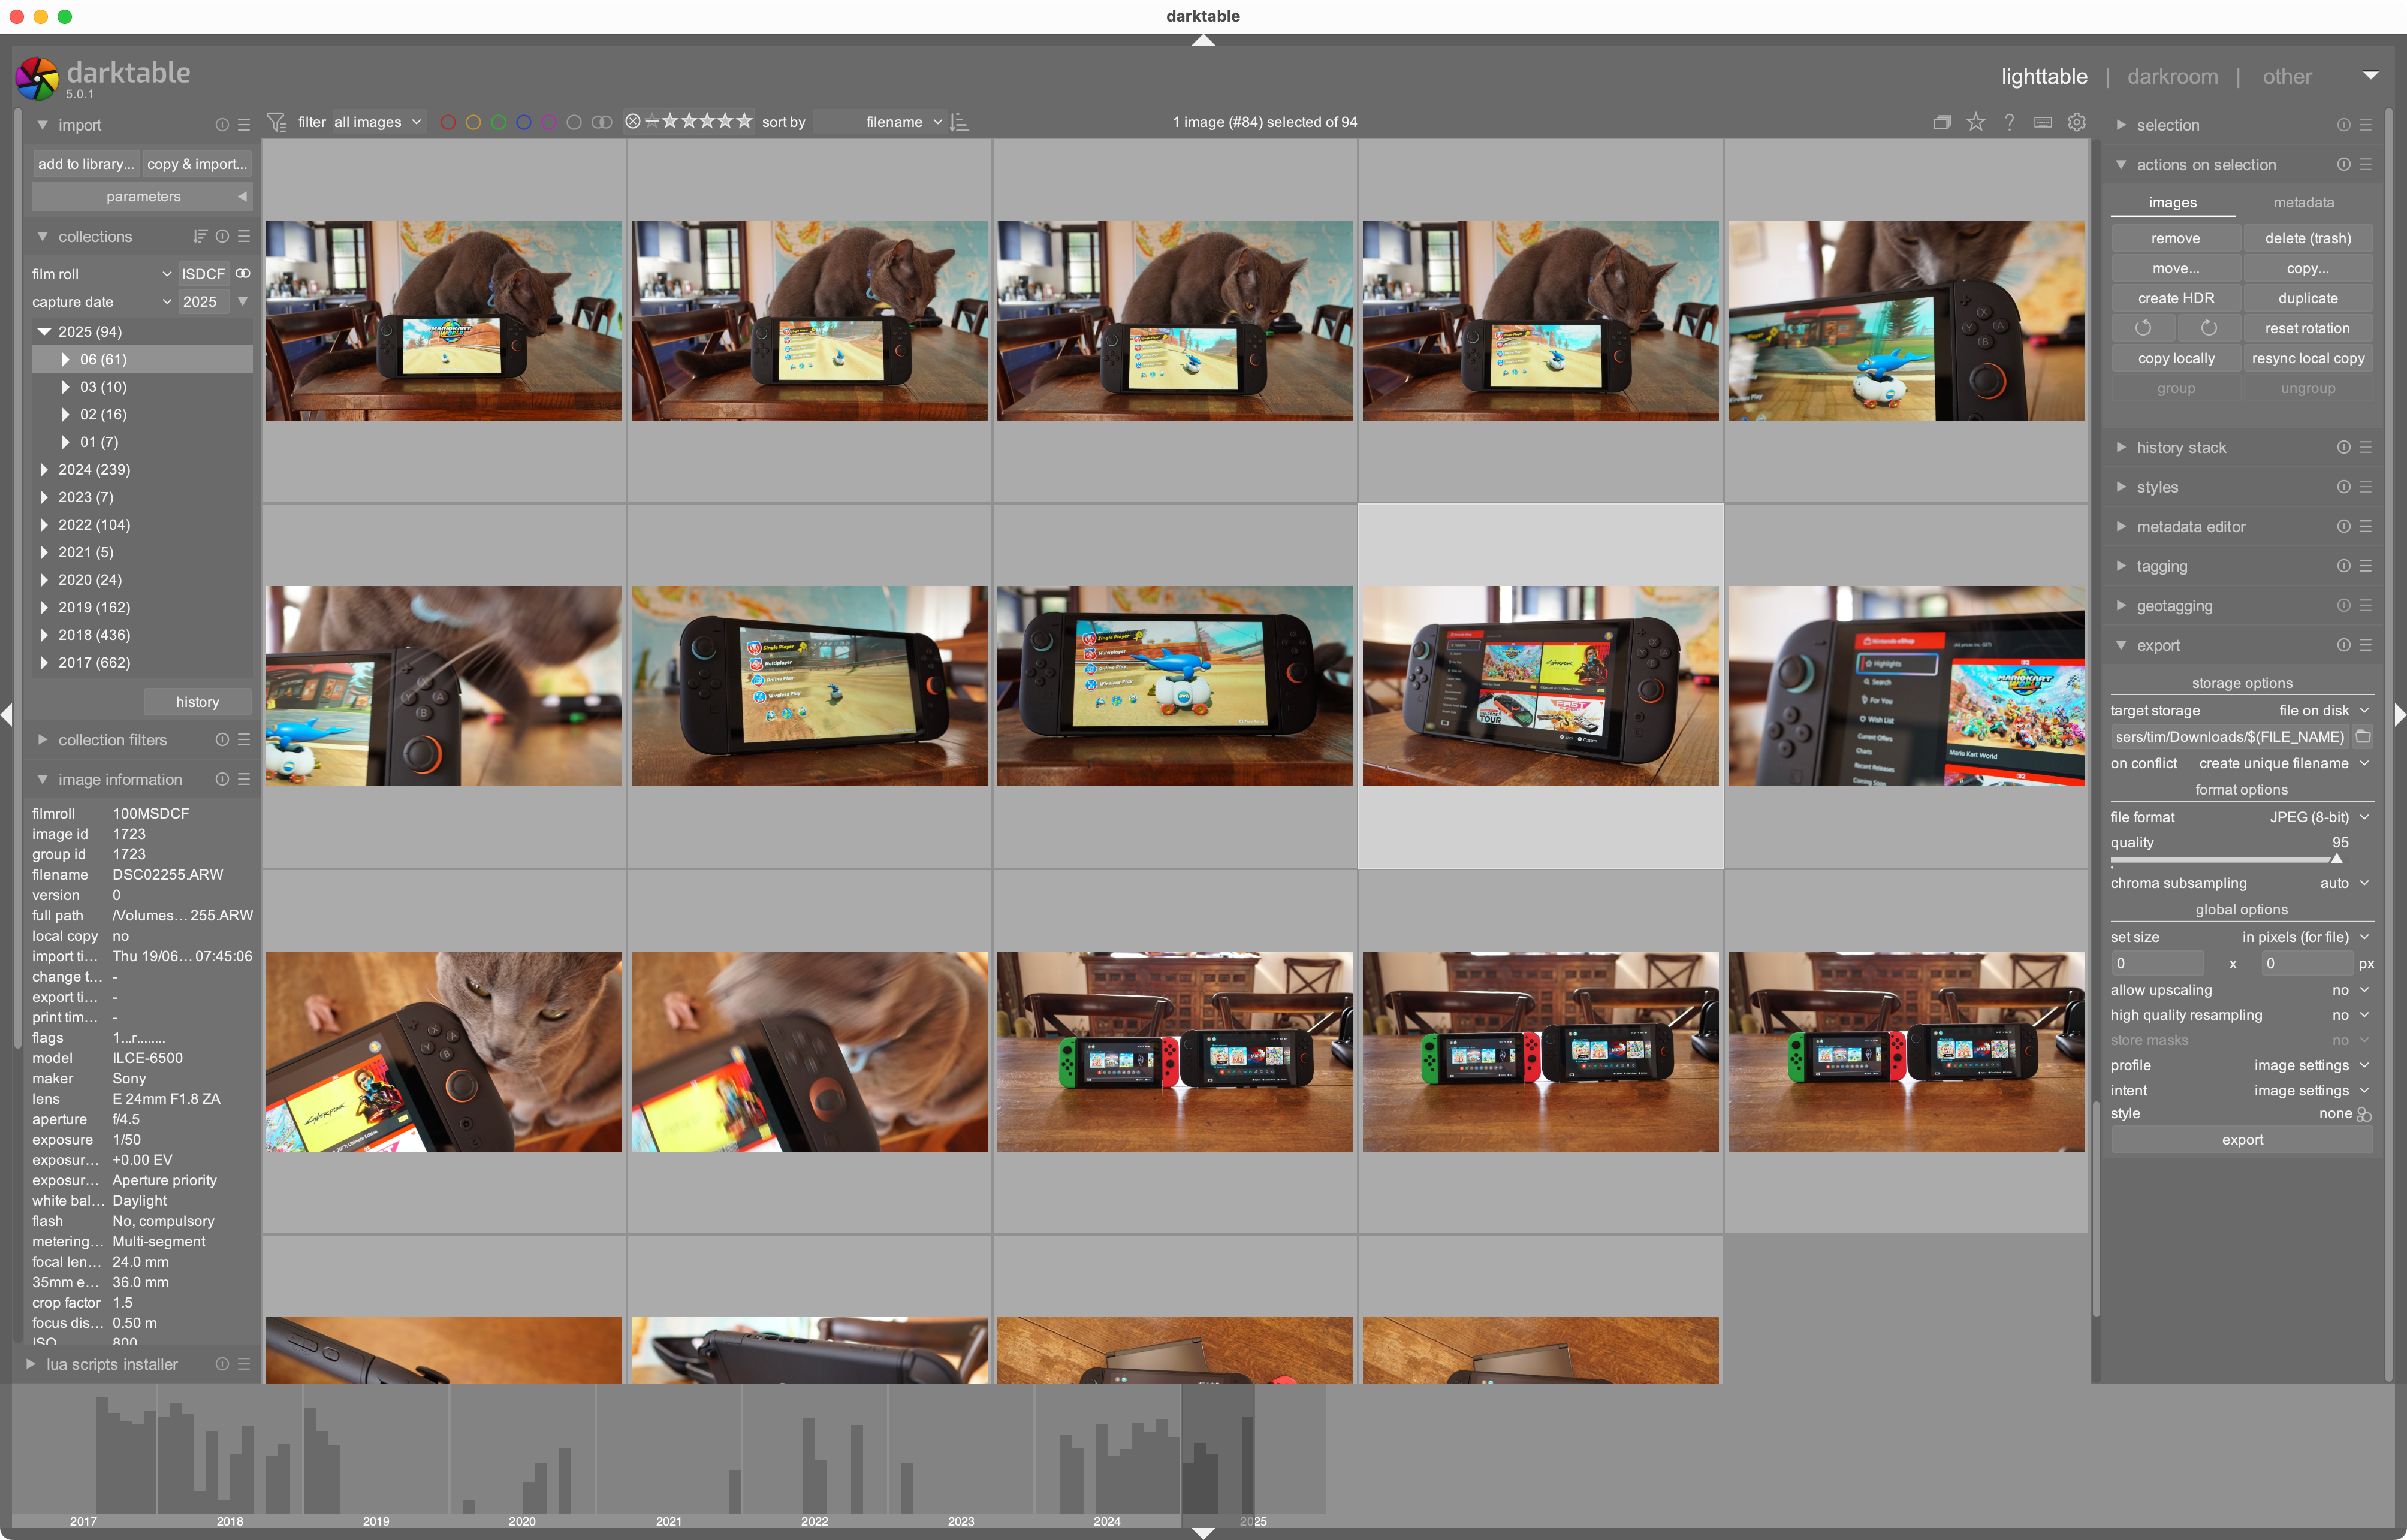
You can also get way more involved and do things like apply styles to your selections without having to edit them first, add tags and location data, edit the photo’s metadata, create HDR images from multiple exposures, and export images directly without editing them (or as a batch, applying color space profiles and styles). Use the “Import” button to get started (darktable won’t duplicate images unless you use the “copy & import” button) and populate your image library.
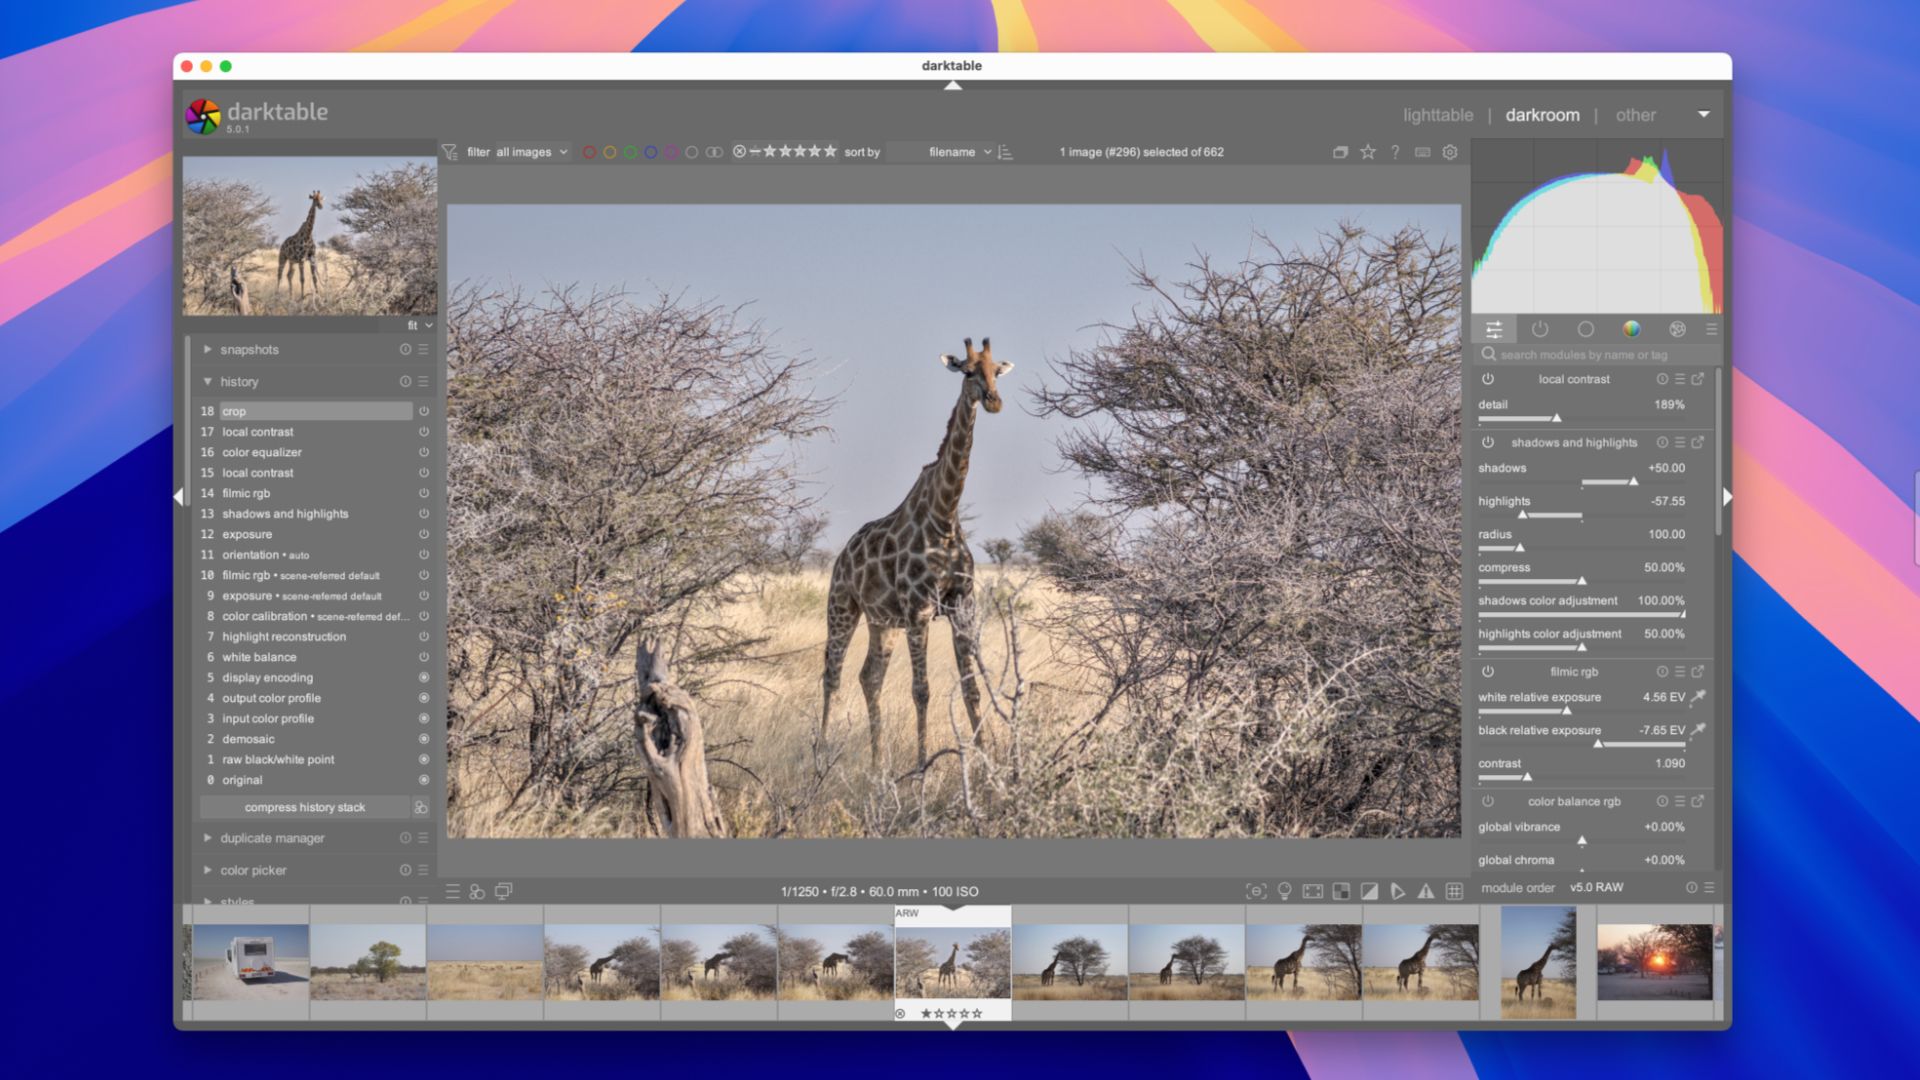
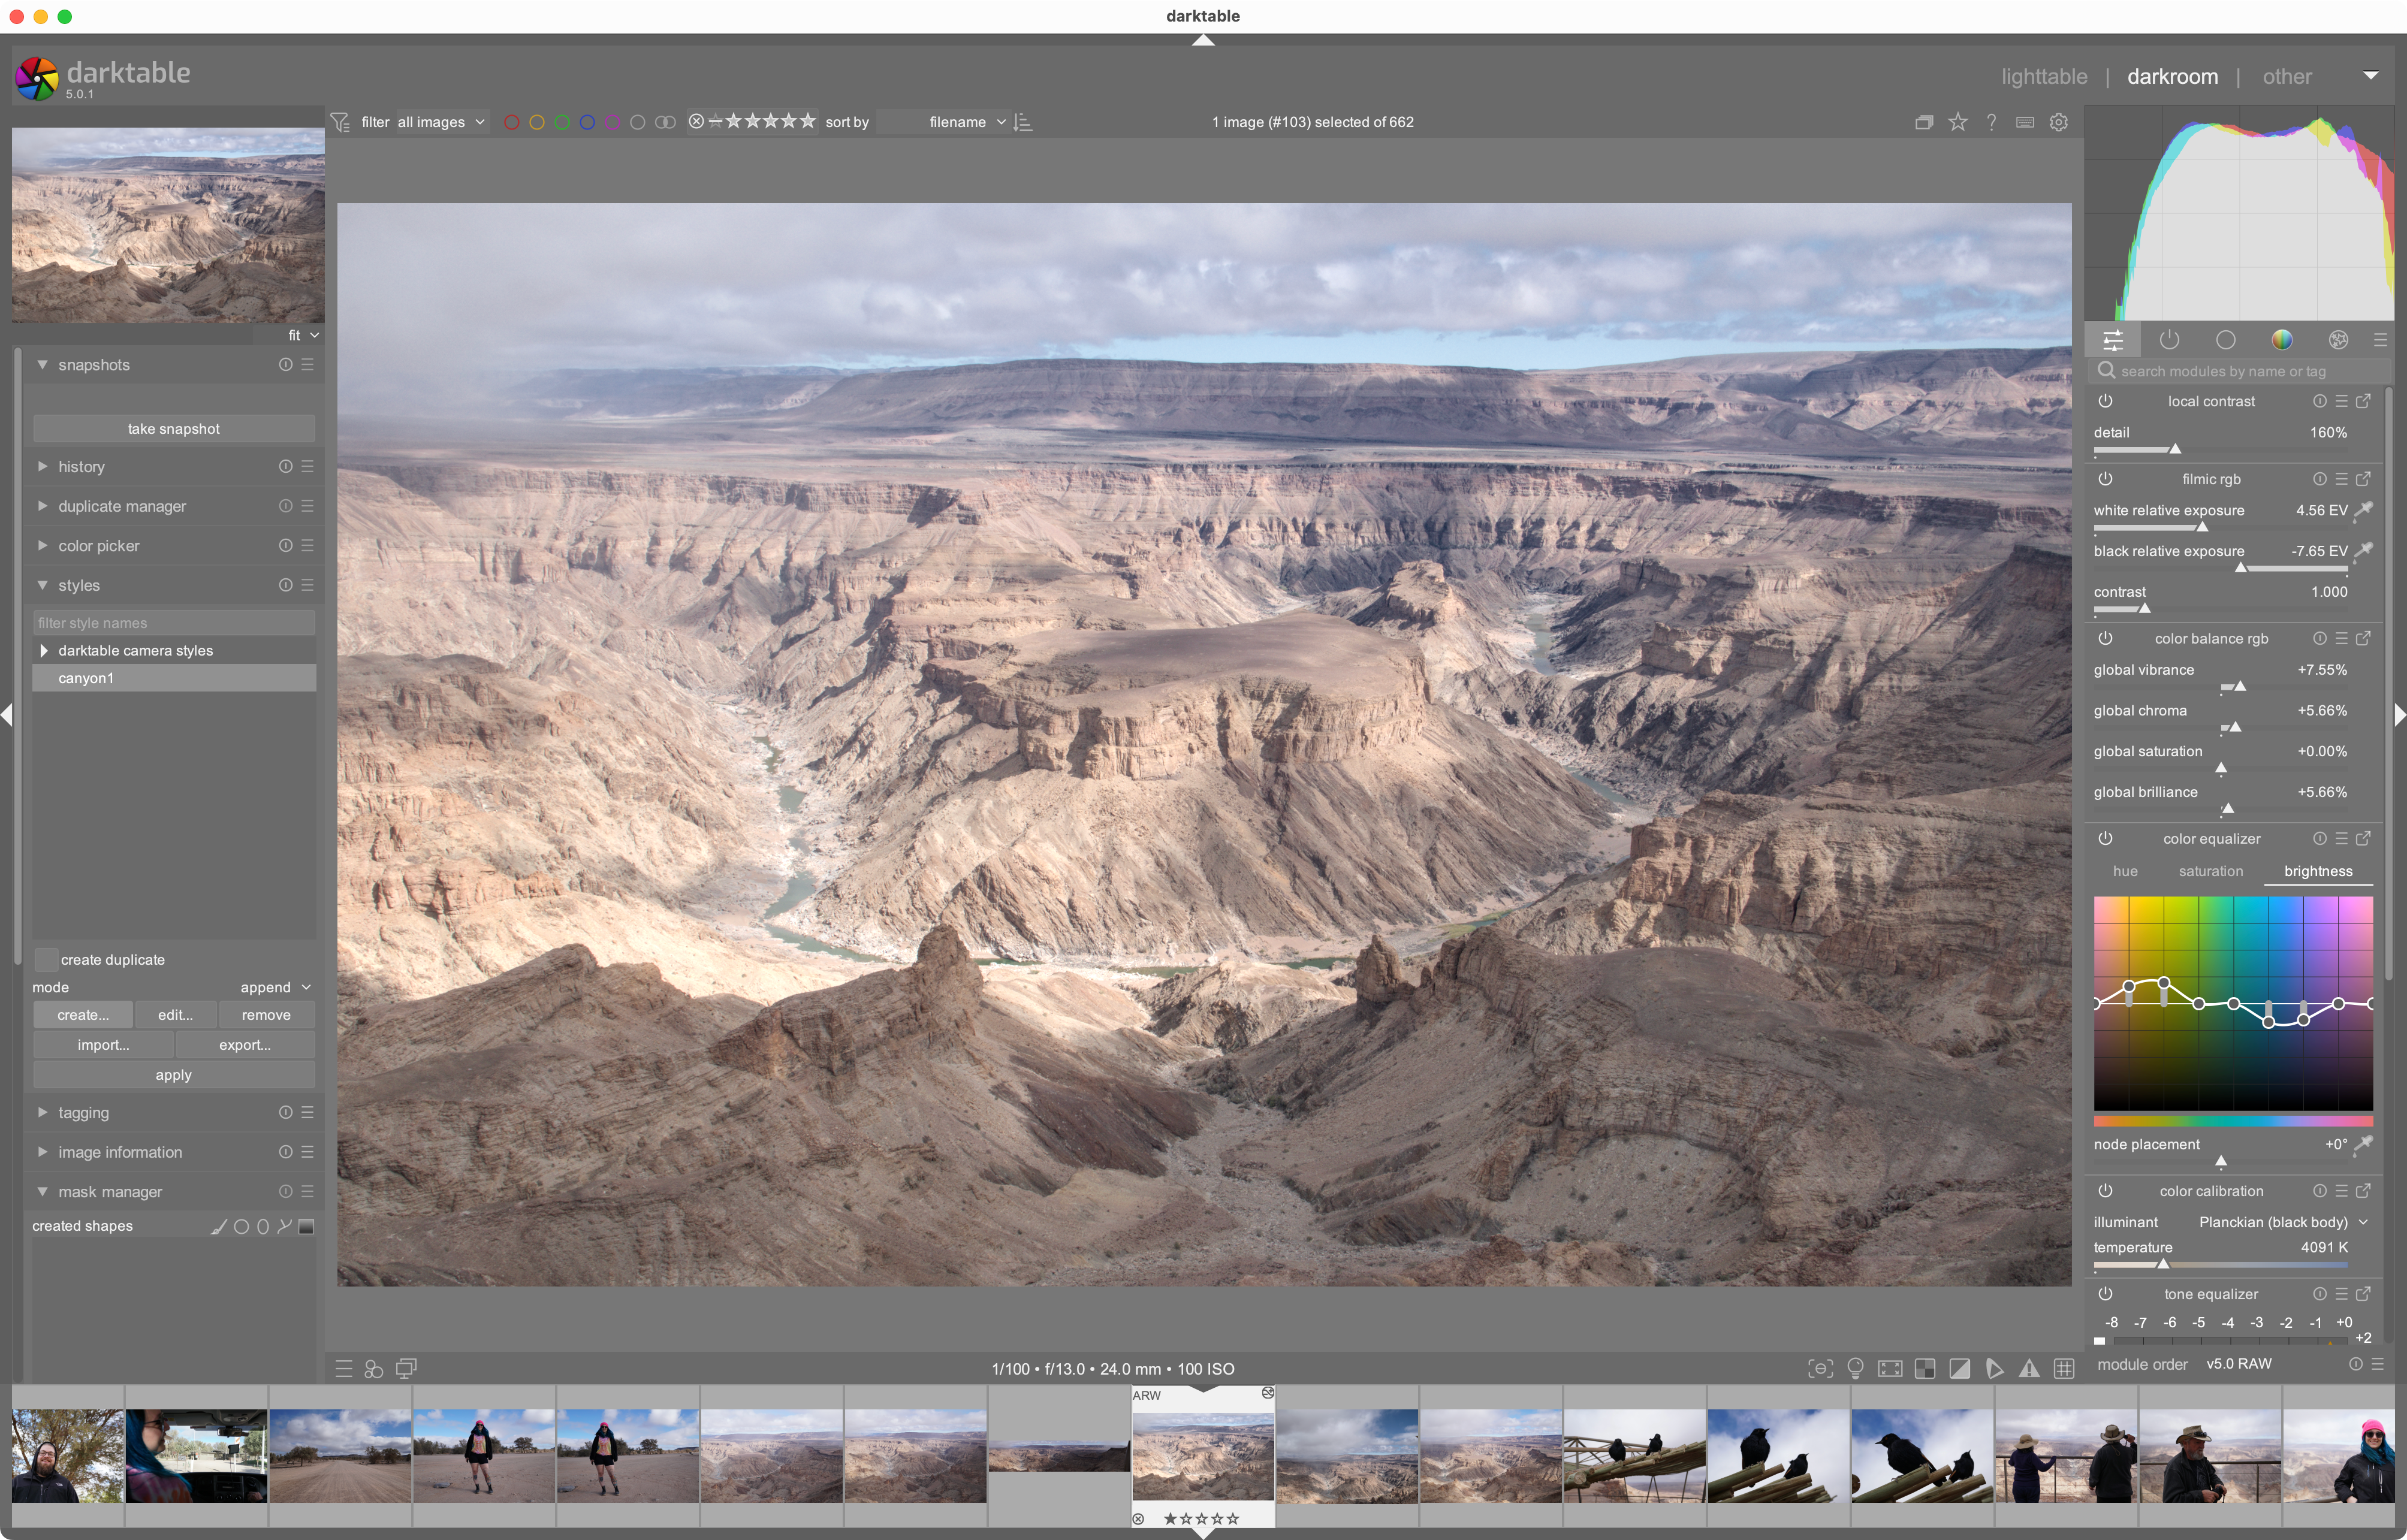
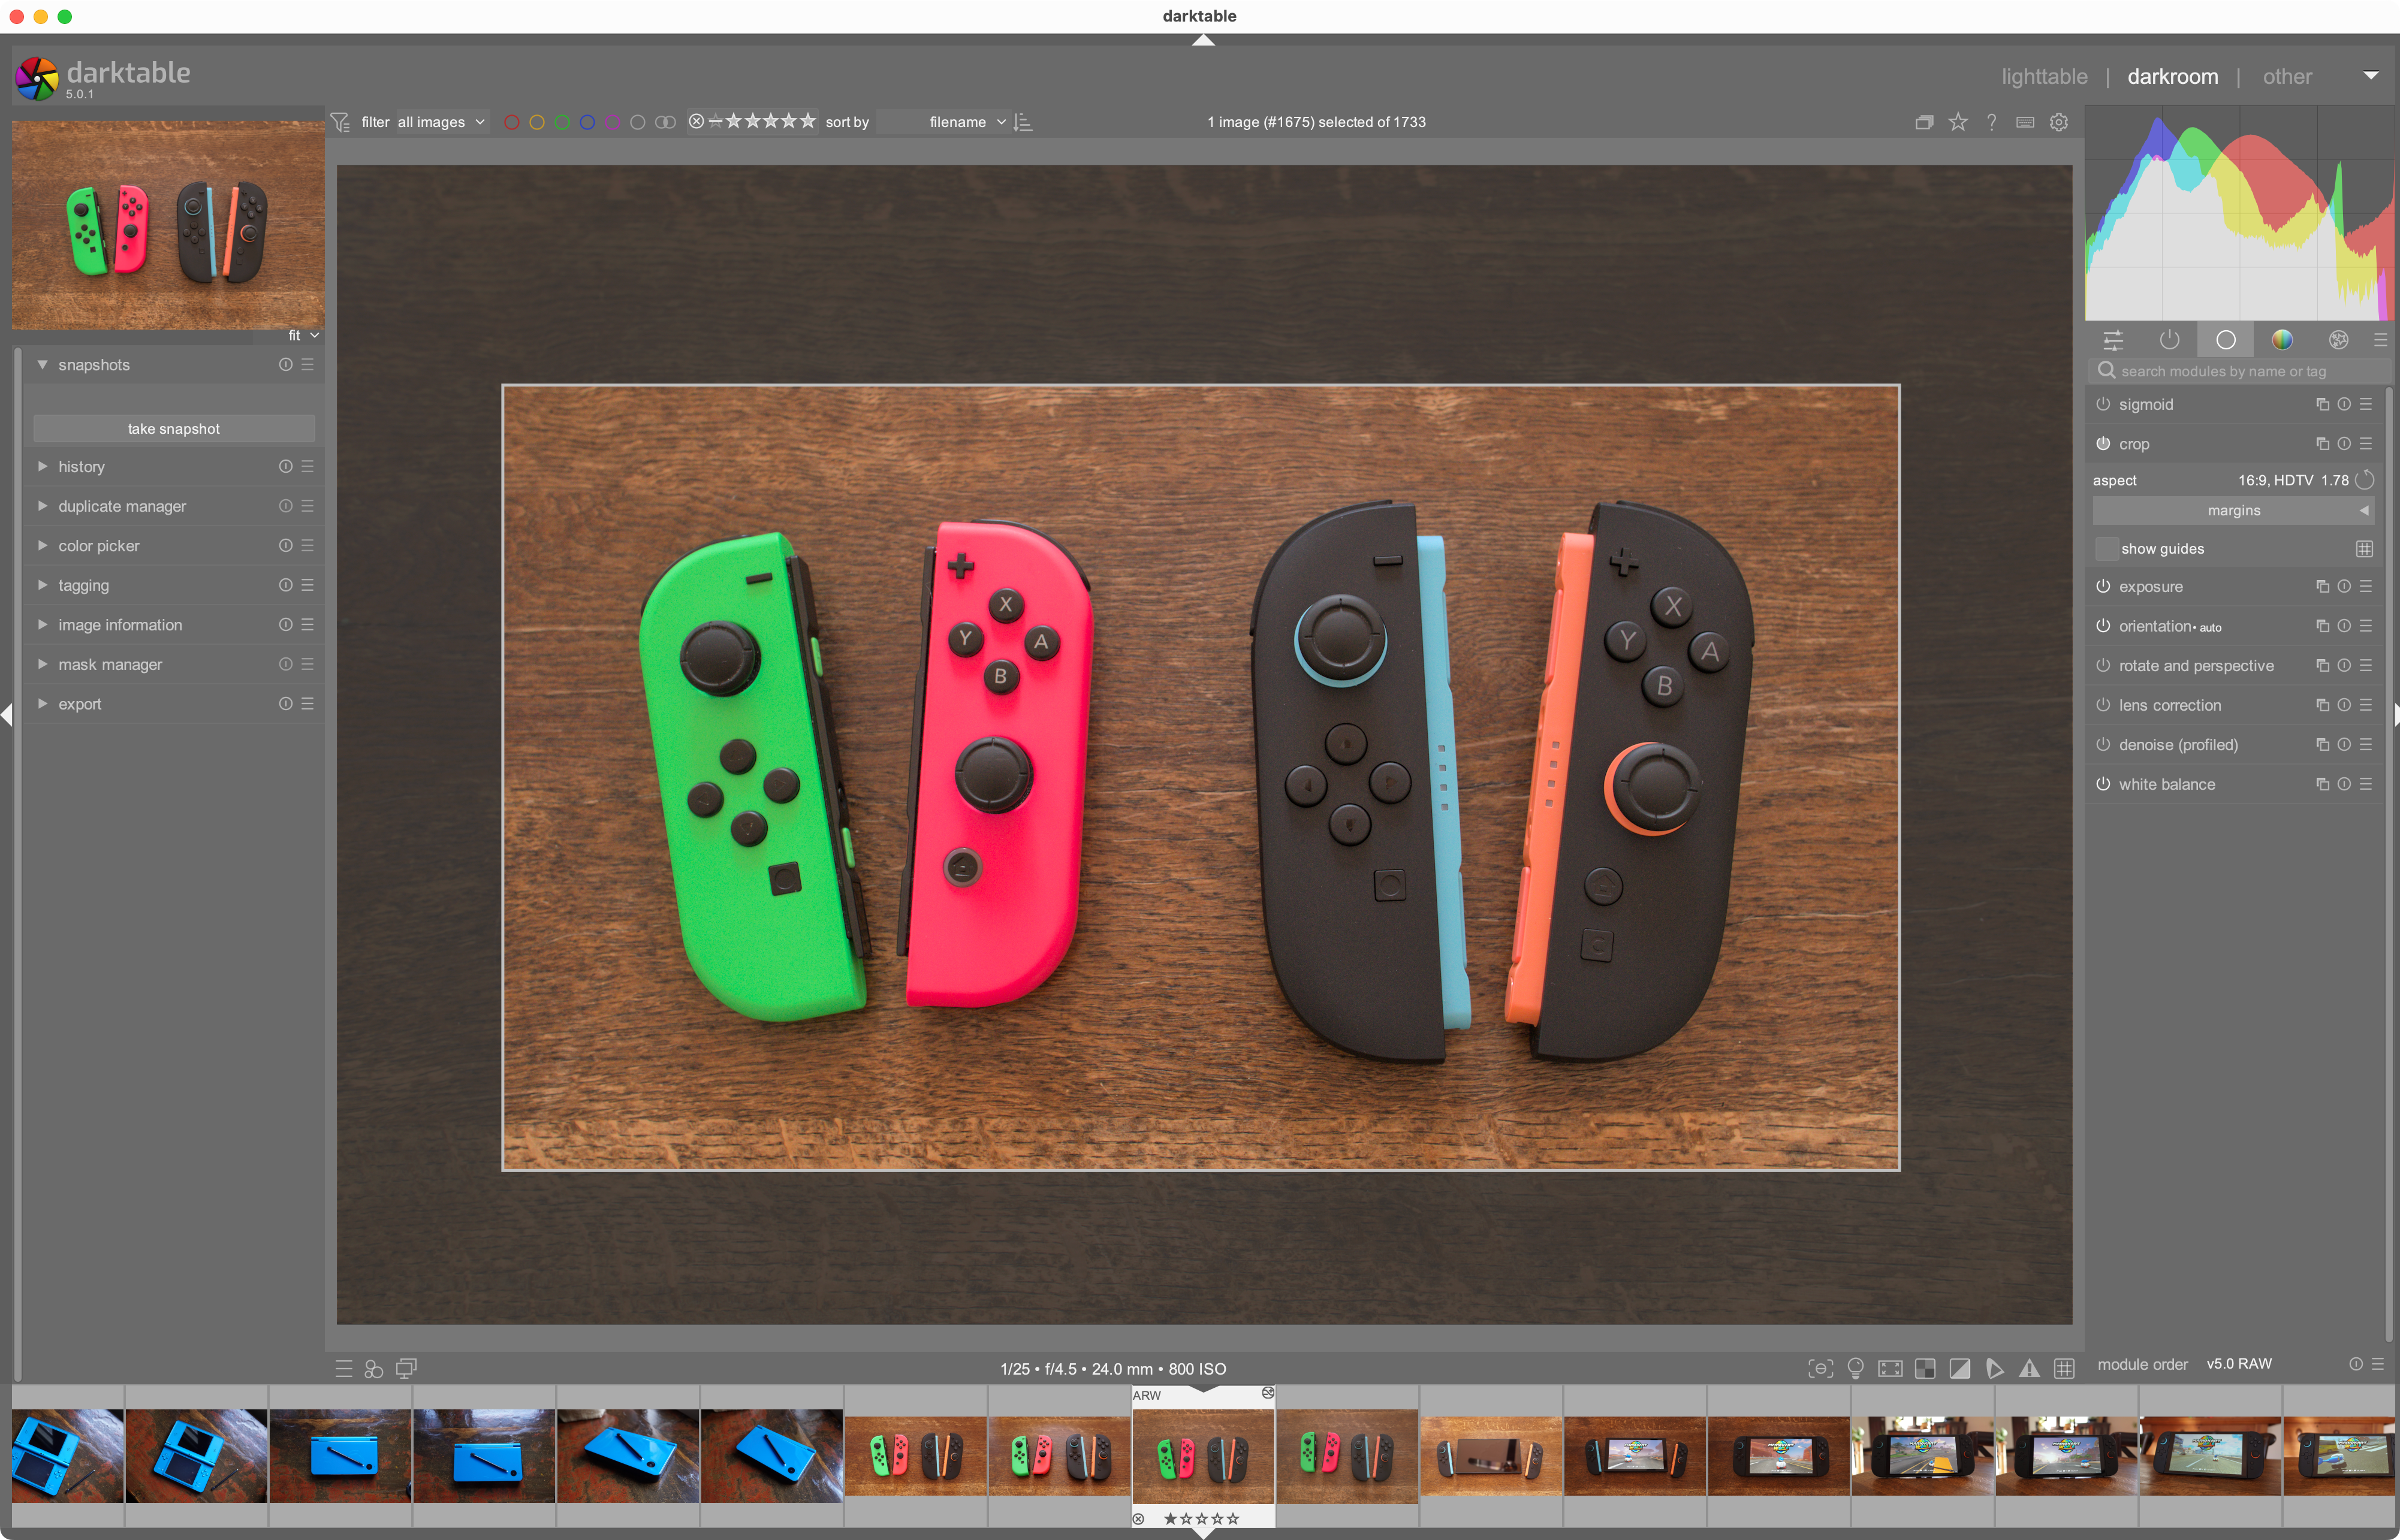
Double-click on any image and you’ll head to the darkroom, which is where the real magic happens. From here, the interface should be relatively familiar for anyone who has used Lightroom and apps like it. Tweak settings using the tools within the panels on the right, consult the histogram at the top of the screen, and move through your image selection using the carousel at the bottom.

There are some useful panels on the left of the screen that let you take snapshots that you can restore, save your current settings as styles to deploy on other photos, manage masks for spot-fixes, and of course export your image. You’ll also find a fair few extra tools dotted around the UI.
An App That’s Worth Your Time
The one glaring area where darktable lags behind commercial projects is its approachability. Despite being an incredibly powerful RAW editor that can do almost anything a premium tool can, the app isn’t exactly user-friendly. Thankfully, there is a detailed help document that you can refer to in a pinch. Personally, I’ve had more joy searching the web for quick how-tos and finding YouTube videos that show rather than tell.
Ultimately, the best way to find out how much of darkroom works is to just experiment. Open a random RAW image and click your way around the UI, tweak sliders, and enable modules to understand how it all fits together. The app is designed to be highly modular, allowing you to set things up just the way you want it. As a result, the darkroom portion of the app has a lot of modules that can feel overwhelming.
Remember that changes you make to your RAW images are stored in separate XMP files, so tweaks you make are non-destructive. You can’t mess up your photos by experimenting, so go wild.
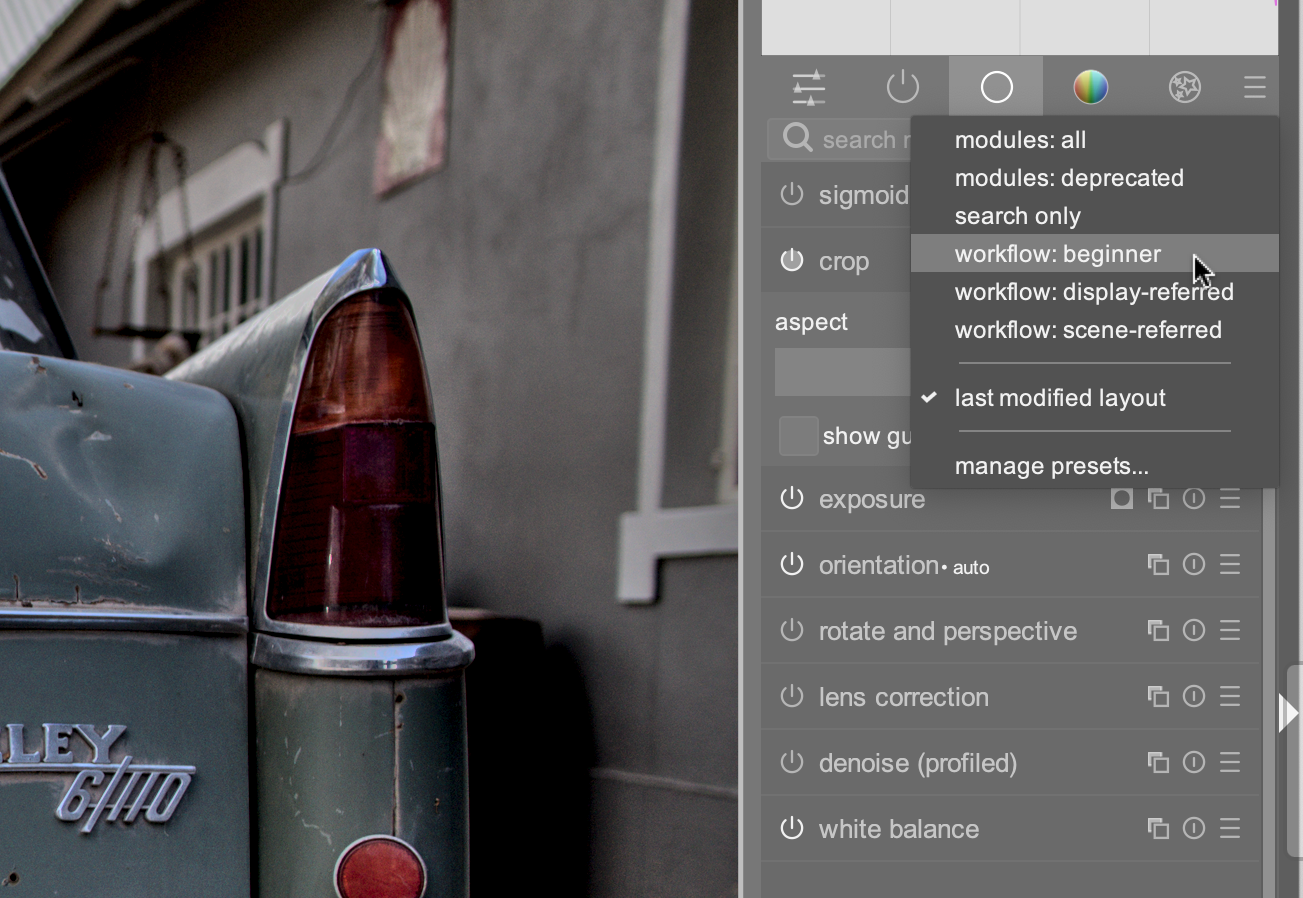
The good news is that each module features a “reset” button to the right of its name and an “on/off” toggle to the left. Right-clicking on any module will let you add or remove additional parameters, while right-clicking on the quick-access (and other tabs) lets you add and remove modules. You can also click on the hamburger tab to add preset module selections for beginners, to show everything, or to manage and build your own editing presets.

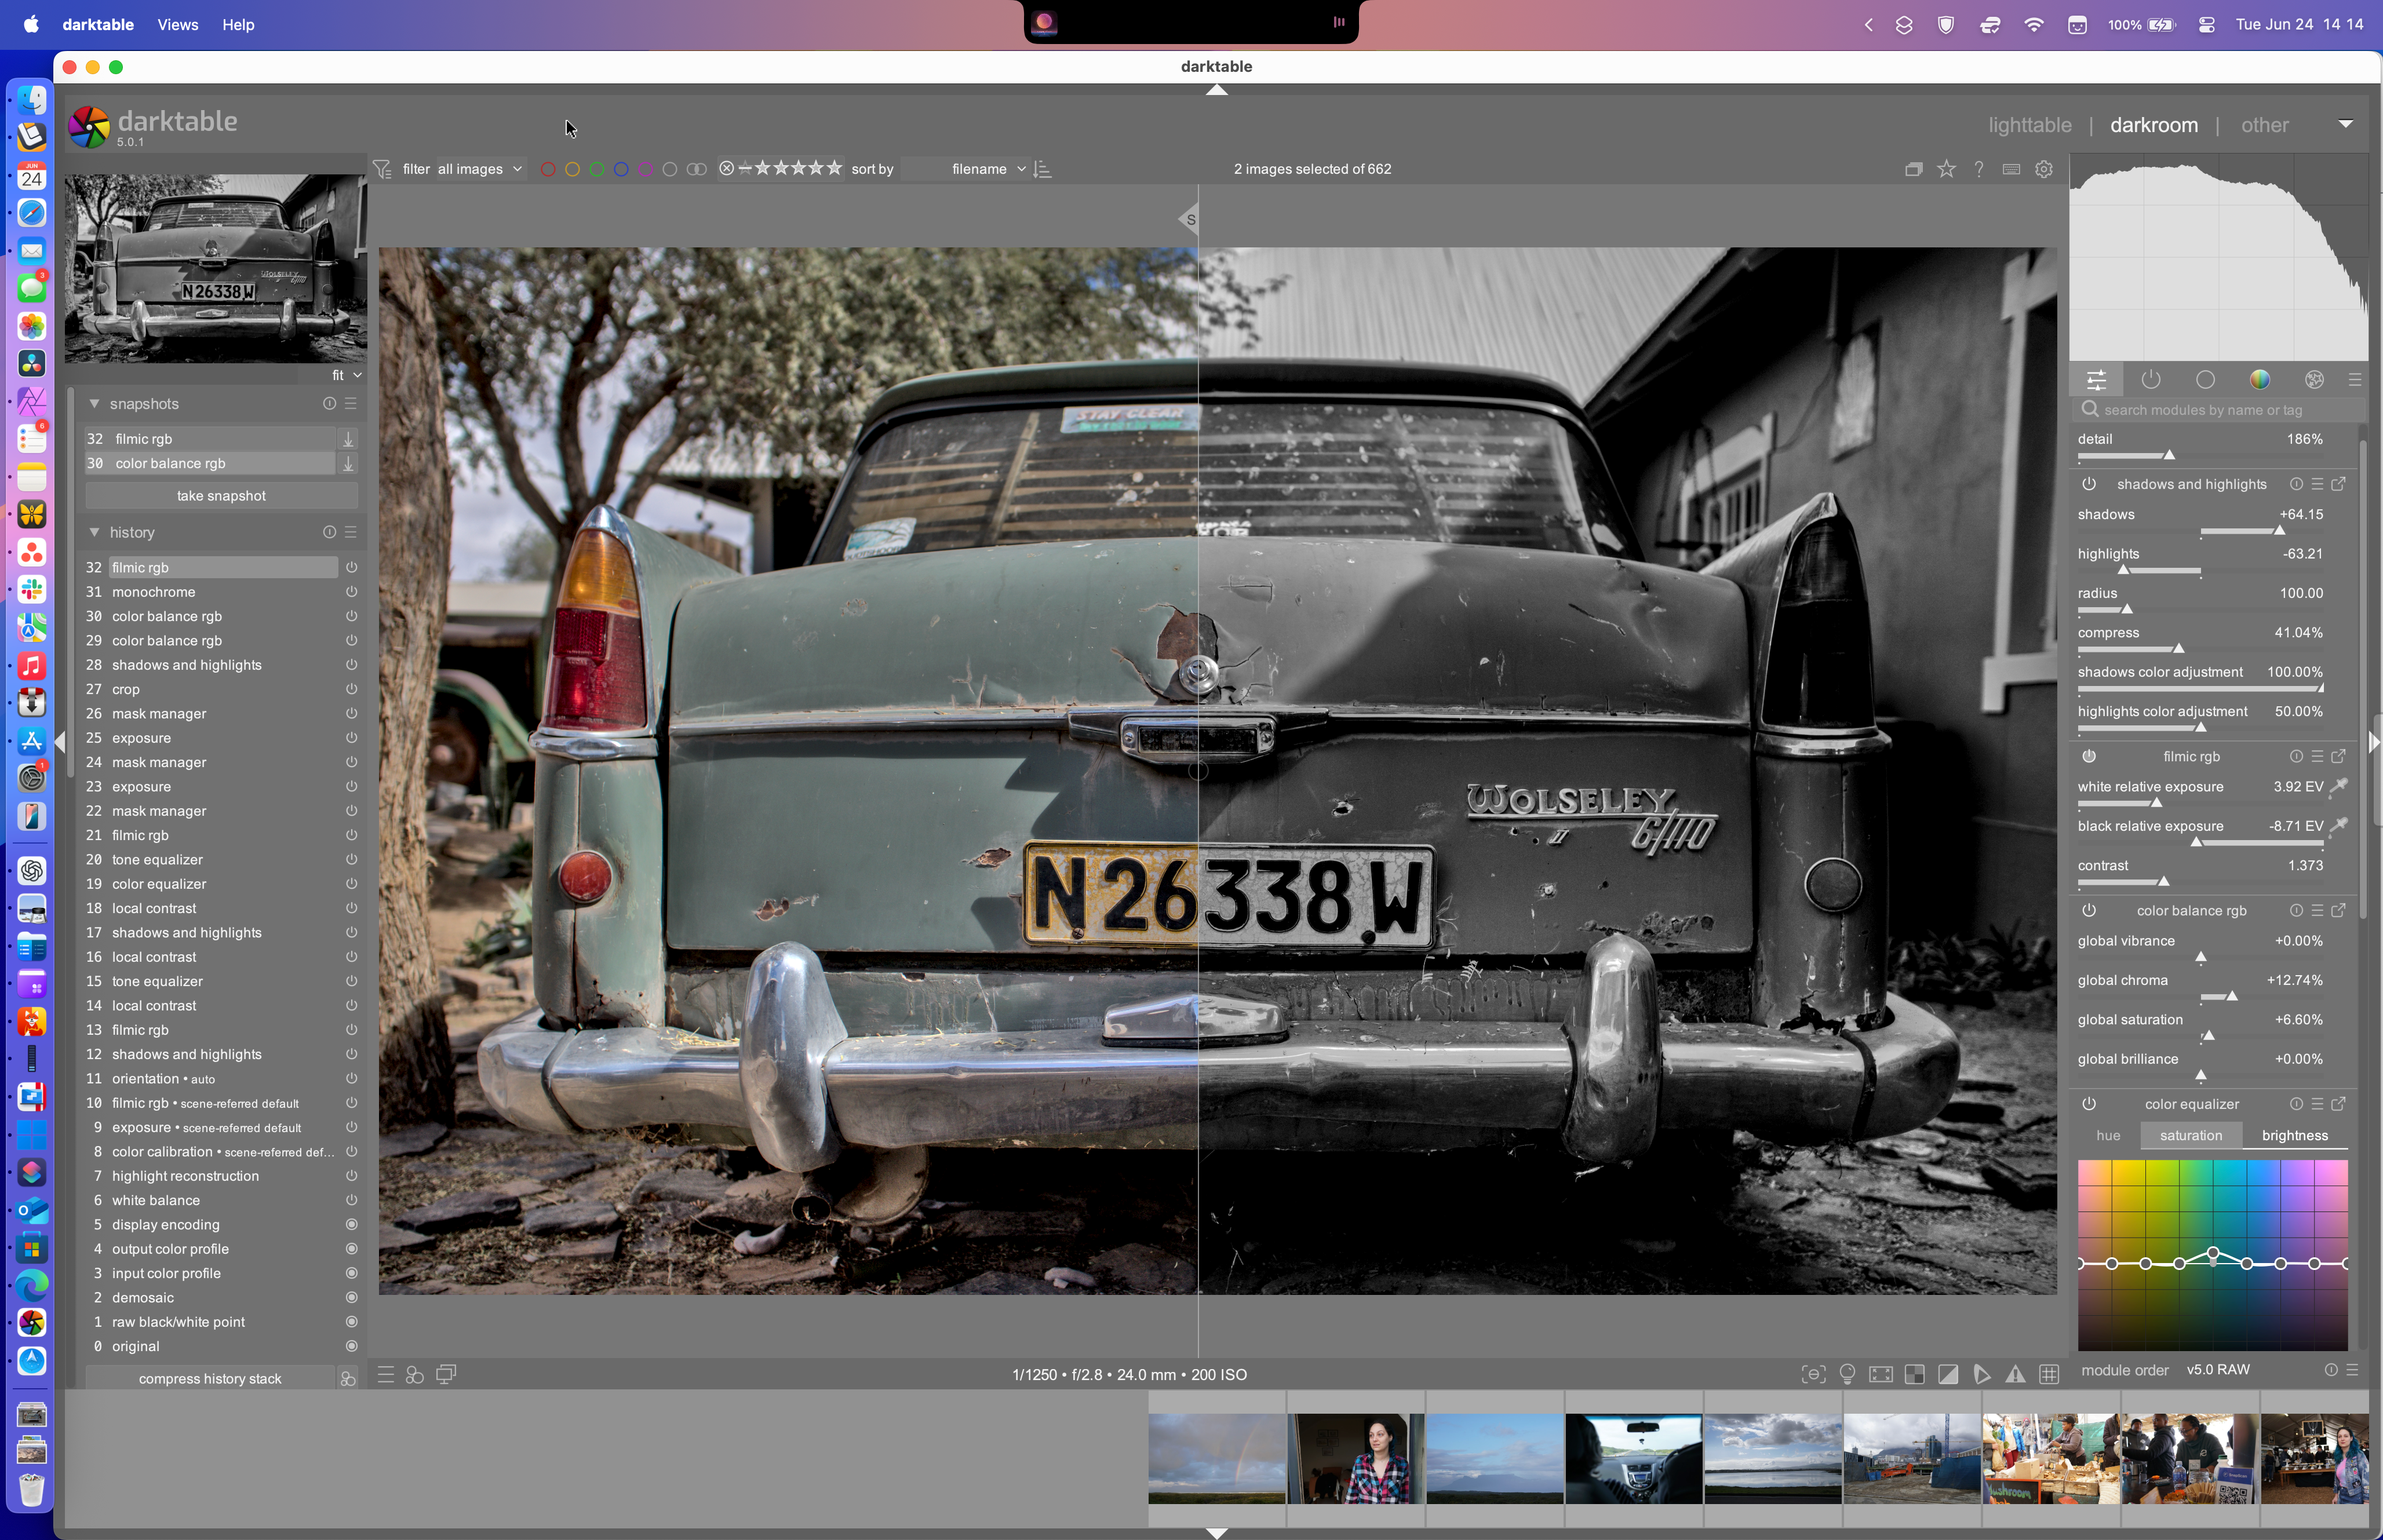
I started out feeling overwhelmed by darktable, but I kept at it. After an hour or two of playing around, I’ve reached a stage where I’m confident that I can easily replicate the sorts of edits I was performing in Photoshop Camera RAW and Affinity Photo. Dare I say it, darktable has reinvigorated my appetite for editing photos again. Learning to effectively use tools like the tone equalizer to more selectively boost darks and lights, and apply selective saturation to color ranges (rather than just tweaking shadows and saturation sliders) has given me reason to go back and edit old photos through fresh eyes.
I’m not going to pretend there aren’t quirks. Some issues I ran into include not being able to adjust the shadows or highlights with a simple slider (fixed by enabling the prerequisite module), a complete lack of understanding of how masks work (a module’s mask tools won’t appear on the quick access tab, for some reason), and spending way too long looking for easily deployable styles (that were there all along).

I also had to enable the “mouse wheel scrolls modules panel by default” in the app’s preferences on the Mac version because scrolling with the trackpad would just change slider values and I literally couldn’t access all of the settings I needed. Like I said, the app is quirky.
Free and Available for Everything
It’s hard to complain about the slightly prickly onboarding process when darktable is a completely free and open-source app. I installed it using the Mac package manager Homebrew, but you can download binaries directly from the Install page.
Mac users will need to use the “Open anyway” button under System Settings > Privacy & Security (or allow-list the app using Terminal) to get the app running on modern systems since it’s not signed with an Apple Developer certificate.
Another free and open-source alternative to darktable is Rawtherapee, a similar all-in-one RAW image editor with an arguably more friendly user interface. That said, the app performed considerably worse than darktable on my M1 Max MacBook Pro (and after several hours spent editing old images, I missed darktable’s deeply customizable approach to editing).
I had darktable open while writing this, and I’ve spent way too much time editing photos I shot in 2018 when I should have been working. Not only is darktable powerful, it’s surprisingly moreish. Give it a shot and you won’t be disappointed.
Related
5 Photoshop Alternatives for Linux
Edit images with ease.
Source link
-

-

- – Официальный сайт Pinco играть онлайн Зеркало и вход.1832
- – Официальный сайт Pinco играть онлайн Зеркало и вход.2634 (2)
- Glory Casino (3123)
-

- Casino en ligne Golden Panda Licence et sécurité.381
-


