Creating animated GIFs used to require downloading special software or using paid online services. Now ChatGPT offers a simple way to turn your images into moving GIFs with custom effects.
All you need to do is upload an image, add a prompt that describes the animation you want, and ChatGPT does the rest. The entire process takes just a few minutes from start to finish.
Whether you need a GIF for social media, presentations, or just for fun, this straightforward method works for all kinds of images and animation needs. Here’s how to create your own custom GIFs directly in ChatGPT.
1. Log in
(Image: © Tom’s Guide)
First, log in to ChatGPT.
2. Attach your photo
(Image: © Tom’s Guide)
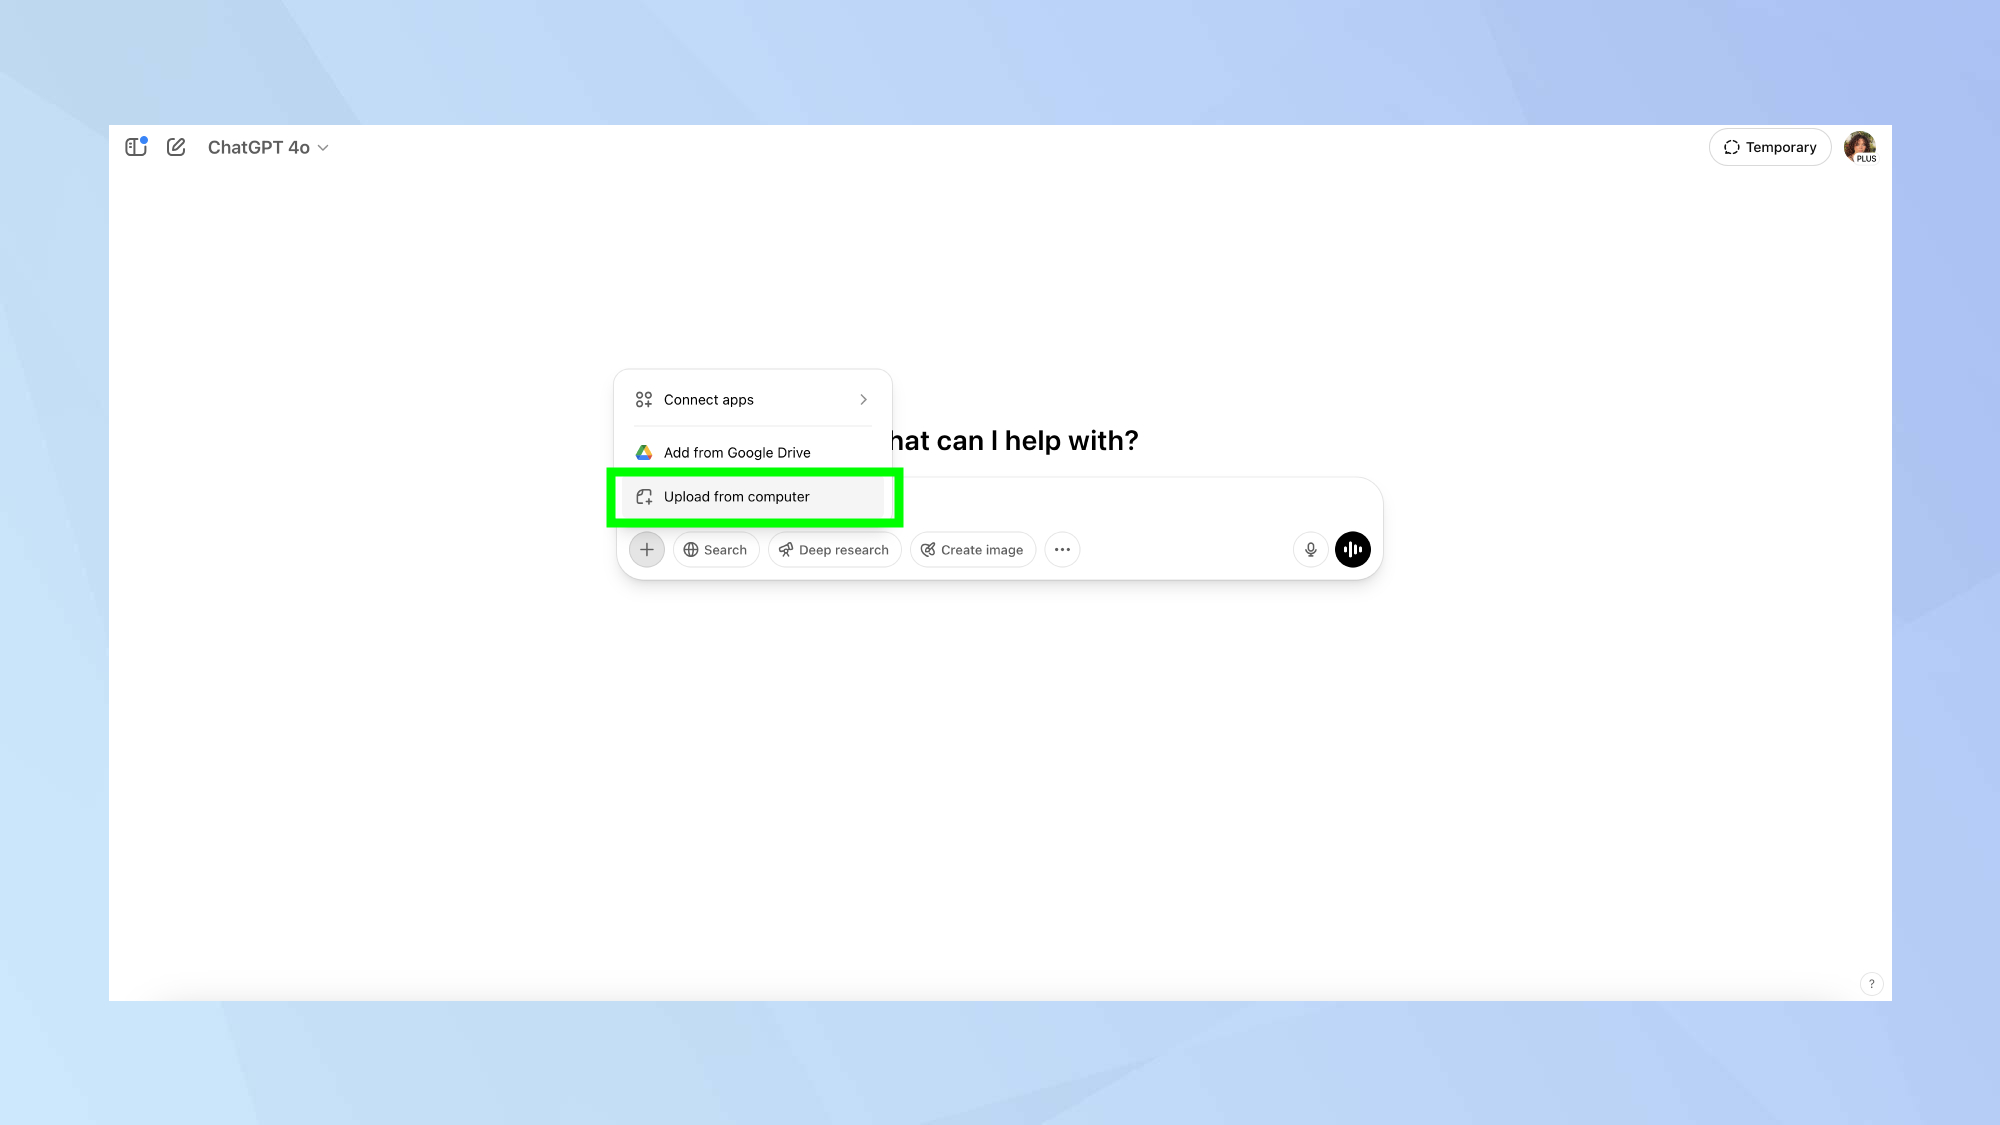
Next, attach your photo. You can do this by clicking the plus (+) icon and choosing Upload from computer. All you need to do now is select your chosen image saved to your computer.
If you’re on mobile, the steps are the same except you’ll have the option to attach an image from Photos, Camera, or Files.
3. Type in your prompt
(Image: © Tom’s Guide)
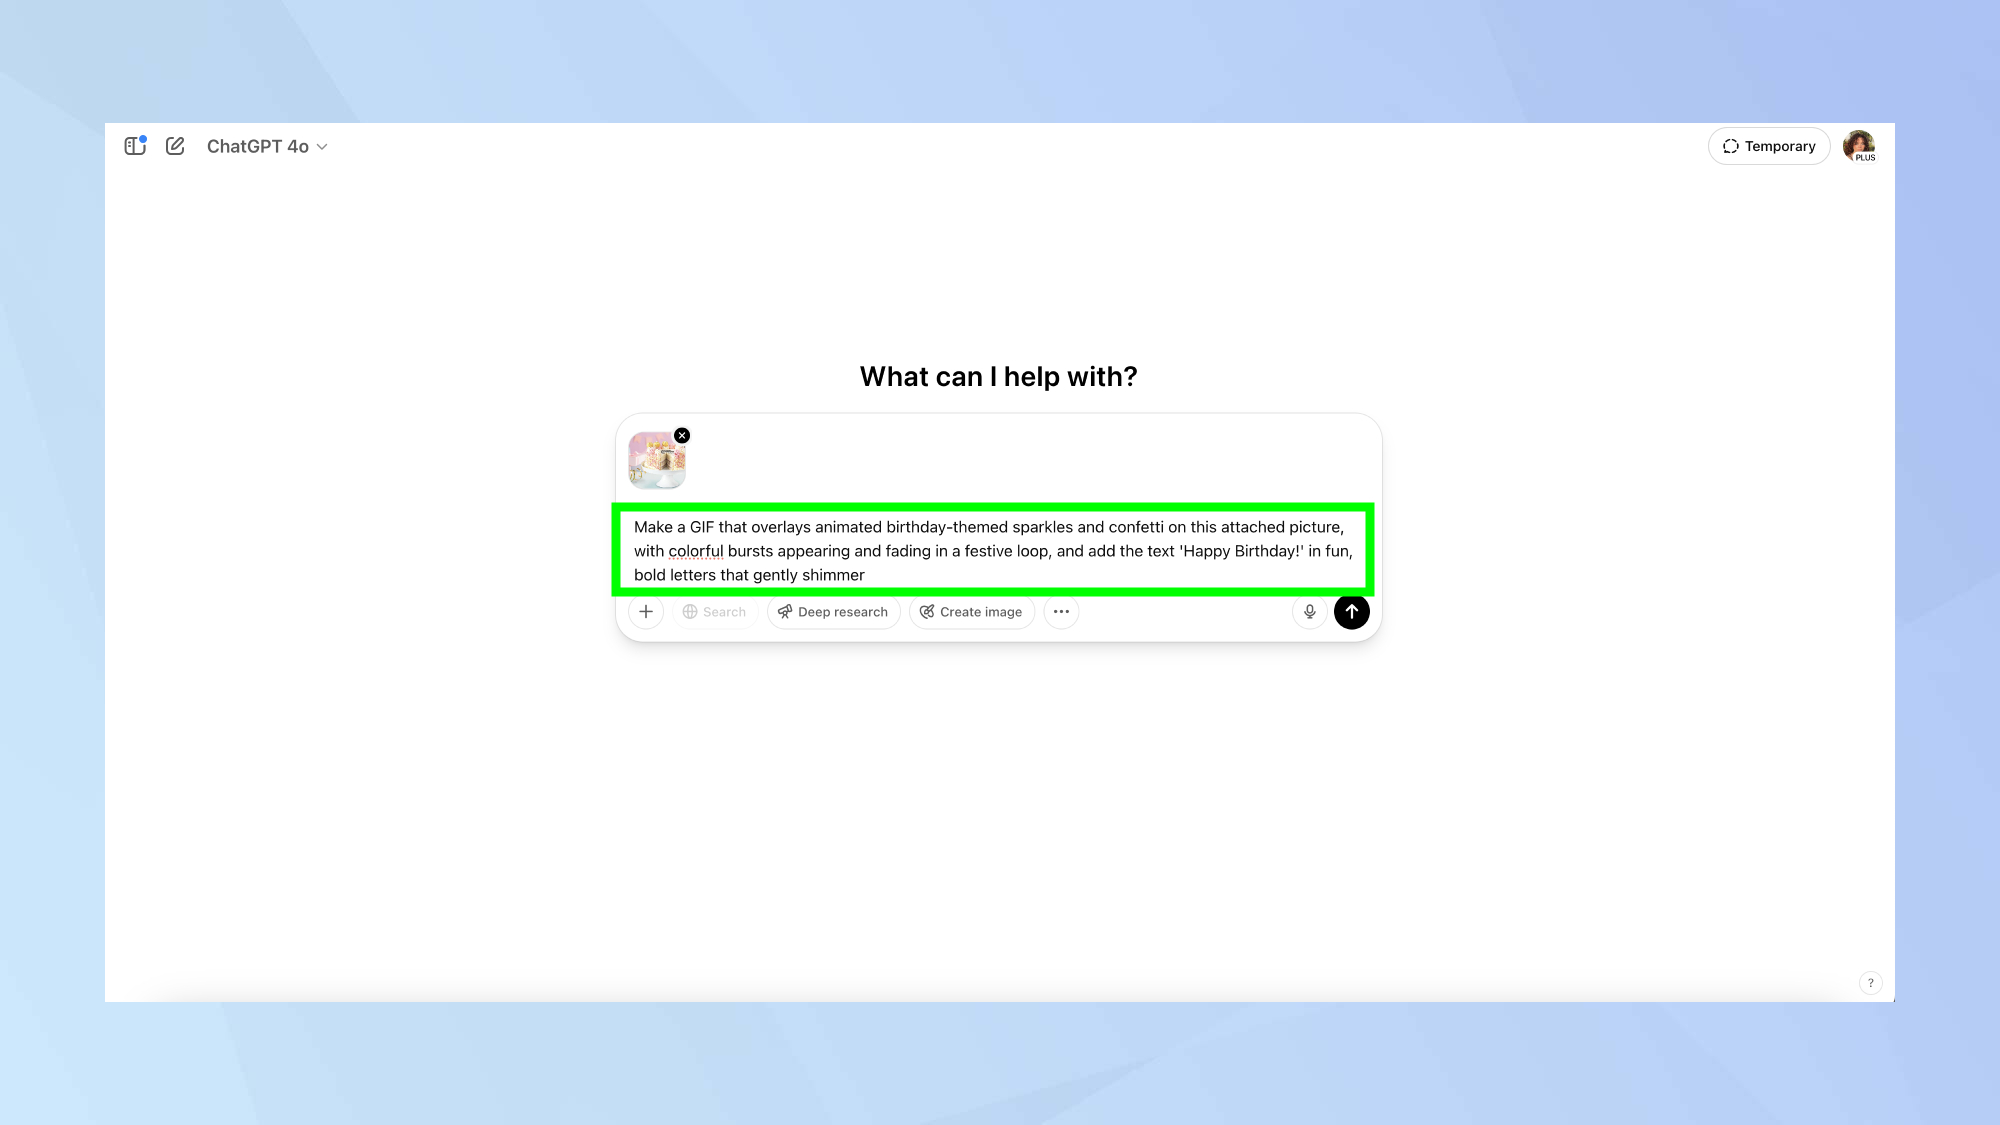
Before generating a GIF with ChatGPT, it’s helpful to clarify the details you want to include to make it personal and engaging. Think about the message or text you’d like to display, whether it’s a simple greeting, a celebration note, or something more custom.
Consider the animation style, should the text sparkle, bounce, fade, or use another effect. You might also want to add visual extras like confetti, icons, or themed graphics to enhance the look.
Decide on a color scheme that matches the mood or purpose of the GIF, and choose how long you want the loop to last, typically between 3 and 10 seconds. Finally, define the overall tone, whether it’s playful, formal, elegant, or bold.
4. Create your GIF
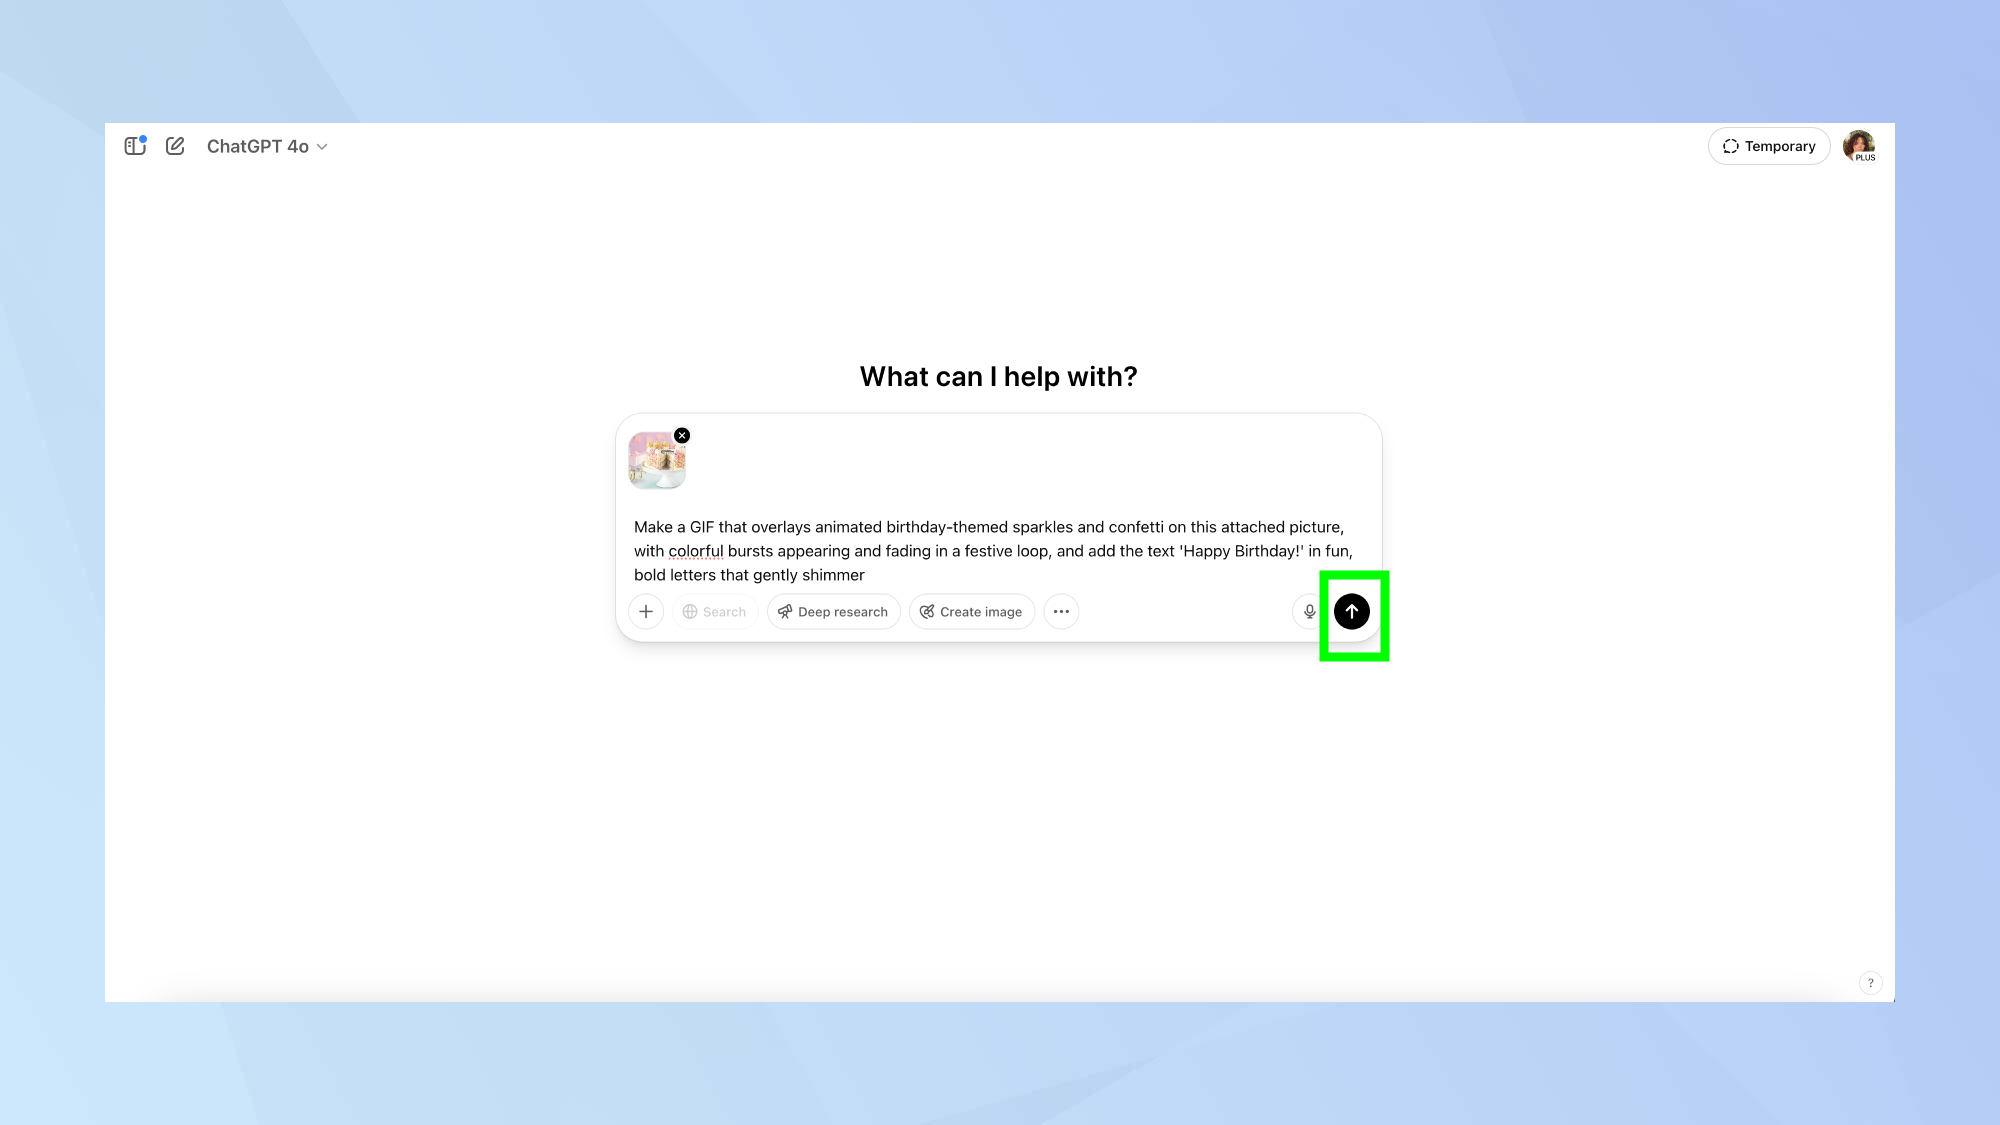
(Image: © Tom’s Guide)
Now you’ve attached the image and typed out the prompt, it’s time to create. Click the arrow button for ChatGPT to generate your GIF.
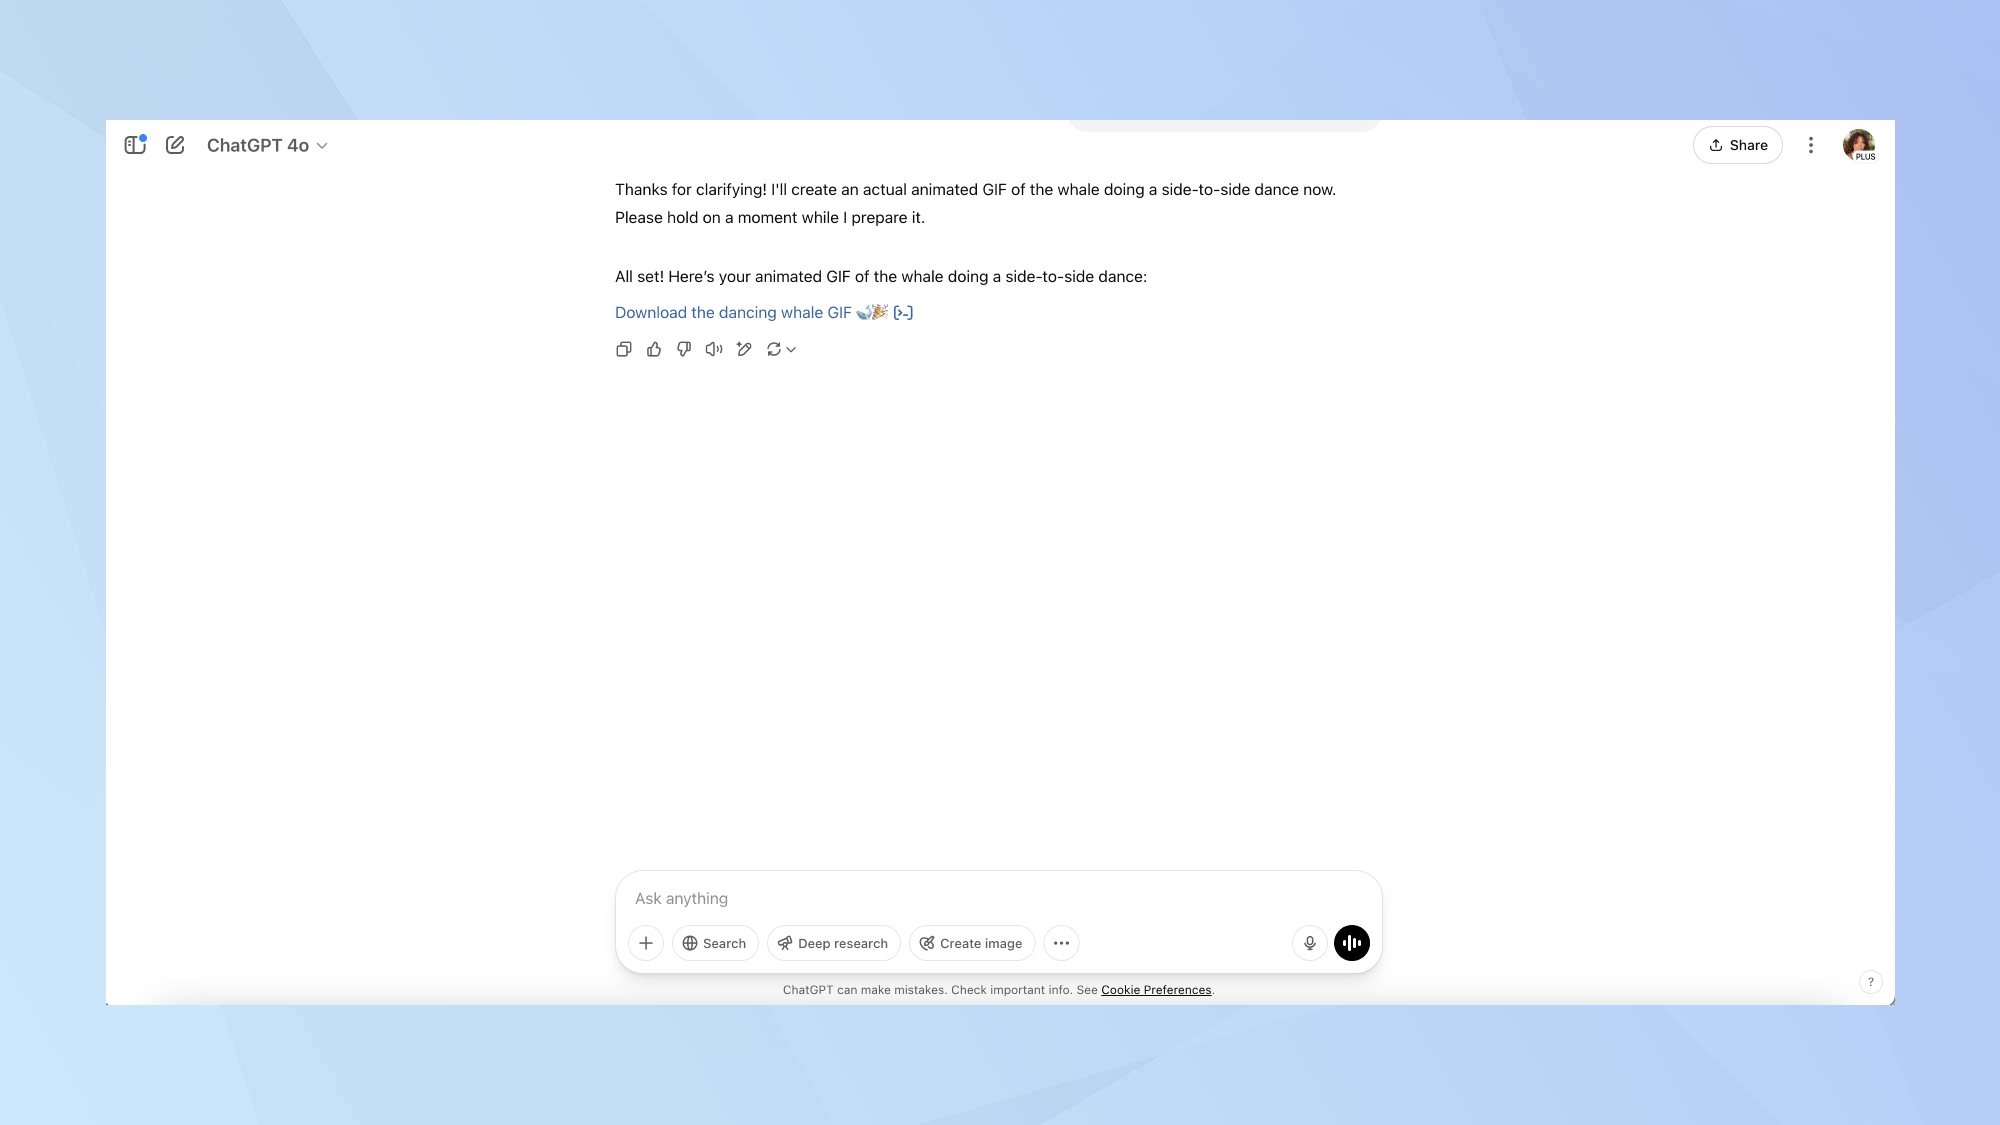
When it’s done, you’ll see your completed GIF displayed in the chat. Click the download button that appears below it to save the GIF to your device.
If you’re not happy with the result, you can simply ask ChatGPT to change specific aspects, for example, “make it zoom in more slowly”, or “make the GIF longer.
Once you’ve got the images created, you might need to go to somewhere like GIPHY.com to turn your frames into a sharable GIF.
5. Creating a GIF from scratch
(Image: © Tom’s Guide)
If you don’t have an image you want to turn into a GIF, you can also ask ChatGPT to create one for you. This is a great option for creating something truly original.
Now that you’ve how to make your own GIFs in ChatGPT, why not take a look at some of our other AI articles?
Check out I use ChatGPT every day to boost my productivity — and these 5 prompts always deliver and 11 prompting tips to get better results. And you can even use ChatGPT to build the perfect spring cleaning schedule.
More from Tom’s Guide

Back to MacBook Air

Source link
-

-

-

-
-

-
-

-