Samsung Notes has quietly become one of the best apps for typed and handwritten notes, sketches, and quick to-do lists, especially if you’re using a Galaxy smartphone or tablet. Until recently, however, the answer to the question “Can I view Samsung Notes on my PC?” was usually no. Well, unless you had a Samsung Galaxy Book laptop. That’s finally changing, and with its latest update, Samsung Notes for Windows should now be available to everyone through the Microsoft Store. You can install it, and with your Samsung account, notes will automatically sync between your phone and PC. So if you’re wondering, “How do I transfer Samsung Notes to my PC?”, here’s how to set it up to get everything to work:
Step 1. Install the Samsung Account app on your Windows PC
Before you can sync Samsung Notes on your PC, you have to install the Samsung Account app from the Microsoft Store. This is the app that handles your Samsung login on Windows, and without it, Samsung Notes won’t connect to the cloud and sync your notes across devices. Once you’ve installed the app, launch it. You’ll see a welcome screen with the message: “Continue writing notes, editing pictures, and listening to music when you switch devices.” Click Sign in to get started.

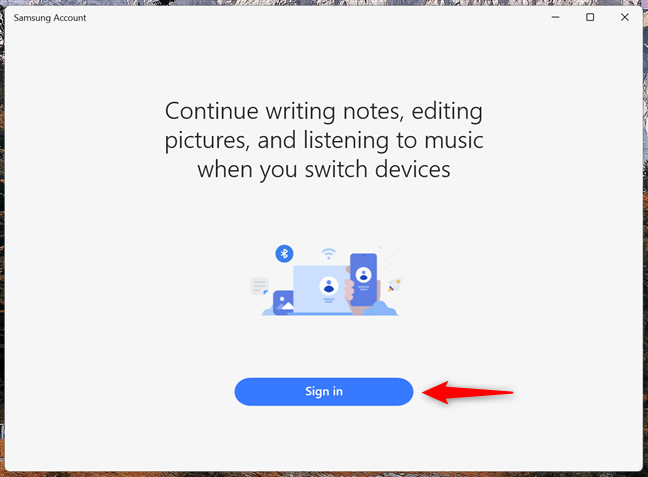
Install and open Samsung Account on your Windows PC
On the next screen, choose how you want to sign in. You can use your Google account or your Samsung account email. If you don’t already have an account, there’s also an option to create one. You can also use another Samsung Galaxy device (one that you own and where you’re already signed in) to scan the QR code and quickly authenticate.


Sign in with your Samsung account
After you sign in, Samsung asks if you agree to its policies and some optional data sharing. While you must agree to its mandatory terms, you don’t have to check all of the boxes unless you want the full marketing experience with personalized ads, newsletters, and special offers. Then, click or tap Agree.

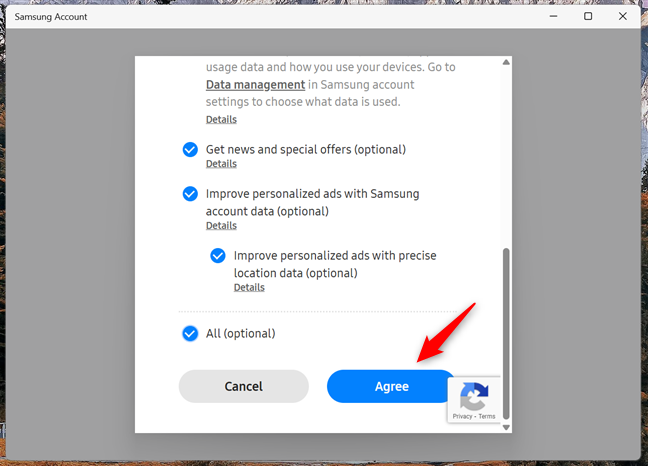
To agree to the terms, click or tap Agree
Once that’s done, you’ll get to the Samsung Account app’s main screen. You can safely ignore most of what’s here. It confirms that you’re signed in, and what matters is that the app is now running in the background and connected to your account.

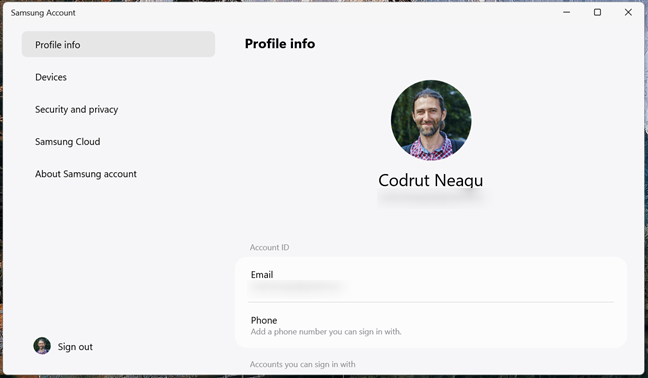
The Samsung Account app when you sign in
Now, you’re ready to install Samsung Notes and actually sync all of your stuff between your Samsung Galaxy and Windows devices.
Step 2. Install the Samsung Notes app on your Windows PC
Once the Samsung Account app is up and running on your Windows computer, it’s time to install the Samsung Notes app itself. Open the Microsoft Store, search for Samsung Notes, and click or tap the Install button. If you prefer, you can also use this direct link to get it: Samsung Notes for PC – Download.

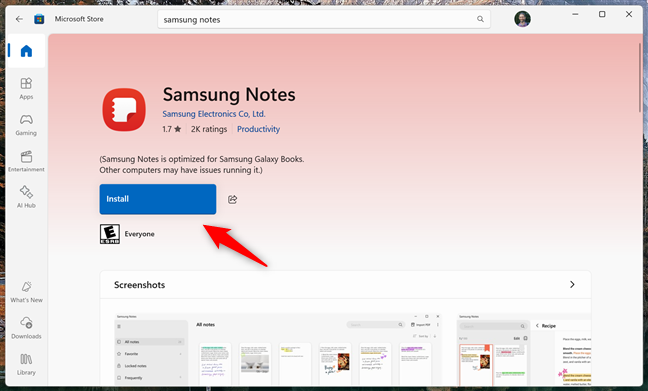
Install the Samsung Notes app on your Windows PC
When you run Samsung Notes on Windows, it should automatically detect your Samsung account and log you in. You’ll also probably see a warning saying it’s “optimized for Samsung Galaxy Books.” Just click or tap OK and ignore it. I tested the app on a regular desktop PC and had no issues using it.

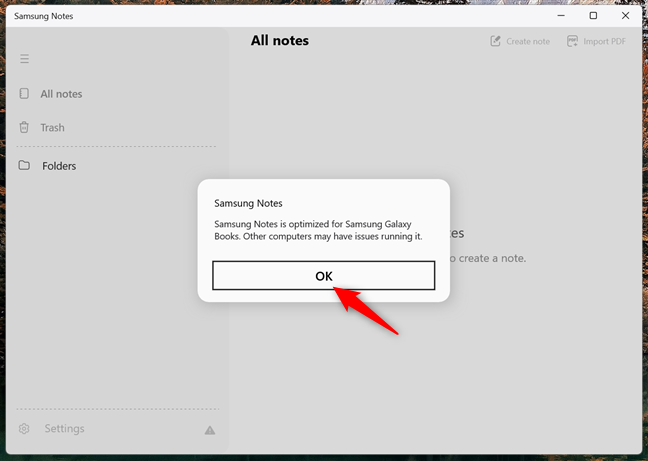
Samsung Notes is optimized for Samsung Galaxy Books
Once you’re past that, the interface loads with a basic sidebar. No notes show up yet. To sync them, take the next step:
Step 3. Enable sync in Samsung Notes for Windows
To get your mobile notes to appear on your PC, you need to enable cloud sync in the Windows version of Samsung Notes. Start by clicking or tapping Settings in the app window’s bottom-left corner.

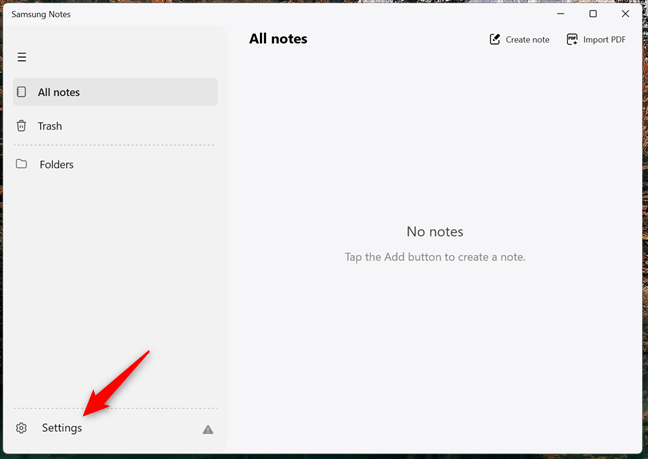
Click or tap Settings in the bottom-left corner
In the settings panel, you see the option Sync with Samsung Cloud. By default, it’s off.
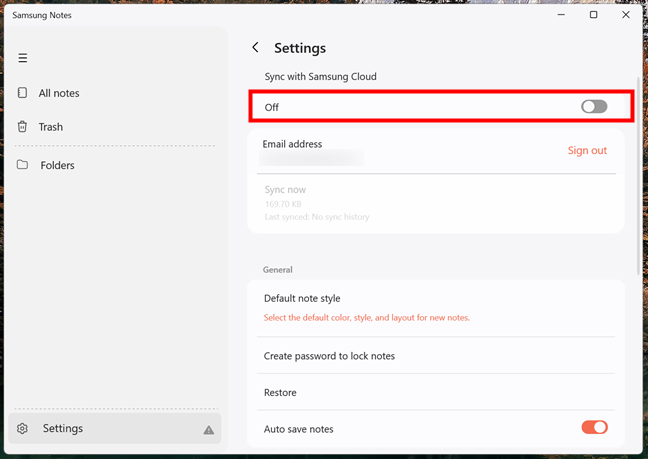
The Sync with Samsung Cloud switch
Click or tap the switch to turn it On. Once enabled, you should see how the app automatically starts syncing your notes.

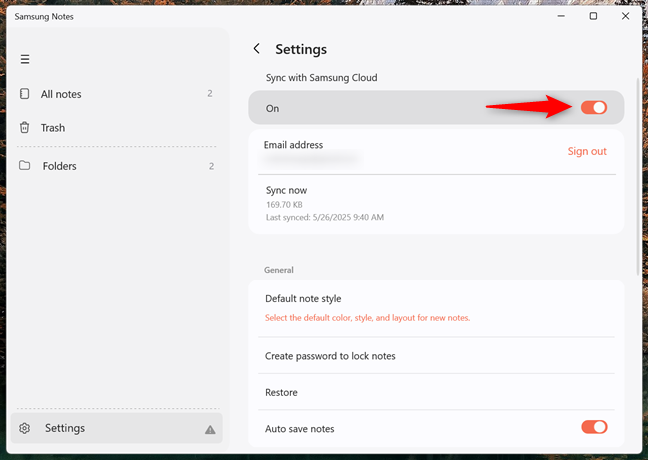
Activate the Sync with Samsung Cloud option
TIP: This step is the answer to another common question: “Why won’t my Samsung Notes work on my PC?”. It’s often because sync is turned off or the Samsung Account app isn’t installed.
You can also manually start the sync process anytime you want to by clicking or tapping Sync now. Depending on how many notes you have stored, it may take a few seconds.
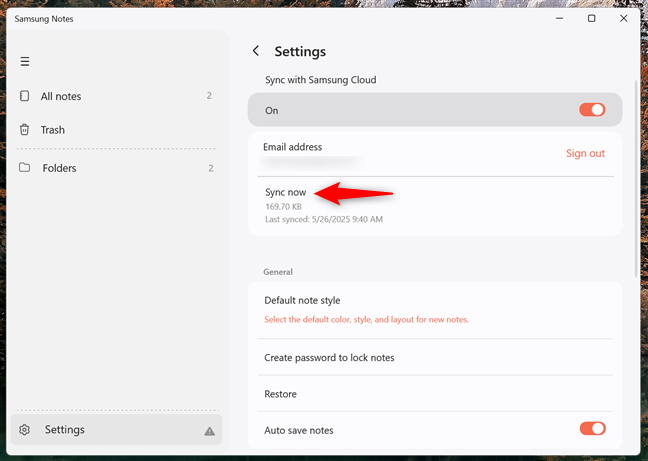
Force a synchronization for Samsung Notes
When the sync finishes, your notes appear in the main window of the Samsung Notes app for Windows. Everything from to-do lists to handwritten notes should show up.
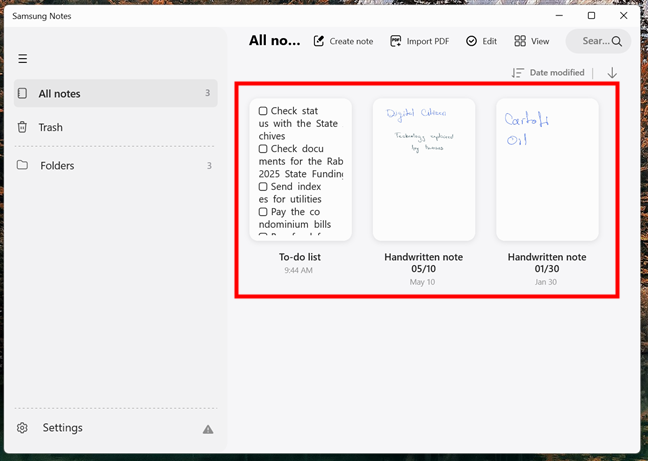
View your Samsung Notes on Windows
Now, you’re all set, and you can start writing new notes, editing existing ones, or simply check the ones you’ve already created. Any changes will sync back to your Samsung Galaxy devices, too, as long as both devices stay signed in.
Step 4. Enable sync in Samsung Notes on your phone or tablet
On your Samsung Galaxy smartphone (or tablet), open the Samsung Notes app from your Home Screen or app drawer.


Find and open Samsung Notes on your Samsung Galaxy device
If you don’t already have the Samsung Notes app on your phone or tablet, head to the Google Play Store and install it. You can find it by searching for Samsung Notes or tapping this direct link: Samsung Notes. Either way, once you get to its page, tap Install. Wait for the app to install on your device, then open it.
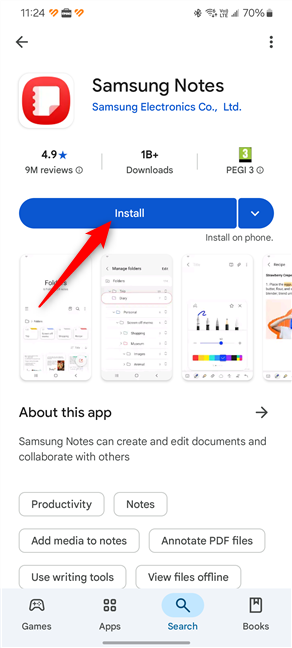
Install Samsung Notes on your phone if you don’t already have the app
In the Samsung Notes app, you should see your existing notes if you’ve used it before. To access the settings menu, tap the hamburger icon in the upper-left corner.
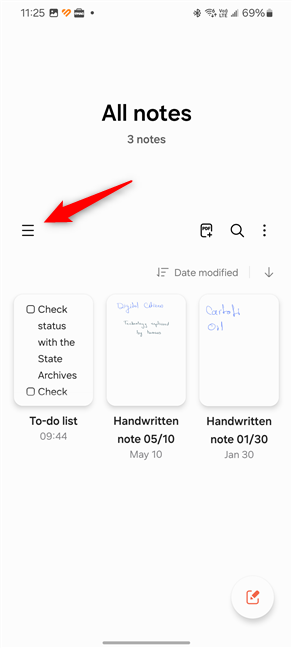
Tap the three-line button in the app’s top-left corner
Next, tap the gear icon in the panel’s top-right corner to open Samsung Notes’ settings.
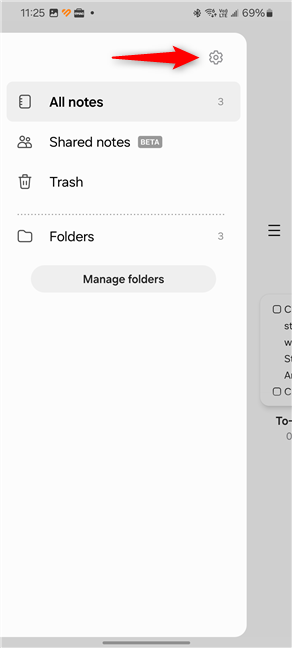
Open the Samsung Notes settings
On the settings screen, you see an option called Sync with Samsung Cloud. Turn it on.
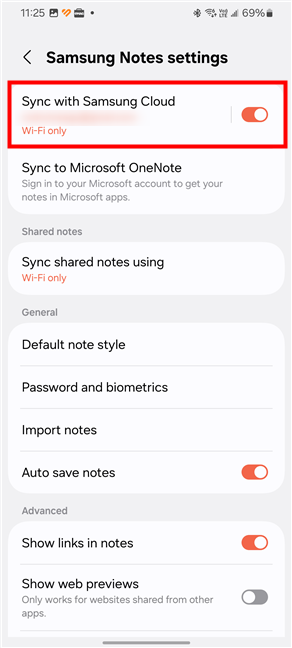
Make sure the Sync with Samsung Cloud switch is turned on
The app should now start uploading your notes to the cloud. If your PC is already set up with the same Samsung account and syncing is enabled, your notes should start showing up there, too.
Optional: Adjust sync options on your Samsung Galaxy device
By default, Samsung Notes syncs only over Wi-Fi. If you also want it to sync while you’re on mobile data, you can change that manually. On the same Samsung Notes settings screen, tap the small text that says Wi-Fi only under the Sync with Samsung Cloud switch.
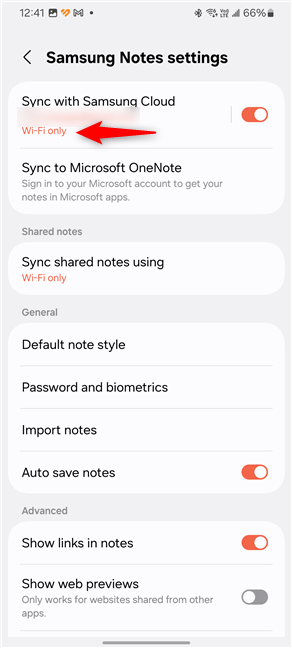
Tap the Wi-Fi only text
This takes you to a more detailed Samsung Notes sync screen. Here, you see a Sync now button and the option called Sync using. Tap Sync using, then choose either Wi-Fi only or Wi-Fi or mobile data, depending on how you want your notes to sync.

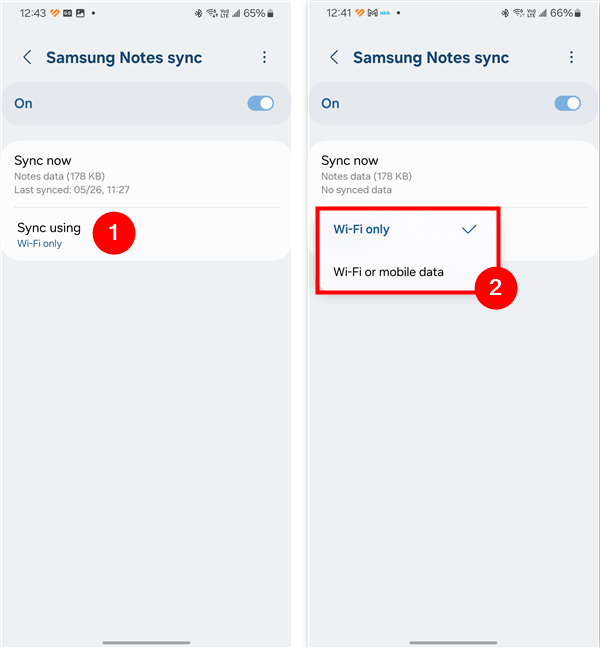
Tap Sync using and choose between Wi-Fi only and Wi-Fi or mobile data
If you want to force a sync on the spot, just tap Sync now on the same screen. This can be useful if you just created something important and want it to appear immediately on your PC.

Force Samsung Notes to Sync now
That’s it!
Do you use Samsung Notes on your Windows PC?
I’ve tested this process with the latest version of Samsung Notes on both Android and Windows, and it works well as long as you go through this guide’s first step – Install the Samsung Account app on your Windows PC. It’s a simple way to make your notes available on all your devices. If you’ve followed the instructions in this tutorial, let me know how they worked for you. Did syncing go smoothly? Are there features you’re still missing or bugs you’ve stumbled upon? Feel free to share your opinions, questions, or tips about Samsung Notes in the comments.
Source link
-

-
-

-

-

-
-
-